How to Add a Calculated Member to an Account Dimension?
- 2 Minutes to read
- Print
- DarkLight
- PDF
How to Add a Calculated Member to an Account Dimension?
- 2 Minutes to read
- Print
- DarkLight
- PDF
Article summary
Did you find this summary helpful?
Thank you for your feedback
Complete the steps below to add a calculated member to an Account dimension:
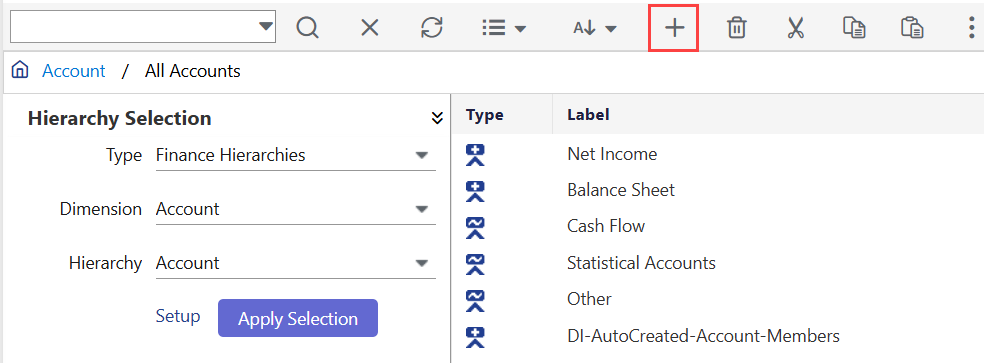
Navigate to Maintenance > Hierarchy > Hierarchy Management.
On the Hierarchy Selection pane, select the Finance Hierarchies for Type, Account for Dimension, and Account for Hierarchy from the drop-down list.
.png)
Click Apply Selection.
Select a rollup node to place the new formula member under that node in the hierarchy.
Click Add. The Add New Member pop-up appears.
Note:
If you have selected Read Mode as the default view, click Edit Hierarchy (on the top right) to view the Add icon.
.png)
Select the Node Type as Leaf Node and the Node Sub Type as Calculated Member from the respective drop-down lists.
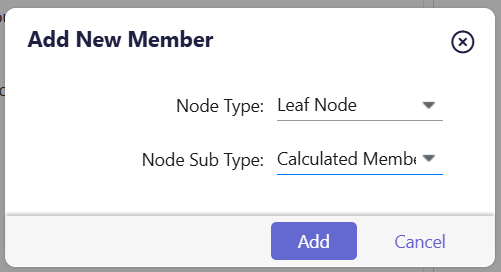
Click Add. The New Member pane appears on the right side.
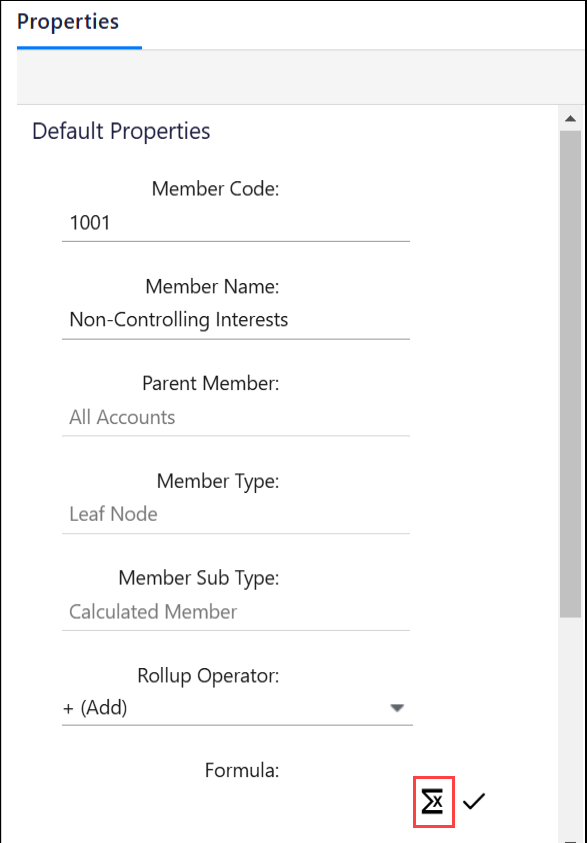
Enter a Member Code and Member Name.
Select a Rollup Operator from the drop-down list to apply at the Rollup level.
Click the Select Formula icon to set up the rule.
How to Set the Rules for the Calculated Member?
To set the rules for the calculated member, follow the steps below:
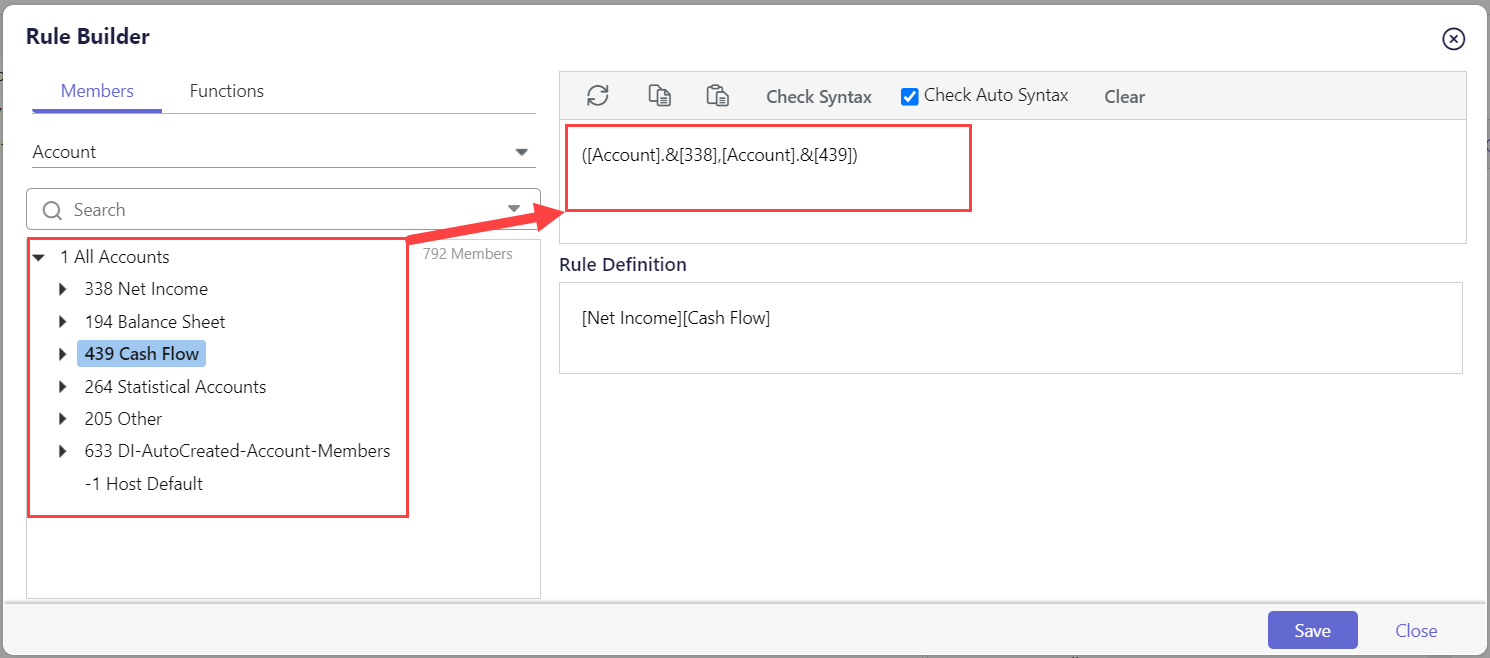
Under the Members section, select the necessary dimension from the drop-down list.
Note:
Utilize the Functions section to set the formula using the pre-defined system functions.
.png)
Drag and drop the required dimension members into the right pane to add the formula.
Notes:
You can select members from multiple dimensions using the drop-down menu in the Rule Builder. This allows you to create formulas across dimensions like Account, Product, Department, etc.
You can use:
basic math operators: +, -, *, /
parentheses ( ) to group calculations
curly braces { } to combine multiple members
parentheses around the entire formula if using commas
Avoid adding = at the beginning of the formula, it will throw a syntax error
Examples:
[Gross Sales] = [Sales]+[Freight Revenue]-[Sales Returns]
[Net Sales] = [Gross Sales]-[Sales Discounts]-[Sales Deductions]+[IC Sales]
[Operating Profit Margin] = ([Gross Profit]-[Operating expenses])/[Net Sales]
[Shipping Expenses] = {[Total Departmental Expenses],[Shipping Department]}
Rule Builder Tools:
.png)
Reset - Clear the currently added dimension members and revert to the previously saved state.
Copy - Copy the syntax.
Paste - Paste the copied syntax.
Check syntax - Click to validate if the syntax is correct or not.
Check Auto Syntax - Enable this option to auto-validate the syntax when you save the rule.
Clear - Removes the rule and rule definition.
You can update the Rule Definition for your reference if needed.
Click Save to add the rule to the formula.
Click Close to proceed.
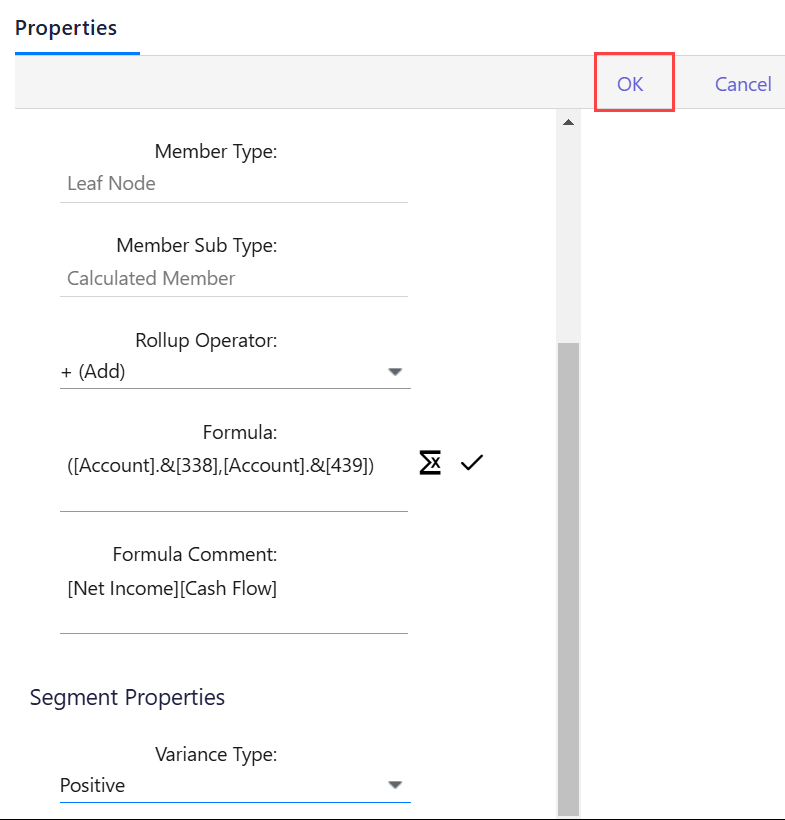
The defined formula and rule definition on the Rule Builder page will be reflected in the Formula and Formula Content, respectively.
Select a Variance Type from the drop-down list.
Click OK to create the calculated member (reflected on the middle pane).
Click Save. The newly created calculated member appears in the hierarchy.
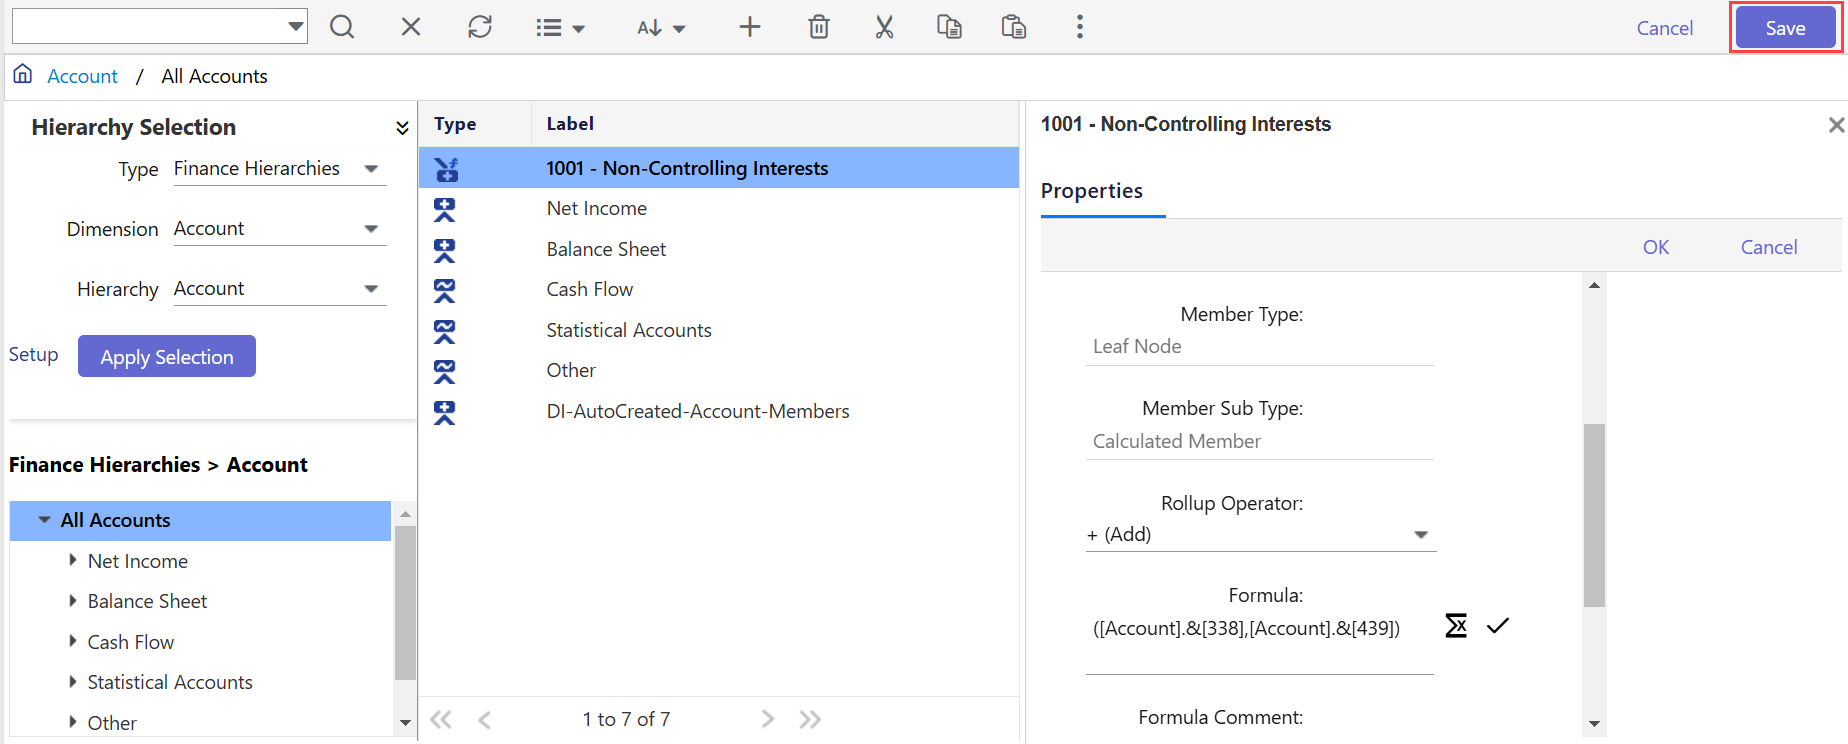
The same calculated member displays when creating Dynamic Reports. You can see that the new Non-Controlling Interests is mapped at the page level.

Was this article helpful?