- 5 Minutes to read
- Print
- DarkLight
- PDF
August 2024 Release Notes
- 5 Minutes to read
- Print
- DarkLight
- PDF
Structured Planning: Enhanced the Refresh Preloaded Data Process
Easily refresh preloaded data for Preloaded Budget Scenarios and automate this process by scheduling it using the Cloud Scheduler.
.gif)
Read More...
With this release, we have enhanced the process of the Refresh Preloaded Data option for the Preloaded Budget Scenario on the Scenario List screen. This change initiates the process within the application and informs users of its completion through in-app or email notifications. Additionally, users can automate this process by scheduling it at predefined periods using the Cloud Scheduler feature.
Previously, refreshing the data for Preloaded Budget scenarios was time-consuming. When large quantities of data were involved, the user had to remain on the page for a long time and wait for the success notification to appear. This notification used to be available on the Scenario List page for a limited time and disappeared within a few seconds.
Now, this processing occurs in the background (in the cloud), enabling the users to focus on other tasks instead of waiting on the screen for extended periods. We have enhanced the refresh data process to enable the user to view the progress on the Cloud Scheduler and Detail View pages. After the data is refreshed, the success notification appears on the Scenario List page until the user closes the notification.
Viewing the Status of the Data Refreshed for Preloaded Budget Scenario
The data for the Preloaded Budget is refreshed in the cloud. To view the detailed status of this data, follow these steps:
- Go to Maintenance > Administration > Scenario Setup.
The Scenario List page appears. - On the Scenario List page, select the required Preloaded Budget scenario.
- Click the three vertical dots icon, and then select Refresh Preloaded Data.
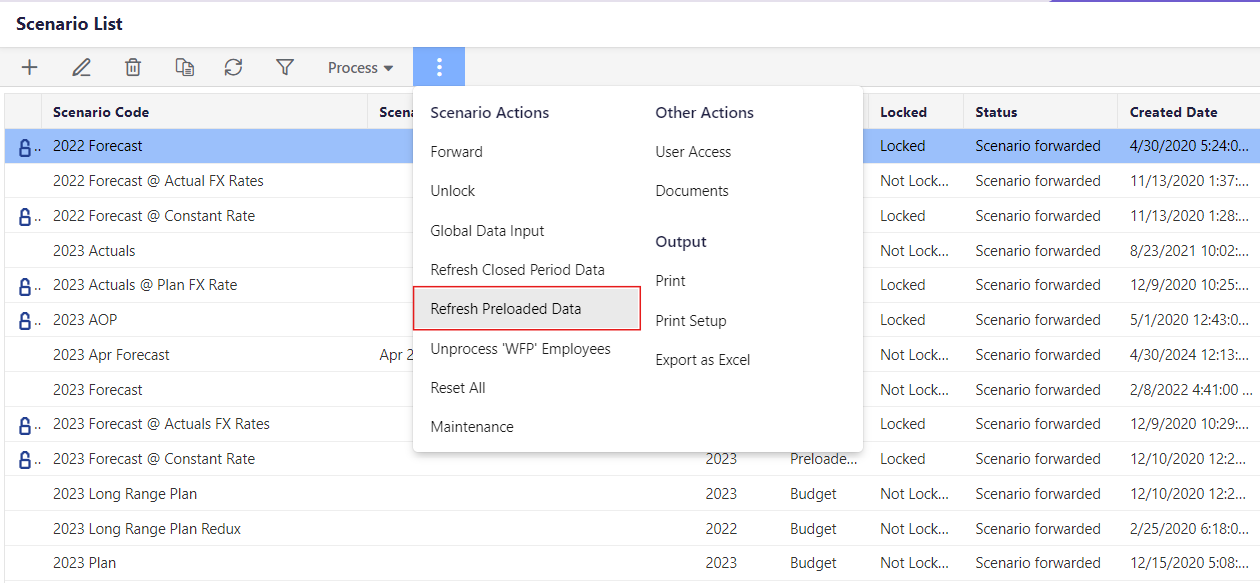 The scenario is submitted to refresh preloaded data, and a notification is displayed when the preloaded data for the selected scenario is processed successfully.
 - Use the Click here link to view the detailed status of that scenario.
 The Detail View page appears with the time and status details of the scenario.
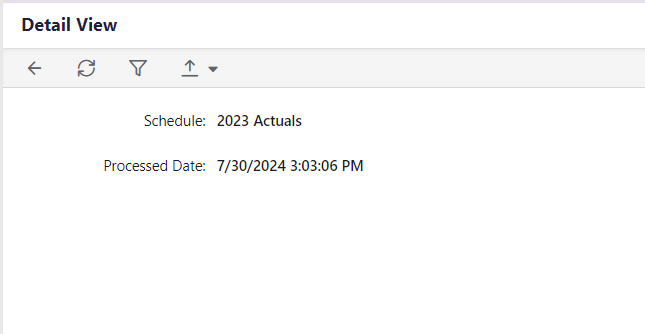 The user will also receive an email notification indicating the status of the task submitted for refreshing preloaded data.
Creating a Task in Cloud Scheduler to Refresh Preloaded Data
- Go to Maintenance > Administration > Cloud Scheduler, and then click the Process Flow tab.
- Click the Add icon.
The Add Process Flow page appears. - Click the General Information tab, and then add the appropriate details in the Code, Name, and E-mail Recipients fields.
.png)
- Click the Tasks tab and click the Add icon.
.png) The New Task window appears.
The New Task window appears. - From the Task Type list box, select the Refresh Preloaded Data task.
.png)
- From the Scenario list box, select a scenario.
The Task Name field is auto-populated with the scenario name but it can be changed as required.
The Dependencies field is optional. - In the E-Mail Recipients field, type the email address.
An email notification is sent to this email address after completing the task. - Click Save.
- Click the Scheduler tab, and then add the relevant details in the Start Date, Start Time, and Time Zone fields.
To repeat this task, select the Repeat checkbox and then specify the frequency of recurrence in the respective fields. - Click Save & Schedule.
The task has been created and scheduled for the specified time.Note:To refresh preloaded data in the application, the user can create one job (on the General Information tab) in an application.
Structured Planning: Extended Support for Dynamic Commentary for Custom Time Sets in GTSC Templates
With this release, we have extended the support for the dynamic commentary functionality for Global Template Single Copy Templates using Custom Time Sets.
Now, users can see the comments added in templates at rolled-up time periods for the respective dimensions, and perform functions like Edit, Delete, Highlight, Reply, and Resolve comments.
Dynamic Planning: Introduced New Export to Excel Option in the Spotlight Web
With this release, we have added the ability to export views and reports to Excel within Spotlight Web. In the Analyze section, users can export any view, including ESMs, to Excel by clicking the Export to Excel option on the toolbar.
Similarly, users can export reports to Excel in the Reports section, ensuring that the exported file accurately reflects the data presented in the web-based report. This update enhances the platform's export functionality, providing users with consistent and accurate data representation for further analysis.
Dynamic Planning: Update to the SpotlightXL Add-In
If you have automated installation for SpotlightXL, there is nothing you need to do as the update will be done automatically. If you manually install SpotlightXL and related updates, you must access the Spotlight for Office Installation Guide and download the latest update.
Platform: Introduced the Ability to Switch Between Budget Manager Experience and Full Experience
Seamlessly switch between the Budget Manager Experience (BME) and the Full Experience applications with a single click.
Read More...
With this release, we have introduced an ability to seamlessly switch between the Budget Manager Experience (BME) and the Full Experience (the existing standard Planful functionality).
Previously, even users with administrator support roles had to create multiple accounts to experience or access BME. We have added new functionalities allowing administrators or any users with the appropriate access to use both experiences and switch between them.
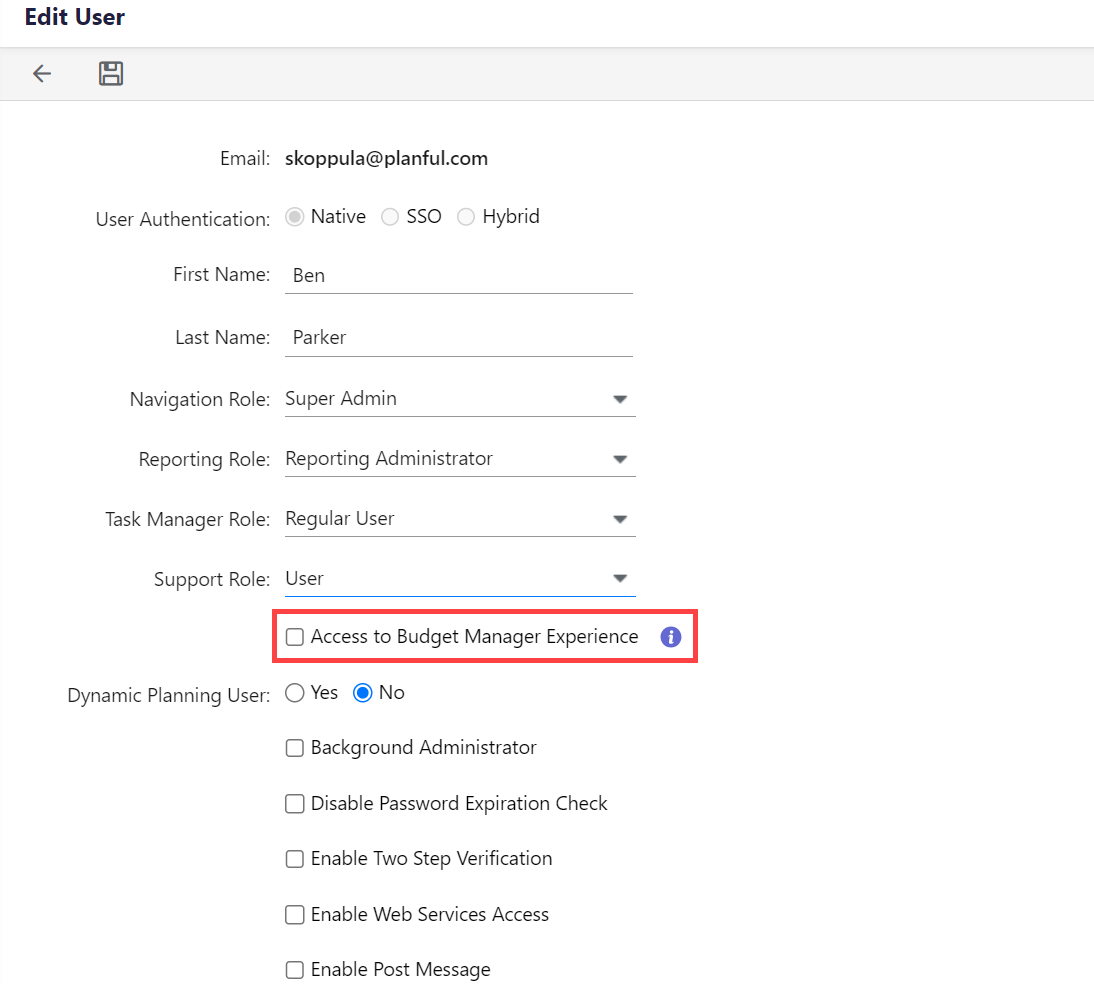
After this release, on the Add User/Edit User page, users will see the new Access to Budget Manager Experience checkbox when selecting the support role as User. Selecting this checkbox provides access to both BME and the Full Experience while leaving it unchecked will give access only to the Full Experience.
When the administrator support role is selected, the user can access both experiences by default.
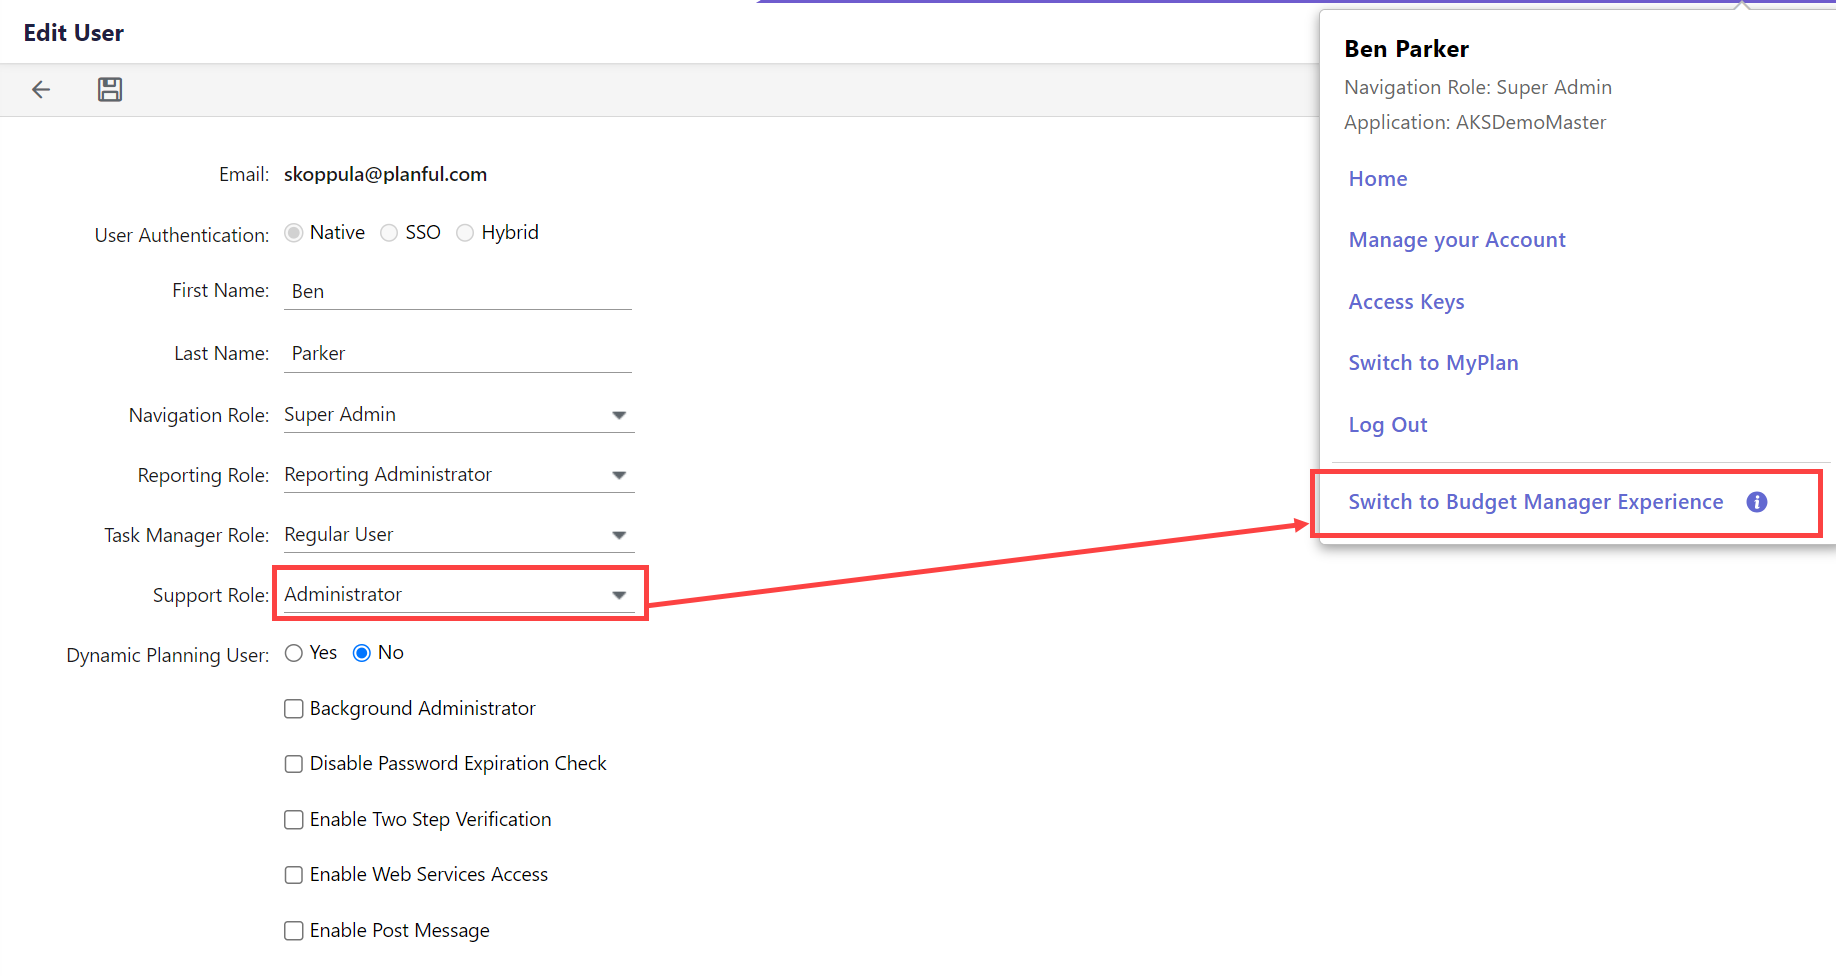
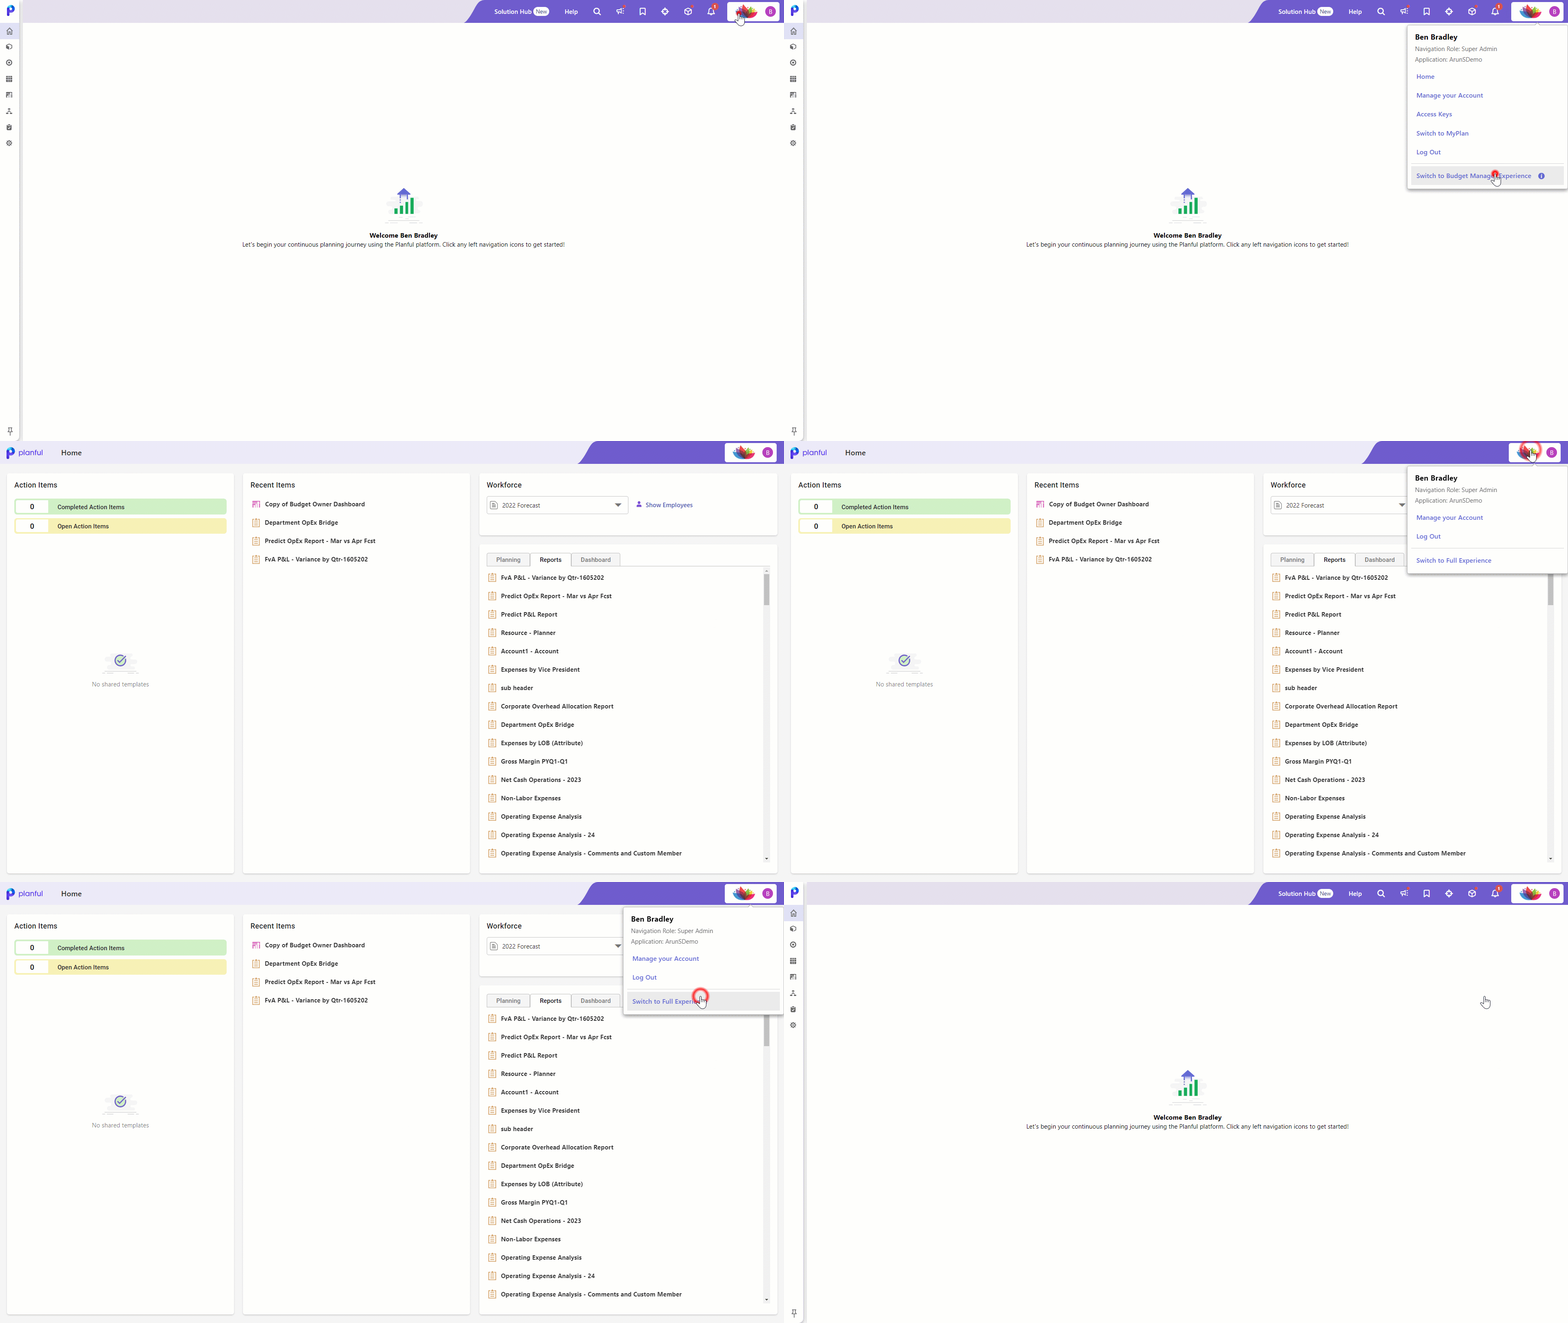
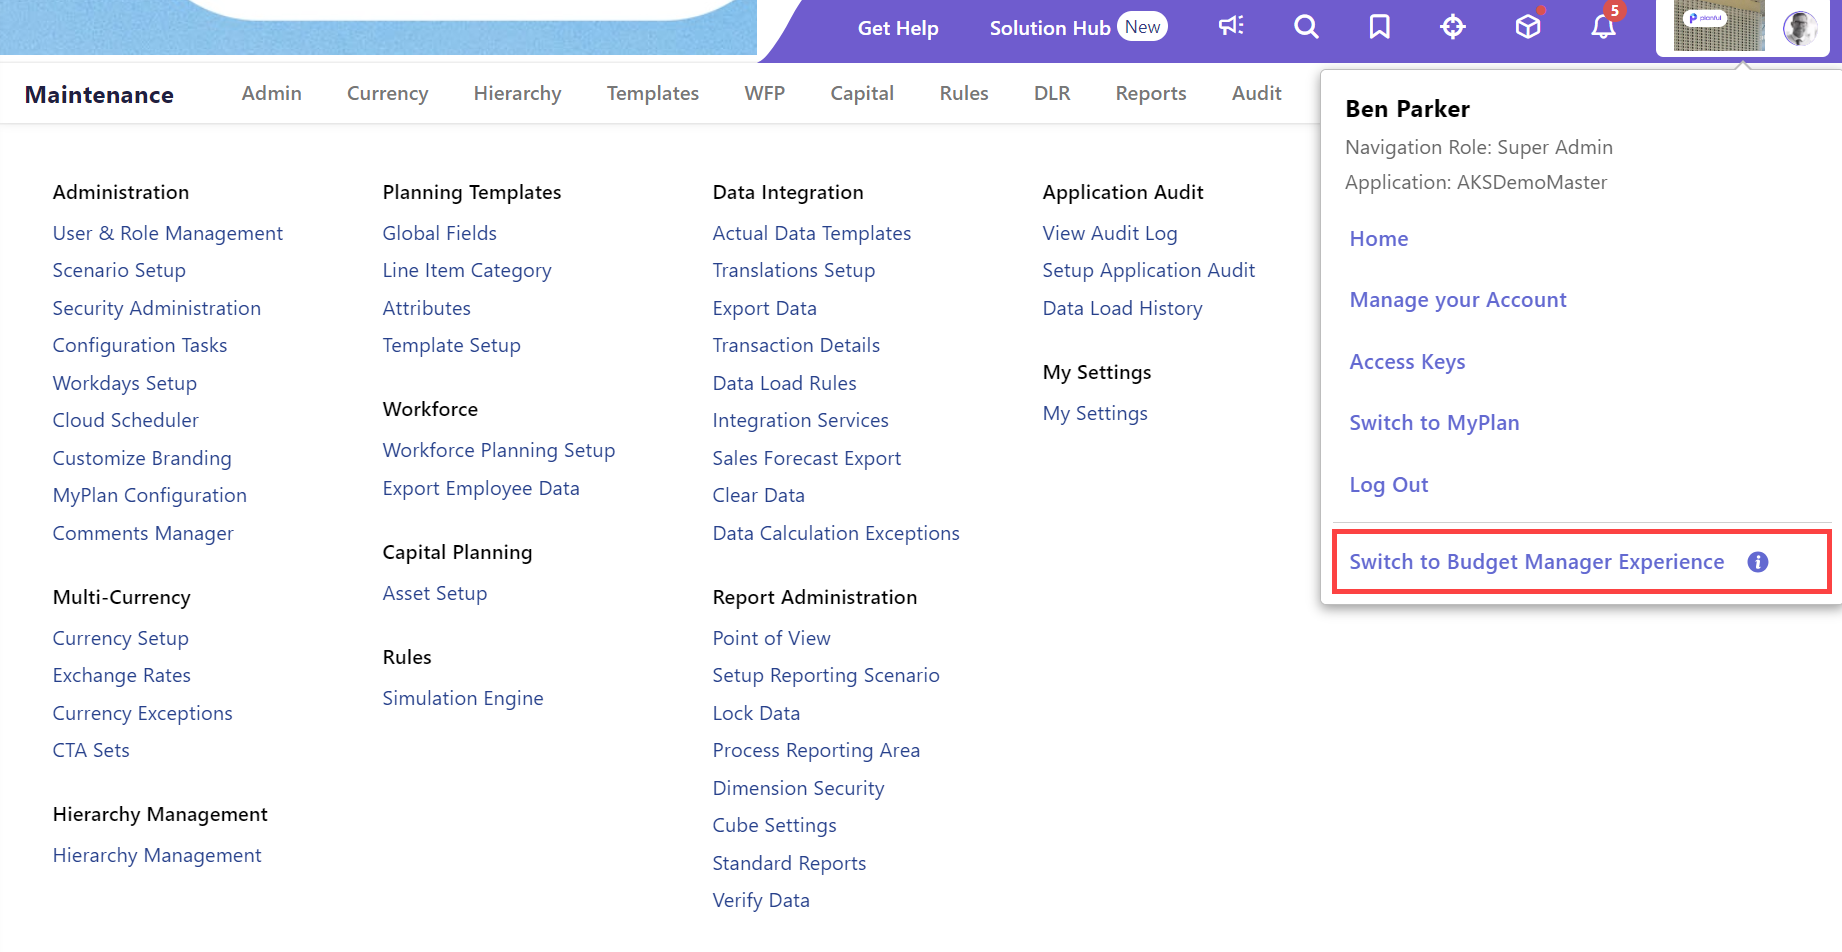
Once a support role that provides access to both experiences is selected, users can see a new option/link added to the user profile menu in the top-right corner of the application. The available options are:
- Switch to Budget Manager Experience: This link will take you from the Full Experience to the Budget Manager Experience.
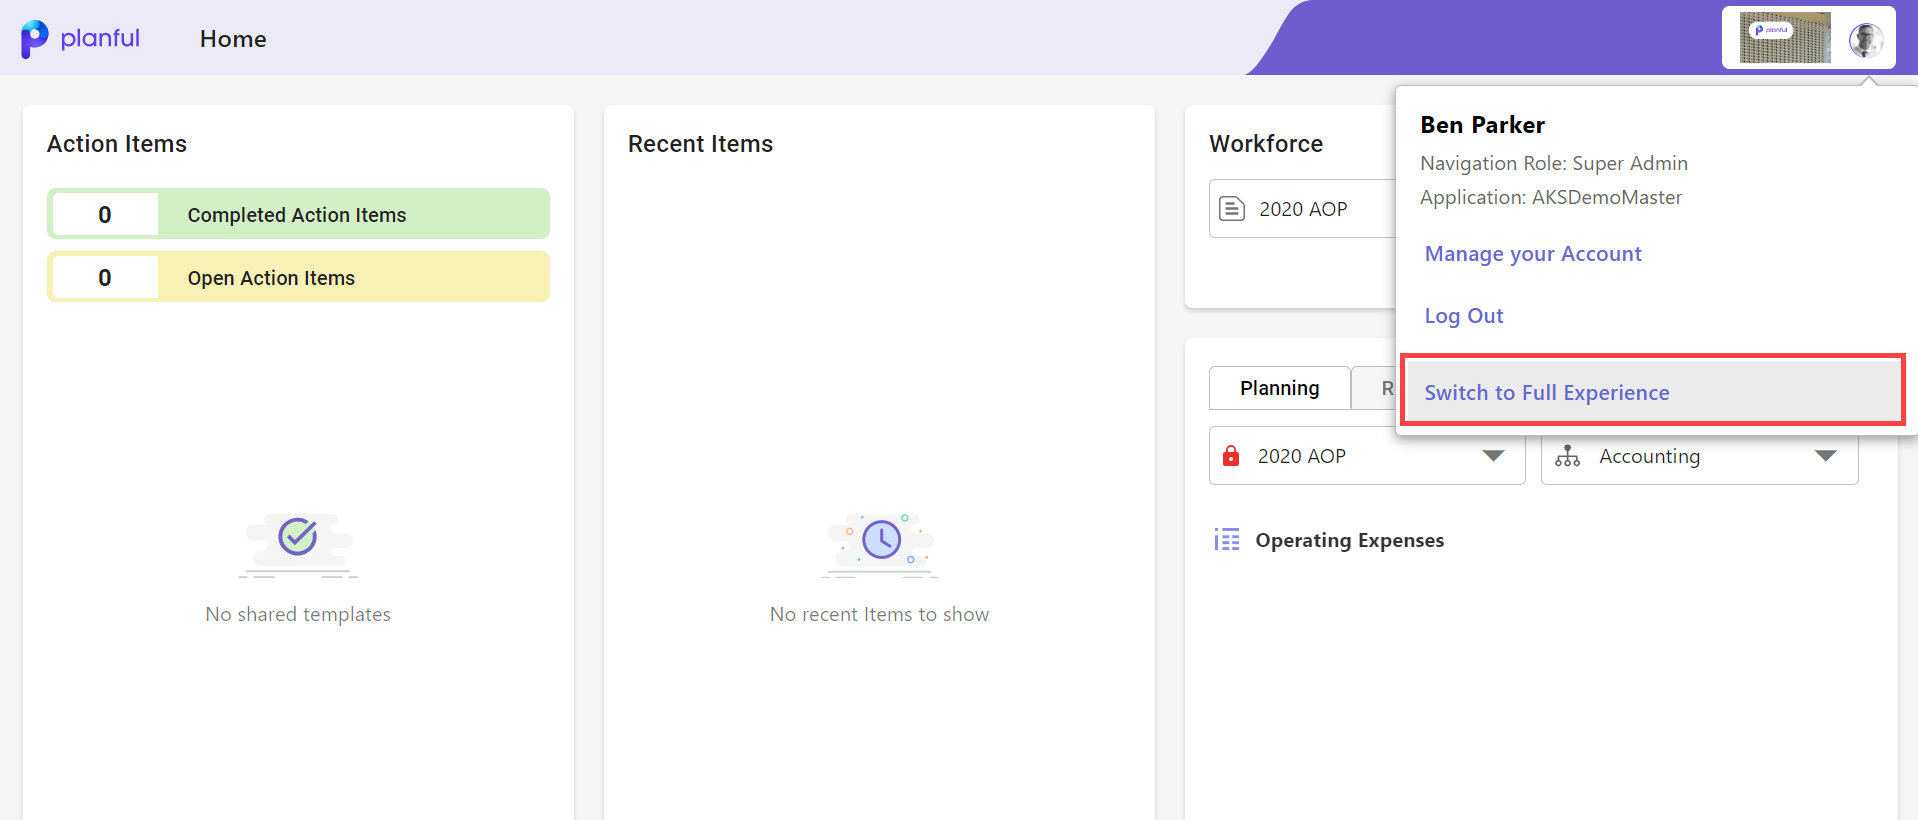
- Switch to Full Experience: This link will take you from the Budget Manager Experience to the Full Experience.
Platform: New Task Manager Role Column in User Security Standard Report
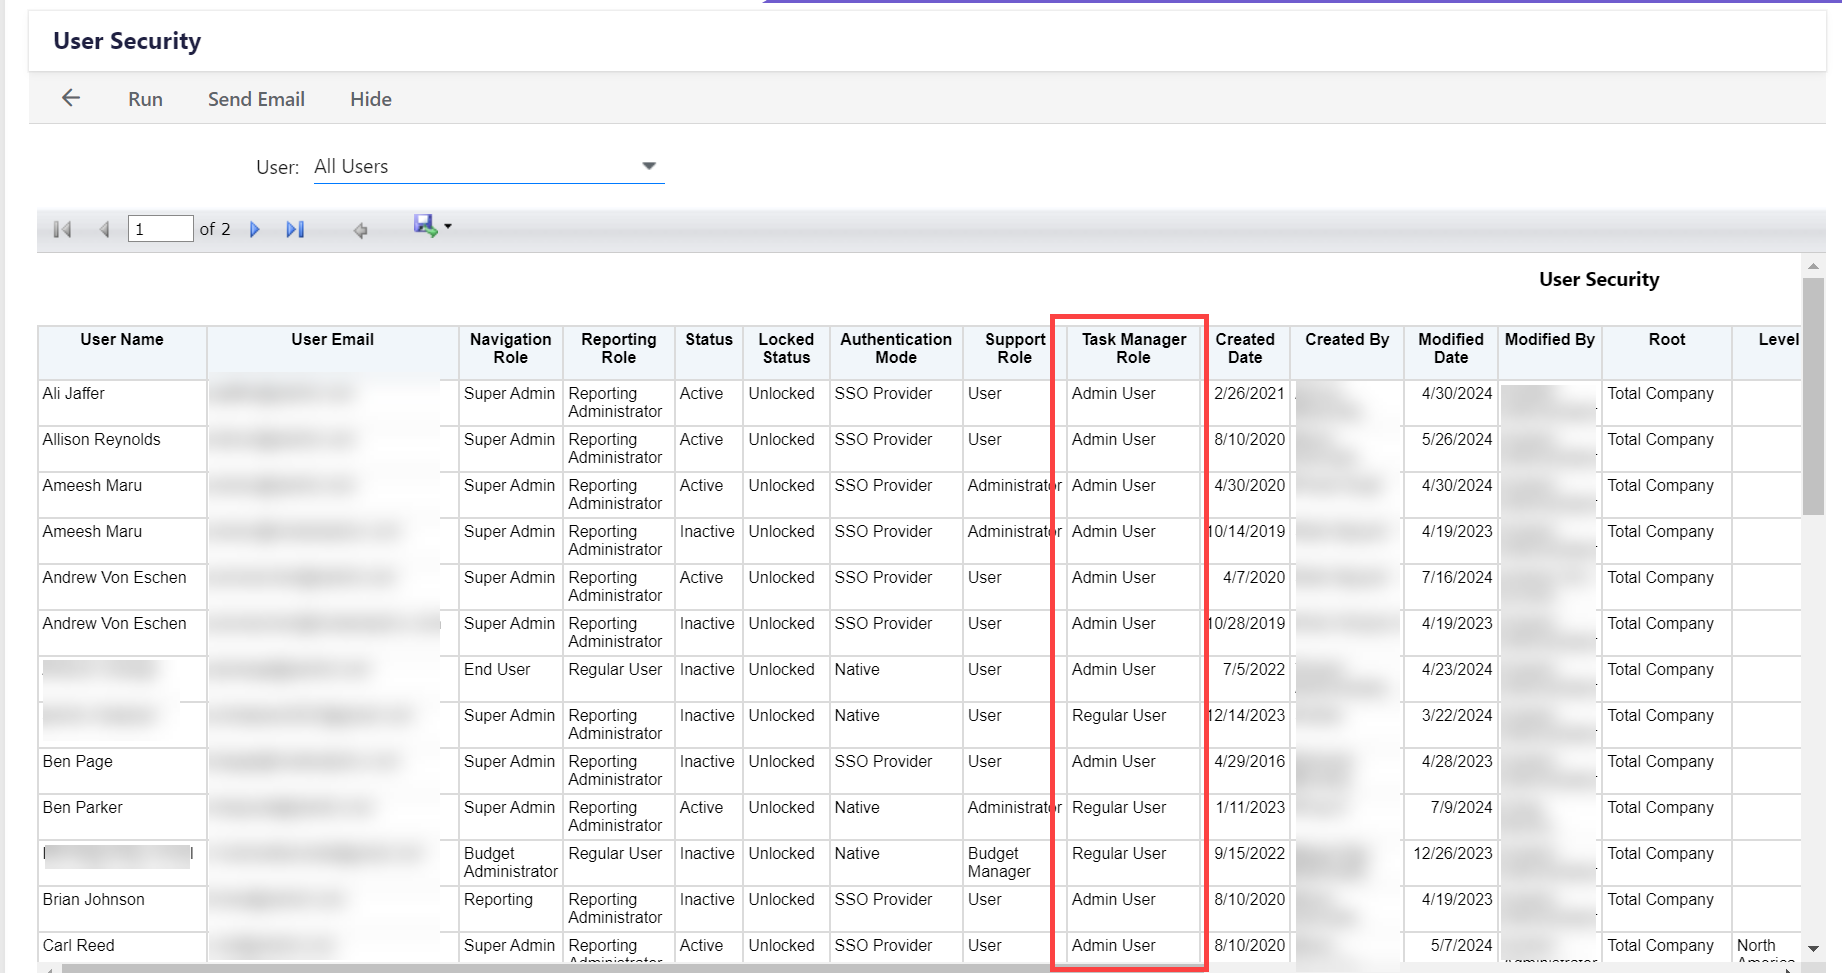
With this release, a new column displaying the Task Manager Role is added to the User Security report.
The User Security report gives the security information for a selected user. This report offers a quick way to find out a user's reporting role, navigation role, etc. Now, a new column has been added next to the Support Role column, and the value in the new column can be Regular User or Admin User. Click here to learn more about the User Security report.
The new column details are also available in the exported file when you export the user list using the Export drop-down menu.
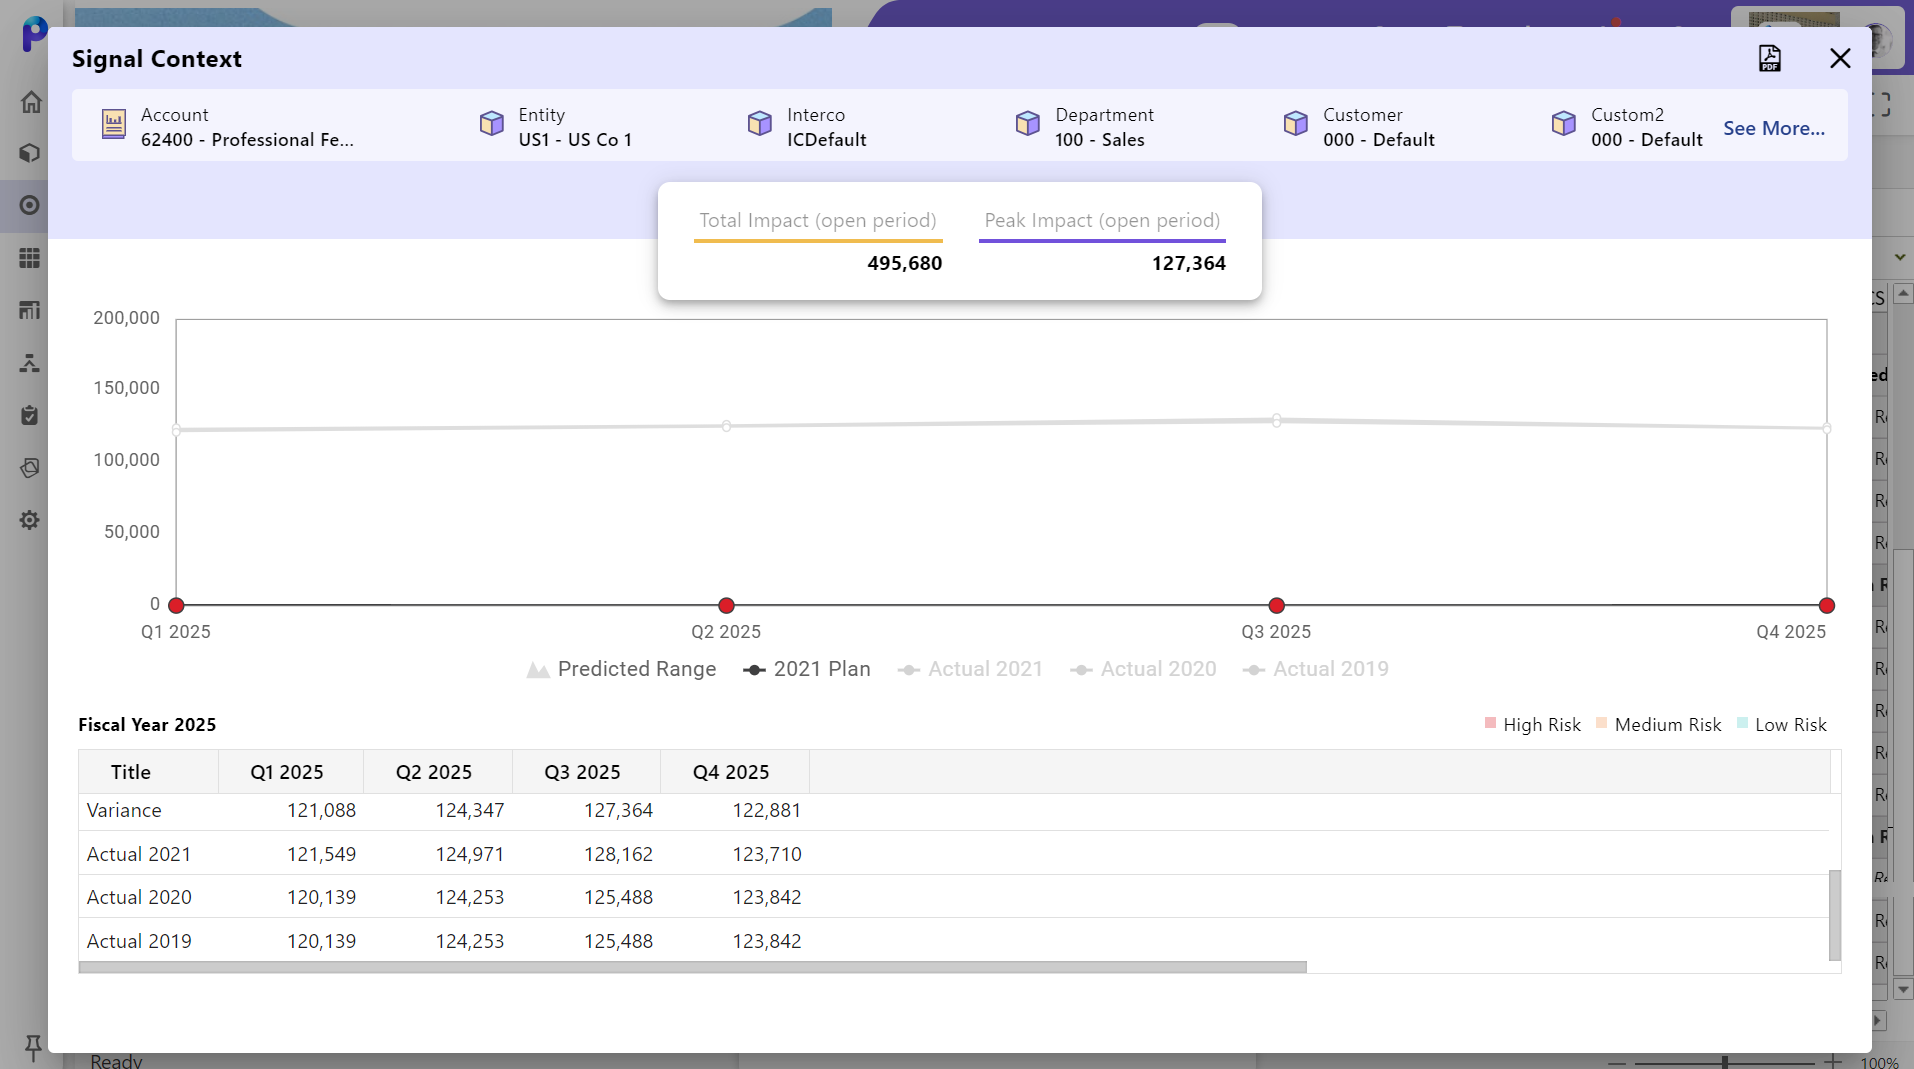
Predict: Introduced Support for Signals and Projections in Templates with Custom Time Set
With this release, we have introduced support for generating both Signals and Projections in templates set up with custom time sets.
