Dynamic Planning: SpotlightXL and Spotlight for Office Installation
- 15 Minutes to read
- Print
- DarkLight
- PDF
Dynamic Planning: SpotlightXL and Spotlight for Office Installation
- 15 Minutes to read
- Print
- DarkLight
- PDF
Article Summary
Share feedback
Thanks for sharing your feedback!
Overview
Spotlight is an Add-In to Microsoft Excel, PowerPoint, and Word that provides access to all Dynamic Planning capabilities. You can install it in two ways:
Automated. Install Spotlight for Office once and get upgrades in future months automatically. This is the ClickOnce method.
Manual. Install Spotlight for Office the first time. When an upgrade is released, uninstall the old version of Spotlight for Office and install the new. This is the InstallShield MSI method.
Recommendation : We recommend that you get automatic upgrades by installing ClickOnce. However, if this is not preferred, then install InstallShield MSI and upgrade it manually with every release. We support backward compatibility of Spotlight for Office so you can upgrade the Add-In less frequently (but at least quarterly).
Note:
For specific release dates for Quick Fix and Feature releases, click the link below and open the Maintenance Schedule. https://planful.com/trust/system-status/
| If you are | And you want or have an automated installation: | And you want or have a manual installation: |
|---|---|---|
A New User | See How to Use the ClickOnce Installer for Automatic Upgrades. | |
An Upgrading User | Do nothing. |
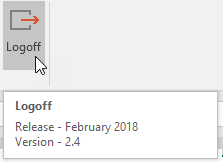
What Version of SpotlightXL Am I Using?
To see which version of SpotlightXL you are currently using, hover your mouse over the Login or Logoff button on the SpotlightXL menu.
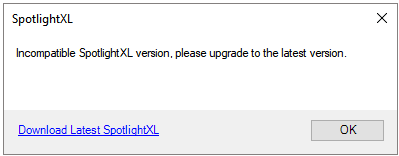
Incompatible SpotlightXL Error
Some users do not upgrade their Spotlight Add-In regularly. Sometimes, when a new version of Dynamic Planning is released, older versions of the Spotlight Add-In will not work. We support backward compatibility of Spotlight so you can upgrade the Add-In infrequently but we recommend that you upgrade at least 4 times per year.
If you have received the error message "Incompatible SpotlightXL version," then you need to uninstall the old version of the Spotlight Add-In and install the newest Spotlight Add-In on your computer. See Upgrading SpotlightXL and Spotlight for Office for instructions on how to upgrade.
System Requirements
SpotlightXL and Spotlight for Office require the following:
Windows 10 or 11
Microsoft Excel/Office 2010, 2013, 2016, 2019, and Office 365
SpotlightXL Native and SSO users
Excel Add-In on Windows 32 and 64 bits
Notes:
- For optimal performance, we recommend Excel 2016.
- In addition, it is also recommended that customers install the semi-annual release version of the Office 365 application. The SpotlightXL add-in is certified to work seamlessly with the semi-annual release version.
You can also find installation instructions for the Office 365 application in the following resources:
- Microsoft Office Customization Tool Overview
- Change the Microsoft 365 Apps Update Channel for Devices in your Organization Deploy Office
- How to Revert to an Earlier Version of Office - Microsoft Support
If you need further assistance, please reach out to your IT team.
In Practice: To Check the Release Version of the Office 365 Application
- Open Excel and navigate to the File.
.png)
- Click Account.
.png)
- The Product Information, including the release version, will be displayed.
.png)
.png)
.png)
.png)
SpotlightXL and Spotlight for Office Client Requirements
SpotlightXL and Spotlight for Office require that you have .NET and Microsoft Visual Studio Tools for Office Runtime on your computer.
Microsoft .NET 4.7.2 and TLS 1.2 Requirement Beginning February 1, 2019
Planful supports only TLS 1.2. All customers who are using either Spotlight or Dynamic Planning must do two steps:
Upgrade to .NET Framework 4.7.2.
Upgrade to the latest Spotlight Add-in.
By upgrading to Microsoft .NET Framework 4.7.2, you also get TLS 1.2. Transport Layer Security (TLS) protocol is an industry standard designed to protect the privacy of information communicated over the Internet.
End users with ClickOnce, which provides automatic installation of the latest client software, must have Microsoft .NET Framework 4.7.2 installed.
Users who manually install the January 2019 or later client software must have Microsoft .NET Framework 4.7.2 installed.
MS Office Users:
If you are using Spotlight for Office (SpotlightXL, PPT, Word) or just SpotlightXL and you do not have .NET Framework 4.7.2 installed, then you are affected by this change. We recommend to update the .NET Framework to 4.7.2 as early as possible. All users who do not have .NET Framework 4.7.2 installed will not be able to access the Spotlight Add-Ins.
If you do not have .NET Framework 4.7.2, then you will see a message on the menu ribbon:
.NET Framework needs to be upgraded. We recommend to do it at the earliest.

Browser Users:
If you use any of the modern browsers to log in to Planful (Firefox, Chrome, Safari, IE 10 and above), you will NOT be affected by this change. All the modern browsers already support TLS 1.2. If you are using lower versions of IE and use TLS 1.0 or TLS 1.1, please upgrade to TLS 1.2 by upgrading your .NET Framework.
Upgrading to .NET Framework 4.7.2:
If you see the message that .NET Framework needs to be upgraded, then you need to upgrade the .NET Framework to 4.7.2. To upgrade the .NET Framework to 4.7.2, you need to have Admin rights on your PC, otherwise you can ask your IT team to upgrade it.
If .NET Framework 4.7.2 is already installed, then you do not need to do anything and there will not be any impact for you to access the application.
Where to Download .NET Framework 4.7.2:
https://www.microsoft.com/net/download/dotnet-framework-runtime
How to Determine Which .NET Framework is Installed:
For Additional Information, Refer to the Links Below:
https://en.wikipedia.org/wiki/Transport_Layer_Security
https://docs.microsoft.com/en-us/windows/desktop/secauthn/transport-layer-security-protocol
Visual Studio
If Visual Studio is not detected, you are prompted to install it.
See also Installation Best Practices.
Installing SpotlightXL and Spotlight for Office
If you plan to use SpotlightXL exclusively and not use SpotlightWord or SpotlightPPT, complete the following steps:
Download the appropriate SpotlightXL executable file as instructed by your administrator (choose from ClickOnce, InstallShield MSI 64-bit, or InstallShield MSI 32-bit). The executable files are listed here: Where to Download and Version Information.
Double-click the file (likely in the Downloads folder) to run it.
If you plan to use Spotlight for Office , complete the following steps:
Download the appropriate Spotlight for Office executable file as instructed by your administrator (choose from ClickOnce, InstallShield MSI 64-bit, or InstallShield MSI 32-bit). The executable files are listed here: Where to Download and Version Information.
Double-click the file (likely in the Downloads folder) to run it.
Note:
There is no installation required for Spotlight on the Web.
How to Use the ClickOnce Installer for Automatic Upgrades
Using ClickOnce reduces ongoing maintenance because you install it only once. Thereafter, updates are installed automatically.
There are three flavors of ClickOnce for Spotlight for Office:
ClickOnce for SpotlightXL
ClickOnce for SpotlightWord
ClickOnce for SpotlightPPT
If you want to use Spotlight for Excel, Word, and PowerPoint, you will need to run each of the three ClickOnce installers for these applications. Simply run them each once and you will receive automatic updates in future releases.
Note:
The ClickOnce installation method is recommended for all users.
Download the SpotlightXL_ClickOnce.exe, SpotlightPPT_ClickOnce.exe, and SpotlightWord_ClickOnce.exe files from the Where to Download and Version Information table above.
Locate the files on your computer (likely in the Downloads folder), then double-click the file to run each.

Click Install.
When installation is complete, click Close.

If you try to run the ClickOnce.exe file a second time, the installer looks to see if you already have the latest release, and if so, displays the following message:
"The latest version of this customization is already installed."
See also ClickOnce Best Practices
How to Use the InstallShield MSI Installer
Using InstallShield MSI lets you control when the Spotlight Add-In is upgraded. After you install it for the first time, for future releases, you must uninstall the previous release before installing the latest release.
There are three flavors of InstallShield MSI:
InstallShield MSI 64-bit and 32-bit for SpotlightXL: provides Spotlight functionality only in Excel.
InstallShield MSI 64-bit for Spotlight for Office: provides Spotlight functionality in Excel, Word, and PowerPoint.
Note:
You must exit the Office applications before installing, uninstalling, or reinstalling SpotlightXL or Spotlight for Office.
These steps apply to either MSI 64-bit or MSI 32-bit:
These steps apply to either MSI 64-bit or MSI 32-bit:
Download one of the following files from the Where to Download and Version Information table.
SpotlightXL_MSI.EXE (64-bit version)
SpotlightXL_MSI_32.EXE (32-bit version)
SpotlightOffice_MSI.EXE (64-bit version)
- You should install the Spotlight version (64-bit or 32-bit) that matches your Microsoft Windows version.
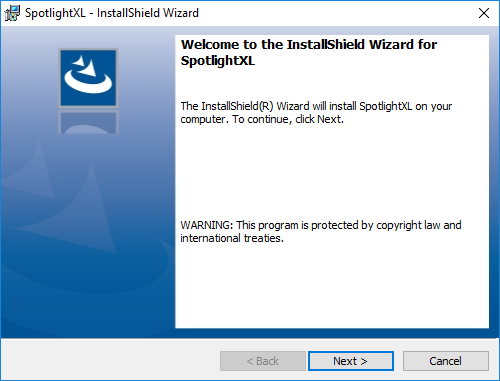
Locate the file you downloaded on your computer (likely in the Downloads folder), then double-click the file to run it.
Click Next and follow the prompts to install SpotlightXL or Spotlight for Office. When installation is complete, click Finish.

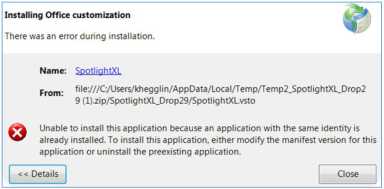
If you try to run the file you downloaded a second time, the installer looks to see if you already have SpotlightXL installed, and if so, gives you choices to Modify, Repair, or Remove the installation. Click Cancel.
When a newer release of SpotlightXL or Spotlight for Office is available, you must uninstall the existing Spotlight Add-In and then install the new. See Upgrading SpotlightXL and Spotlight for Office below.
See also InstallShield MSI Best Practices.
Upgrading SpotlightXL and Spotlight for Office
The SpotlightXL and Spotlight for Office Add-Ins are updated regularly by Planful.
Recommendation : Planful recommends that you upgrade it at least quarterly.
If you have installed the SpotlightXL, SpotlightWord, or SpotlightPPT Add-Ins with ClickOnce (automated method), there are no upgrade steps to do. When you start Excel, Word, or PowerPoint, the Add-In looks for a new Add-In and then automatically uninstalls the old Add-In and installs the newly available Add-In.
If you have installed the SpotlightXL or Spotlight for Office Add-In with InstallShield MSI (manual method), you need to first uninstall the Add-In from your computer, then install the new version.
Notes:
- You must exit the Office applications before uninstalling and reinstalling SpotlightXL or Spotlight for Office.
- You must close Excel and reopen it to ensure that the changes installed via MSI and ClickOnce are applied; otherwise, you may encounter issues.
Uninstalling SpotlightXL or Spotlight for Office
The following steps apply to either InstallShield MSI 64-bit or InstallShield MSI 32-bit.
Close out of your Office applications: Excel, Word, and PowerPoint.
Start Windows Control Panel or Windows Run/Search "Add or Remove Programs."
Scroll down to find SpotlightXL or Spotlight XL|PPT|WORD.
Depending on what version of Windows Control Panel you are using, select it and click Uninstall, or double-click it.
Click OK when asked if you are sure you want to remove the customization from your computer.
To reinstall, follow the instructions for installing the Add-In, either with How to Use the ClickOnce Installer for Automatic Upgrades or How to Use the InstallShield MSI Installer.
ClickOnce Flexible Deployment
Now, ClickOnce Spotlight Addins allows you to automatically switch between the Production Spotlight Addins and Sandbox Spotlight Addins with the use of the application URL. This application URL is used for Logging into the application in a specific environment. Previously, to validate a new functionality available in the Sandbox environment through ClickOnce, you had to do the following:
- Uninstall the existing ClickOnce Addin from the Production environment.
- Download and install the new Addin, which would validate the Sandbox environment.
- Uninstall the new Addin from Sandbox.
- Reinstall ClickOnce Addin from the Production environment.
The installer page will be deployed on selected hosting environments, so you will have the flexibility of switching from one tenant to another in different environments.
Note:
Post this release of the ClickOnce Spotlight feature, all version updates to the application will be done automatically with the flexibility of switching between the Sandbox and Production environments.
Business Value
With the new change, you can download and install the latest version of the new functionality through the automated link specific to a version. This change significantly reduces the time and effort involved in uninstalling and installing Addins while simultaneously switching between different hosting environments.
Spotlight Addins Installer Page
On the Spotlight Addins Screen, you now have the installer links to download the latest version of Spotlight Addins. In the Spotlight Addins screen, you can download and install applications in two ways:
Automated, which is a ClickOnce method that will provide you with automated upgrades in the future
Manual, which is an InstallShield MSI method where you will have to uninstall the old version to install the new version when an upgrade is released
Furthermore, Addin download links are updated specific to a particular server, and only the users having access to Dynamic Planning will be able to download the Spotlight Add-in version from the installer page.
Note:
The download links for Spotlight Add-in are also updated in the Online Help.
Business Value
With the Installer page updated in the Spotlight Addins screen, you will not have to navigate to the Online Help for future upgrades.

In Practice: To use Installer Links
Go to your profile, click Manage Your Account.
Select Spotlight Add Ins.
You will see the ClickOnce link for Automatic Installation and the Manual Installation links of Spotlight Addin upgrades.
Troubleshooting Tips
If you Install both ClickOnce and InstallShield MSI
If you accidentally install both ClickOnce and InstallShield MSI versions of SpotlightXL, an error message will appear when you start Excel.
To solve this problem, you must uninstall both Add-Ins and then reinstall the version of the Add-In that you want to use going forward.
Close Excel.
Start Windows Control Panel or Windows Run/Search "Add or Remove Programs."
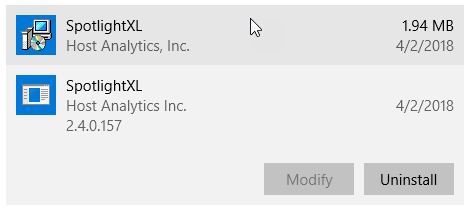
Scroll down to find SpotlightXL. You will see two instances of it.
Depending on what version of Windows Control Panel you are using, select the first SpotlightXL listed, and click Uninstall, or double-click it.
Click OK when asked if you are sure you want to remove the customization from your computer.
Do the same for the second SpotlightXL listed to remove it.
Then reinstall the version of SpotlightXL that you want to use.

Note:
You can tell the difference between the ClickOnce and InstallShield MSI versions of SpotlightXL in the list, but it is still safer to remove both of them and then reinstall:
SpotlightXL with ClickOnce has this icon:
SpotlightXL with InstallShield MSI has this icon:
Visual Studio Error
When you see an error like the one below, rename the VSTOInstaller.exe. The location of the VSTOInstaller.exe is provided in the error message.
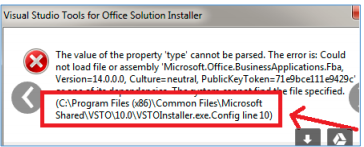
When an error is displayed (like the one below) upon Login:
Uninstall all the Excel VSTO Add Ins files. (VSTO stands for Visual Studio Tools for Office.)
Install SpotlightXL.
Install the remaining Add Ins.

To uninstall Excel VSTO Add Ins, open the Control Panel, select Add or Remove Programs. Locate the Add In(s) and click Uninstall. As a best practice, it is always suggested to clear the cache before reinstalling.
Note:
The first Add In installed determines the .NET runtime loaded for Excel.
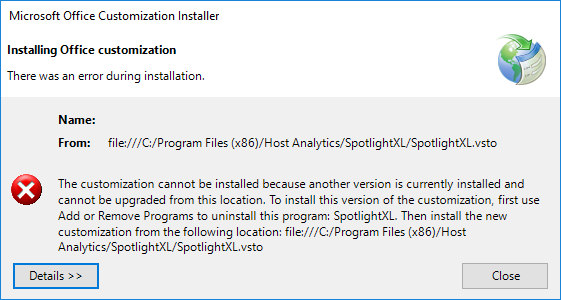
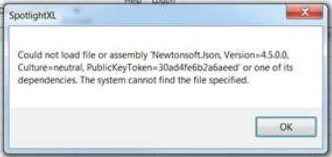
If you are upgrading SpotlightXL from a prior release, you may run into the following error during installation.

This issue occurs because the cache is not properly cleared. Clear the cache by running the following command at the command prompt:
rundll32 dfshim CleanOnlineAppCache
Then install the latest version of SpotlightXL.
Spotlight Office Utility Tool
You can use the Spotlight Office Utility tool to quickly troubleshoot installation issues with the Spotlight Office applications. You can identify and troubleshoot the following issues:
Installation issues - The Spotlight Office Utility tool provides the capability to enable the log file to capture the MSI & ClickOnce installation procedure. This log file can be used to quickly identify the problem with the installation. Previously, MSI & ClickOnce installations did not provide details about the installation.
User account type identification - The user account in the Utility tool helps you to quickly identify whether the account is an Admin or a non-Admin authorized account. This information provides insight on the appropriate installer type for each customer. If the user account is non-Admin, then the customer can use the ClickOnce installer.
Compatibility issues - The Spotlight for Office applications requires an appropriate software environment on the customer machine like the Operating System, Microsoft Office version, and the .Net framework. The Utility tool quickly gathers this information, and based on the collected data; the tool suggests the right action to the customer to solve compatibility issues.
Installed version information - The Utility tool gathers version information on the installed SpotlightXL and Spotlight for Office applications along with the respective type.
Logs for Spotlight Office Add-ins - By default, the Spotlight for Office Add-in logs all errors and exceptions within the application. The following are the different levels that you can select for getting the logs printed:
Error
Warning
Info
Debug
When you select any level, the Spotlight Add-in prints logs for that level along with the levels above it. For example:If you select Debug, then the Spotlight Add-in prints logs for the Error, Warning, Info, and Debug levels.
If you select Info, then the Spotlight Add-in prints logs for the Error, Warning, and Info levels.
If you select Warning, then the Spotlight Add-in prints logs for the Error and Warning levels.
If you select Error, then the Spotlight Add-in prints logs only for the Error level.
Conflicting Add-Ins - The Utility tool gathers Add-In information, which helps in reproducing the problems as reported by the customer.
Installation Best Practices
The SpotlightXL and Spotlight for Office Add-In installations are distributed in Microsoft ClickOnce form and Installshield MSI form. InstallShield MSI form comes as either 64-bit or 32-bit.
ClickOnce Best Practices
ClickOnce allows the user to run an installation program one time to install SpotlightXL, SpotlightPPT, or SpotlightWord and thereafter to receive updates to these Add-Ins automatically.
This format automates the process of updating the Add-Ins each month. Instead of uninstalling the old Add-In, downloading the new Add-In, and then installing the new Add-In each month, users set it up once and then allow the updates to be installed automatically going forward. When a new version of Dynamic Planning is released, the latest Add-Ins will be available in ClickOnce. When users start Excel, Spotlight will look for a new Add-In and then automatically uninstall the old Add-In and install the newly available Add-In.
This format is automated and does not need any local admin privileges.
ClickOnce is recommended for all users.
InstallShield MSI Best Practices
This format of the Add-In is MSI (Microsoft Installer) and it is installed with InstallShield. When a new version of Dynamic Planning is released, the latest Add-In will be available in InstallShield MSI, and users can download it. New users can run it immediately. Existing users must use Control Panel to uninstall the previous release before running the new InstallShield MSI file.
This format is controlled by the user and is manual. It requires local admin privileges on the machine to uninstall and install the Add-In.
You should install the SpotlightXL or Spotlight for Office version (64-bit or 32-bit) that matches your Microsoft Windows version.
Best Practice Examples
Example 1 Basic ClickOnce Installation
User A installs the ClickOnce Add-In in May-17. Then when we release the June-17 Add-In, User A does not have to do anything because Excel automatically installs the latest Add-In. This option is recommended for all users.
Example 2 Basic InstallShield MSI Installation
User B installs the InstallShield MSI Add-In in May-17. Then when we release the June-17 Add-In, User B has to uninstall the May-17 Add-In with Control Panel and then install the June-17 Add-In.
Example 3 Switch from InstallShield MSI to ClickOnce Installation
User C already has the SpotlightXL Add-In installed from previous months, but wants to automate the Add-In installation going forward. User C has to uninstall their Add-In using Control Panel, and then install the May-17 ClickOnce Add-In.
Example 4 Switch from ClickOnce to InstallShield MSI Installation
User D installs the ClickOnce Add-In in May-17 and gets the latest Add-In in June-17 automatically. If the user does not want to get the latest Add-In automatically in July-17, then User D can uninstall ClickOnce, uninstall the current Add-In, and then install the June-17 InstallShield MSI Add-In so that the process will be manual going forward.
Was this article helpful?