- 2 Minutes to read
- Print
- DarkLight
- PDF
Setting Up Initiative Template
- 2 Minutes to read
- Print
- DarkLight
- PDF
To design an Initiative template you will need to map categories to the sub-templates. When an end-user adds an initiative via the Input template page accessed via the Planning Control Panel, the end-user will have to plan for that initiative. Planning is done with sub-templates for each added initiative.
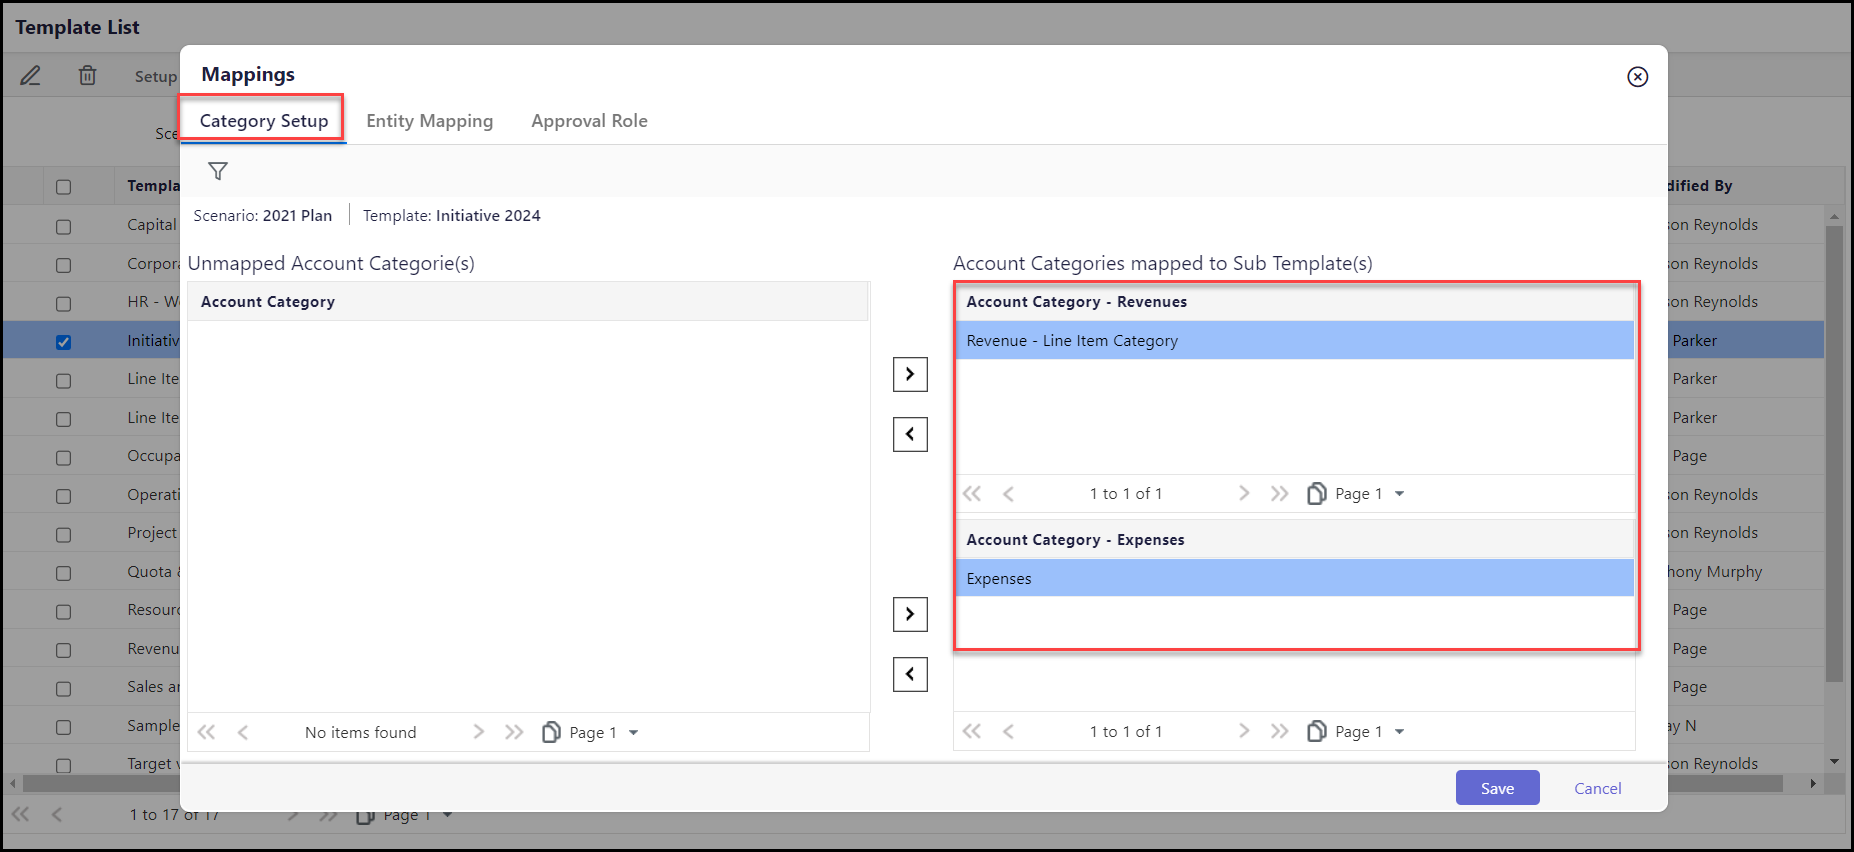
The user creates categories in the Line Item Category and these account categories are available in Template Setup > Category Setup under Unmapped Account Categories. The user can map these account categories to the two sub-templates - Account Category-Revenues and Account Category-Expenses.
Suppose you are launching a new product line and need to manage its finances. Your initiative includes two key sub-templates: one for costs and another for sales revenue. In the Costs sub-template, you record expenses such as raw materials, labor, and packaging associated with manufacturing the product. Meanwhile, the Sales Revenue sub-template tracks the income generated from selling the new product, including the total sales amount and any discounts given. This structured approach helps you effectively monitor and analyze both the expenses and revenue related to the new product launch.
To perform the Initiative template setup, do the following:
- Navigate to Maintenance > Planning Templates > Template Setup.
- Select an Initiative Template.
- Click Setup > Template Setup. Notice that the categories set up on the Line Item Category page are available for mapping.
There are three tabs:
Category Setup
- In the Unmapped Account Categories pane, select categories to add to the revenue and expense account sub-template panes. Initiative Planning recognizes 2 account categories; revenue initiatives and expense initiatives. When you added categories (on the Line Item Category page), you mapped accounts to the categories, which is where initiative planning revenue and expenses will be posted.
- Click Save to confirm your changes.


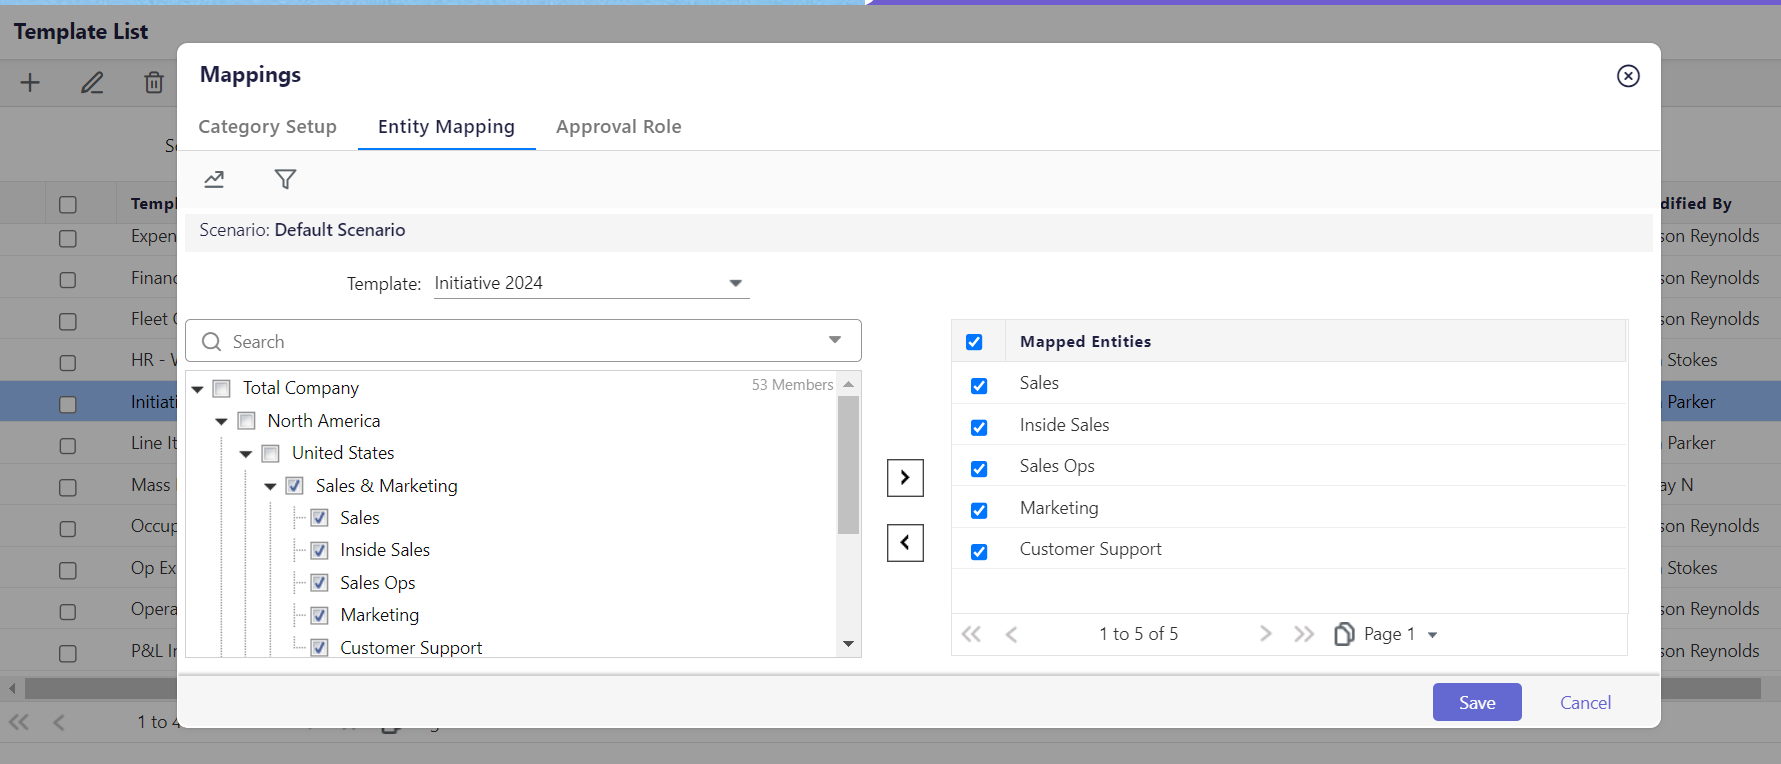
Entity Mapping
- Click the Entity Mapping tab to map the template to a budget entity or entities. Search for the entities you wish to map the template and use the arrow to move the selected entities under the Mapped Entities pane.

- Click Save to confirm your changes.
Additionally, you can use the Entity Report option to view all of the entities mapped to the initiative template.

You can also filter to narrow down your search results using the Apply Filter option and export the entity report using the Export to Excel and the Print options. However, you can also perform the same entity mapping using the Entity Mapping option.

Approval Role
You can assign template access to the desired approval roles. The following actions can be performed based on the approval role setup.
- All —Allow the approval role to perform all template actions (input, view, mark complete, mark not complete).
- Input —Allow the approval role to open Initiative templates in Input mode and to enter data.
- View —Allow the approval role to open Initiative templates in Read Only mode.
- Mark Complete —Allow the approval role to mark templates Complete. Once a template is complete, it cannot be opened in Input mode until marked Not Complete.
- Mark Not Complete —Allow the approval role to remove the Complete status for a selected template and allow the template to be opened in Input mode.

Alternatively, you can assign the approval roles from the Approval Role tab under the User & Role Management area. There, you can also assign the Initiative Approval Actions for the approval role.


