- 2 Minutes to read
- Print
- DarkLight
- PDF
Account Mapping
- 2 Minutes to read
- Print
- DarkLight
- PDF
The Account Mapping category has the following options:
Destination Account (DA)
Select a line in the template and open the Destination Account page to map template rows to segment combinations. Destination accounts are used for saving the budget or forecast data entered or calculated in a selected budget template against a General Ledger account.
On the Destination Account Mapping page, to perform a Mass Destination Account Mapping:
- Select All from the Lines list box. This selection displays all template lines and enables Mass Mapping.
- Select segment members for each line and click Save.
Reference Account (RA)
Select a line and open the Reference Account page to enable the look-up of data from another template. For example, payroll accounts may be looked up from the Workforce template.
On the Reference Account Mapping page: To perform a Mass Reference Account Mapping:
- Select All from the Lines list box. This selection displays all template lines and enables Mass Mapping.
- Select segment members for each line and click Save.
Reference Cube (RC)
Select a line and open the Rule page to look up data from the cube. For example, you can look up total revenue for all sales departments within a legal entity. Or, pull revenue data into a planning template as a basis for cost allocations. Learn more about Reference Cube here.
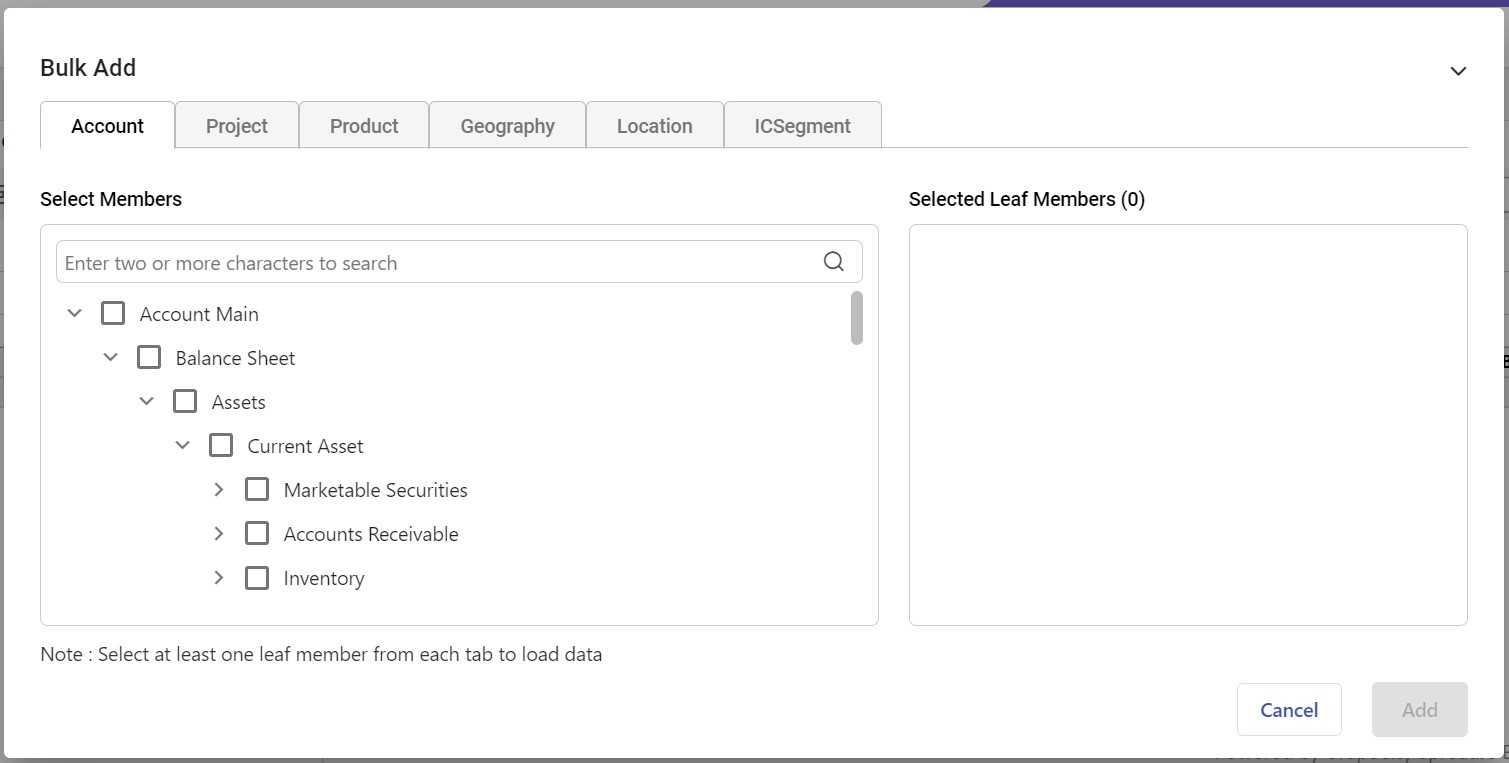
Mass Load / Bulk Add
Mass Load option loads multiple account members at once and inserts rows for each. On the Mass Load page, select the checkbox to select or deselect all accounts to load.
Using this Bulk Add option, you can select all the applicable dimensions at the Rollup and the Leaf level, and add the multiple template line items in one go.

- The number of dimensions on the Bulk Add screen is based on both the application and template configuration. So, the number of tabs may increase depending on the dimensions and template segment member setup.
- You can only select up to 99 members.
- You must select at least one leaf member from each dimension to enable the Add option.
- You can view the GL String that shows the leaf members selected for each dimension by clicking the respective added lines.
To perform Bulk Add:
- Go to Mappings and select Bulk Add. On the Bulk Add screen, select the required members you wish to add from all the respective tabs.
- Click Save.
For segment hierarchies exceeding 10,000 members, the hierarchy is displayed progressively, i.e. the root and its immediate children (up to a maximum of 5,000 members) are shown initially. You will need to expand the rollups to view and select the rollups/leaves at further levels. The limit of 5,000 members applies to the expansion of rollups at any level in the hierarchy. You need to use the search option to view and select segment members beyond this limit.
For smaller hierarchies containing 10,000 or fewer members, the entire hierarchy will be visible by default. This means you can quickly navigate the hierarchy and select required rollups/leaves.

