Consolidation Setup
- 2 Minutes to read
- Print
- DarkLight
- PDF
Consolidation Setup
- 2 Minutes to read
- Print
- DarkLight
- PDF
Article summary
Did you find this summary helpful?
Thank you for your feedback
When a new Planful tenant is provisioned, administrators can define up to 8 dimensions (segments) for use across the application. These dimensions can be named based on the organization’s specific industry or business structure.
Out of these, 3 dimensions—Company, Account, and Intercompany—are typically referred to as system defined segments for consolidation purposes. The remaining 5 dimensions are referred to as user defined segments.
When setting up the Sub Consolidation Process in the Administration module, users can select up to 5 segments. Planful automatically includes the 3 System Defined segments—Company, Account, and Intercompany. The user can then select up to 2 additional segments from the remaining user defined segments. These are referred to as User Defined Additional Segments.
Any remaining user defined segments that are not selected in the Sub Consolidation Process are categorized as Not Selected Additional Segments. For these segments, users must configure default values in the Consolidation Setup window to ensure the consolidation process runs correctly.
Note:
You must enter default values for the Not Selected Additional Segments on the Consolidation Setup window for the system to save the selected field values.
If the Sub Consolidation Process is not configured, the legacy Consolidation Setup window appears.
Prerequisites for Accounts Under Account Dimension
The following accounts must have Account Type selected as Flow and Normal Data Input Type as MTD.
Retained Earnings - Balance Sheet
Non-Controlling Interest - External
Non-Controlling Interest - Related
Equity Method - Investment in Associate
Equity Method - Share Profit From Associate
To select default field values for Not Selected Additional Segments, do the following:
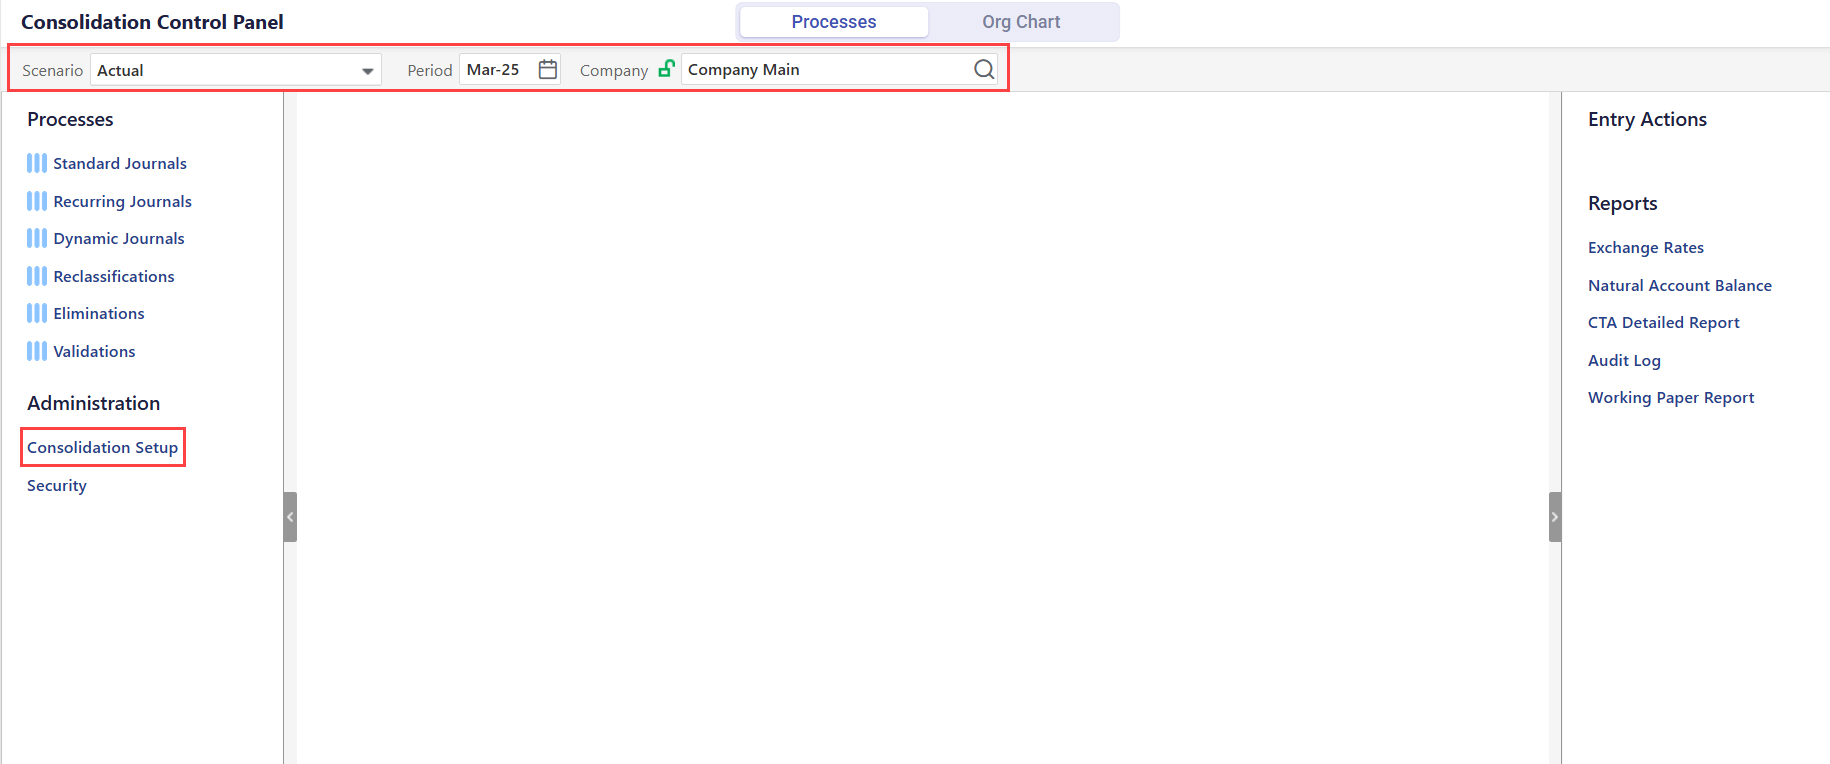
Navigate to the Consolidation > Consolidation Control Panel > Processes tab.
Select values for Scenario, Period, and Company.
From the right side pane under Administration, click Consolidation Setup.
Click the Browse icon to select a value or account for the fields available. You must provide values for all fields in a section to avoid a validation error. Additionally, to successfully process consolidation, you must provide values for all sections. Below is the list of sections available in the Consolidation Setup window.
Additional Segments for Sourced Data
Retained Earnings - Balance Sheet
Account used to store Net Income amount
Account for Retained Earnings - Current Year Calculation
Target Balancing Account
Cumulative Translation Adjustment (CTA) - Balance Sheet
Translation gain (loss) - Income Statement
Balance Sheet Members for CTA Calculations
Inter Company Elimination Offset Account
Non-Controlling Interest - External
Non-Controlling Interest - Related
Equity Method - Share of Profit from Associate
Equity Method - Investment in Associate
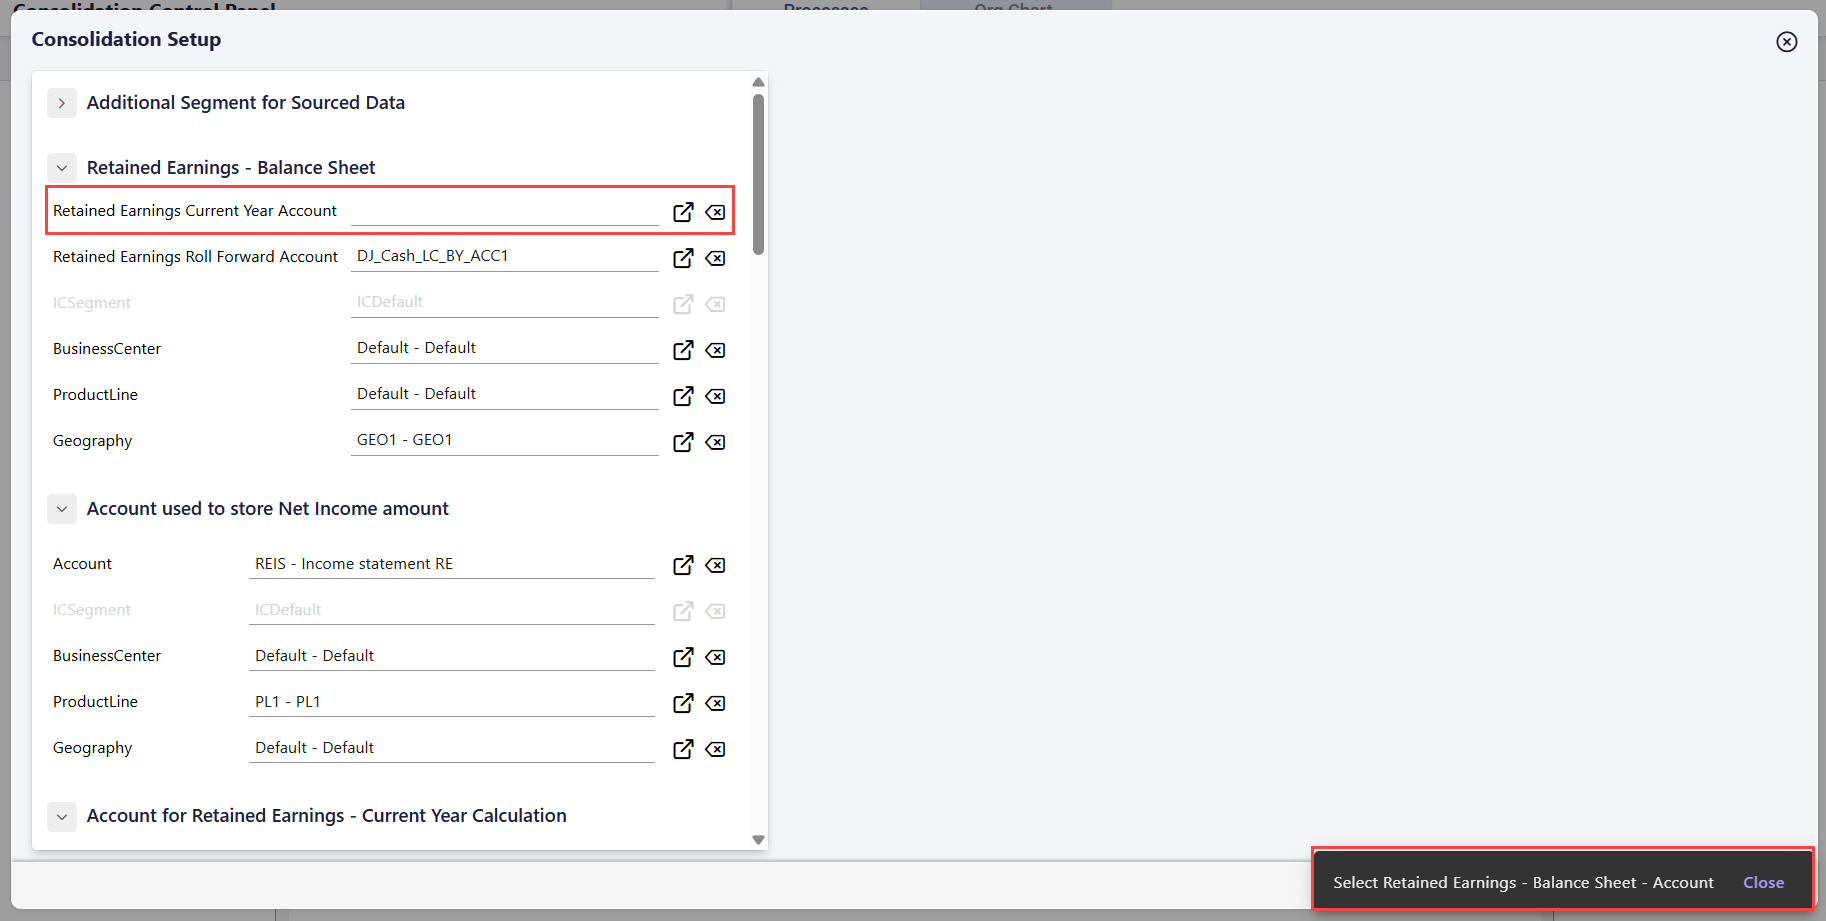
Click Save. The configurations are saved successfully. The provided values are retained when you reopen the Consolidation Setup window.
Note:
The Save option in the Consolidation Setup window is only available if Company Main is selected as the Company in the Consolidation Control Panel.
Was this article helpful?