How to Add a Standard Journal
- 2 Minutes to read
- Print
- DarkLight
- PDF
How to Add a Standard Journal
- 2 Minutes to read
- Print
- DarkLight
- PDF
Article summary
Did you find this summary helpful?
Thank you for your feedback
Important
Data posted using Standard Journals is posted as a standalone data. Ability to post data at the group or the parent levels will be available in future.
Add a Standard Journal when you have to post a journal entry only once. To add a Standard Journal, do the following:
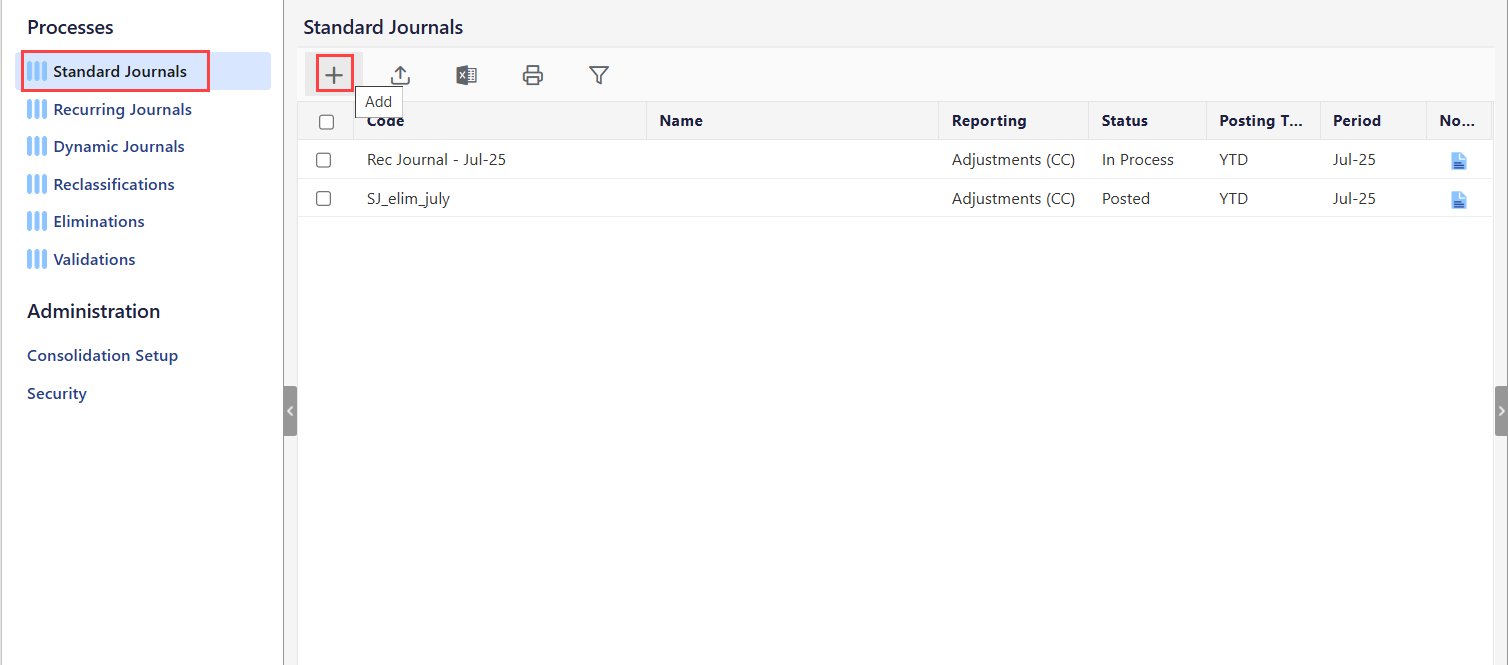
Navigate to Consolidation > Consolidation Control Panel > Processes tab.
Select values for Scenario, Period, and Entity.
In the right pane, click Standard Journals under Processes.
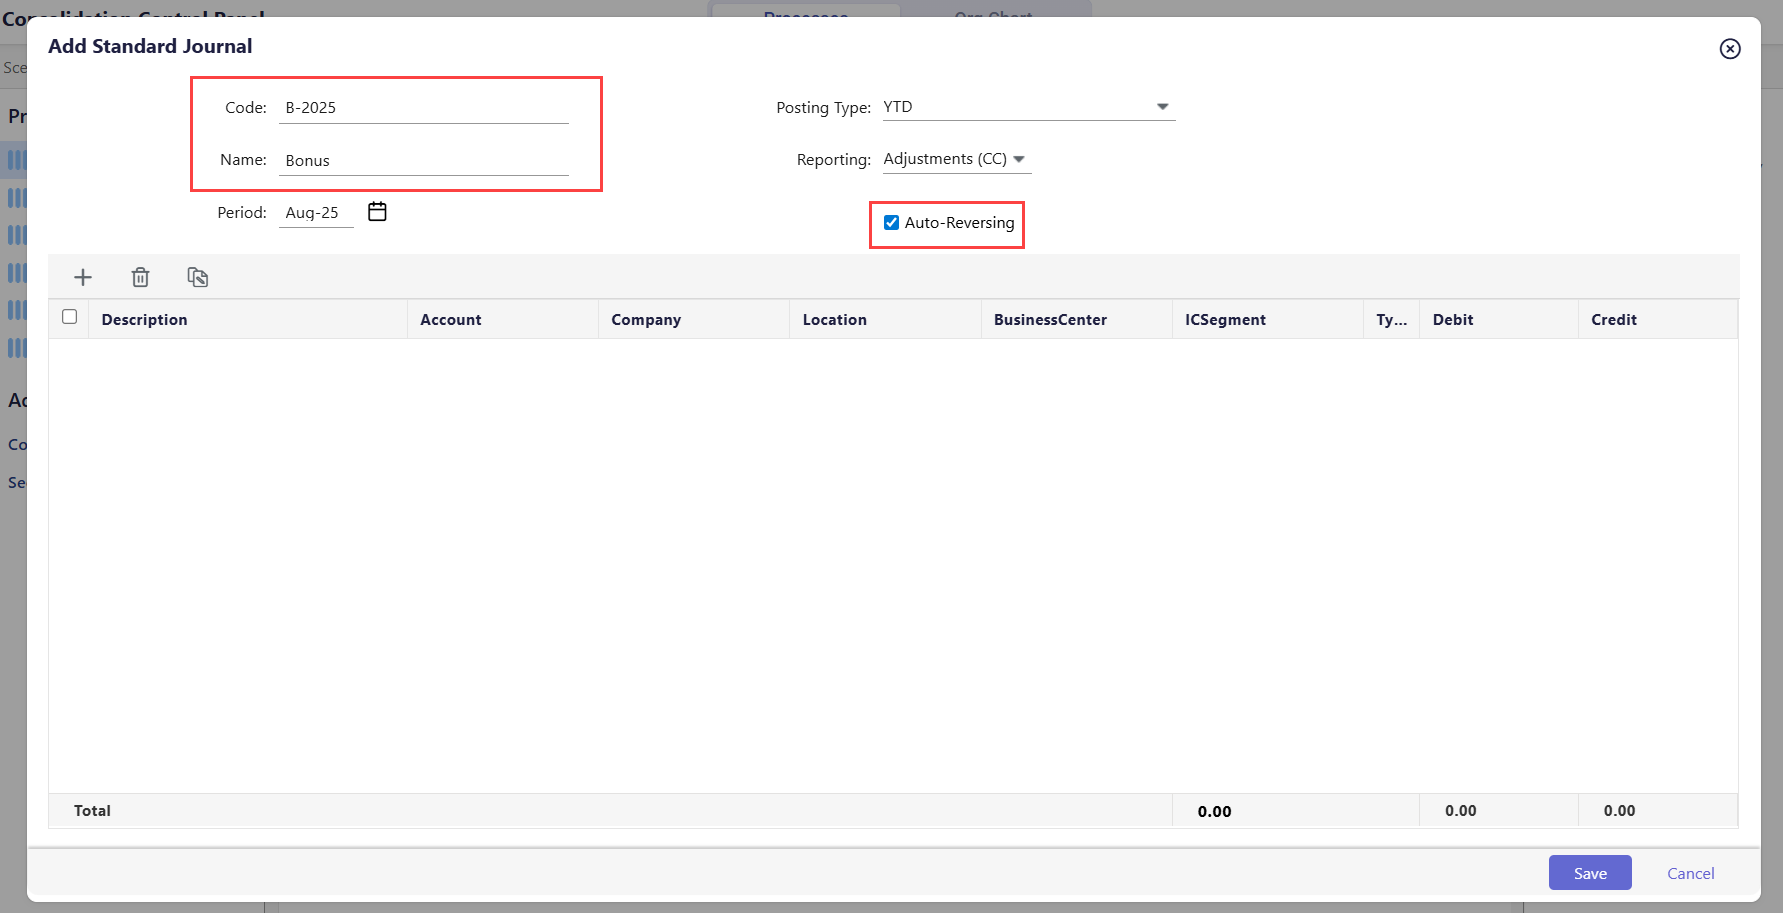
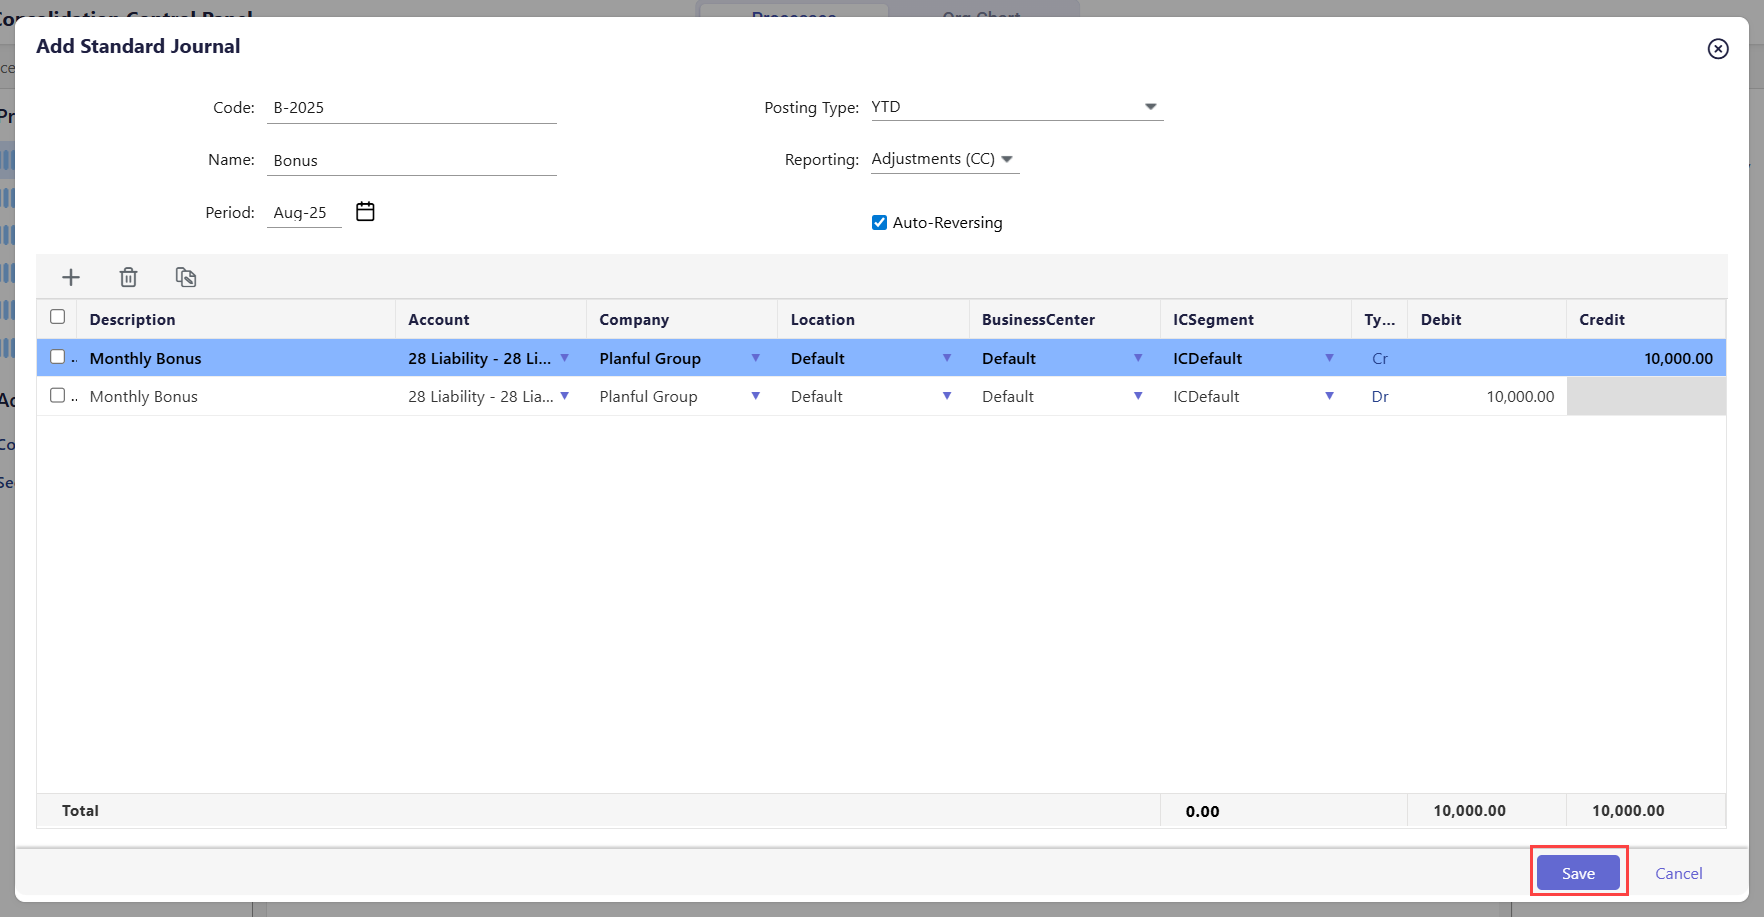
Click Add. The Add Standard Journal dialog appears.
Enter a code of your choice in the Code field.
Enter a name for the Standard Journal in the Name field.
Select the month and year range in the Period field. During the selected time period, the journal is active.
Select YTD or MTD in the Posting Type drop-down.
Note
MTD (month to date) evaluates entries based on the month’s activity; whereas YTD (year to date) evaluates the entries based on the cumulative balance for the line items.
Select Adjustments (CC) or Adjustments (LC) in the Reporting drop-down.
Note:
A journal can be in common currency or local currency. A local currency is often used by a company's subsidiaries and then converted to a common currency for consolidated reporting purposes.
Select the Auto-Reversing checkbox to create a Standard Journal entry with an auto-reversing entry in the subsequent period. The originating entry is the base entry in the current period to configure this option. It is not a mandatory selection.
Note:
The Auto-Reversing entry is a replica of the originating entry, but applicable for the subsequent period. For example, you can use this feature to close books for a given month (accrue vacation liability). This entry will be reversed in the subsequent month when more information about the actual cost is available.
When the originating entry is posted, the Auto-Reversing entry is created. For example, if you post the originating entry in Jan-2025, the Auto-Reversing entry will be posted in Feb-2025.
Create a journal entry in the grid. This grid displays segment columns based on the application’s configuration and the user's security access.
Click Add Row. A new row is added.
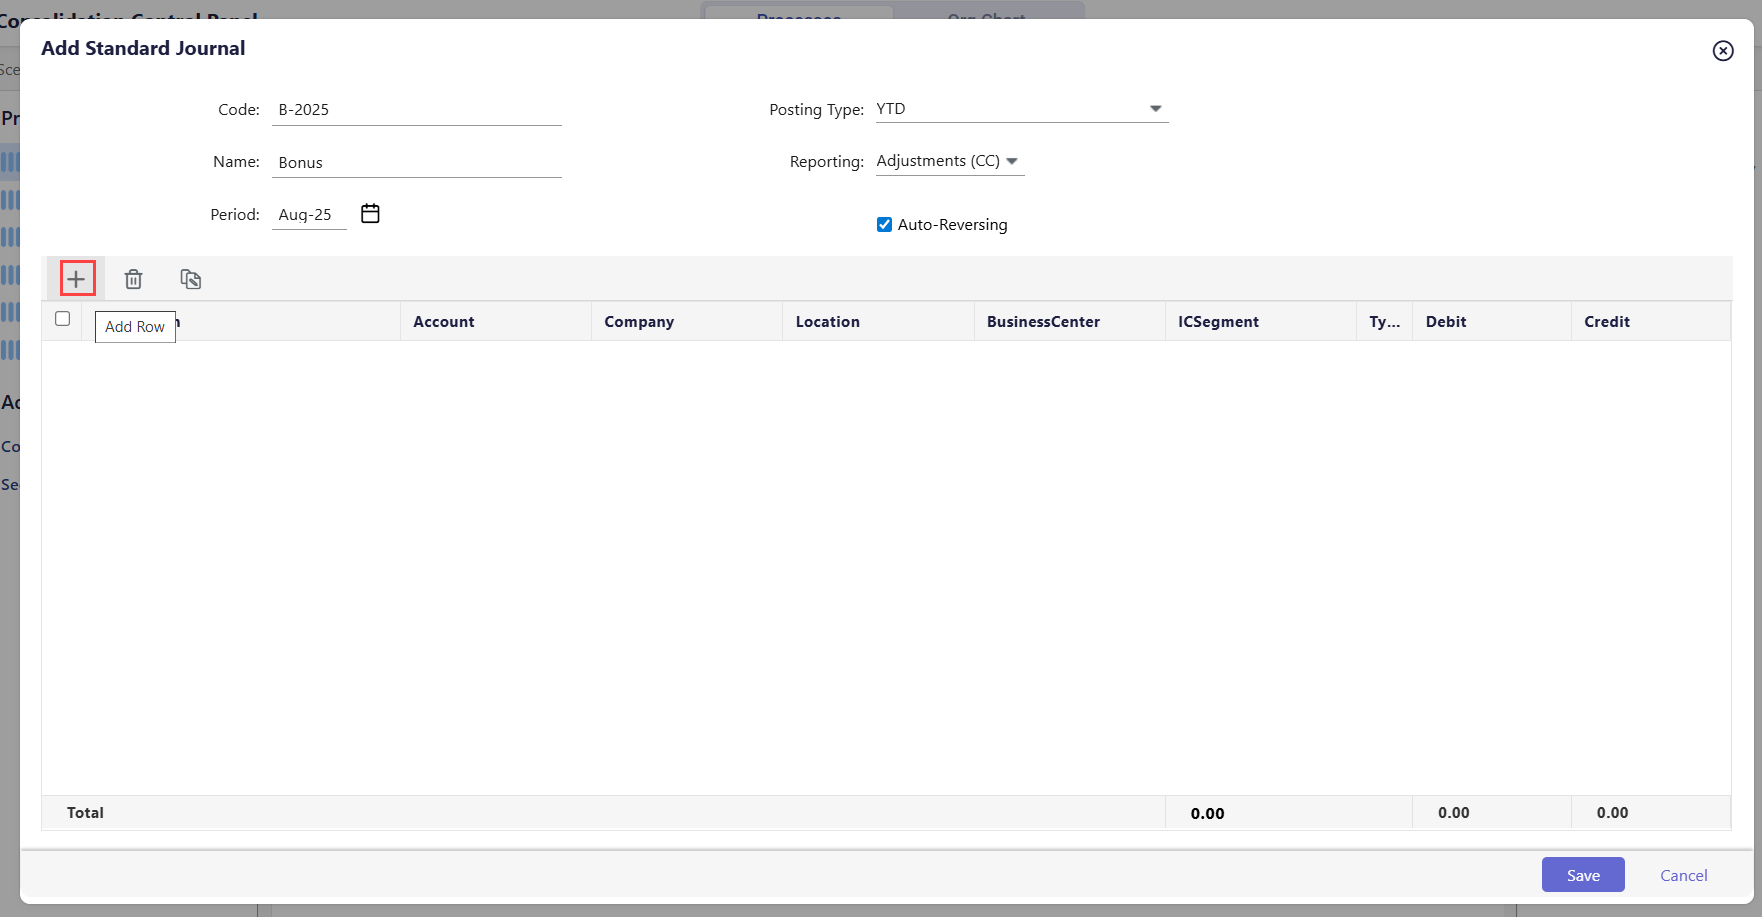
Do one of the following to set up the values for each column:
Complete the journal entry line by either typing the values or selecting the value.
Paste copied line items from an Excel spreadsheet to the journal entry grid. You can copy/paste all values, including descriptions, segments, and debit/credit values. Use shortcut keys (Ctrl+C and Ctrl+V).
(Optional Step) Click the Copy icon to duplicate a journal entry line.
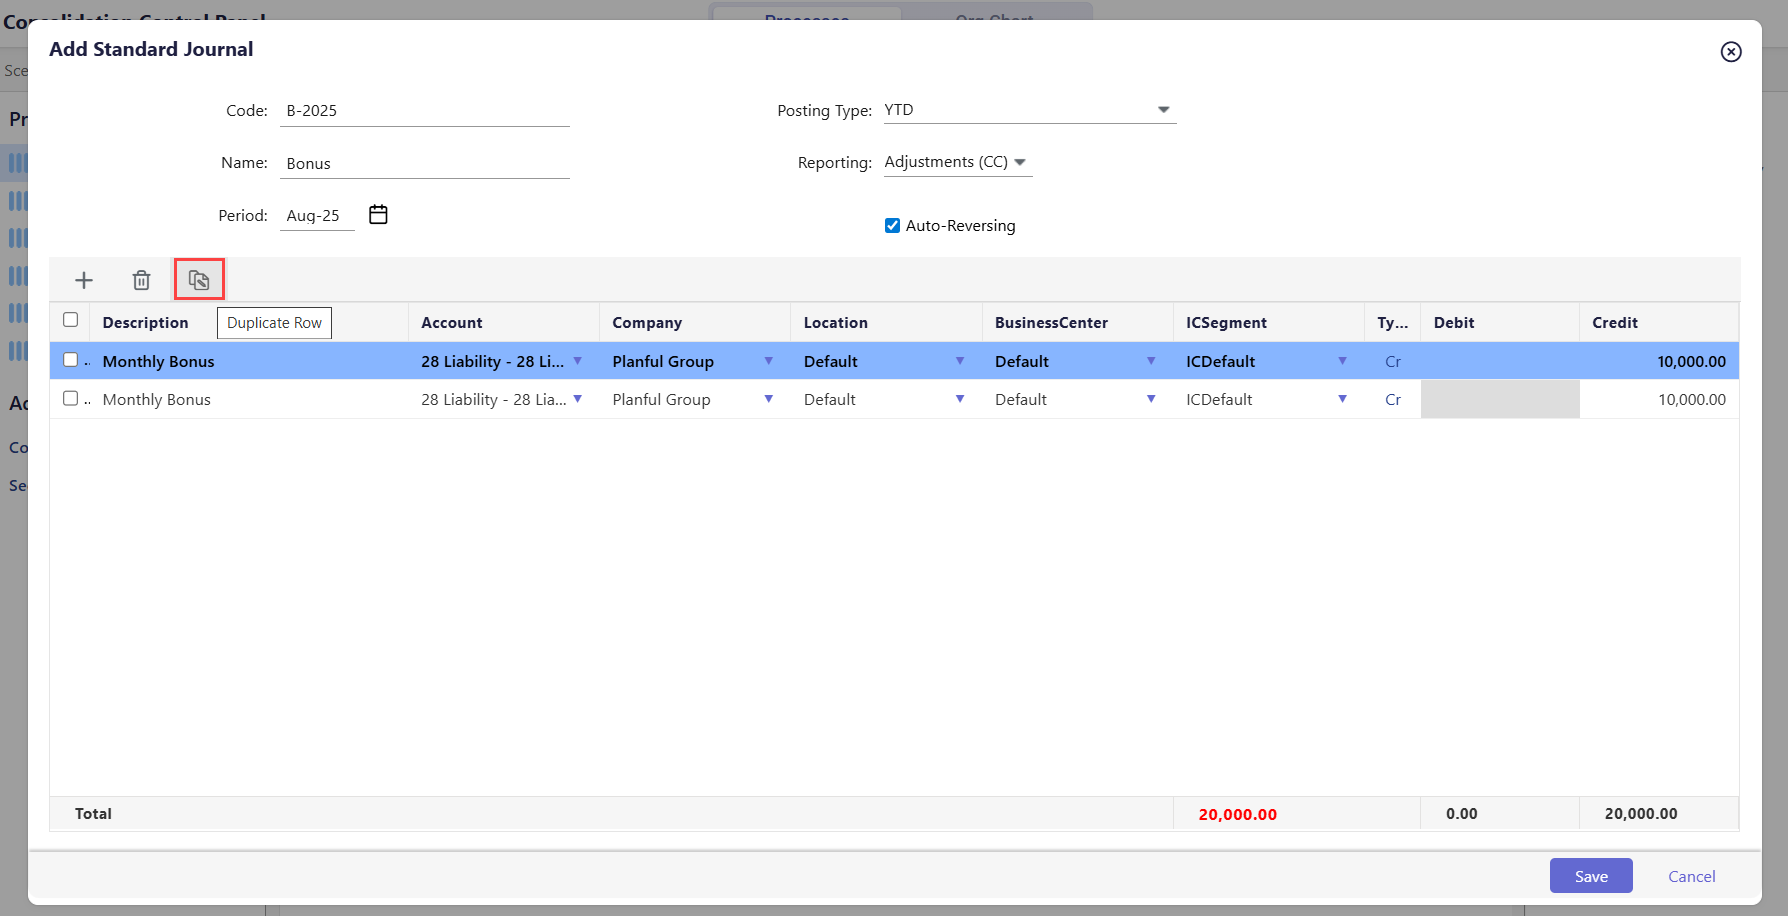
The Total displays the Debit or Credit amount for the entire column as well as the running variance column. Entries in Standard Journals must always balance.
Click Save. The journal entry is added.
After the Standard Journal is added, you need to post that journal in order to process consolidation. To learn more about posting the Standard Journal and other actions, click here.
Was this article helpful?