How to Upload a Standard Journal
- 2 Minutes to read
- Print
- DarkLight
- PDF
How to Upload a Standard Journal
- 2 Minutes to read
- Print
- DarkLight
- PDF
Article summary
Did you find this summary helpful?
Thank you for your feedback
Important
Data posted using Standard Journals is posted as a standalone data. Ability to post data at the group or the parent levels will be available in future.
Upload Standard Journals in the .xlsx format directly to the Consolidation module. Use the sample template (that you can download) for ease of use when performing the upload.
Note:
You must download and use the sample templates as they are journal-specific. For example, you cannot use the Standard Journal template to upload Dynamic Journals.
To upload Standard Journals, do the following:
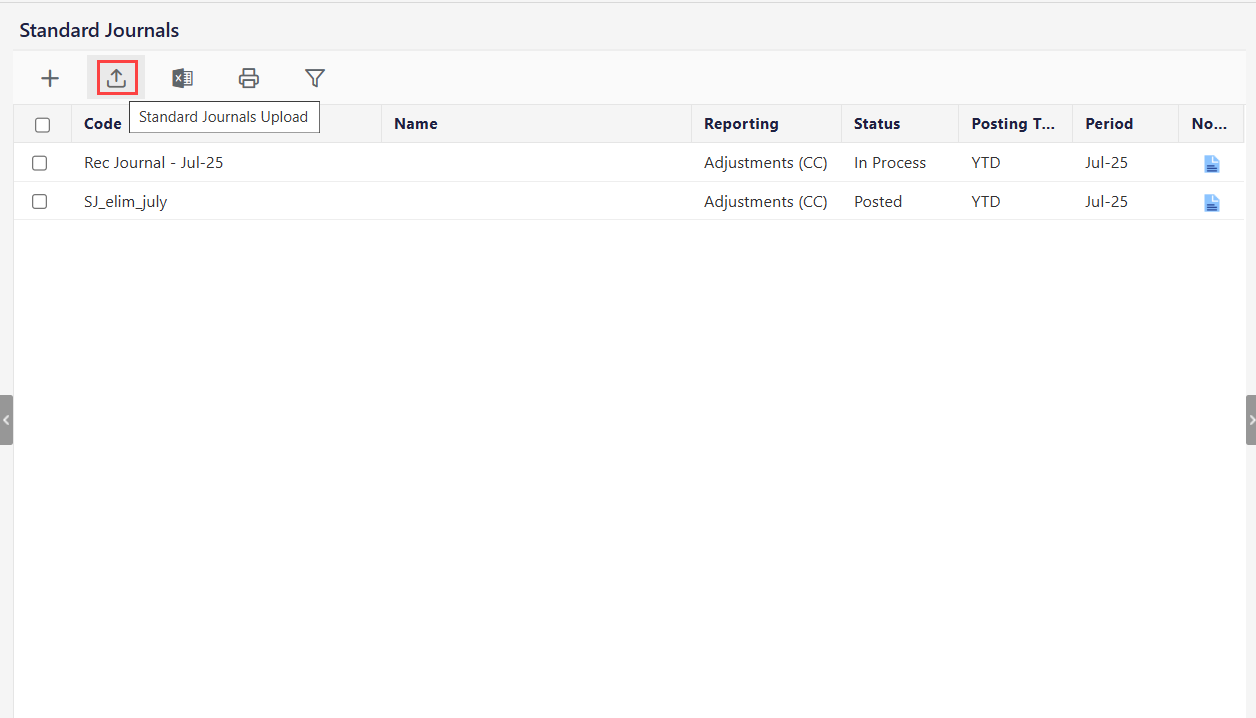
Navigate to Consolidation > Consolidation Control Panel > Processes.
Select values for Scenario, Period, and Entity.
Click Standard Journals under Processes.
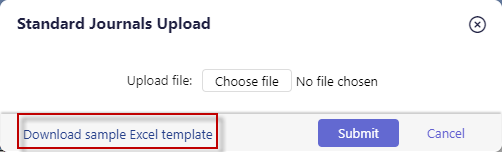
Click the Standard Journals Upload icon. The Standard Journals Upload dialog appears.
Click Download sample Excel template. The template is downloaded to your local system.
Note:
It is best practice to use the sample Excel template as it instructs you exactly how to organize your journal data to load it successfully.
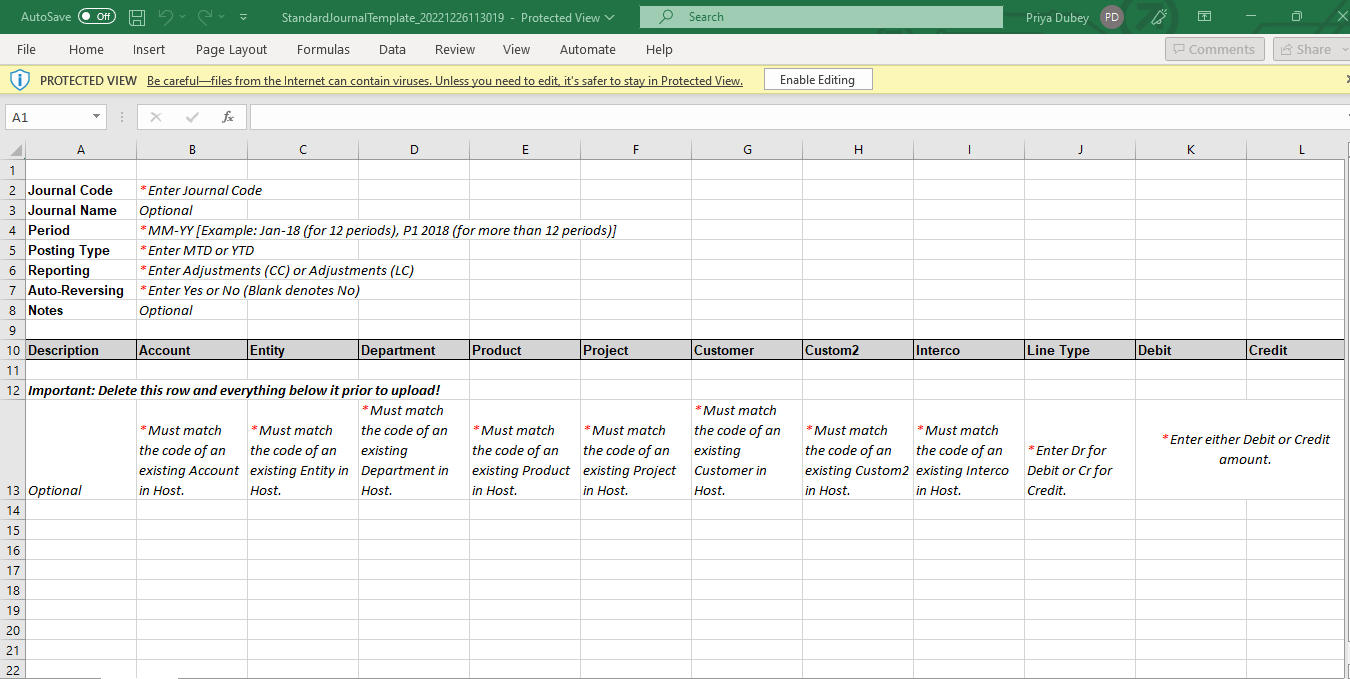
Open the template. It is downloaded to your computer. The template displays and indicates the required fields. It also provides information to ensure the correct data is entered where needed.
Note:
You must leave the offsetting debit or credit field blank instead of entering a zero as shown below in the sample Excel file.

Enter a journal code, the period for which you want to load the journals, and the posting type as shown below.
Enter Adjustments (CC) or Adjustments (LC) for reporting, Yes, or No for auto-reversing, and enter notes as needed
Note:
You can copy and paste journals into the spreadsheet. Notice how the grid names in the Excel template match the names within the application Journal Add page. Before copying and pasting data to the Excel file, ensure to delete all the tips located in the sample file.
Save the .xlsx file to your computer.
Click Choose File.
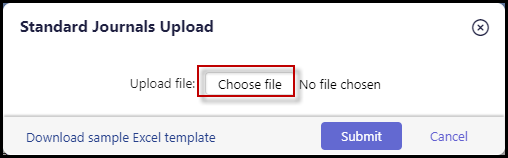
Select and upload the saved file from your local system.
Click Submit to perform the upload. A message will appear once submitted (as well as once the upload is complete) where you can click through to the Detail View to view the status of the upload. Additionally, clicking Submit will create a Job Manager process called Standard Journals Upload.
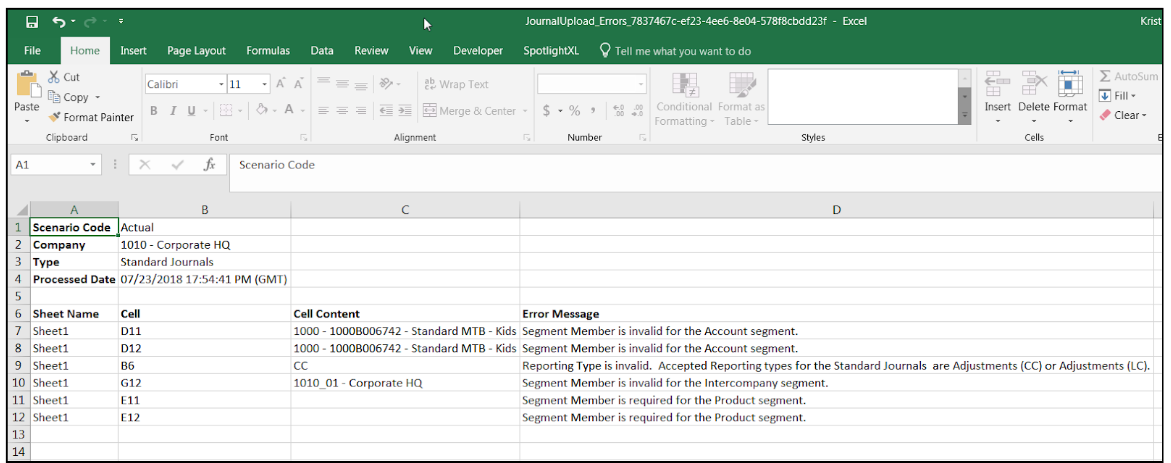
If the upload failed, click the Status field link (Click Here ) to download an Excel file with information on why the failure occurred. Fix the errors and upload the file again.
Once journals are uploaded successfully, the Detail View will display Success in the Status field and the uploaded Standard Journal will display in the Consolidation Control Panel.
After the Standard Journals are uploaded added, you need to post them in order to process consolidation. To learn more about posting the Standard Journal and other actions, click here.
Was this article helpful?