- 1 Minute to read
- Print
- DarkLight
- PDF
Dated Hierarchy
- 1 Minute to read
- Print
- DarkLight
- PDF
When there are changes in company organizational structures, you may need to manage multiple versions of hierarchies that existed during different periods in time, and you may also need to generate reports using different versions of organizational hierarchies that represent different reporting positions of individual entities.
Dated Hierarchy allows you to manage hierarchies based on periods, allowing you to create a new version of a hierarchy and take a snapshot of the existing version.
A few examples:
- Company 01 was part of a Parent group until December 2022, when it was moved to a different Parent group, and you need to generate reports using both Parent group hierarchy versions.
- Product 01 was part of a Product group until December 2022, when it was merged with a different Product group starting January 2023, and you need to generate reports using both versions of the hierarchies to understand the impact of the movement on the financials of the Product group.
Prerequisite
To add dated hierarchies, the Enable Dated Hierarchy option must be set to Yes on the Define Financial Segments Configuration task for the appropriate segments as shown below.
Adding a Dated Hierarchy
Once enabled, complete the following steps in the Hierarchy Management interface accessed by navigating to Maintenance > Hierarchy > Hierarchy Management.
To add an attribute hierarchy to a dimension, follow these steps:
- Navigate to Maintenance > Hierarchy > Hierarchy Management.
.png)
- In the Hierarchy Selection section, select Finance Hierarchies from the Type drop-down list, and select a Dimension.
- Click Setup.
.png)
- On the Financial Hierarchies Setup page, click Add.
.png)
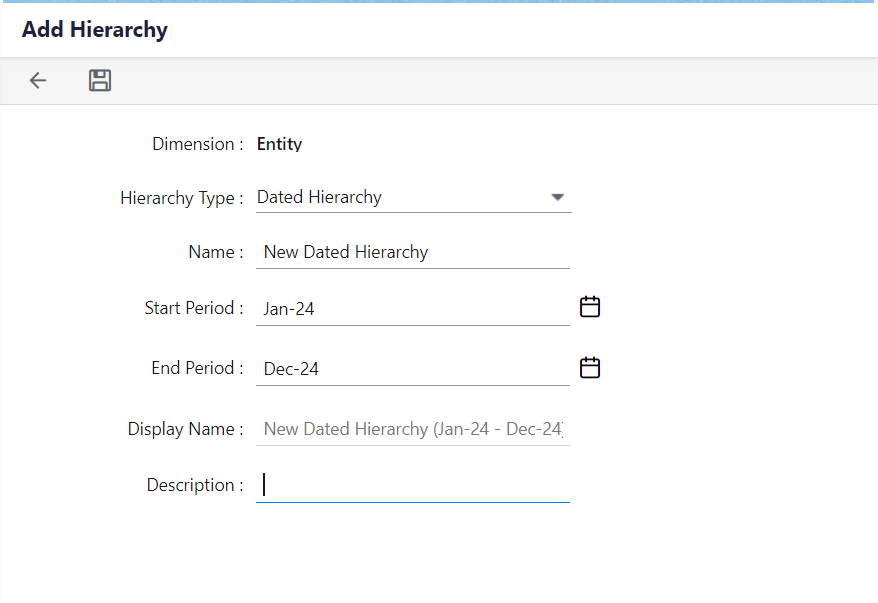
- Select Dated Hierarchy from the Hierarchy Type drop-down.

- Enter a name, display name, and description for the hierarchy.

- Select the date the hierarchy will start and end.
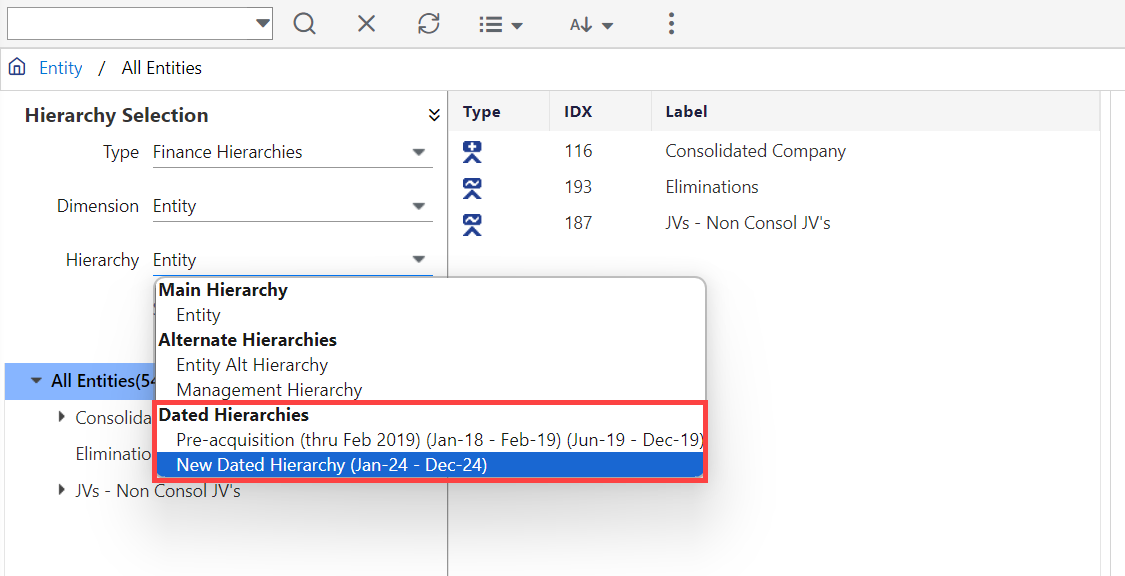
- Click Save. Notice the Dated Hierarchies defined below.

- Edit the hierarchy by adding members as you would with any hierarchy.


.png)
.png)
.png)


