How to Add Groups to Group Dimension via Hierarchy Management
- 1 Minute to read
- Print
- DarkLight
- PDF
How to Add Groups to Group Dimension via Hierarchy Management
- 1 Minute to read
- Print
- DarkLight
- PDF
Article summary
Did you find this summary helpful?
Thank you for your feedback
You can add groups to the Group dimension from the Hierarchy Management page. To add a group to the Group dimension, do the following steps:
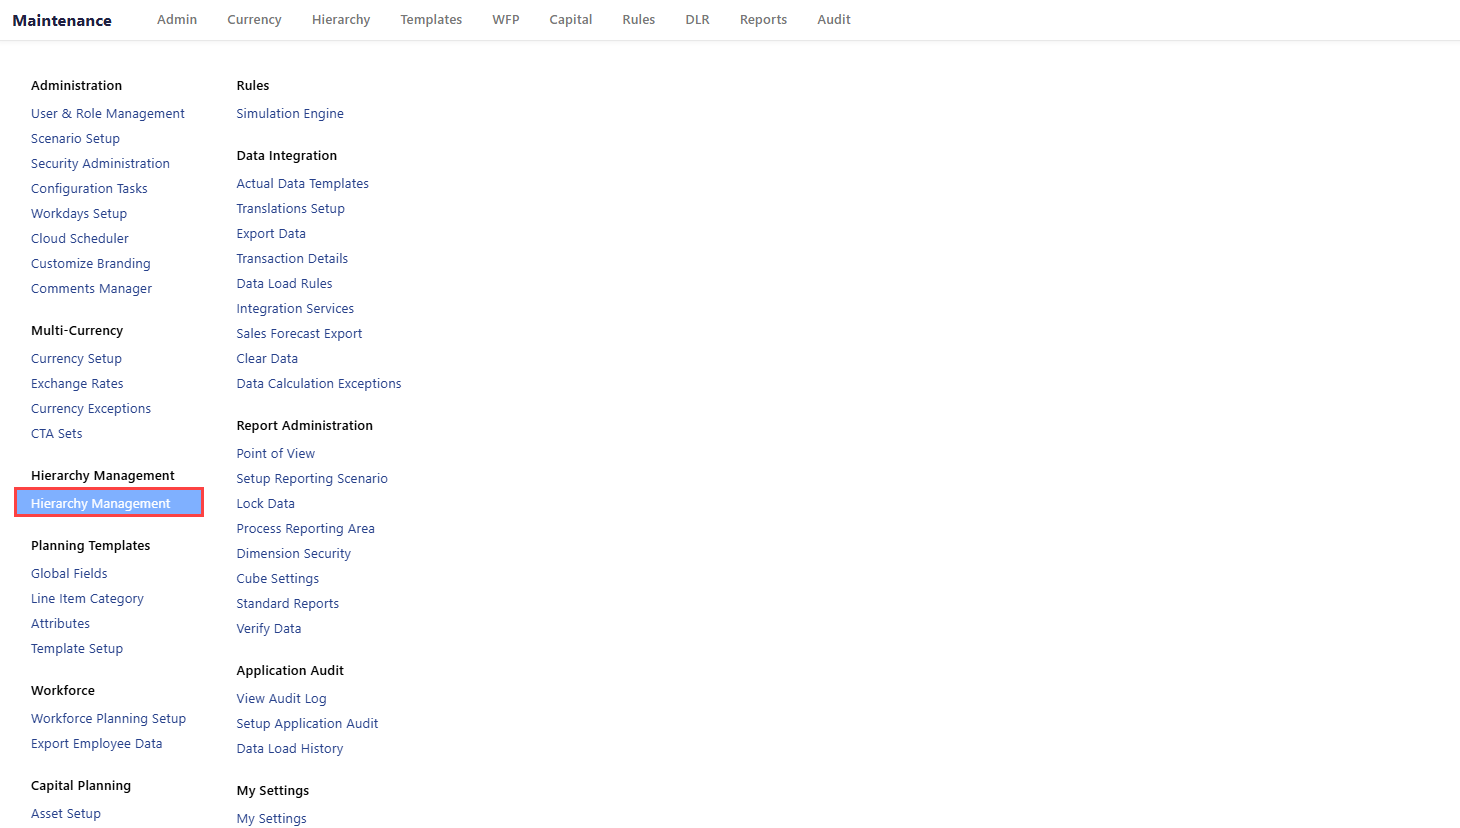
Navigate to Maintenance > Hierarchy Management.
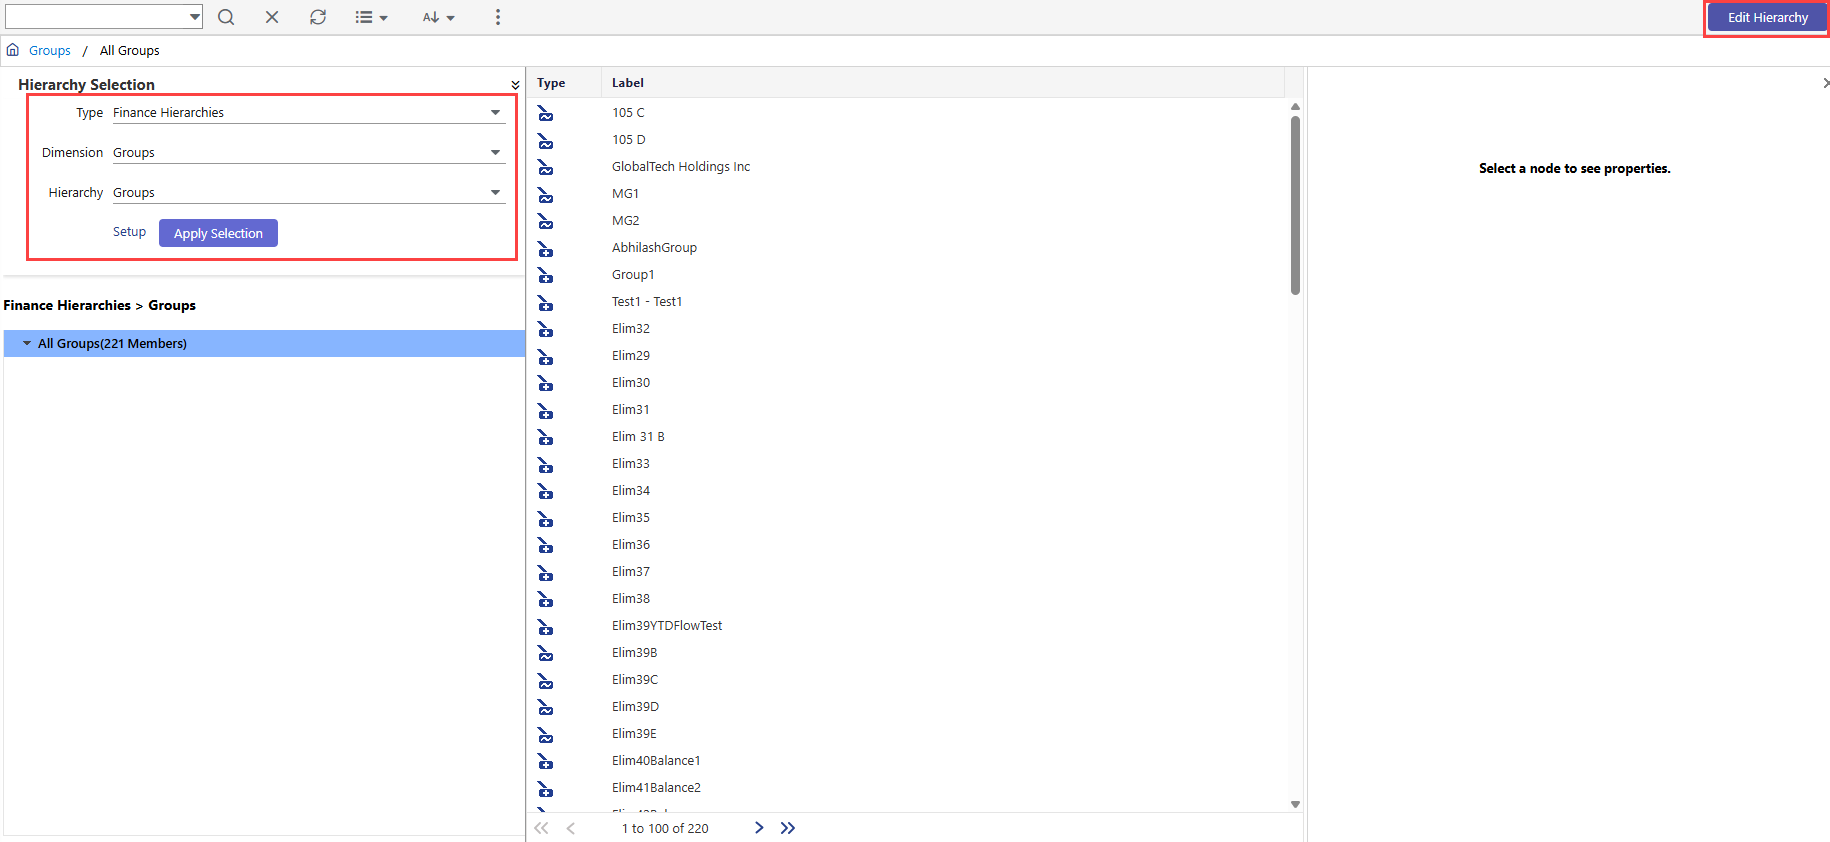
Select Type, Dimension, Hierarchy as Finance Hierarchies, Groups, and Groups respectively, and then click Apply Selection.
Click Edit Hierarchy to activate the editing mode.
Click Add.
Select Node Type and Node Sub Type as Leaf Node and Leaf Member respectively, and then click Add. The system allows you to create a company in the Group dimension only as a leaf node and member.

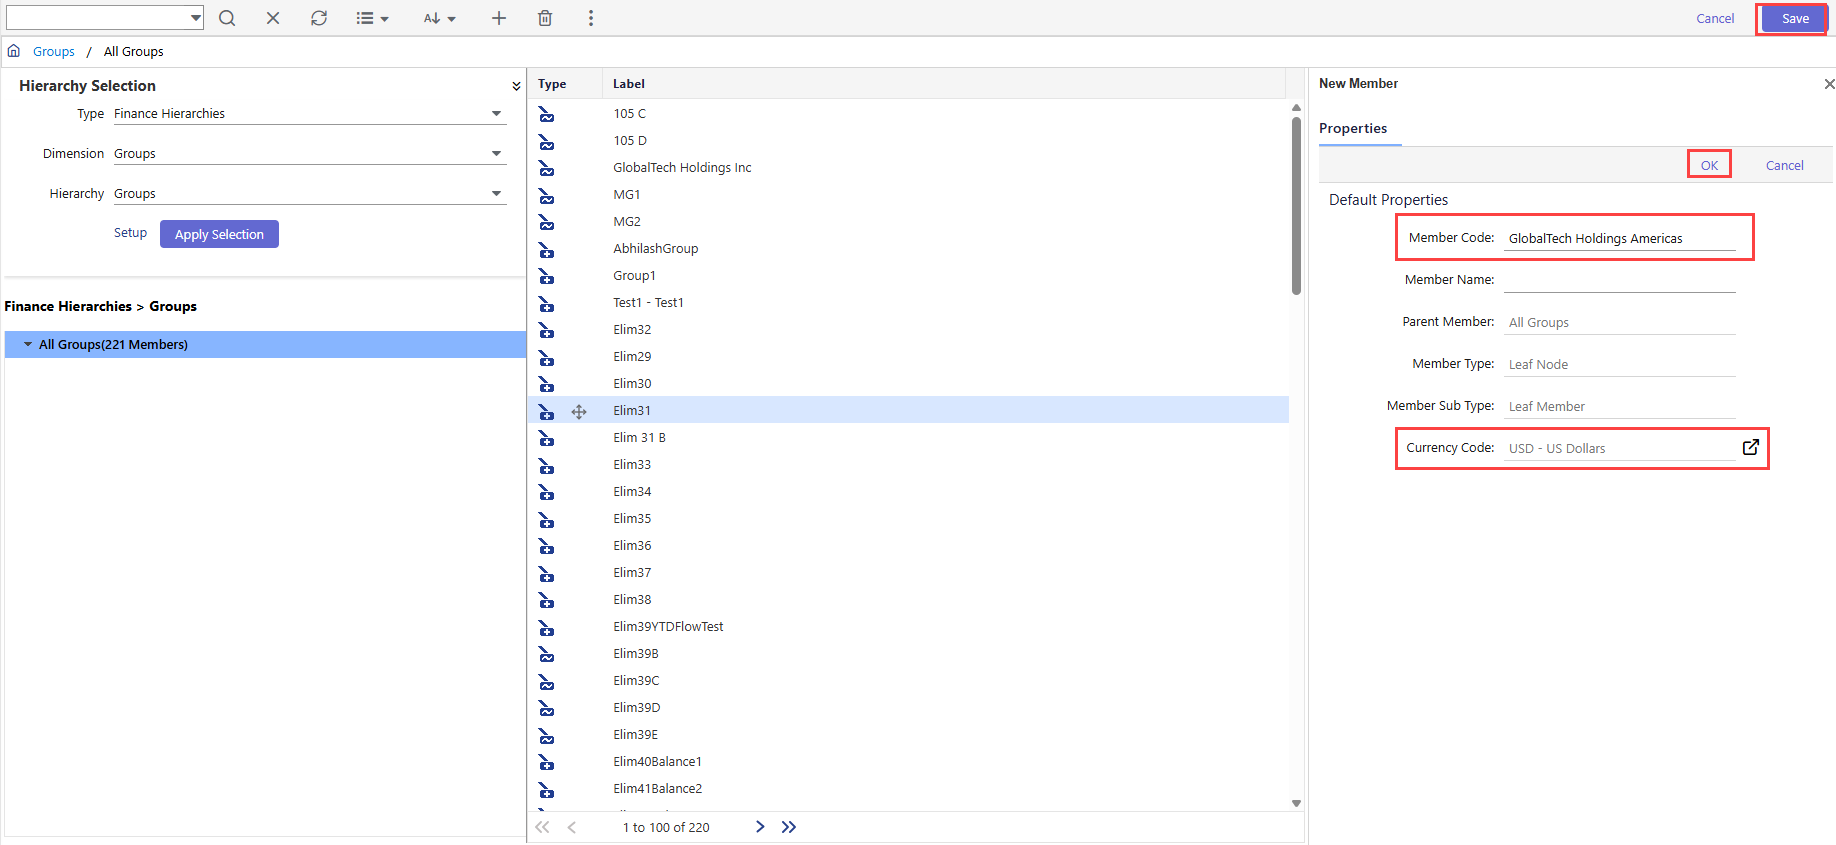
Enter Member Code and Member Name.
Click Select Currency Code to assign the required currency to the group.
Click OK, and then click Save. The group is created successfully.
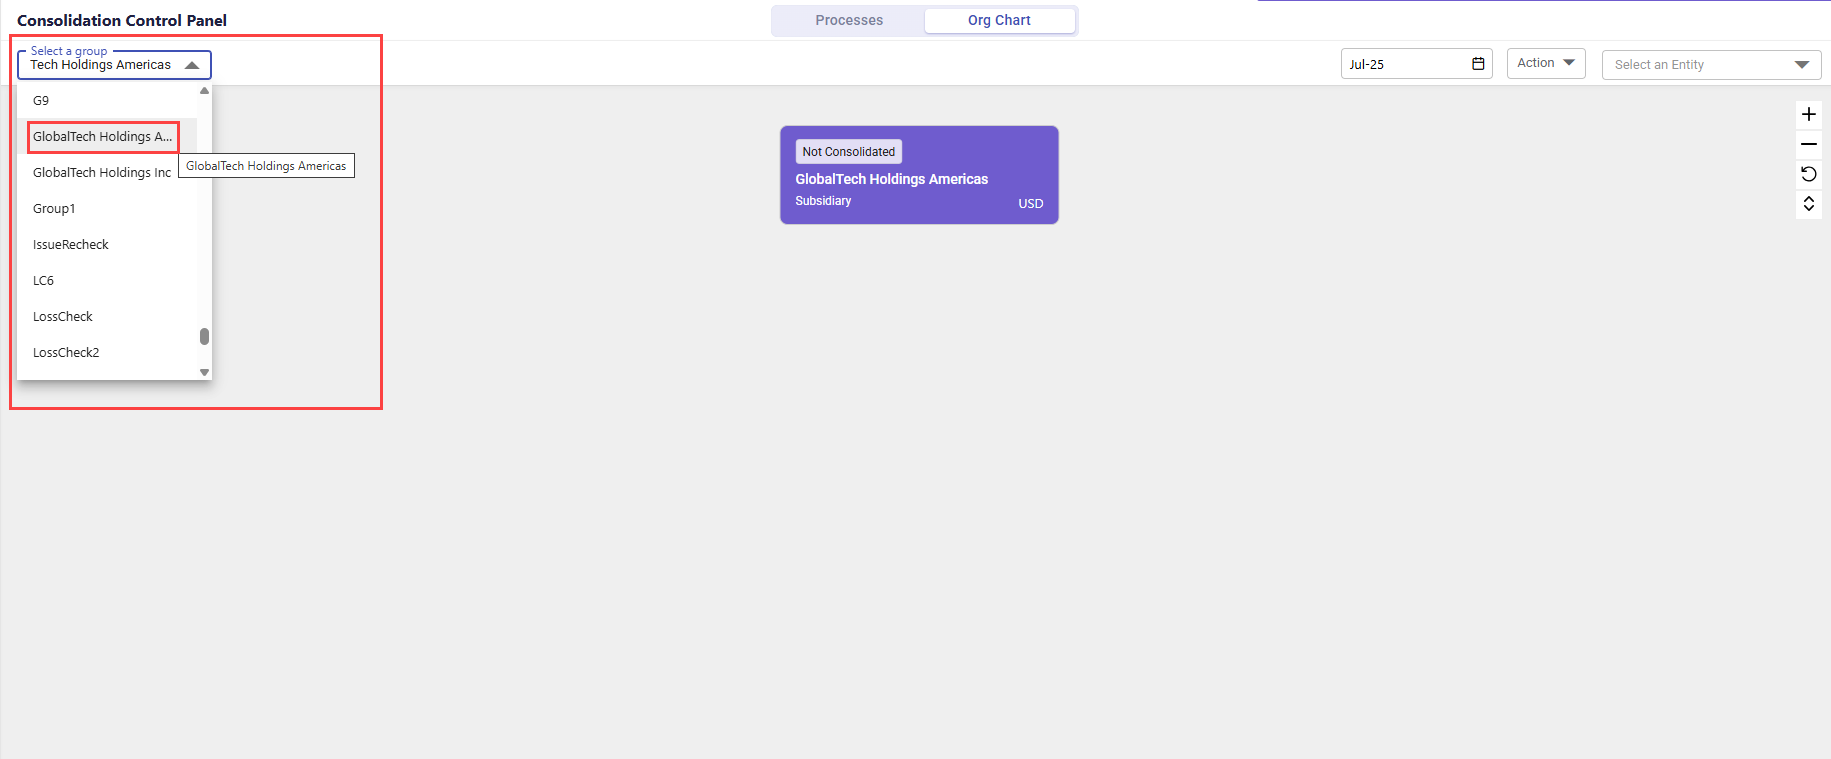
Navigate to Consolidation > Consolidation Control Panel > Org Chart tab. This group appears in the Select a Group drop-down.
Note:
The system creates a fictitious company in the Company dimension for every group you create in the Group dimension. To learn more about fictitious companies, click here.
This action and relevant details are captured in the audit log. Navigate to Maintenance > View Audit Log to view the audit details.
How to Access Group Dimension Companies in Company Dimension
The system creates a fictitious company in the Company dimension for every group you create in the Group dimension. This fictitious company appears in the Group Dimension Companies rollup node under the Company hierarchy. Once the Sub Consolidation Process setting is configured and enabled, the system creates the Group Dimension Companies rollup node in the Company dimension.
To view the list of fictitious companies, do the following:
Navigate to Maintenance > Hierarchy Management.
Select Type, Dimension, Hierarchy as Finance Hierarchies, Company, and Company respectively, and then click Apply Selection.
Select Group Dimension Companies from the left pane. All the fictitious group companies appear in the center pane.
Select a fictitious company to access the Properties tab in the right pane.
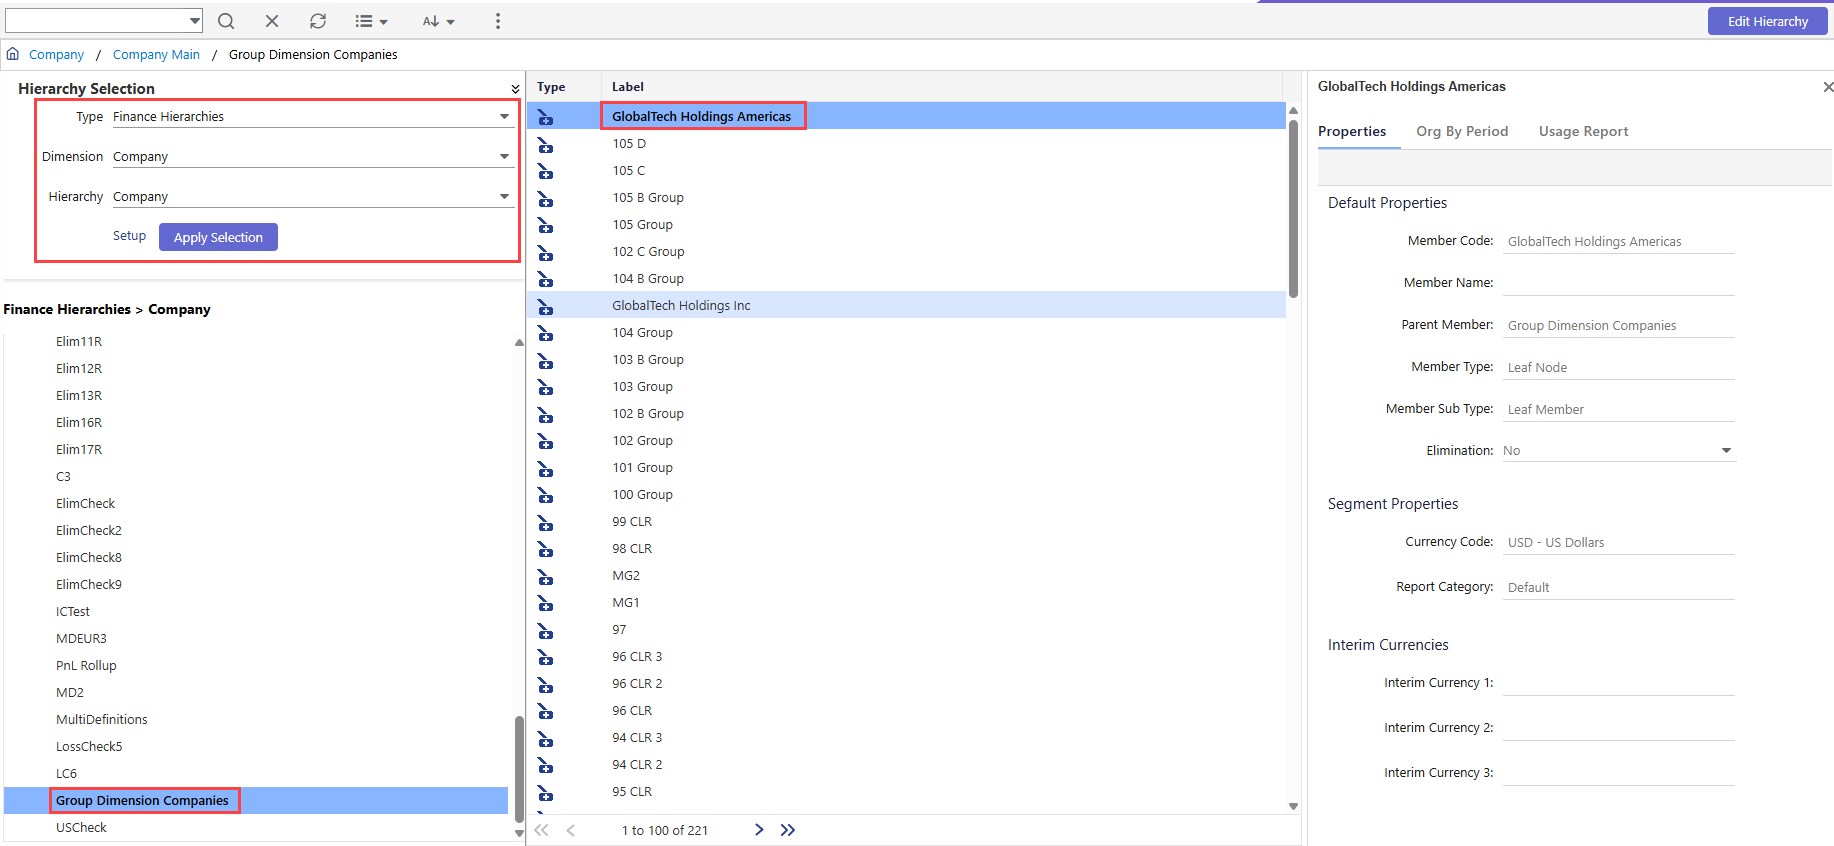
Note:
You cannot change properties of these fictitious companies and cannot delete them from the Company dimension. All such actions must be taken in the Group dimension.
You cannot change properties of the Group Dimension Companies rollup node. Additionally, you cannot create another company using the same member code in the Company dimension.
Was this article helpful?