How to Add Employees?
- 2 Minutes to read
- Print
- DarkLight
- PDF
How to Add Employees?
- 2 Minutes to read
- Print
- DarkLight
- PDF
Article summary
Did you find this summary helpful?
Thank you for your feedback
Employees are where the employee details will show for all of the employees in a specific scenario and entity. While information can be updated here, it is typically updated from the Planning control panel. In the Workforce Planning Setup area, the employee area is primarily used to view employee information or make changes before rolling it out to individual budget owners.
Depending on your role, you can add employees either as an admin user or an end-user. Below are detailed instructions for both cases on how to add employees and process their information.
To add the employees, do the following:
Note:
This article provides instructions on how to add employees and highlights the required fields for adding an employee. Click here to learn more about all the tabs visible on the Employee Add or Edit screen.
First, let's see how to navigate:
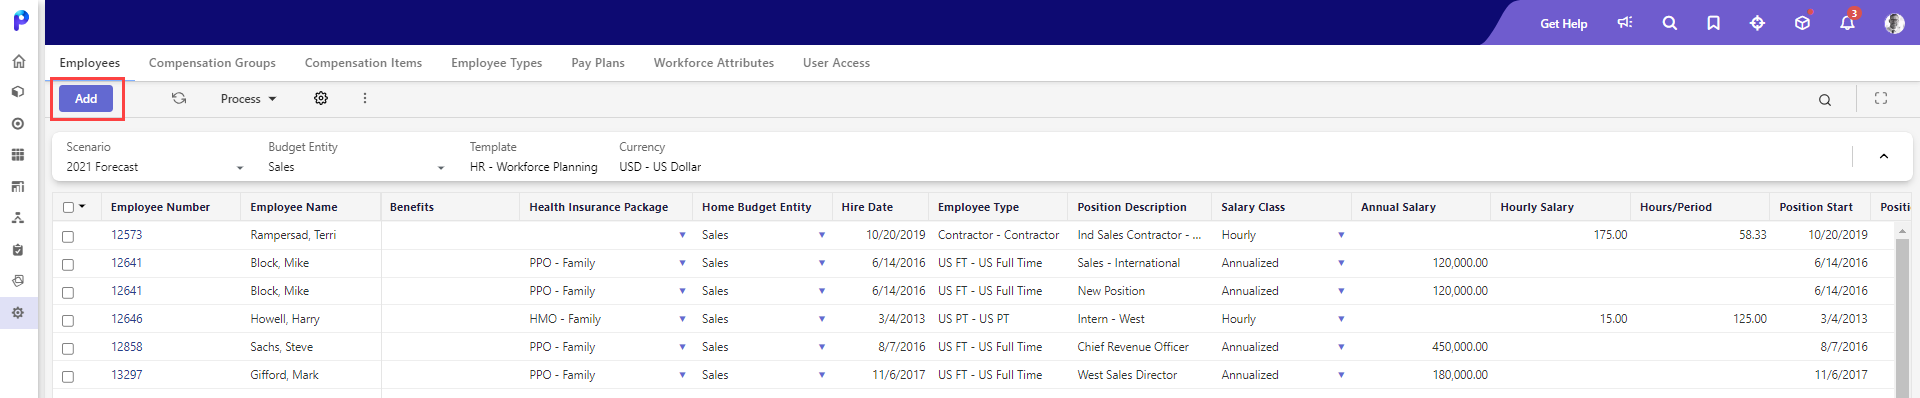
For Admin Users
- Go to Maintenance and navigate to Workforce Planning Setup > Employees.
- Select the Scenario and Budget Entity from the respective fields.
- Click Add.
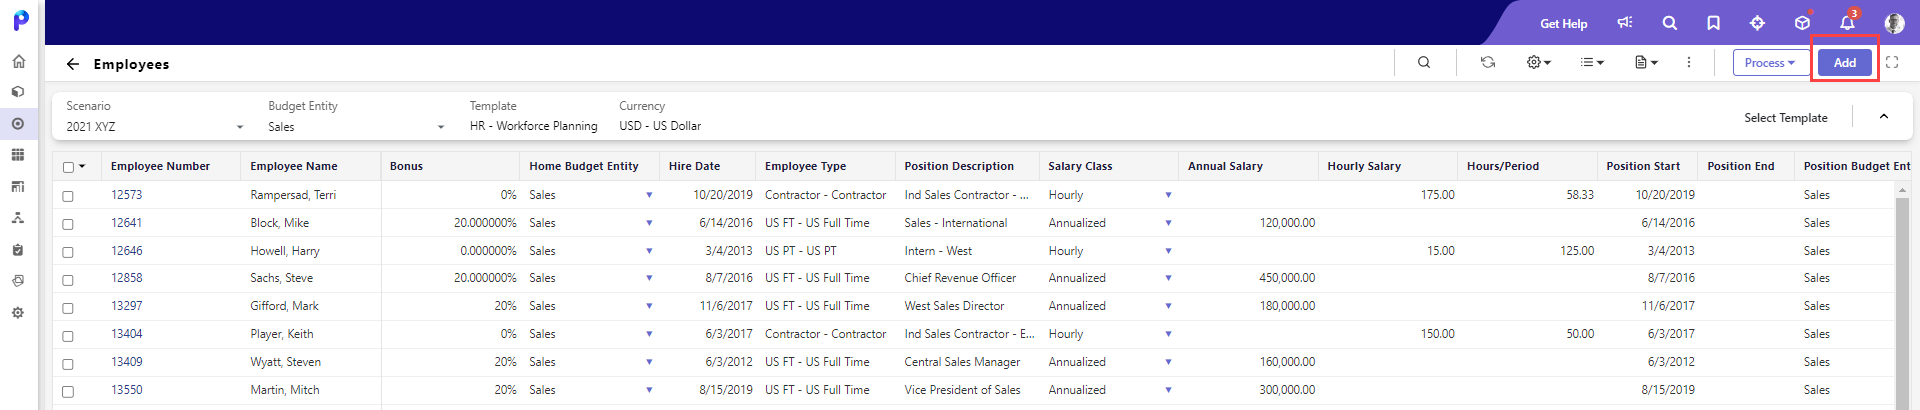
For End-Users
- Access the Planning Control Panel.
- Select the desired scenario, budget entity, and workforce template.
- Open the selected template in Input mode.
- Click the Add button to add employees.
To add an employee and process it, follow these steps:
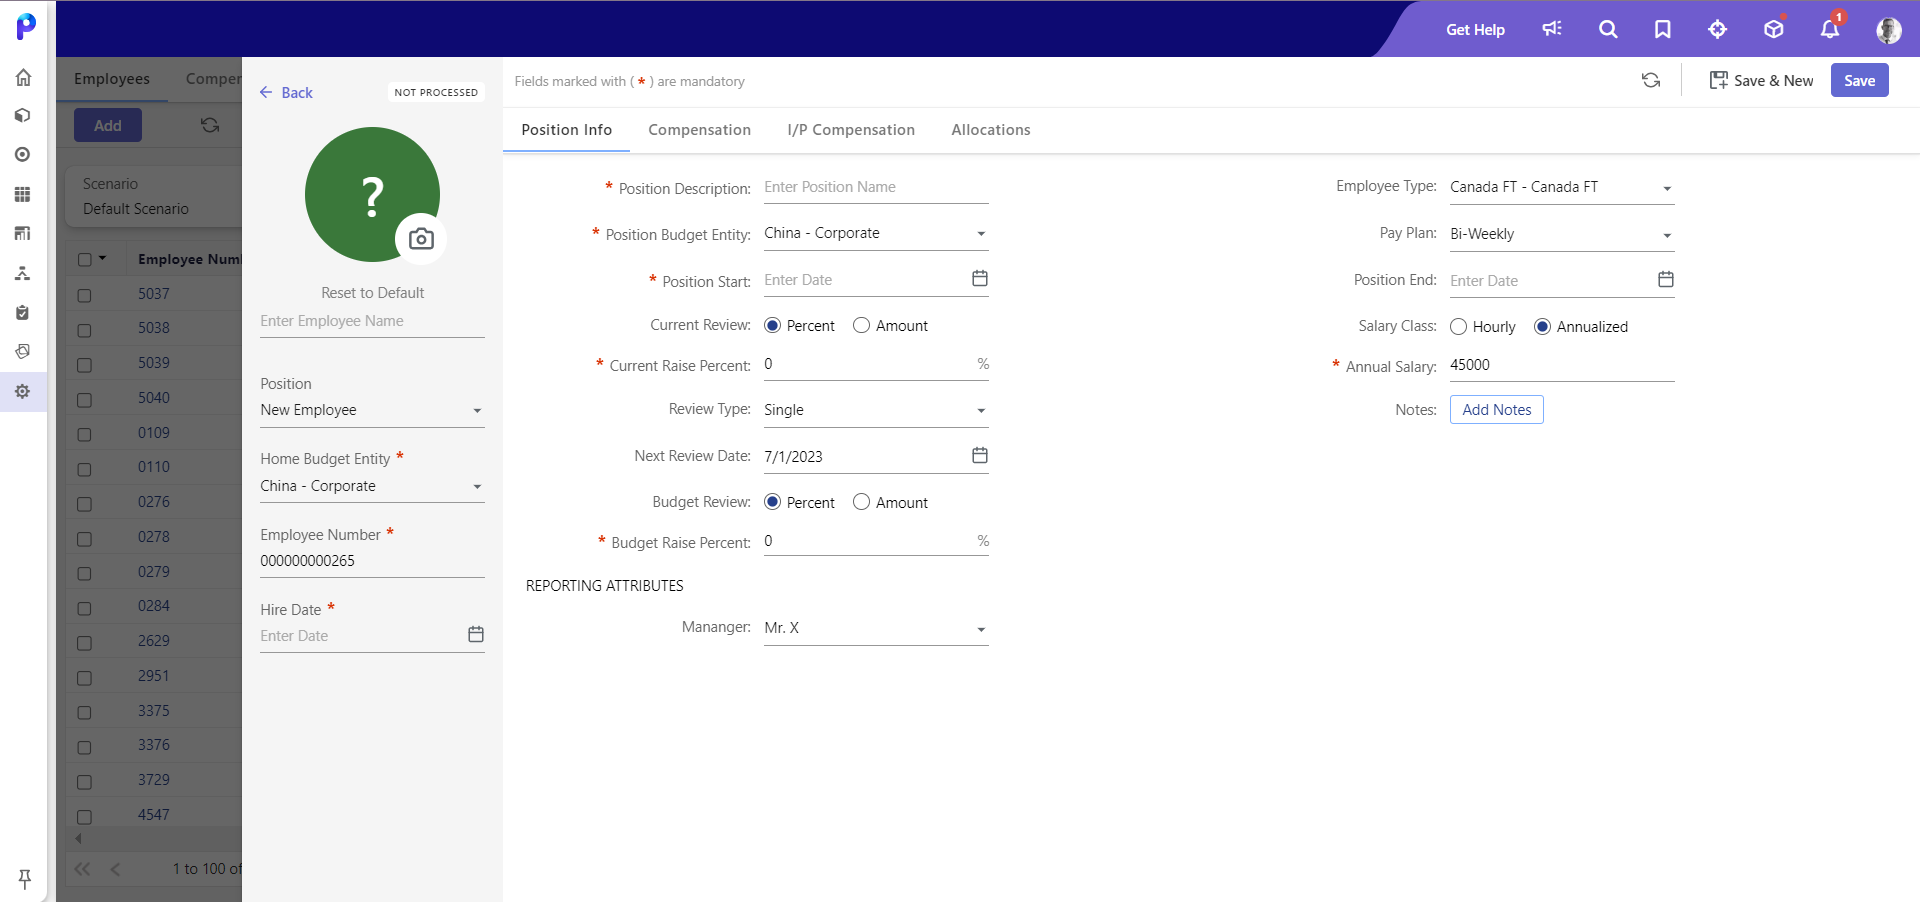
- Once you click Add, the Add Employee window appears.
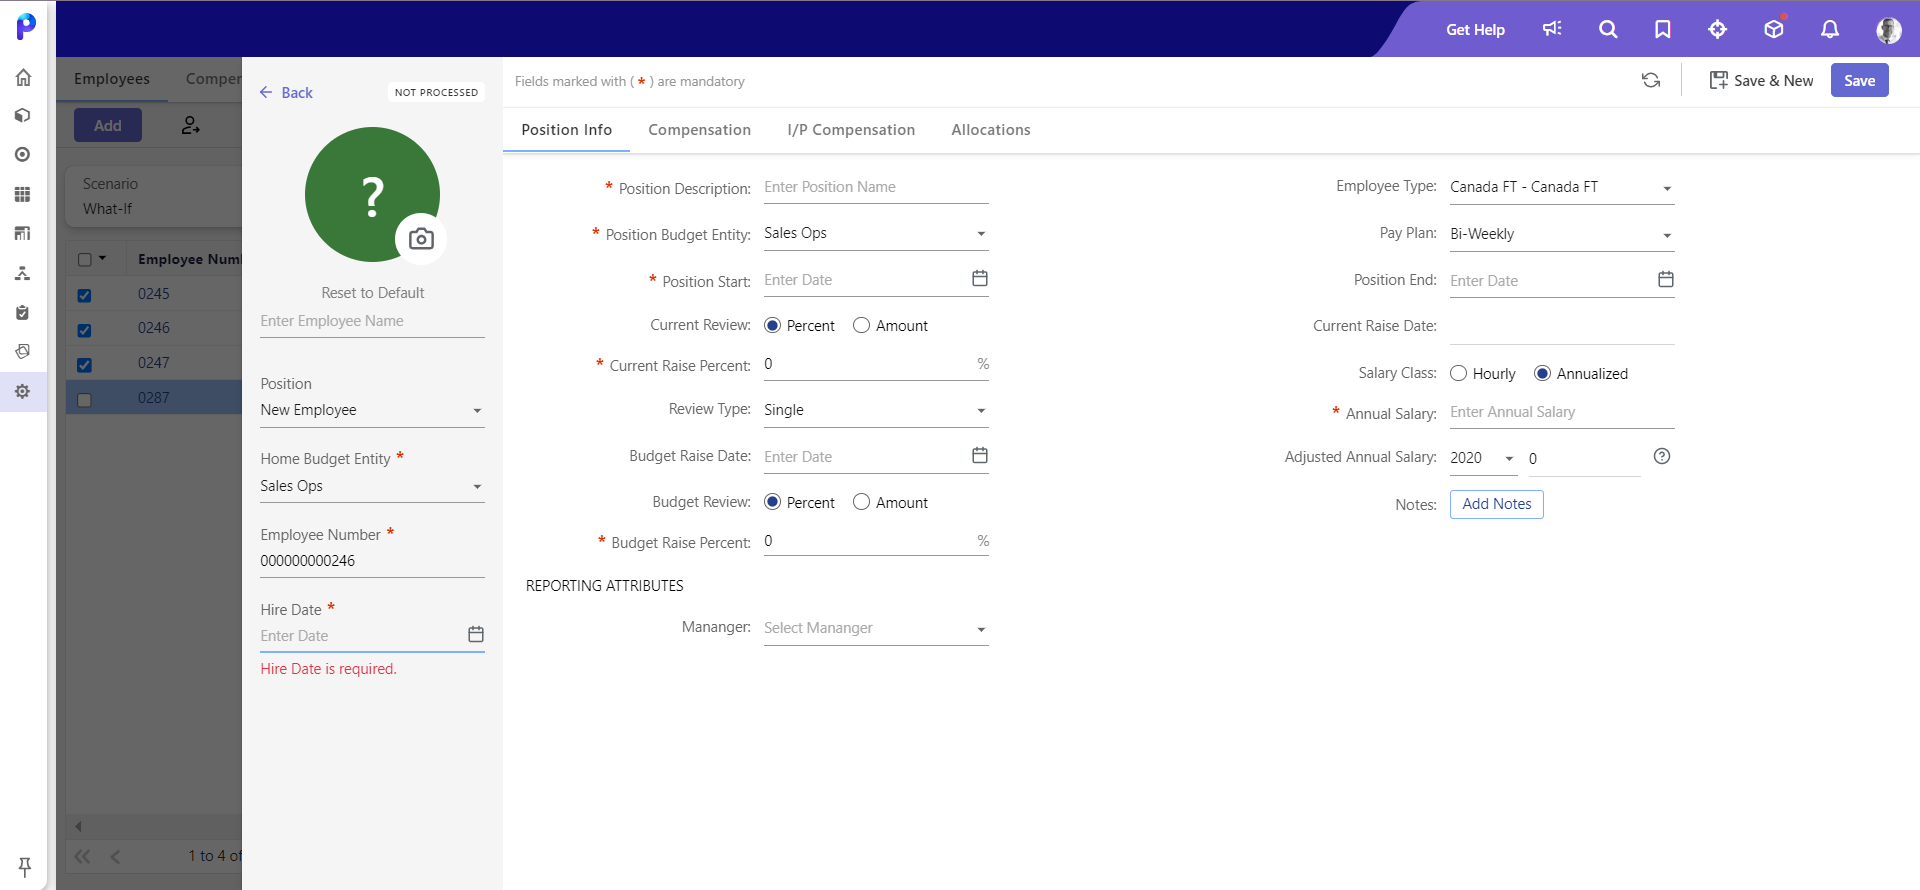
- Enter the employee's name, and employee number to identify the employee (you can later edit this number after it has been saved), and then select the Home Budget Entity to which the employee will belong. Click here to learn how you can add the profile picture.
- For Hire Date, select the date on which the employee was hired. The Hire Date and the Position Start Date are the same in most cases. However, in some cases, an employee can be tied to two different positions within the same organization making multiple Position Start Dates a possibility. The Position Start Date value always drives the employee's expense.
- Enter the following required fields under the Position tab:
- Employee Name
- Hire Date
- Position Description
- Position Start
- Annual Salary
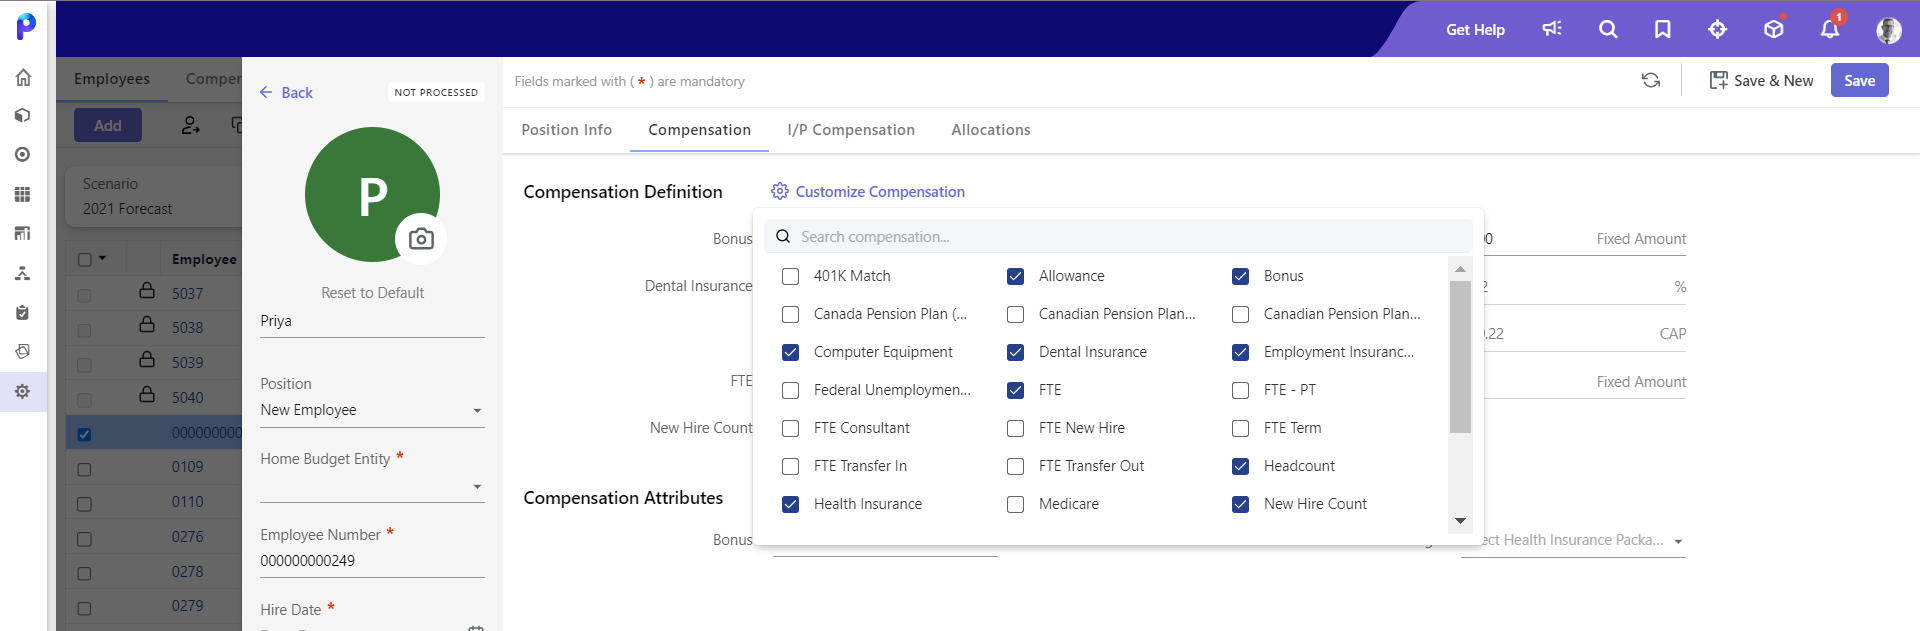
- Enter the following required fields under the Compensation tab:Note:Compensation items are displayed based on the employee type assigned to the employee. Budget users cannot modify associated rates, amounts, and percentages which are set by Admins.
- Select the Customize Compensation option to select and map the compensation items with an employee.
- For the compensation items that vary annually, additional details are displayed. You can modify the Effective Date and Percentage amounts for these compensation items. These modifications will not affect the compensation item setup and will only be modified for the employee you add or edit.
- In the Compensation Attributes section, your available attributes will vary based on your setup. Attributes are based on the compensation items mapped to the employee (and set up by your Admin user on the Add Attribute page).
- Optionally, fill in the I/P Compensation and the Allocations tabs.
- Click Save or Save & New
- Save to save employee details.
- Save & New to save employee details and add a new employee.
Note:
Employees are automatically processed when employee data is updated from the Roster view (Employees page), Employee Add, Employee Edit, and Mass Update pages. Learn more about automated processing here. Processing is performed in the cloud. You will receive a message after the processing has been completed.
Was this article helpful?