What is Mass Update and How to Apply a Mass Update to Employees?
- 1 Minute to read
- Print
- DarkLight
- PDF
What is Mass Update and How to Apply a Mass Update to Employees?
- 1 Minute to read
- Print
- DarkLight
- PDF
Article summary
Did you find this summary helpful?
Thank you for your feedback
The Mass Update option helps you to make mass changes to employee details. This option also offers you the flexibility to apply mass updates to the selected employees or all of the employees. Here's how to navigate:
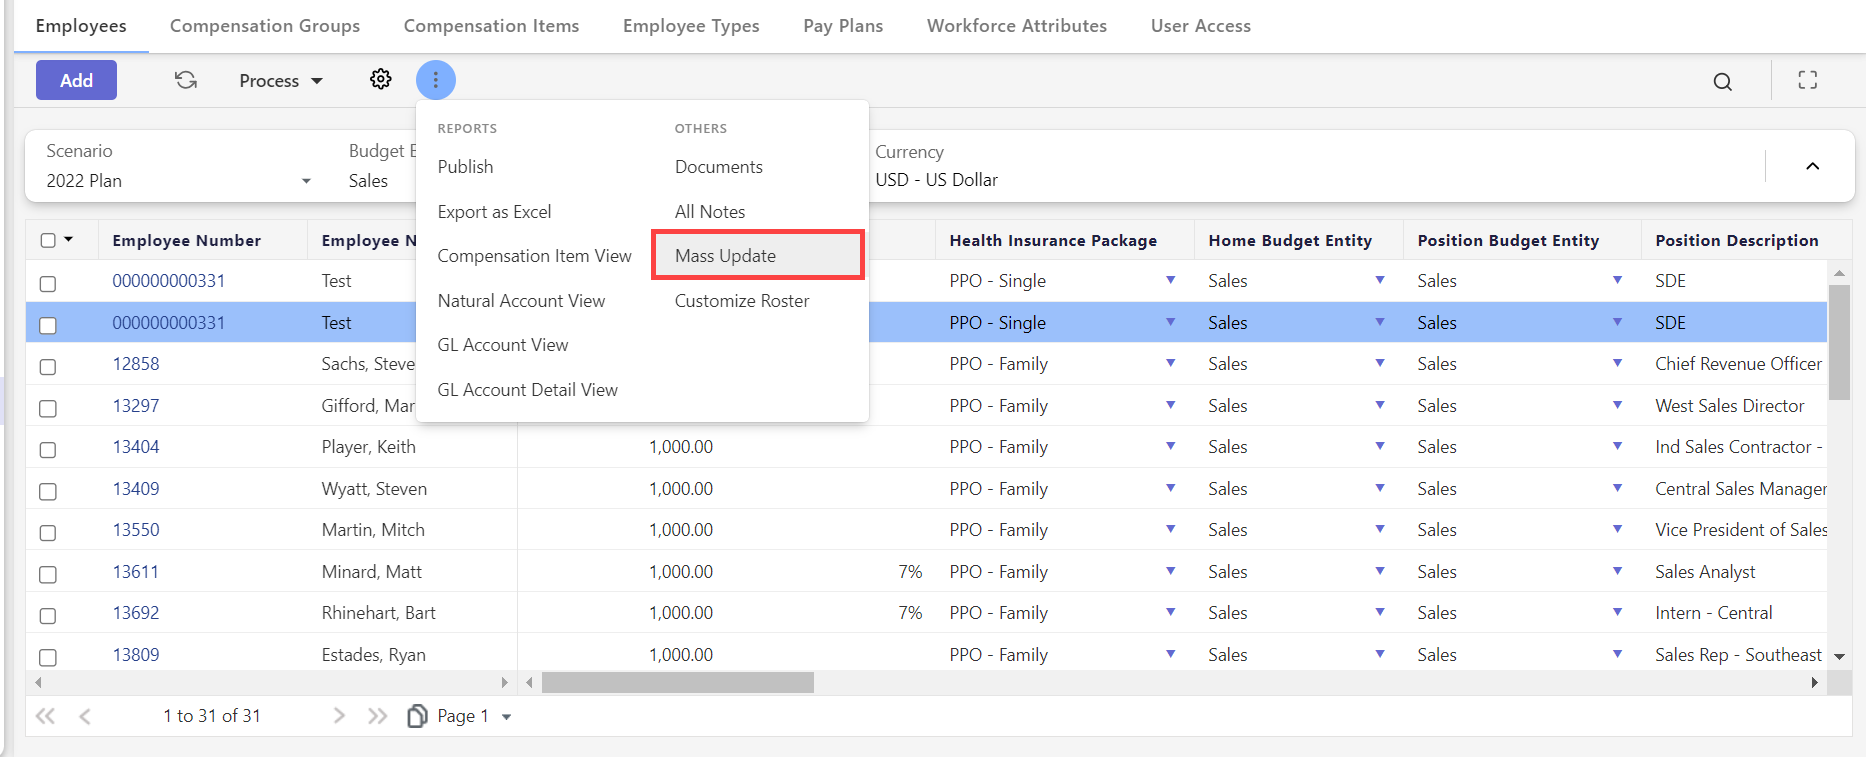
For Admin Users:
- Go to Maintenance and navigate to Workforce Planning Setup > Employees.
- Select the Scenario and Budget Entity from the respective fields.
- Click More > Mass Update.
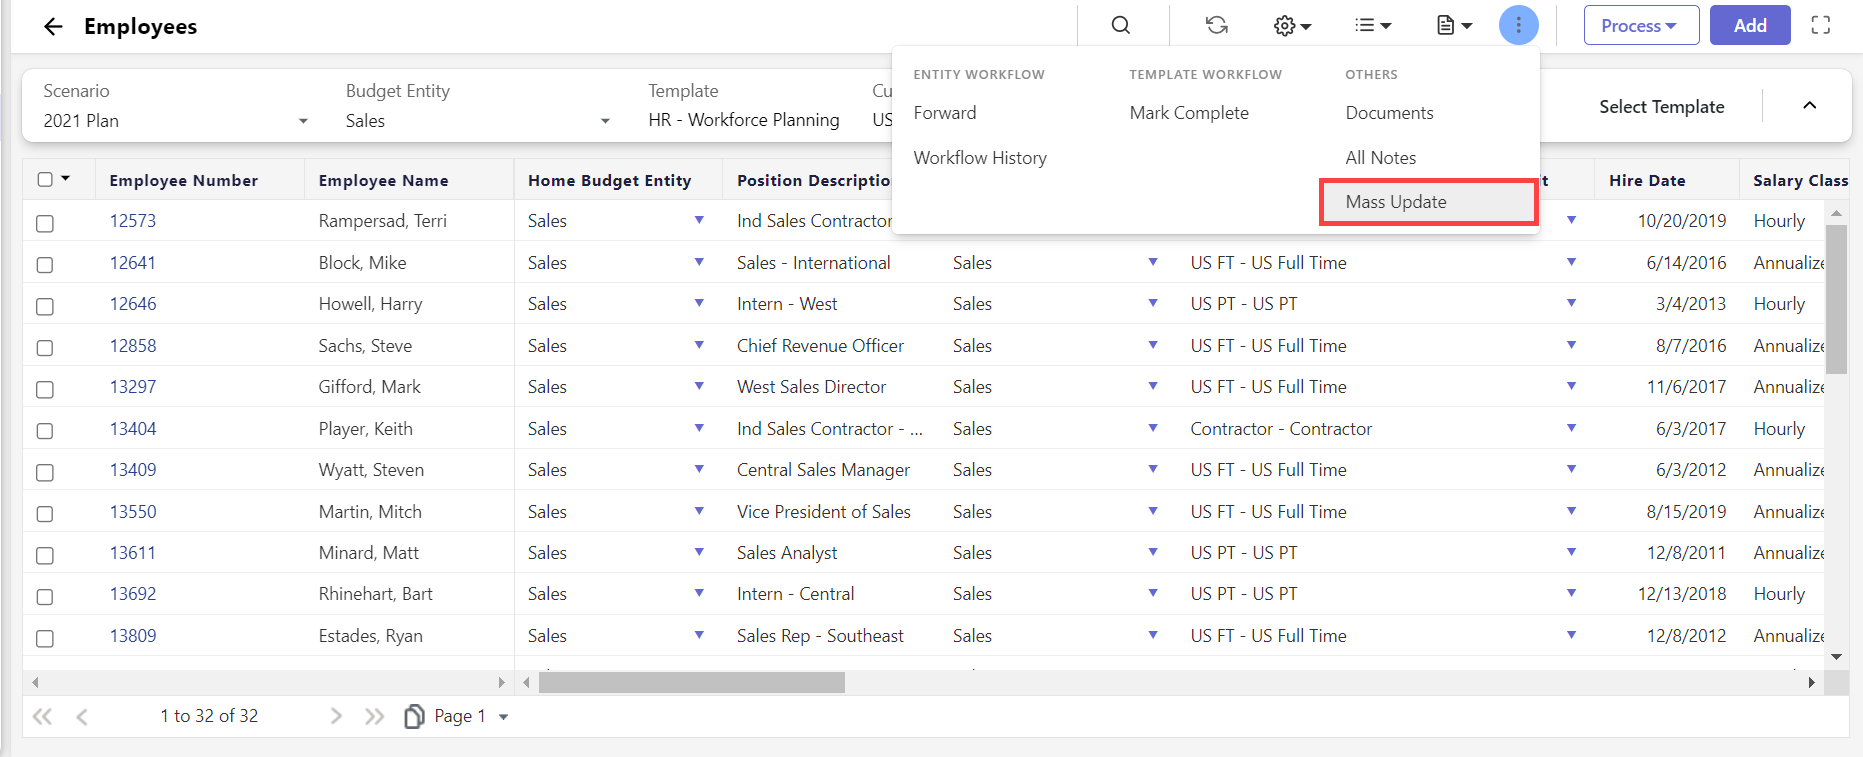
For End-Users:
- Access the Planning Control Panel.
- Select the desired scenario, budget entity, and HR - Workforce Planning template.
- Open the selected template in Input mode.
- Click More > Mass Update.
To apply a mass update to the employees, do the following:
- Select the employees on the Employees page.
- Go to the more icon and select Mass Update.Notes:
- If you are applying a mass update to all employees, select the Mass Update option from the More icon directly.
- The Selected option in the Apply to field (which is available in all the three tabs) won't be active in this case. However, if employees are selected beforehand, you can still choose the All option to apply updates to all employees.
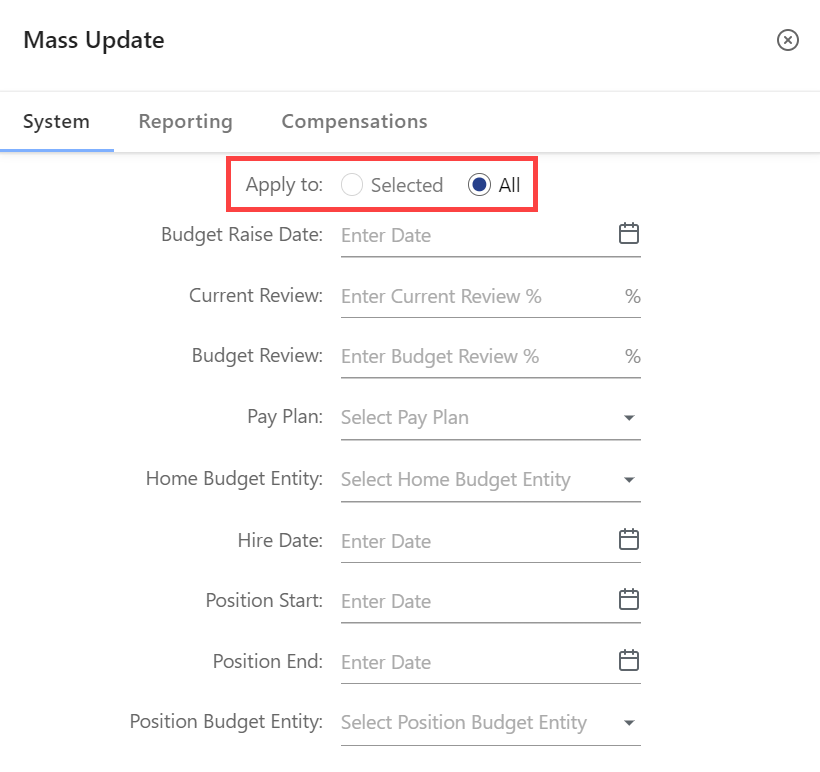
Use the System tab to update the employee details. This is the default tab that is visible after clicking Mass Update.
- Make changes to the following employee details as needed.
- Home Budget Entity
- Hire Date
- Position Start Date
- Position End Date
- Employee Type
- Position Budget Entity
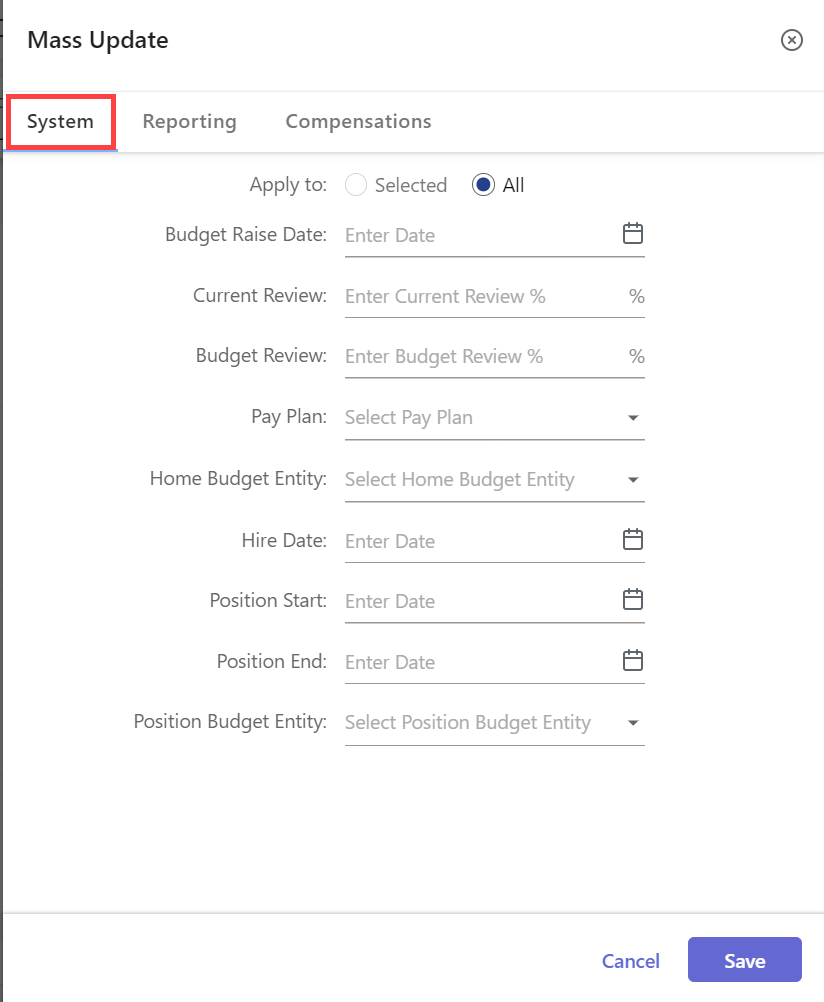
- Click Save to confirm your changes.
Use the Reporting tab to mass update the value of a reporting attribute field.
- Make changes to the attribute value as needed.
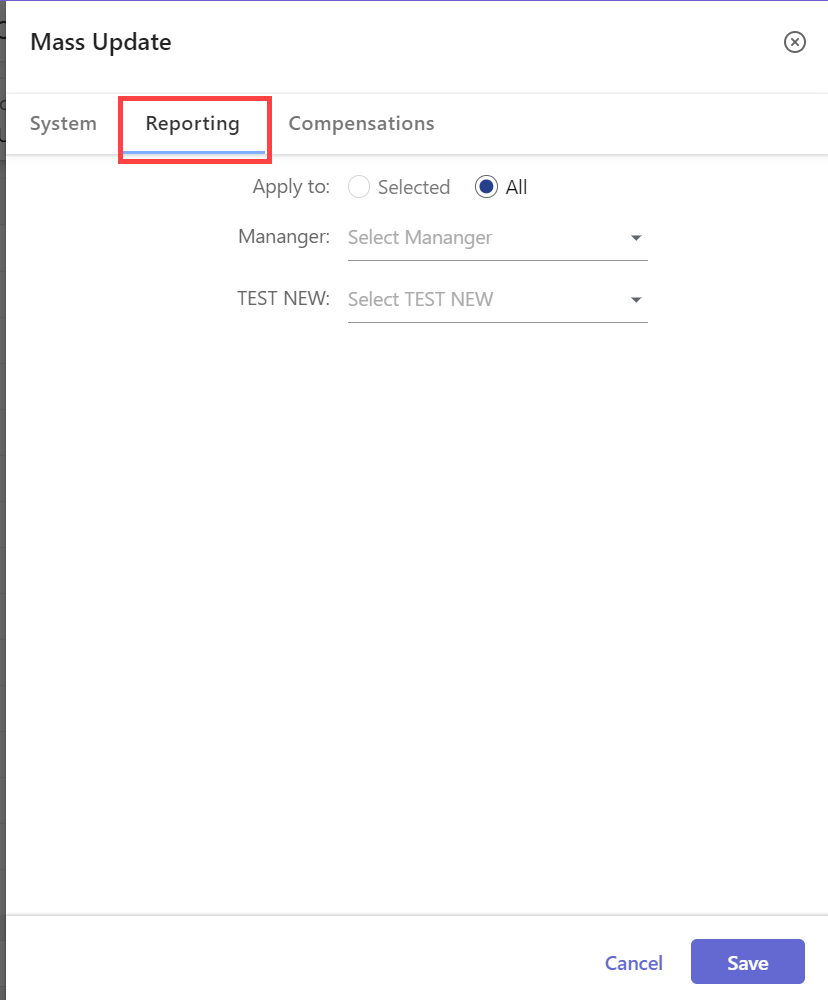
- Click Save to confirm your changes.
Use the Compensations tab to select and update compensation items. The compensation items that are part of the Roster screen are displayed in this tab and are available for Mass update.
- Make changes to the compensation items.
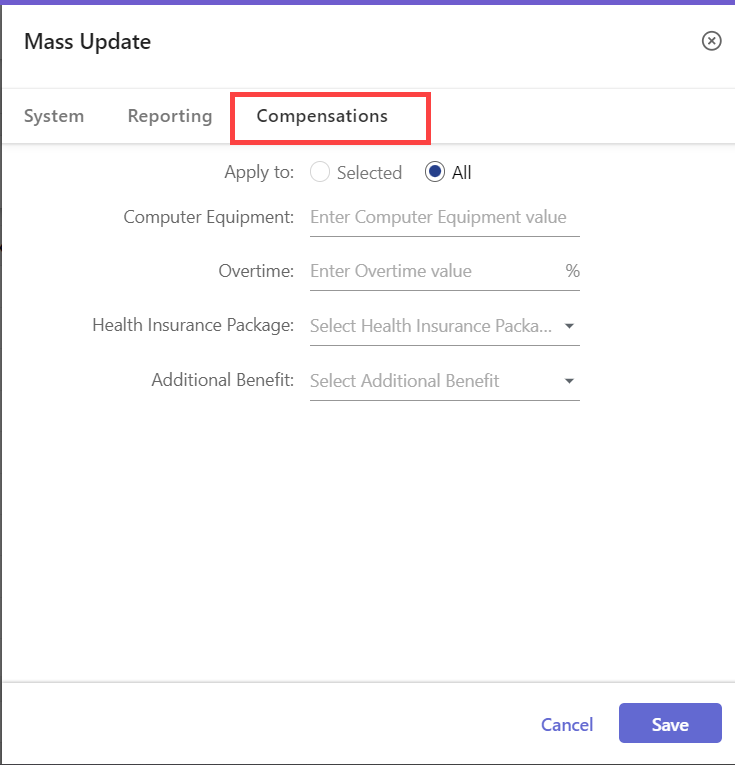
- Click Save to confirm your changes.
Notes:
- The Compensation tab will be visible only after you add the compensation items to the roster using the Customize Roster option. Click here to learn more about how to add compensation items to the roster using the customize roster option.
- While updating any compensation item for the selected number of employees, no value will be set by default, and you can specify the values for the fields accordingly. For example, here we have Computer Equipment, Overtime, and Bonus in the Mass Update Window.
Was this article helpful?