Workforce Planning Setup
- 6 Minutes to read
- Print
- DarkLight
- PDF
Workforce Planning Setup
- 6 Minutes to read
- Print
- DarkLight
- PDF
Article summary
Did you find this summary helpful?
Thank you for your feedback
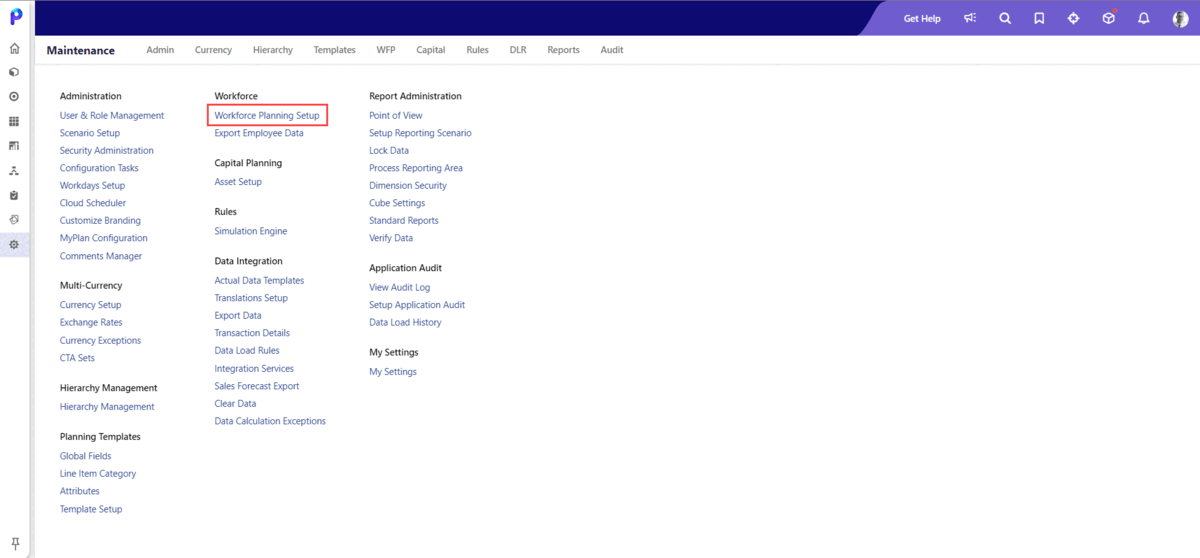
The Workforce Planning Setup option is where you configure and customize the settings for defining employees' compensation and pay structure.
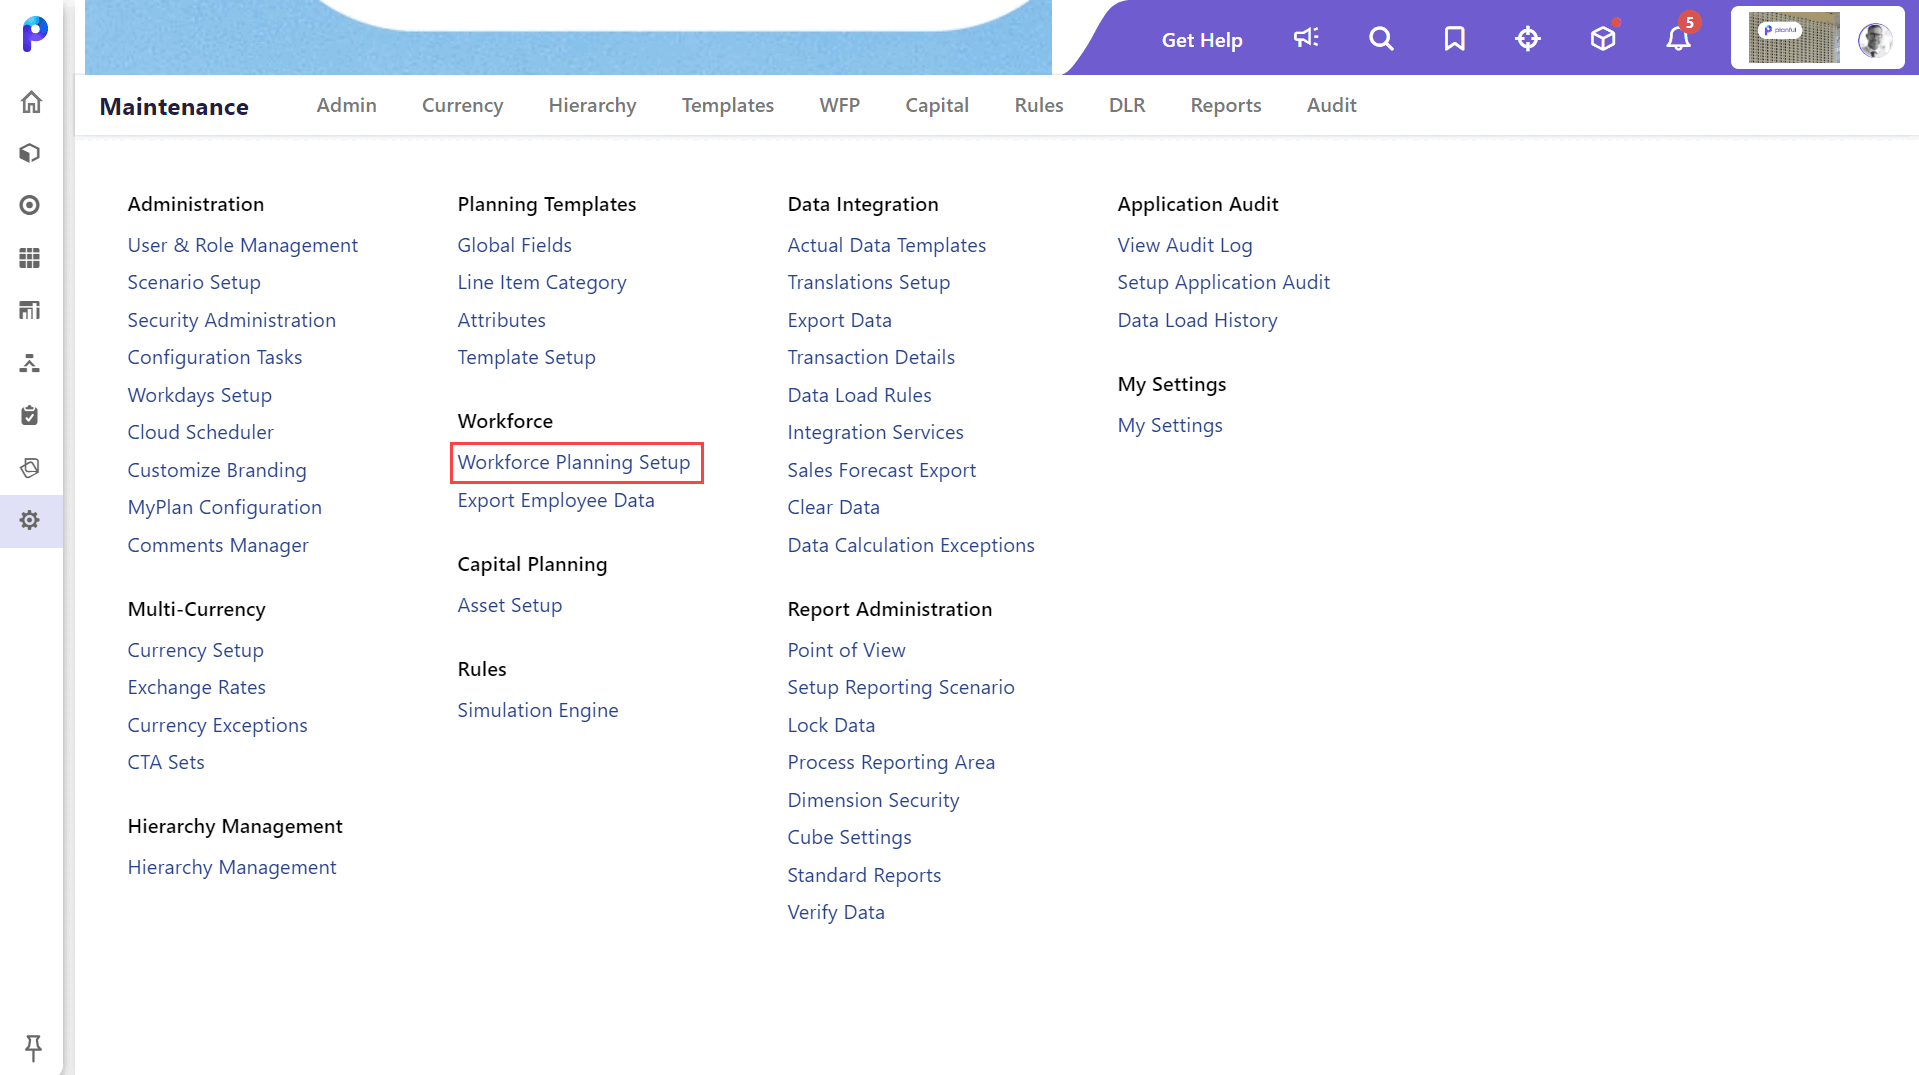
Navigate to Maintenance > Workforce Planning Setup. You can view all the respective component tabs next to each other.
How-Tos
Refer to the following how to's for quick reference:
- How to Copy Employees from One Scenario to Another?
- How to Add Employees?
- How to Copy all Compensation Items and Rates from One Scenario to Another?
- How to Map A Pay Plan At The Employee Or Compensation Item Level?
- How to Make a Workforce Attribute Available as a Value Source?
Click through each of the tabs to start configuring your workforce planning components.
Before adding or loading any employees though, the Workforce Planning setup must be completed. Click here to learn more about the Employees tab.
Here is the summary of the actions you can do on the Employees tab in the Workforce Planning Setup Area:
- Add/Edit Employees: Add or modify employee details.
- Process Employees: Automate the capability to process multiple employees across multiple budget entities.
- Customize Page: Personalize your view, hide/rearrange columns
- Reports: View/export various reports, ensuring changes are reflected by publishing.
- More Menu: Manage documents/notes, make mass updates, and customize rosters.
- Advanced Search: Easily filter/display specific employee data with options to apply, cancel, reset, or clear searches.
- Employee Record Actions: Copy, delete, or duplicate individual/selected employee records.
The following are the actions that can be performed in the Compensation Groups tab. Click here to learn more in detail about this tab.
- Add: Click to make a new compensation group.
- Edit: Change existing group details. Save changes after updating.
- Delete: Remove a group after ensuring it's empty.
- Save Display Order: Arrange groups using arrows. Click Save to keep changes.
- Apply Filter: Type to quickly find a group.
- Export Options: To export or print the names in an Excel file.
The following are the actions that can be performed in the Compensation Items tab. Click here to learn more in detail about this tab.
- Add: Create compensation items with details like code, name, group, and account.
- Edit: Change existing compensation items as needed.
- Delete: Delete items not mapped to employees.
- Copy: Make a copy of the compensation items for quick setup.
- Publish compensations: Automatically updates the data to the workforce cube.
- Apply filters: Simplifies the search based on code, name, basis, or group.
- Export Options: Exports the compensation item details to Excel or print.
The following are the actions that can be performed in the Employee Type tab. Click here to learn more in detail about this tab.
- Add: Create a new category for employees based on compensation, assigning specific compensation items.
- Review Setup: Set up review percentage values and types for different employee types.
- Edit: Modify existing employee types, update compensation items, and choose whether to apply changes to existing employee data.
- Delete: Remove an employee type (can't delete if mapped to employee(s).
- Publish Employee Type: Automatically update data for all employee types to the workforce cube.
- Filter: Simplify search results by employee type and code.
- Export Options: Export employee types data to Excel or print.
The following are the actions that can be performed in the Pay Plans tab. Click here to learn more in detail about this tab.
- Add: Create a new pay plan specifying code and name.
- Edit: Modify existing pay plan details, excluding the code.
- Delete: Remove a pay plan (cannot be deleted if mapped to employee(s)).
- Pays Setup: Add payout schedules for a pay plan.
- Filter: Simplify search results by pay plan type and code.
- Export Options: Export Pay Plans' data to Excel or print.
The following are the actions that can be performed in the Workforce Attributes tab. Click here to learn more in detail about this tab.
- Add: Create a new attribute with a specified type (Date, Value Set, Value Source, Derived Years).
- Edit: Modify existing attribute details (excluding type, for system-defined attributes).
- Delete: Remove a workforce attribute (cannot be deleted if it has dependencies or is system-defined).
- Copy: Duplicate an existing attribute, excluding system-defined ones.
- Filter: Simplify search results by attribute name, type, and reporting attribute.
- Export Options: Export workforce attributes data to Excel or print.
This allows you to manage and control the visibility of compensation items for other users.
This feature enables you to hide any sensitive information such as salary or benefits and also ensures that the hidden compensation items are not visible on various pages and reports including the Employees tab (Admin and End users), Employee Add/Edit pages, Employee report, all Views, Dynamic reports, Report sets, Standard reports, and the Customize Roster page.
Note:
The user's own name cannot be viewed within the users' list displayed on the User Access tab.
Once the Workforce User Access tab is enabled for you from the Approval Role Setup screen, do the following:
- Go to Maintenance > Workforce Planning Setup, and click the User Access tab. This tab is available within the Workforce Planning UI.
- Select the required compensation item from the Compensation Item drop-down menu.
- Click Apply to proceed.
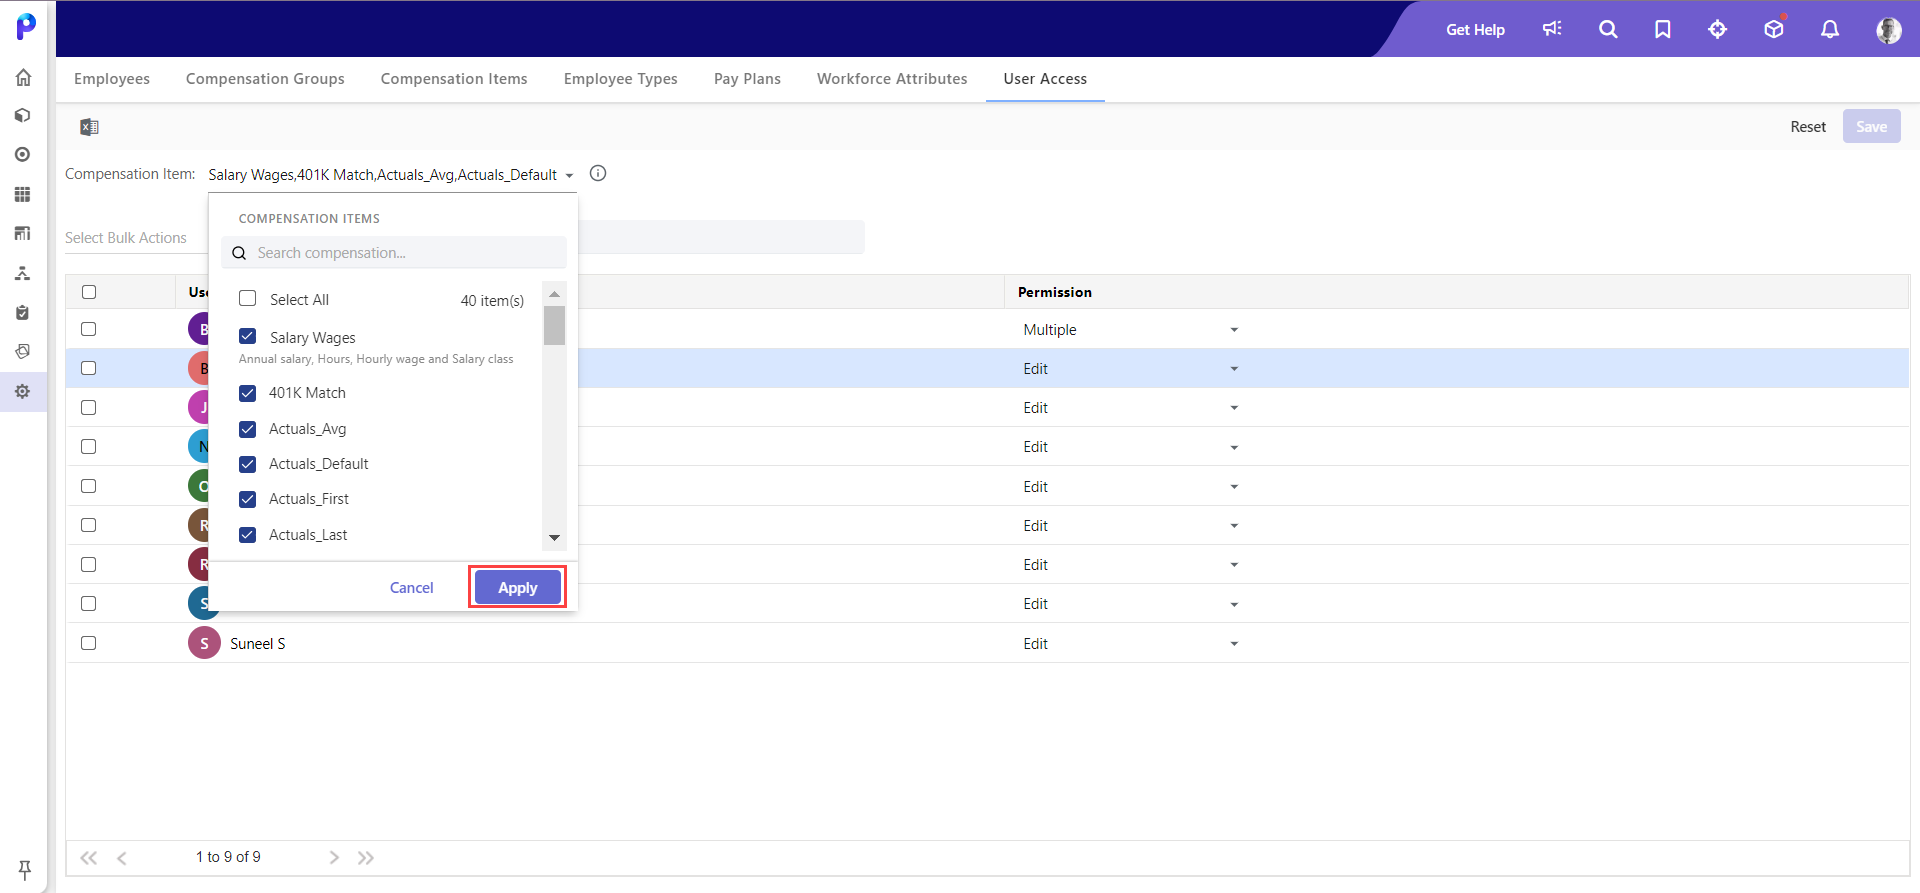
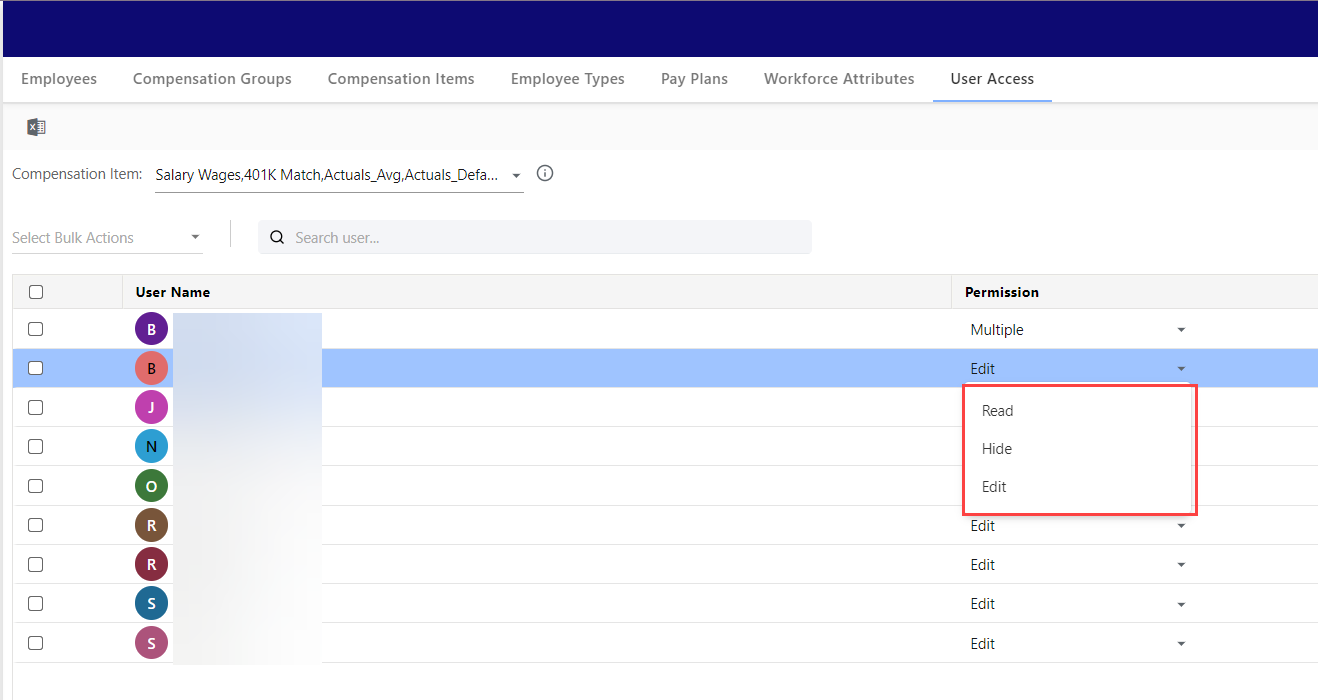
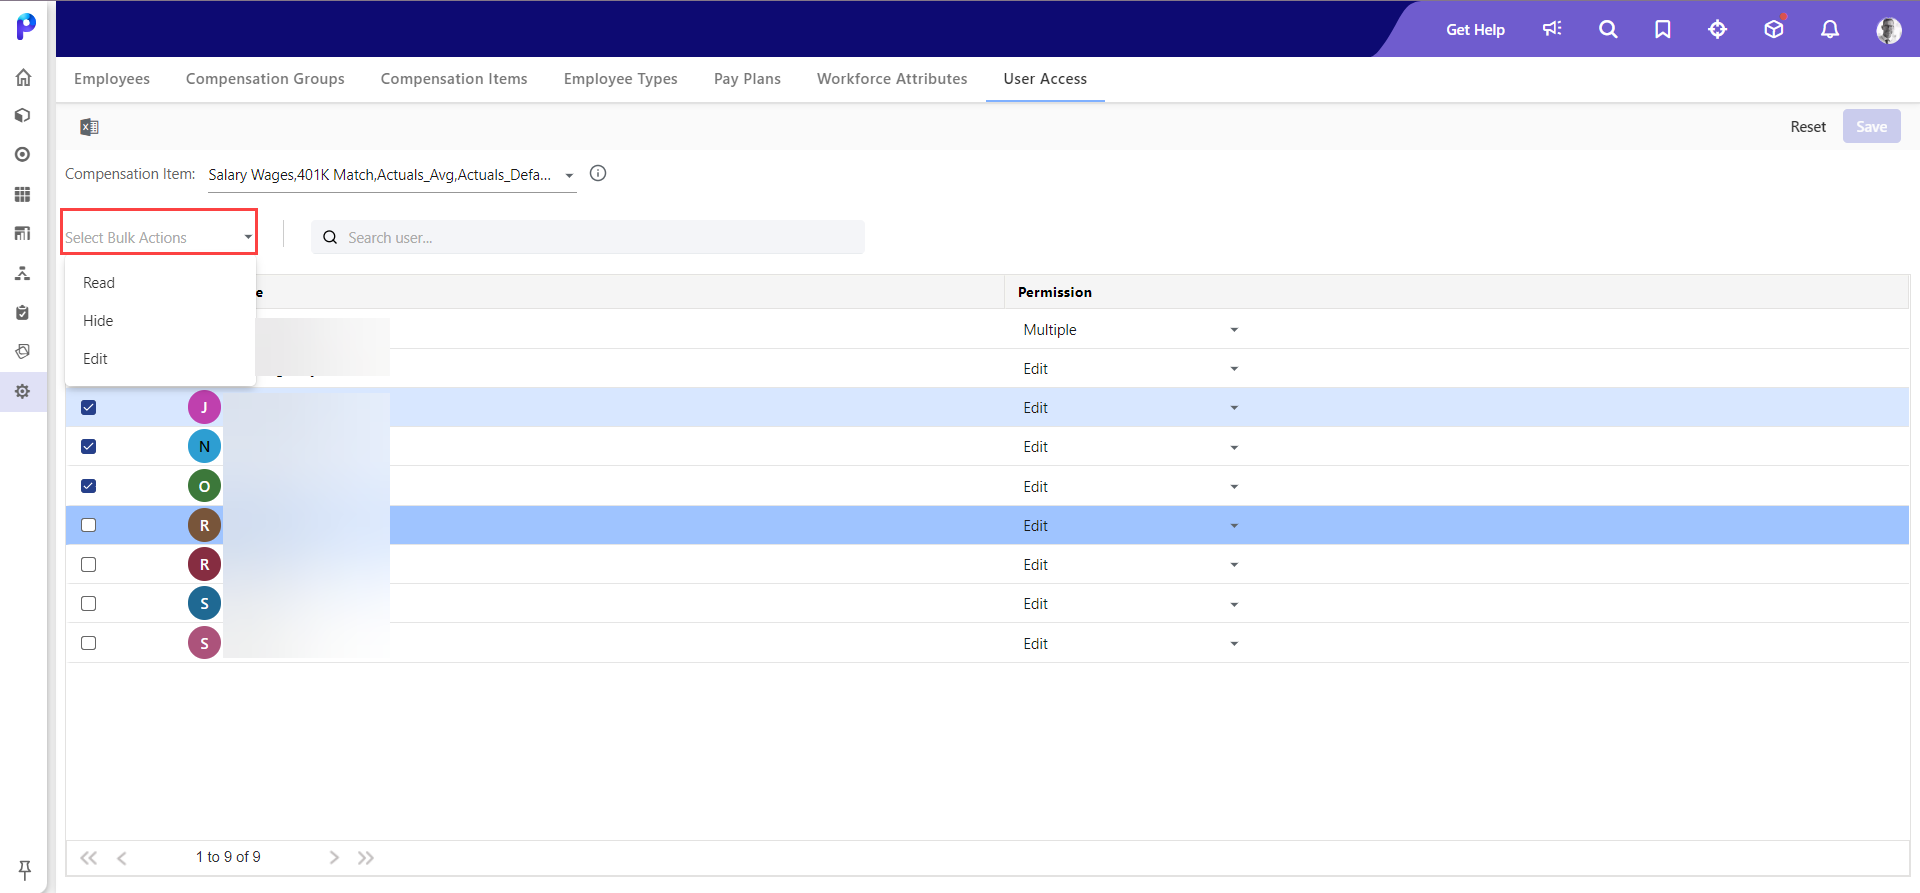
- Select the user for whom you want to modify the permissions. You can also search using the search field.
- Select from the following options from the list under the Permissions column:
- Read: Allows users to view information for the selected compensation item.
- Hide: Hides the information for the selected compensation item, and then users cannot view any information related to that compensation item.Notes:
- The Hide option hides the compensation item from the Employees tab (only for Admin and End users), Employee Add/Edit pages, Employee report, All Views and Dynamic reports, Report sets, Standard reports, and the Customize Roster page.
- Hiding the Salary Wages compensation item will hide the Annual Salary, Hours, Hourly Wage, and Salary Class compensation details. This option also disables users from adding new employees to the Workforce Planning template because salary items are mandatory to add a new employee.
- Edit: Allows users to edit information for the selected compensation item.
- You can use the Select Bulk Actions field to modify permissions to multiple users at one go. All you need to do is, select the users that you want to update the permissions for, click Select Bulk Actions, and then select any of the options, Read, Hide, and Edit.
- Click Save.
You can navigate to the Cloud Scheduler and check the status of the job. An email is also sent to you confirming the job’s status.
After you have saved the compensation items, the updated permissions are reflected in the Workforce Planning reports across all scenarios.Note:You can select multiple compensation items and permissions for multiple users. After you have set the permissions for a compensation item, they are applicable across all scenarios if the same compensation item exists in those scenarios.
For example:
Suppose User 1 has Read permission for the Bonus compensation and has Edit permission for the Allowance compensation. So, when you select the Bonus and Allowance compensations from the Compensation Items list box and then click Apply, the permission for User 1 is displayed as Multiple because User 1 has different permissions for the Bonus and Allowance compensations.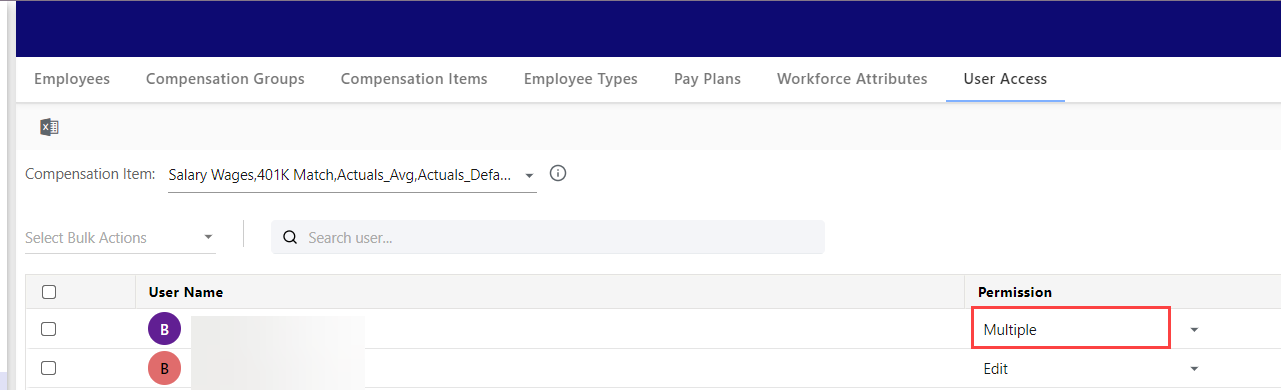
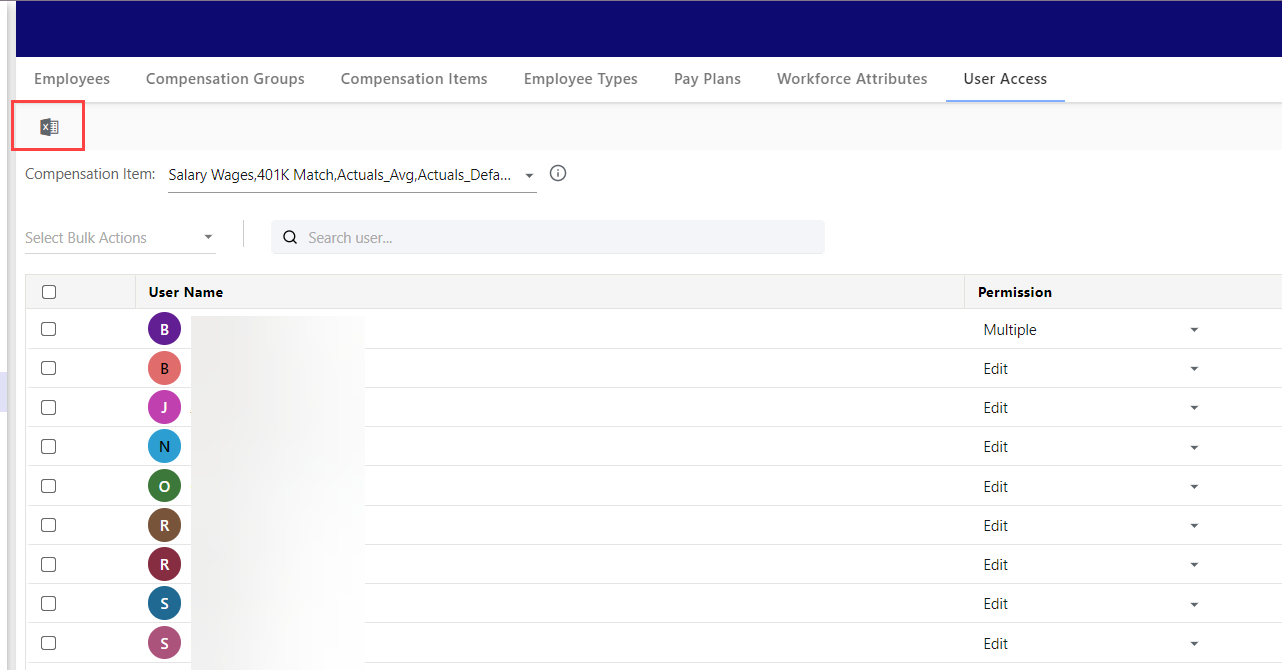
- Click the Export icon on the User Access tab to export the user access permission details.
In the Export dialog box, you can choose to export all permissions, only edit permissions, only read permissions, or only hide permissions for users.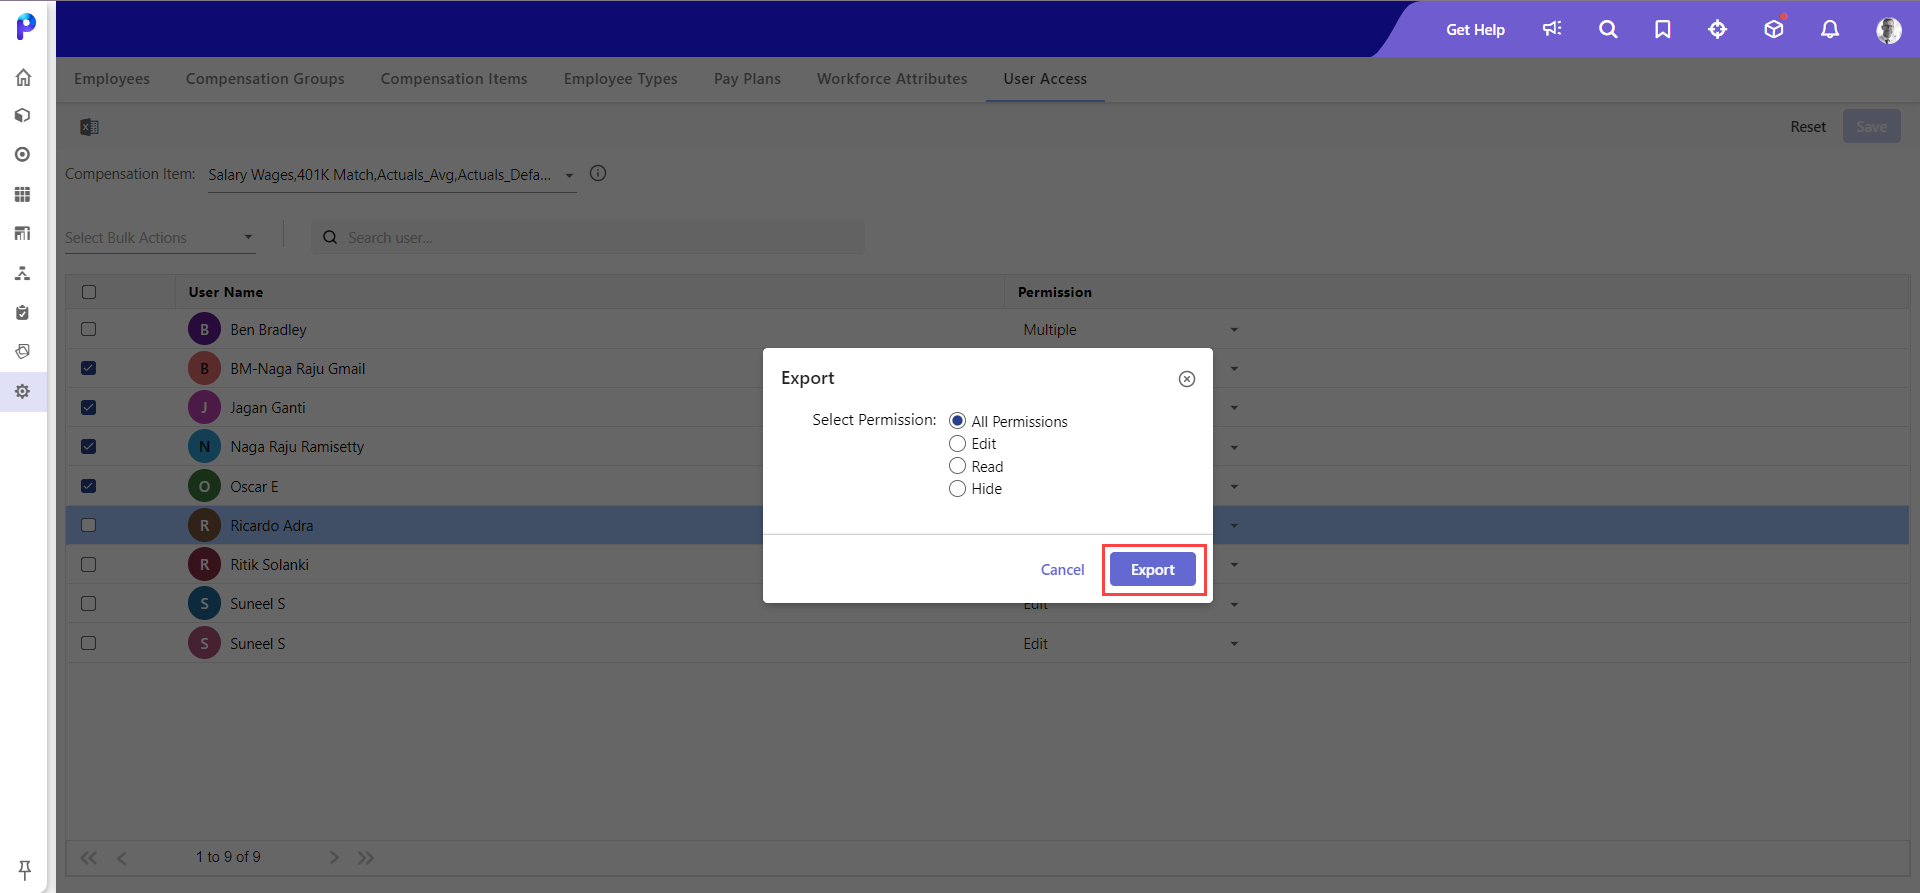
- Click Reset to clear the current selection and make new selections.Note:If Workforce Analytics(workforce cube) has been enabled for an application, to view the compensation items list on the User Access tab, users must publish the compensation items on the Compensation Items tab.
Workforce Defaults are used to identify default members for any dimensions that are identified as a constant. During the configuration, any dimensions that are not to be included for planning employee expenses are identified as a constant. For example, if customer or product is a dimension, but the business does not plan employee costs down to the individual, customer, or product level. These could be identified as constants. A workforce default would then be identified indicating where all workforce planning data should be posted when it comes to those specific dimensions.
Note:
Workforce Defaults must be set before creating Workforce templates or loading employee data.
The segments listed must be provided with defaults. Select a leaf-level member as a default for each segment.
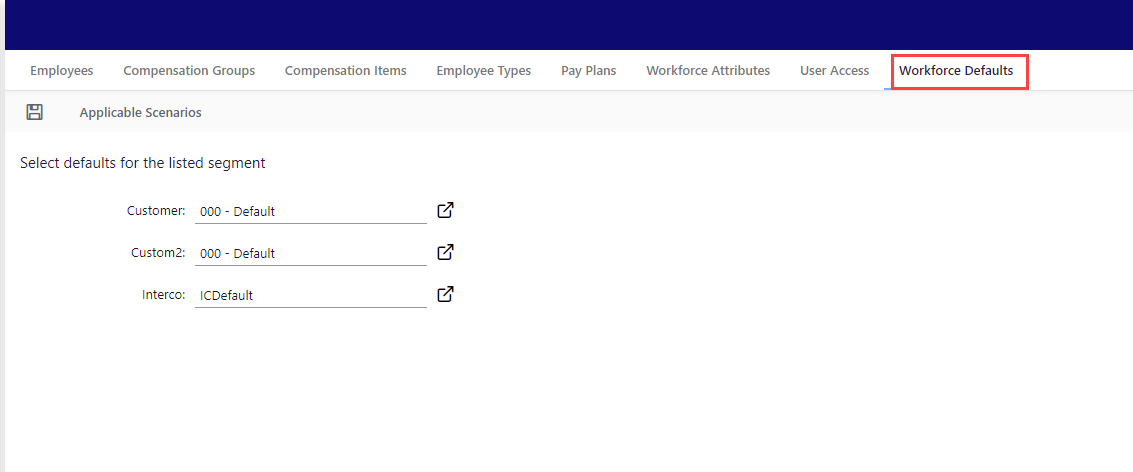
Note:
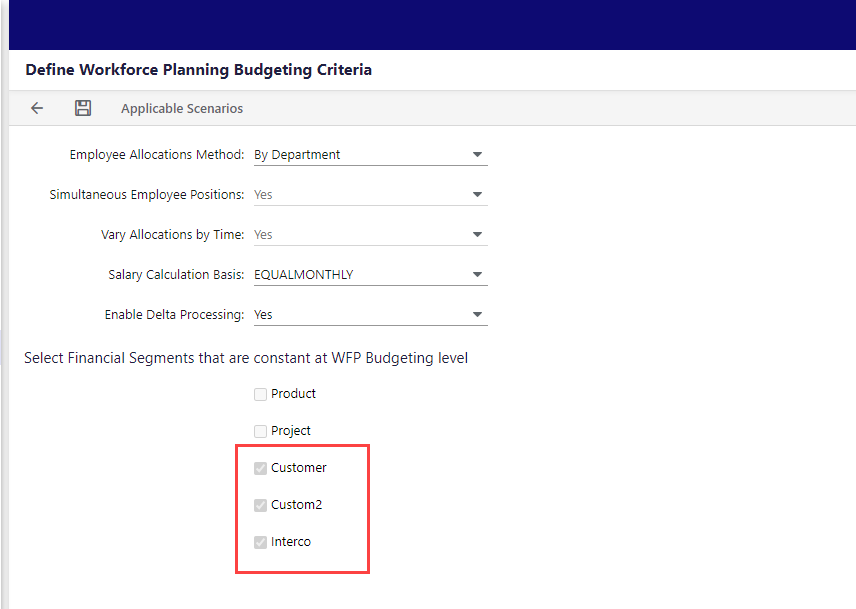
The list of segments you see here is based on the criteria you defined in the Define Workforce Planning Budgeting Criteria. Click here to learn more about > Define Workforce Planning Budgeting Criteria.
Related Articles
Was this article helpful?