- 3 Minutes to read
- Print
- DarkLight
- PDF
Finance Hierarchy
- 3 Minutes to read
- Print
- DarkLight
- PDF
Financial hierarchies are used to categorize financial data into various segments and dimensions. Financial hierarchies are created for each defined financial segment. They can be set up independently for each financial segment or integrated as a dimension within its configuration. Set up a hierarchy for each financial segment/dimension that you added on the Financial Segments Configuration Task page. You will load members to Planful for each dimension. For example, if you created a Company segment, you can load all company data to build a financial hierarchy.
To set up a financial hierarchy, do the following:
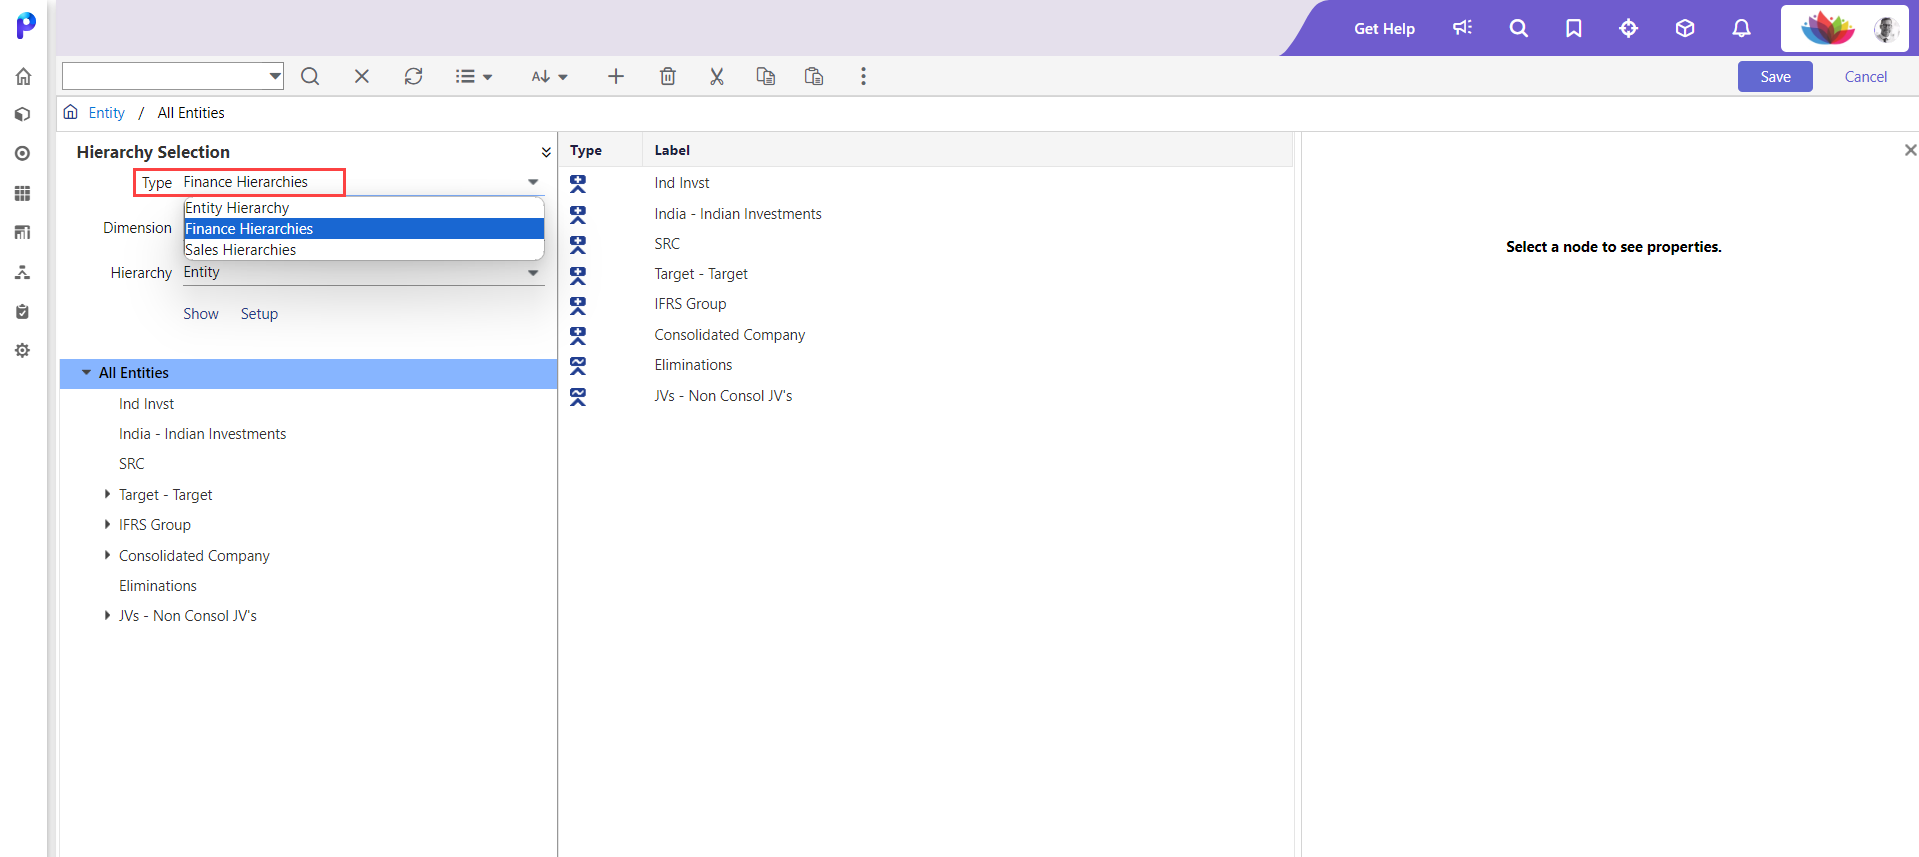
- Select the hierarchy type as Finance Hierarchies from the Type dropdown.
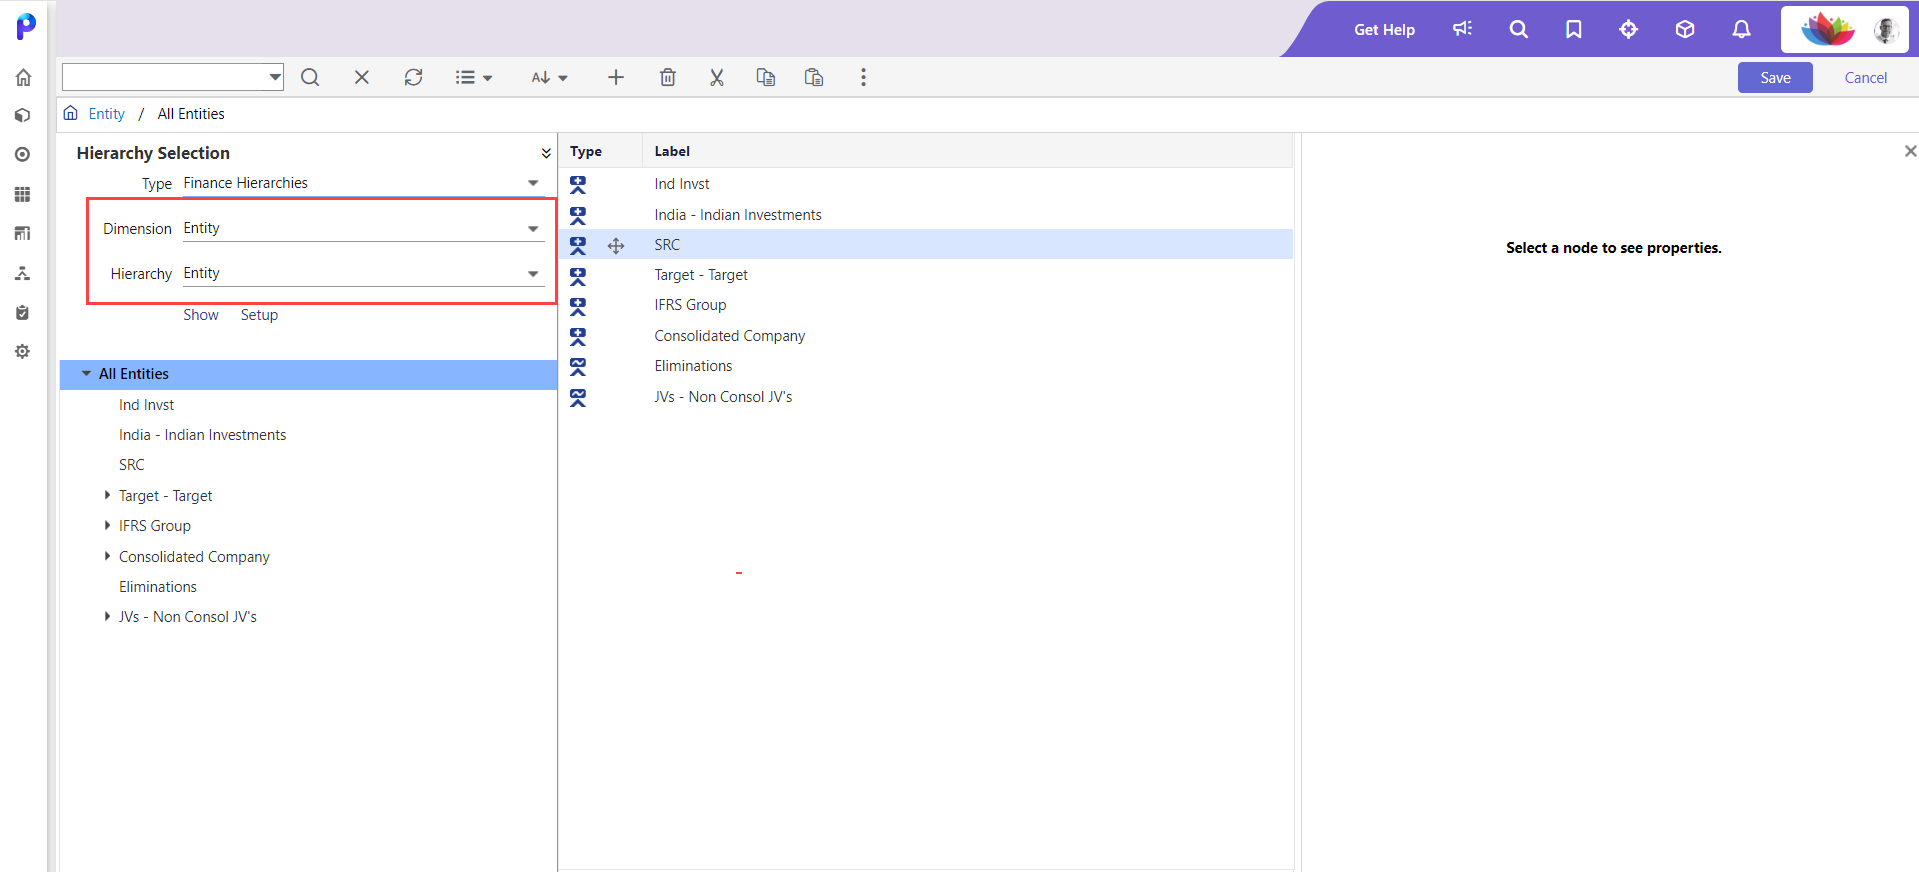
- Select the required Dimension and Hierarchy.
- Click Setup. The Financial Hierarchies Setup page appears.
- You must have Dated Hierarchies enabled on the Configuration Task page for setting up a financial hierarchy.
- You cannot edit a hierarchy once its members are in use. For example, you can't edit an Attribute hierarchy if the members are used in reporting.
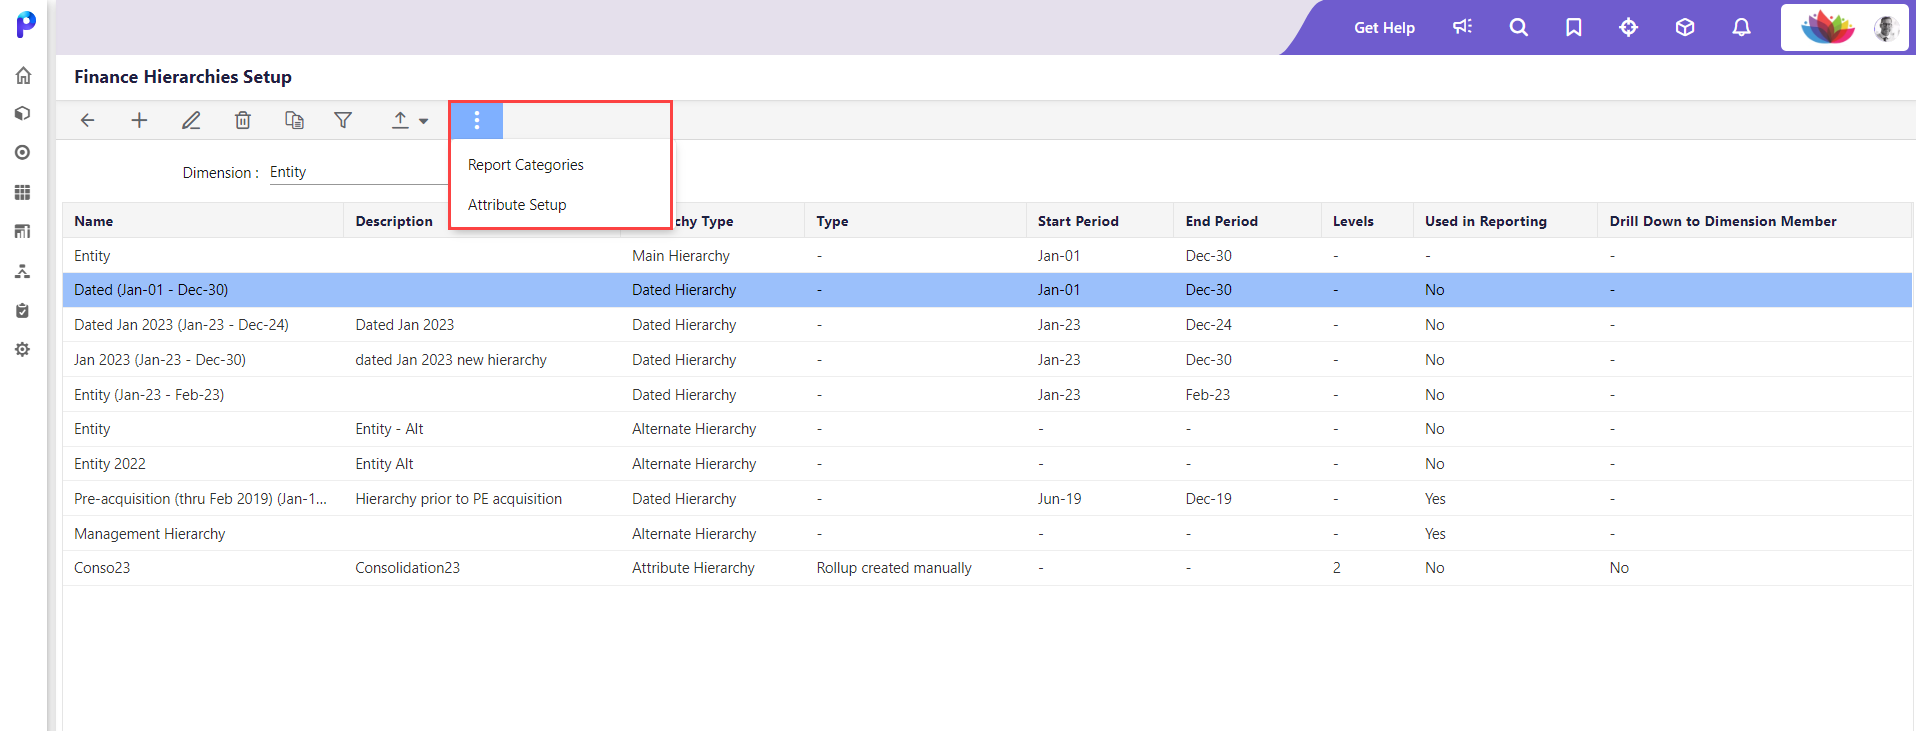
On the Financial Hierarchies page, you will see the following options.

Let’s explore each of the options available on the Financial Hierarchies Page.
To add hierarchies based on the dimension you select, do the following:
- Click the Add icon. The Add Hierarchy page appears.
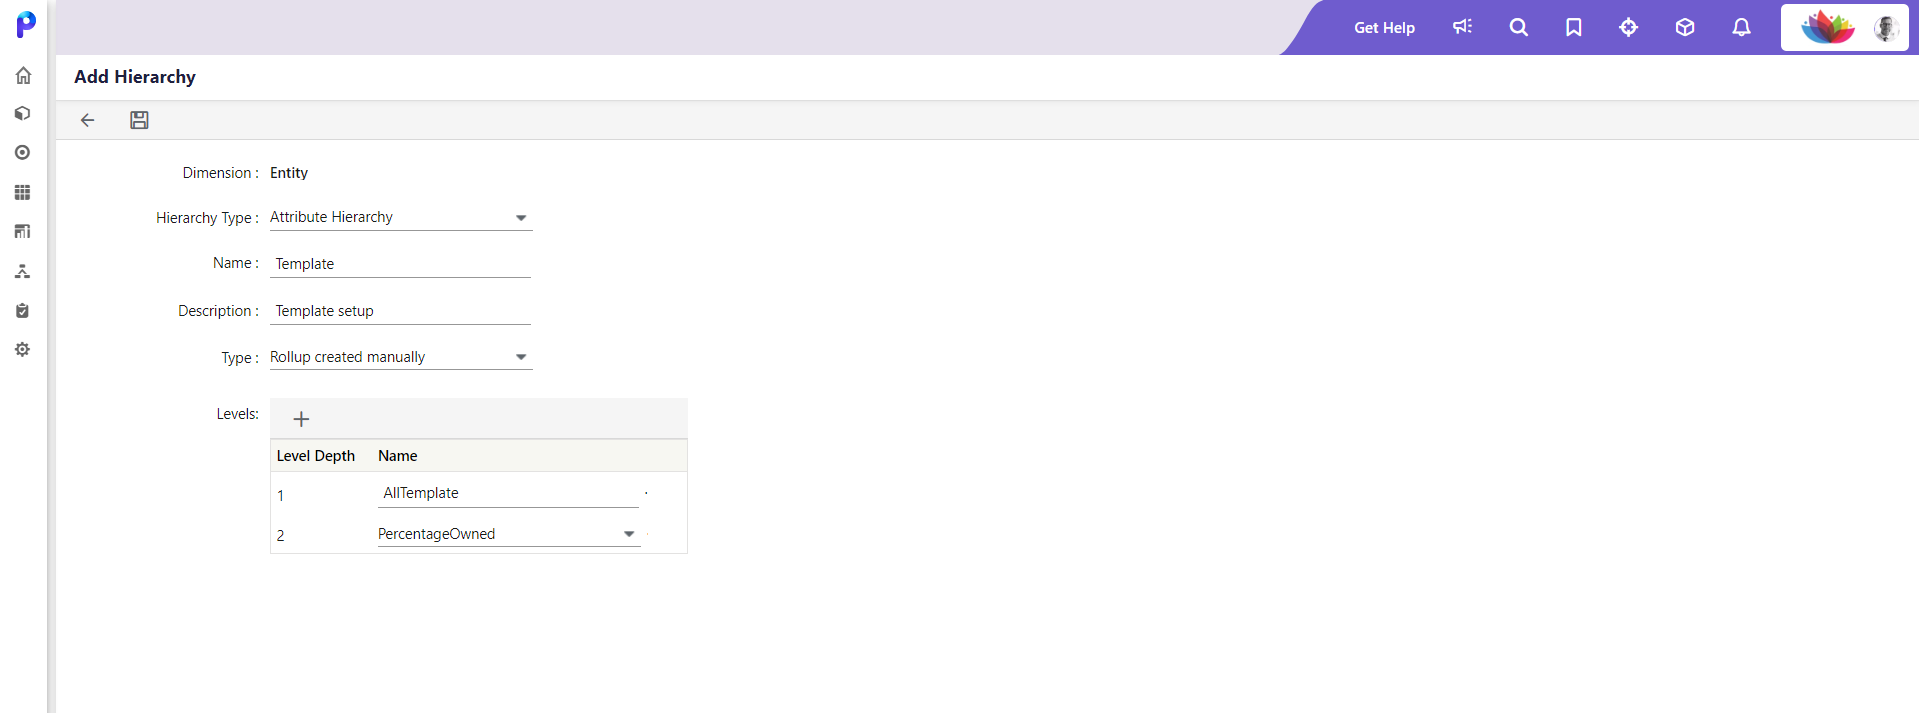
- Select the required Dimension. You can add an Attribute, Alternate, or Dated hierarchy to a selected dimension.
- Enter the Name and provide a Description for the new hierarchy.
- Select a Hierarchy Type from the dropdown.
- Add the required Levels. You can add up to five levels in the same hierarchy.
- Click Save to save your changes.
You can edit an existing hierarchy if the hierarchy is not in use. To do so, follow the steps below:
- Click the Edit icon. The Edit Hierarchy page appears.
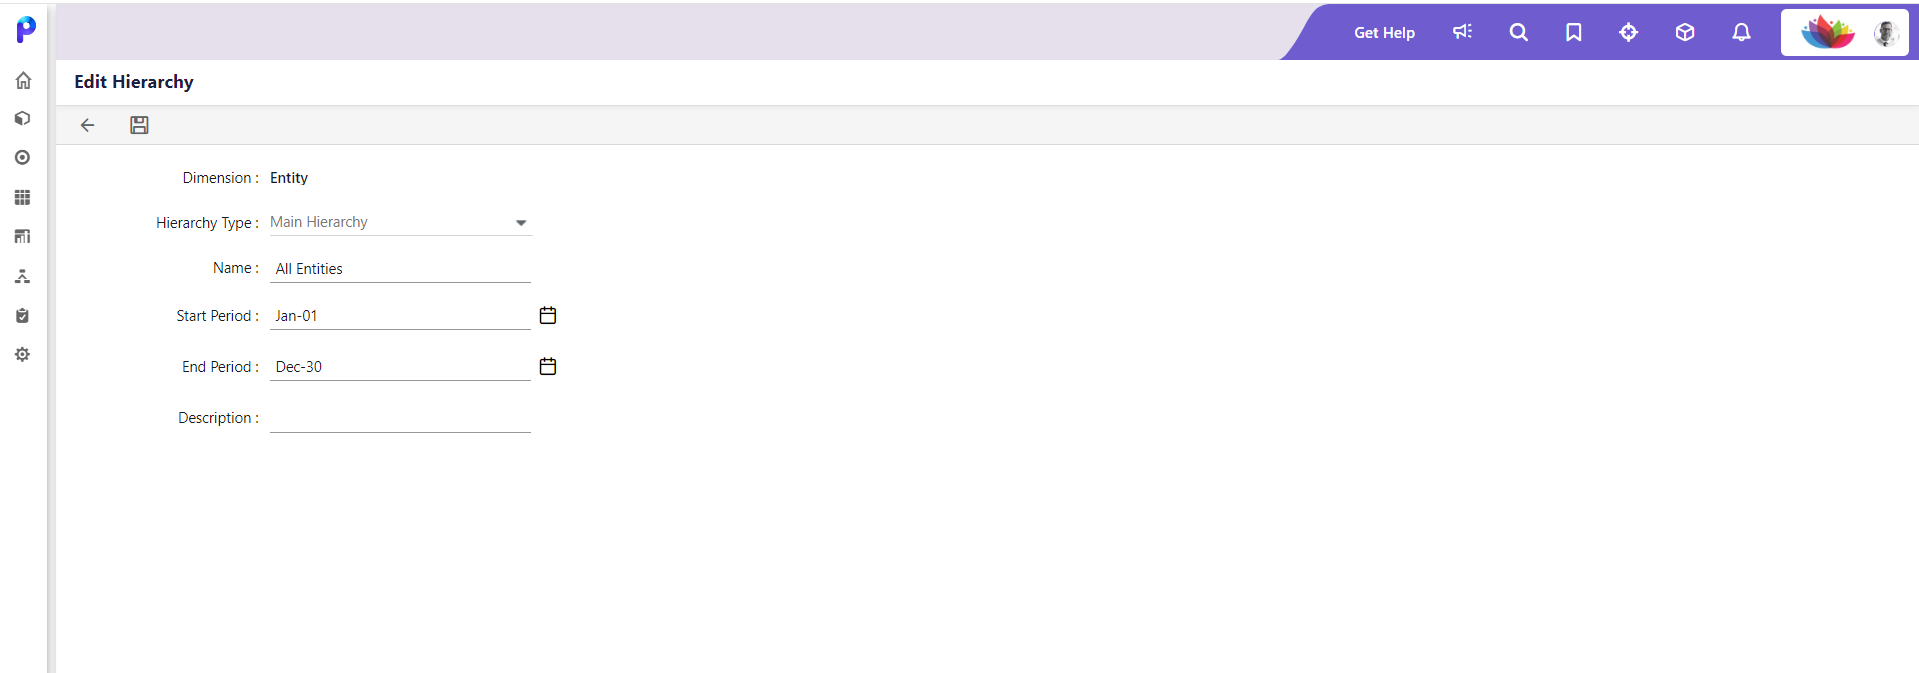
- Select the required Dimension.
- Select the required Hierarchy Type from the dropdown.
- Enter all the required details, such as Name, Start Period, End Period, Display Name, and Description.
- Click Save to save the changes.
There are certain cases where editing a hierarchy member is not allowed. You cannot edit a hierarchy when:
- The member is being used in Templates (both budget and Data Integration) with mappings using the segment code set
- The member is being used in Data Integration as the default.
- The member is being used in Translations
- The member is being used in Reclassifications (if a consolidation module is being used)
This option is used to delete the financial hierarchy.
- Select the hierarchy you want to delete.
- Click the Delete Icon. A confirmation message appears on the screen to confirm the deletion, as shown below.
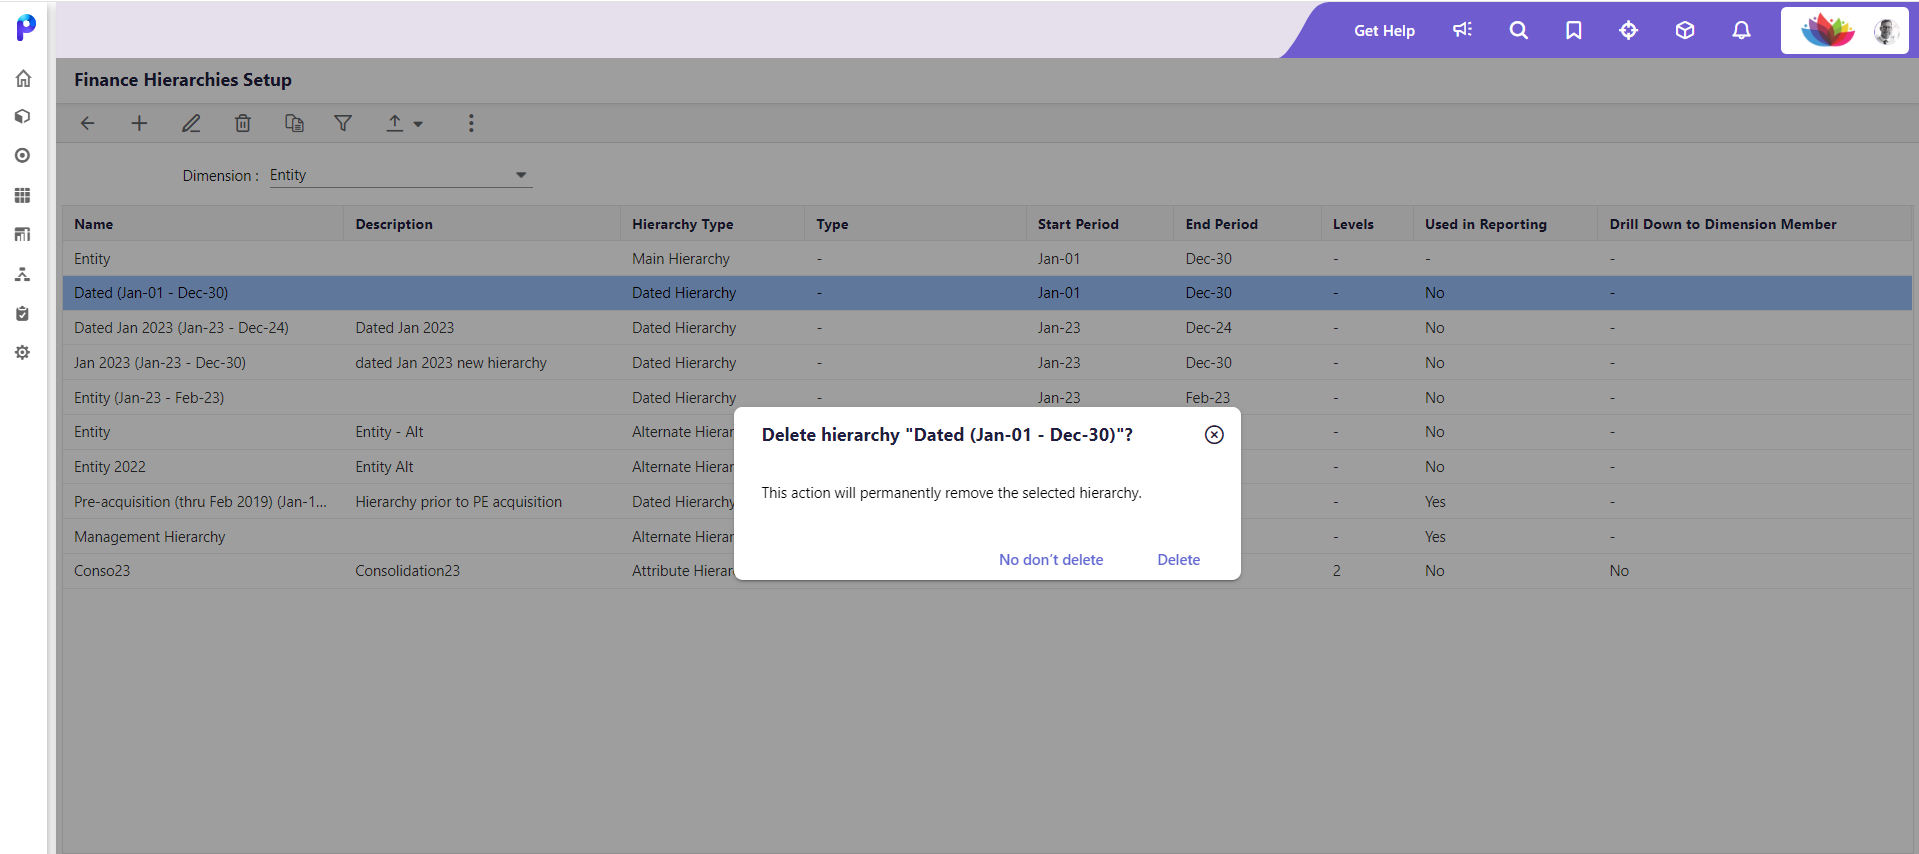
- Click Delete to remove the hierarchy from your database.
You can make a duplicate copy of a selected hierarchy. For example, let's say you want to duplicate the Department's Main hierarchy and save it as an Alternate hierarchy where you can make modifications based on your reporting needs. To do so:
- Click the Copy icon. The Copy Hierarchy page appears.
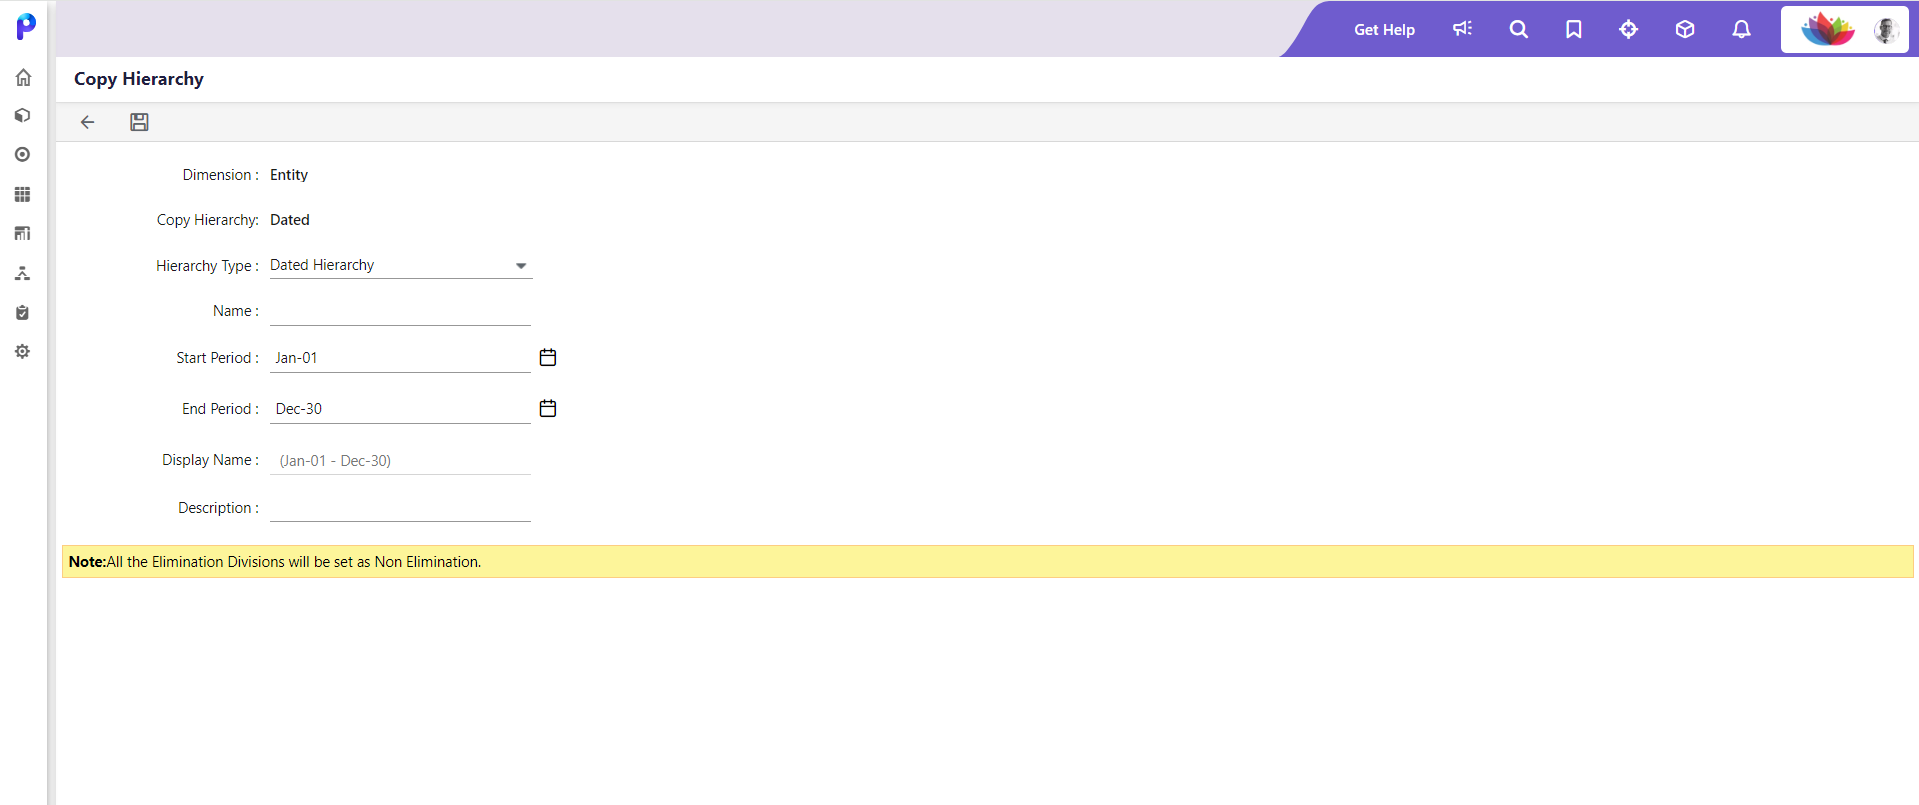
- Enter the required Dimension and select the required Hierarchy Type from the dropdown.
- Enter the Name, Start Period, End Period, Display Name, and Description.
- Click Save to save your changes.
The Apply Filters option simplifies your search process. By clicking the Apply Filter option, you can narrow down your search results by name, description, hierarchy type, period, levels, usage in reporting, and drill down to dimension member.

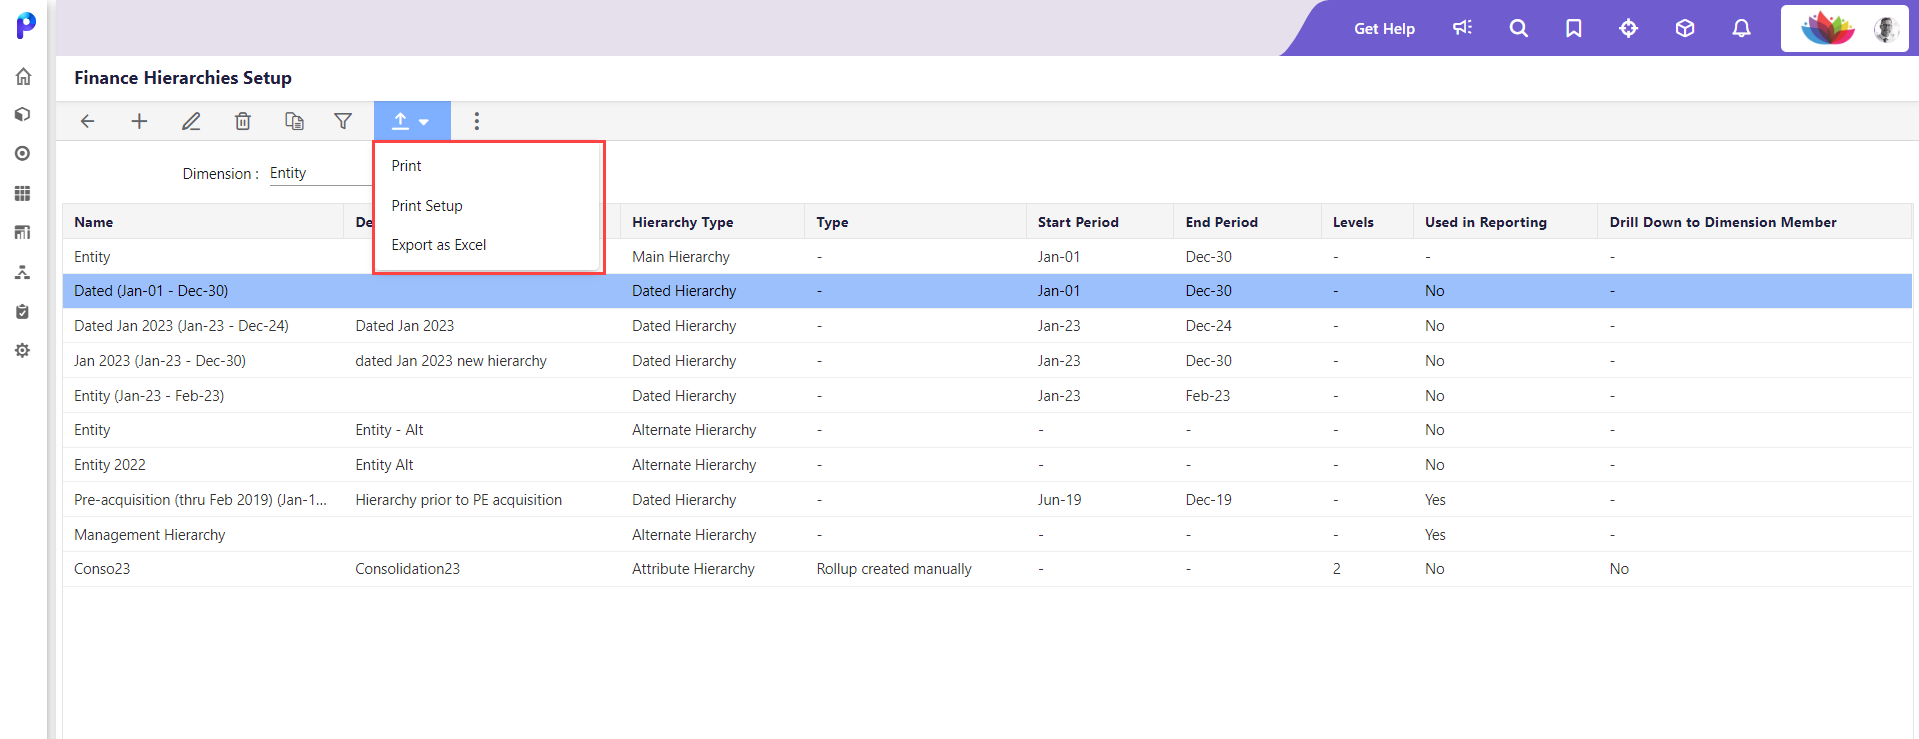
These options allow you to export the hierarchy's data. Select one of the three export options from the dropdown list.
- Print: This option allows you to print the generated financial hierarchies.
- Print Setup: This option allows you to modify the default Print Settings.
- Export as Excel: This option allows you to export the financial hierarchies in Excel format.
There are two options available under the More icon:
- Report Categories: Report categories are assigned to dimensions for organization and reporting purposes. Click here to learn more.
- Attribute Setup: Attributes are used to report and aggregate dimension data based on traits. Before creating an Attribute Hierarchy, you'll define attributes. The attributes defined here are used in the Budget Entity Definition and reports. Click here to learn more attribute setup.
