Hierarchy Management UI
- 8 Minutes to read
- Print
- DarkLight
- PDF
Hierarchy Management UI
- 8 Minutes to read
- Print
- DarkLight
- PDF
Article Summary
Share feedback
Thanks for sharing your feedback!
The Hierarchy Management page is made up of 3 panes:
The Left Plane: This is where you select the hierarchy you want to work with. It is also where the hierarchy is displayed.
The Center Pane: This is where the contents of a roll-up member or the leaf-level members are displayed.
The Right Pane: This is where properties are displayed for leaf members. It is also where you define/set/apply properties for each member, including; default properties, segment properties, and user-defined attributes.
Click on each of the following tabs to learn more about each of these panes.
As soon as you land on the Hierarchy Management Page, you will see the following functionalities on the top ribbon.
.png)
Click on each of the tabs below to explore each of these functionalities.
Search
To search for a user information, follow the steps below:
In the Search box, click the down arrow. Filter search options appear.
Select from: Label (code + name), Code, Name, and IDX.
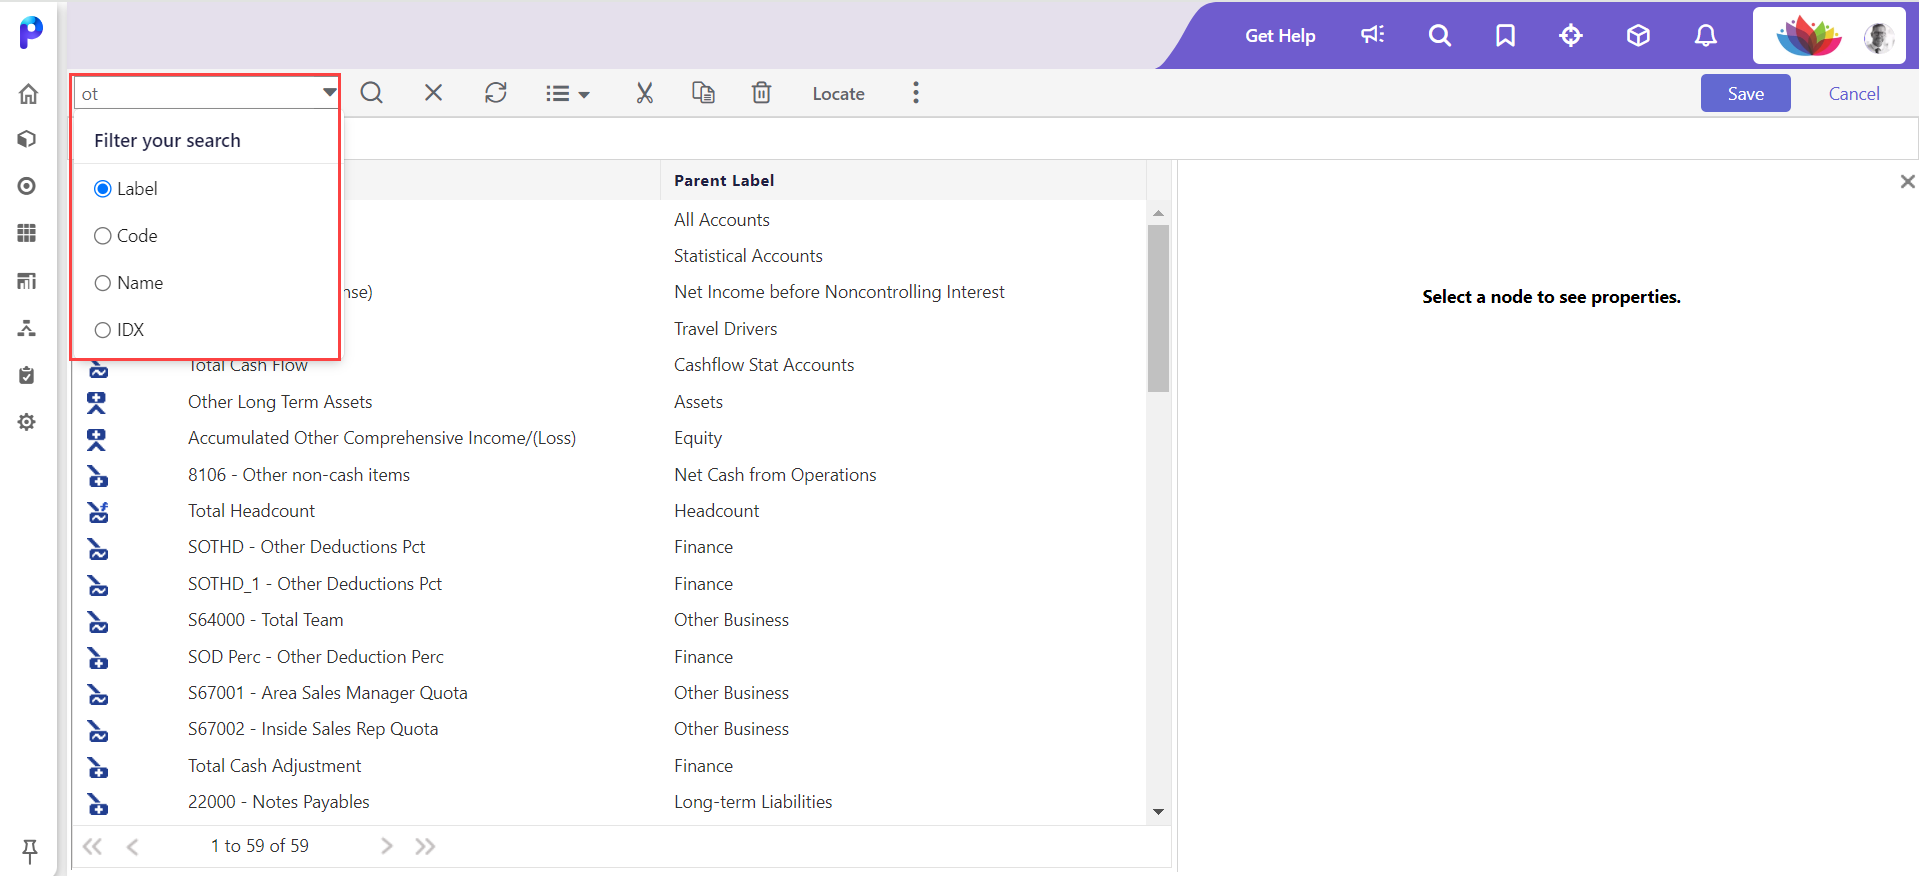
Enter search criteria in the Search box and then click the magnifying glass icon. The search results appear.

Use an advanced search to produce or narrow and results. You can write a query using Type, IDX, Label, Code, and Label columns with the operators (<, >, =, != ), and use the keyword And.
For example, if you want to search for rollup nodes "Label1" and "Label2," the query you would input is Label=Label1 AND Label=Label2
X - click to clear the search.
Locate Results Display
When you search a hierarchy for a member, you can use the Locate button to display the location of a selected member within the hierarchy. The parent member displays in the hierarchy in the left pane, the member displays in the center pane, and the member’s properties display in the right pane.
Hierarchy Path
The hierarchy path is displayed based on where you navigate within a hierarchy. In the example below, the following hierarchy path is displayed:
Click a member in the path and the parent member will be displayed in the left pain and the member itself will be displayed in the center pane.
Show or Hide Columns
You can display members in the center pane by IDX, Code, Name and / or Label as shown below.

Sort
Sort members in the center pane in ascending or descending order.
.png)
Add a Member to the Hierarchy
Click the plus icon to add a member to the hierarchy.
The left pane is where you will select a hierarchy type (for example, entity or finance) to display, the dimension, and the associated hierarchy. It is also where the selected hierarchy is displayed. Click on each of the tabs below to explore the functionalities in the Left Pane:
Entity and Finance Hierarchy Setup
There are two links under Hierarchy selection; Show and Setup.
The Show link displays the hierarchy you select.
The Setup link takes you to application pages that support all functionality related to the set up of your hierarchy.
The center pane is where the contents of a rollup member or the leaf level members are displayed.
Add a Rollup Member
Ensure Hierarchy Management is opened in Edit mode.
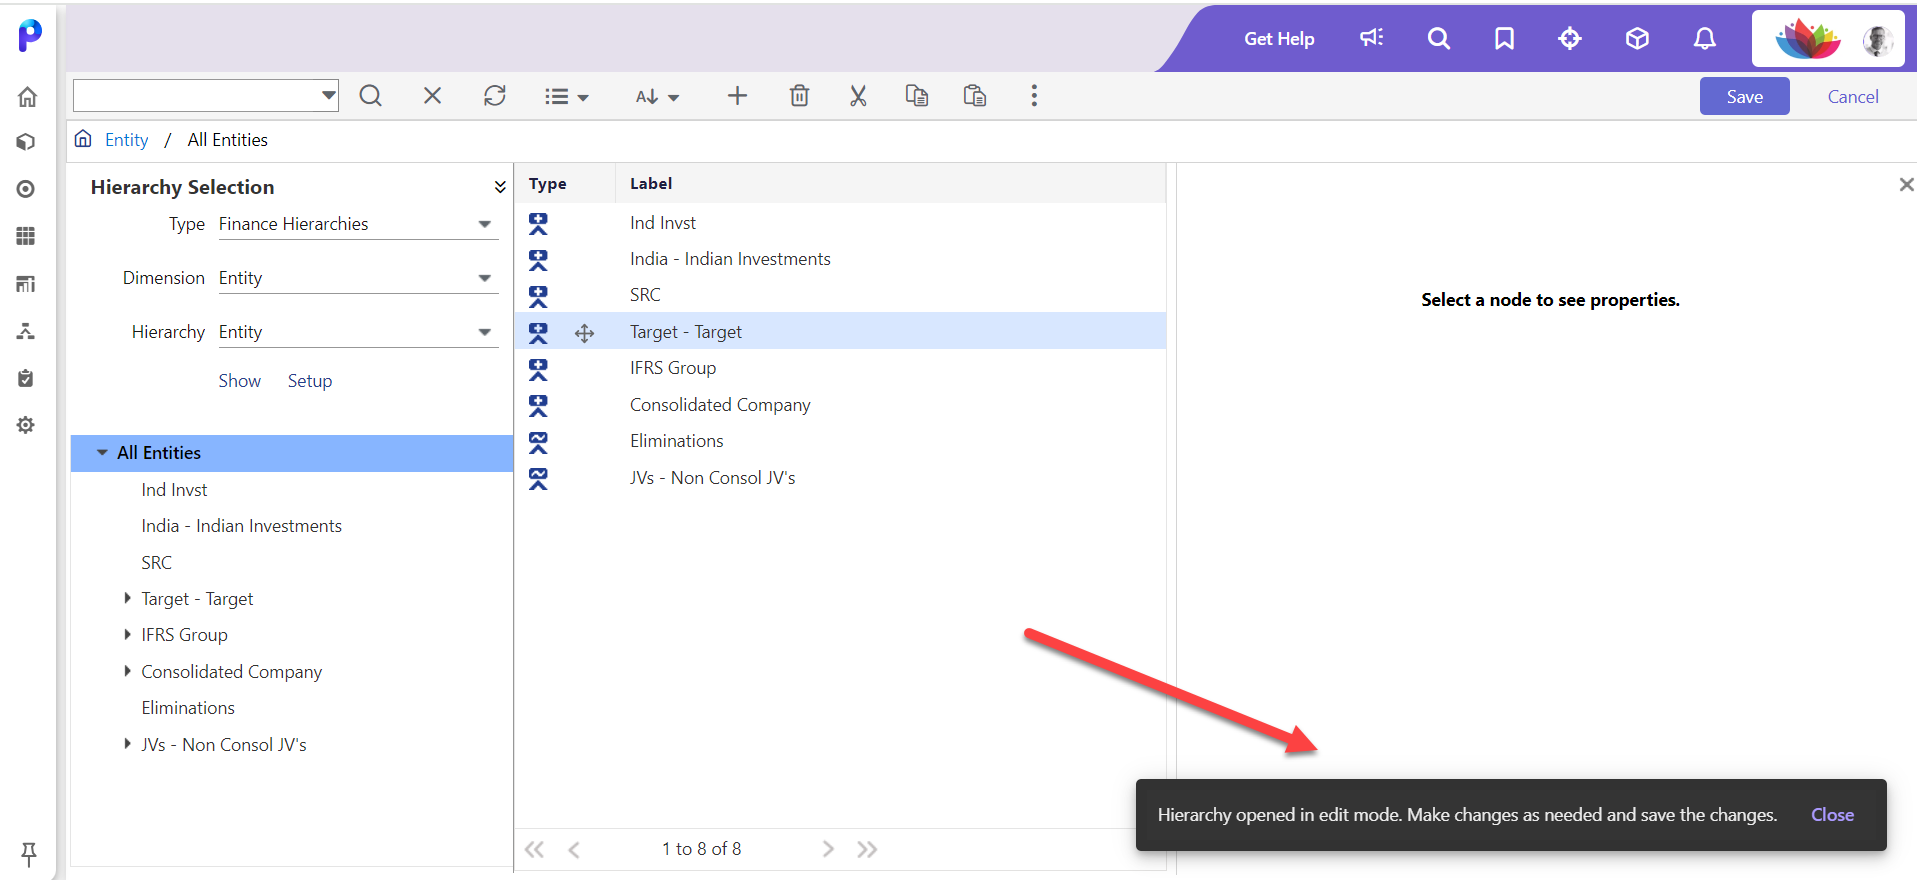
Under Hierarchy Selection, select Type, Dimension, and Hierarchy and click Show.
.png)
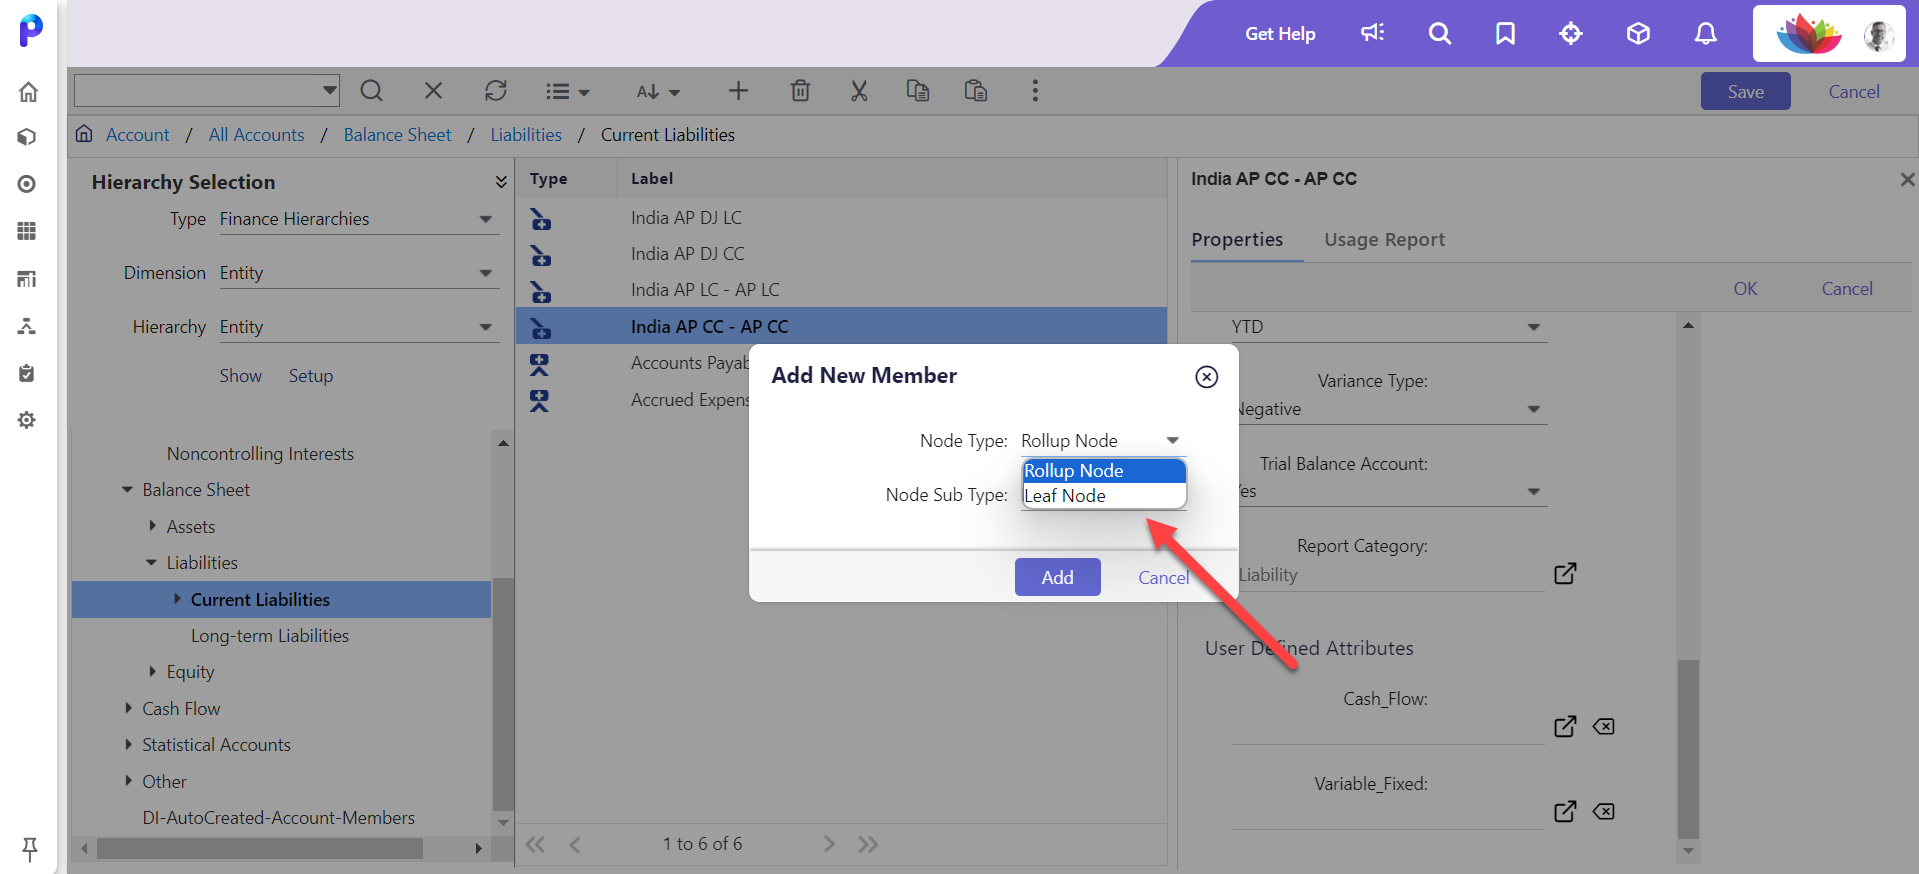
Click Add.
.png)
Select Leaf Node from the Node Type drop-down list. If you are adding a leaf level member in Financial Hierarchies, select Leaf Member or Calculated Member from the Node Sub Type drop-down list. If you are adding a level member in Entity Hierarchies, the default budget entity hierarchy selected in the Node Sub Type drop-down list.
Complete all the required fields (for example; Default Properties and Segment Properties).
.png)
Click Save.
.png)

.png)
.png)

.png)
.png)
In addition to adding a rollup member and /or leaf member, you can edit and delete each of these members. Information on how to do so is provided below.
Note:
The follow special characters are restricted from use in the Leaf Code of a segment leaf member when creating segment hierarchy data or loading it to Planful: ‘ " ` ! @ # $ ^ * ( ) + = [ ] { } \ | ; : < > , ? All other special characters documented in the Getting Started guide are supported.
Edit a Rollup Member
Open Hierarchy Management in Edit mode.
.png)
Under Hierarchy Selection, select Type, Dimension, and Hierarchy and click Show.
.png)
In the hierarchy tree, select the immediate parent member of the desired rollup member.
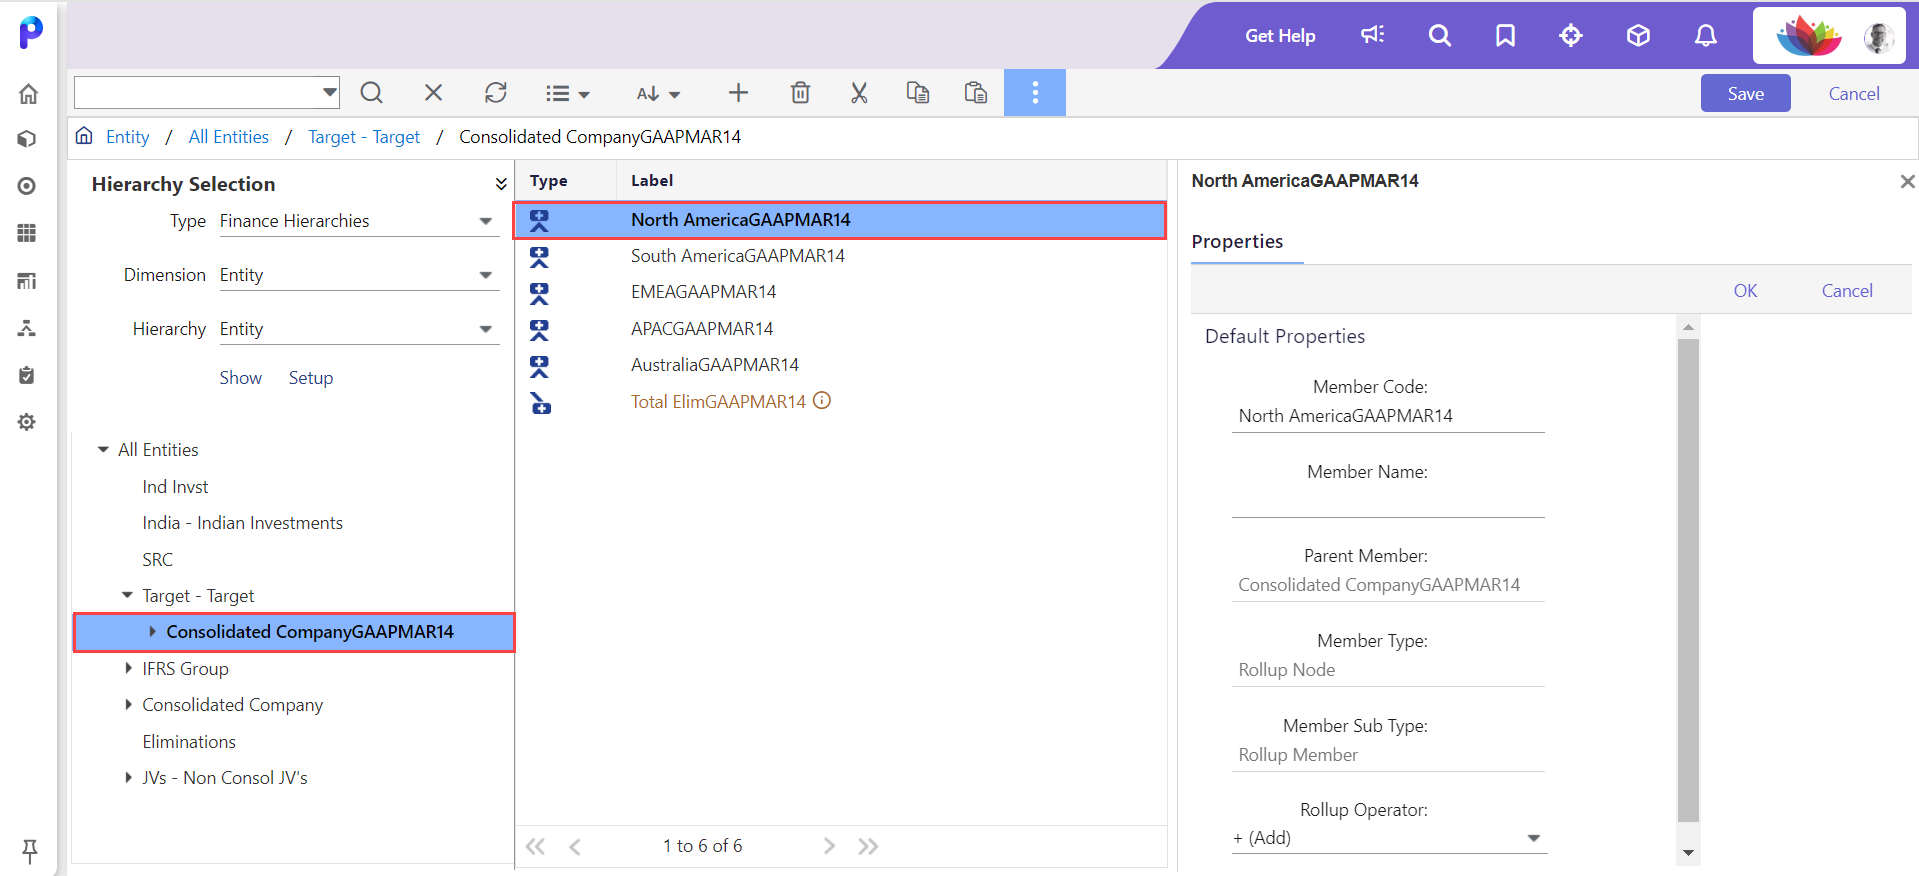
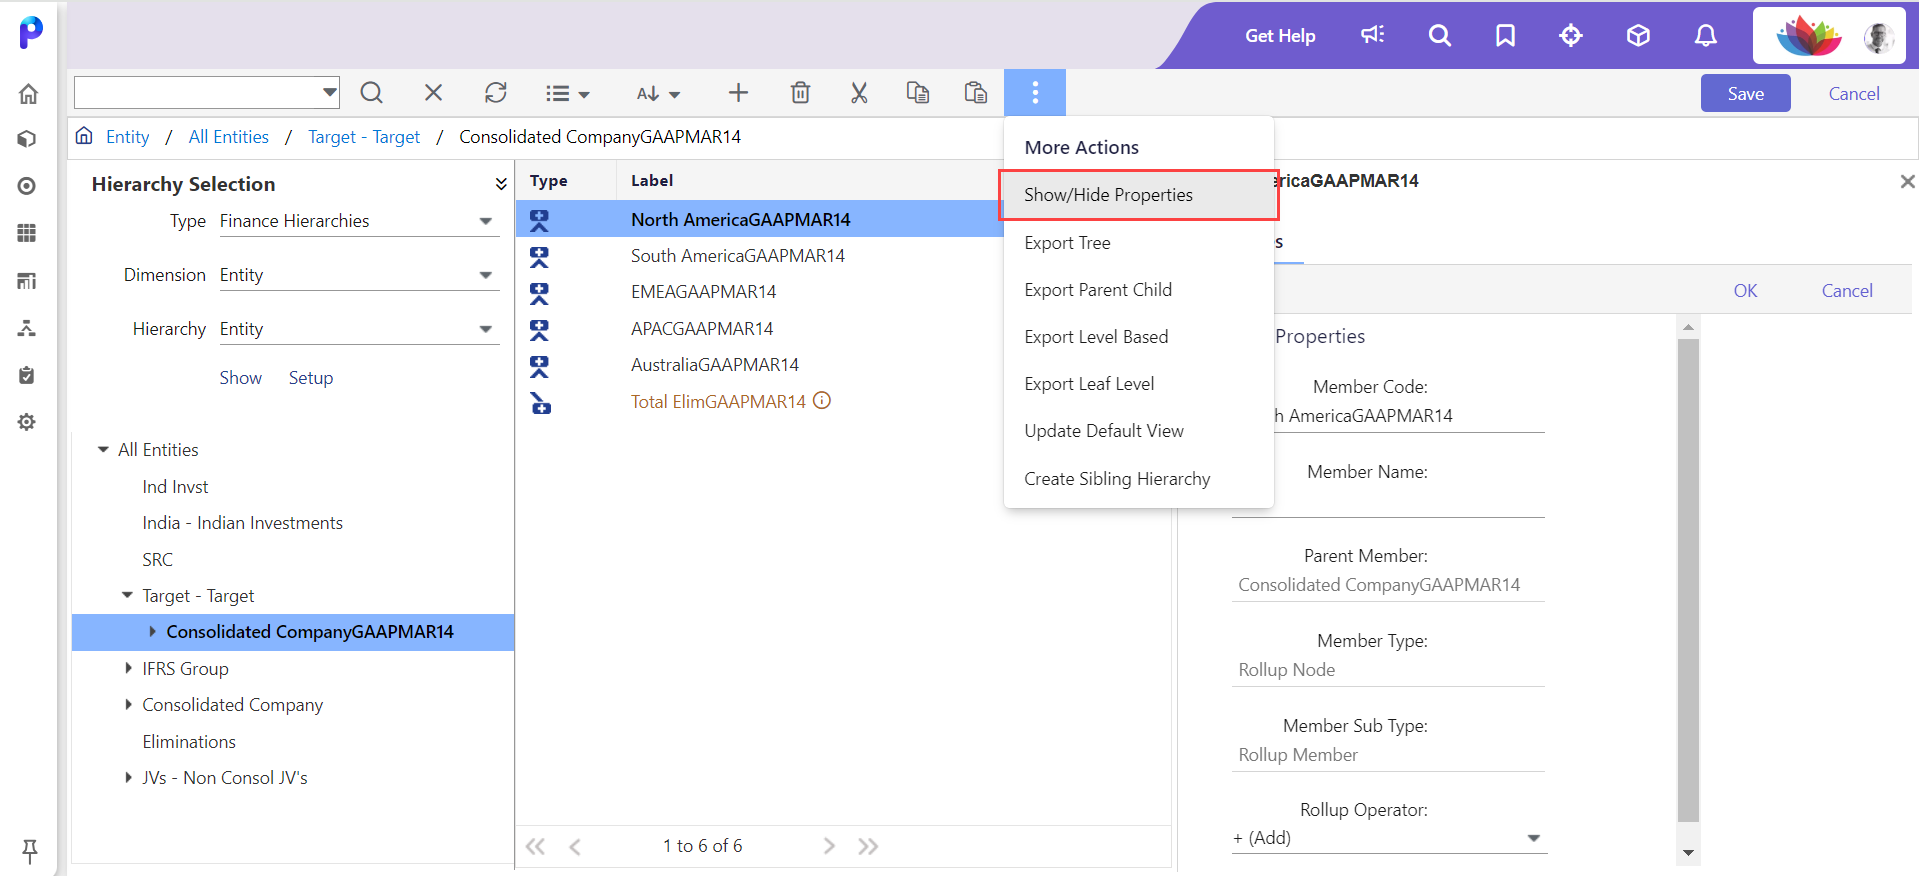
In the middle pane, select the rollup member. If the properties panel is not visible, click More, and then click Show/Hide Properties.
Edit the properties as needed.
Click OK.
.png)
Click Save.
.png)
.png)


.png)
Note:
Hierarchy updates to member names or codes are automatically displayed in the member selections of a Dynamic Report. However, this does not apply to attributes, attribute hierarchies, alternate hierarchies, substitution variables user prompt, and Financial Package Publisher. Members that are used in a Dynamic Report and deleted from the Segment Hierarchies are still shown in the report selections, however, they are ignored when the report is run.
Delete a Rollup Member
Open Hierarchy Management in Edit mode.
Under Hierarchy Selection, select Type, Dimension, and Hierarchy and click Show.
In the hierarchy tree, select the immediate parent member of the desired rollup member.
In the middle panel, select the rollup member.
Click Delete.
In the message that appears for confirmation, click OK.
Edit a Leaf Level Member
Open Hierarchy Management in Edit mode.
Under Hierarchy Selection, select Type, Dimension, and Hierarchy and click Show.
In the hierarchy tree, select the immediate parent member of the desired leaf level member.
In the middle pane, select the leaf level member. If the properties panel is not visible, click More, and then click Show/Hide Properties.
Edit the properties as needed.
Click OK.
Click Save.
Note:
Hierarchy updates to member names or codes are automatically displayed in the member selections of a Dynamic Report. However, this does not apply to attributes, attribute hierarchies, alternate hierarchies, substitution variables user prompt, and Financial Package Publisher. Members that are used in a Dynamic Report and deleted from the Segment Hierarchies are still shown in the report selections, however, they are ignored when the report is run.
Delete a Leaf Level Member
Open Hierarchy Management in Edit mode.
Under Hierarchy Selection, select Type, Dimension, and Hierarchy and click Show.
In the hierarchy tree, select the immediate parent rollup member of the desired leaf level member.
In the middle pane, select the leaf level member.
Click Delete.
In the message that appears for confirmation, click OK.
Understanding the Difference between a Rollup Node and a Leaf Node
Rollup Node functions are different from Leaf Node functions. Leaf Node is the last level in a hierarchy and data can be loaded to leaf nodes. The data loaded to the leaf is rolled up to the leaf node's rollup member.
Cut / Paste
Use cut and paste to move members around within a hierarchy. Select the member, click Cut. Locate the place where you want the member and click Paste.
Copy
Use Copy to make a duplicate of a selected member.
More
Select from the following:
Show/Hide Properties (the right pane).
Export the hierarchy to Excel in one of the following formats: Tree, Level-Based, Parent-Child, Leaf Level.
The right pane is where properties for each dimension member in the hierarchy are displayed. If you are adding members, it is where you will select/enter properties.
Member Properties
Default Properties are available for all members.
Segment Properties are available for leaf members.
User-Defined Properties are specific to each application.
Interim Currency Properties are available based on each application.
Source Properties are available when using multiple set of books.
Default Properties
Use the following Default Properties when adding, editing, and copying rollup and leaf level members.
Member Code —Enter a member code for the leaf level node member or rollup node member.
Member Name —Enter a member name for the leaf level node member or rollup node member.
Parent Member —Displays the parent member of the node.
Member Type — Displays the type of member: Rollup Node or Leaf Node.
Member Sub Type —Displays the sub type of member. In Financial Hierarchies, the only sub type for Rollup Node is Rollup Member, and the sub types for Leaf Node is Leaf Member and Calculated Member. In Entity Hierarchies, the only sub type for Rollup Node is Rollup Member, and the sub type for Leaf Node is the default budget entity hierarchy.
Rollup Operator —Select an operator to use in performing rollup calculations. Available operators are Add (=), Subtract(−), Multiply(*), and Divide(/).
Segment Properties
Options available are based on segment.
Account Group - Specify expense, asset, income, liability, statistical and/or equity for the selected account segment member.
Credit/Debit - Specify credit or debit for the selected account segment member. This will affect reports. If your report displays negative numbers, you will need to change this property.
Account Type - Select Balance or Flow. Balance accounts start with previous year ending balances and Flow accounts do not have any opening balances. Map Balance or Flow accounts to a selected account segment member.
Currency Type - Select a defined currency type (created on the Currency Type page) to map to a selected account segment member.
Normal Data Input Type - Select YTD or MTD to view accounts with a year to date or month to date input type. Map accounts to a selected account segment member. Generally, Income and Expense accounts are associated with MTD. And Asset, Liability and Equity Accounts are associated with YTD values. Statistical accounts can be set as either MTD or YTD.
Variance Type - Select Positive or Negative. The variance is calculated as Actual - Budget or Forecast. Map positive or negative variance accounts to a selected account segment member.
Trial Balance Account - Select Yes or No. A trial balance is calculated by summing the balances of all the ledger accounts. Debits must equal credits in trial balance accounts. Map trial balance accounts to a selected account segment member.
Report Category - Each report category represents a desired level of a reporting view of the consolidated segment members. Report categories are used in standard reporting. Map the Report Category. Report Categories help you to categorize dimension/segment members and are created by clicking the Setup link under the Dimension/Hierarchy in the left pane. And then, under More, selecting Report Categories.
Currency Property Changes made here will be reflected in the Planning templates where the dimension member is used. The template must be opened and closed (or processed via Simulation Engine) and the cube must be processed. Doing so recalculates the data according to the updated properties.
Source Properties
Source Properties are available when you are using a second set of books. See Multiple Set of Books. The Member Group field is used to group companies for processing purposes and the Source Company field is where you select the company where the data will be copied from in your IFRS hierarchy
User-Defined Attributes
Displays the available attribute selections defined for the selected member.

Was this article helpful?