How to Add a Leaf Level Member to a Hierarchy
- 1 Minute to read
- Print
- DarkLight
- PDF
How to Add a Leaf Level Member to a Hierarchy
- 1 Minute to read
- Print
- DarkLight
- PDF
Article summary
Did you find this summary helpful?
Thank you for your feedback
When adding new members (leaf or rollup) to a hierarchy, it is recommended that you use the ‘Append’ action available in the Dimension Hierarchy screen. The following documentation provides information on how to add a leaf level member to a hierarchy.
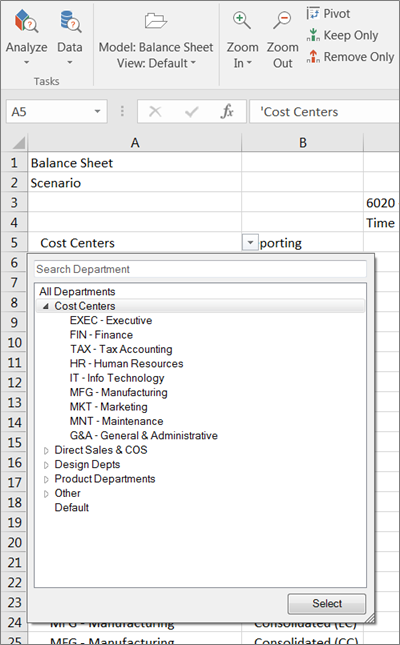
In this example, a new Cost Center member (called QA) is added to a Department hierarchy (displayed below), which is part of the Balance Sheet model.
- Select the Model task and the Dimension subtask.
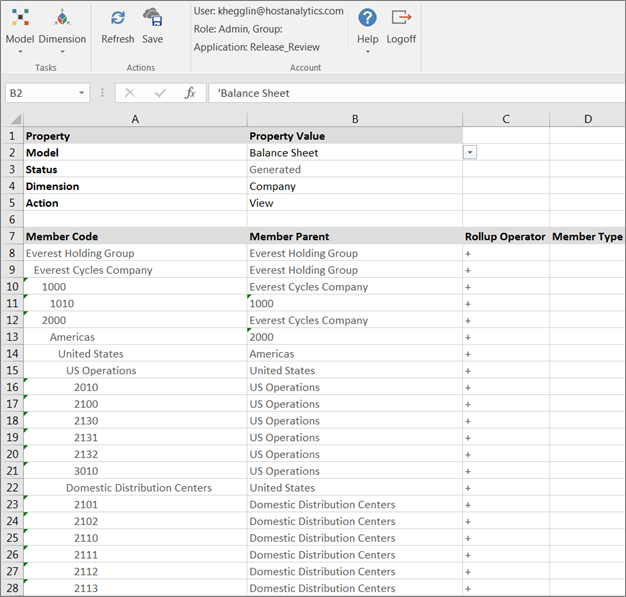
- Select the Balance Sheet model (as shown below).
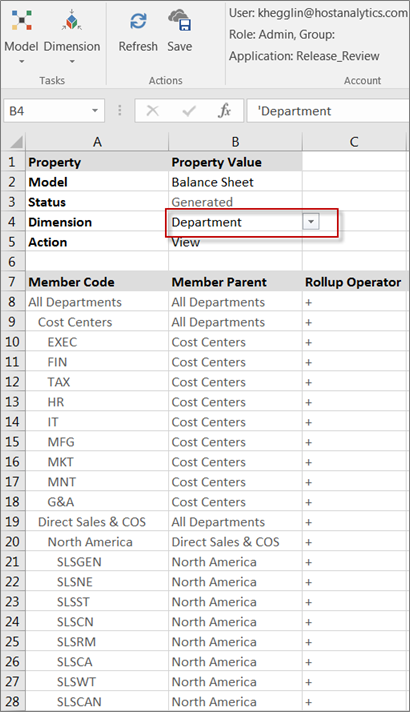
- Select the Department dimension as that is the dimension that contains the Cost Center member in which a leaf level member will be added.
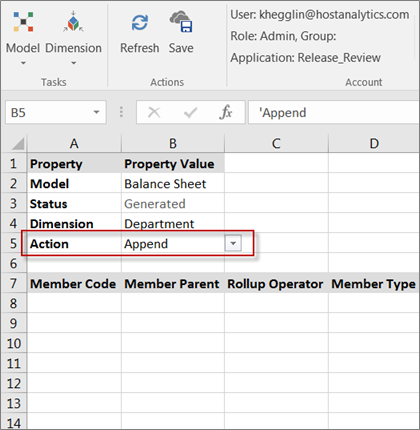
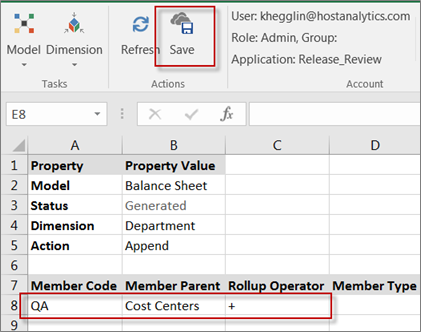
- For Action, select Append.
- Enter the Member Code of the new dimension member, which is QA.
- Enter the parent member of the QA dimension in the Member Parent field, which is Cost Centers.
- Enter the Rollup Operator for the new member, which is + as the QA leaf level member rolls up to the Cost Centers member as shown below, and click Save.
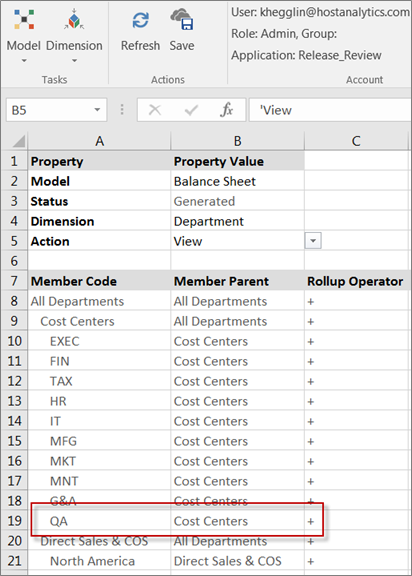
- Return to the View Action by selecting View from the Action list box as shown below. Notice the new QA member.
- Select the Analyze task and the Data subtask.
- Select the Balance Sheet model.
- Expand the Department dimension member to view the new QA member.
You can now include this member in reports and views.
Was this article helpful?

