How to Add a New Approval Role?
- 2 Minutes to read
- Print
- DarkLight
- PDF
How to Add a New Approval Role?
- 2 Minutes to read
- Print
- DarkLight
- PDF
Article summary
Did you find this summary helpful?
Thank you for your feedback
To add a new approval role, follow the steps below:
Navigate to Maintenance > Administration > User & Role Management > Approval Role.
Click Add.
Note:
Users cannot add a new approval role if the Approval Role Management checkbox is not selected on the Navigation Access page. However, users can still view the Approval Role list if the User Management checkbox is selected on the Navigation Access page.
.png)
Enter a Code and Name (optional) for the approval role.
Select the required Approval Actions for the new approval role from the drop-down to access entity actions.
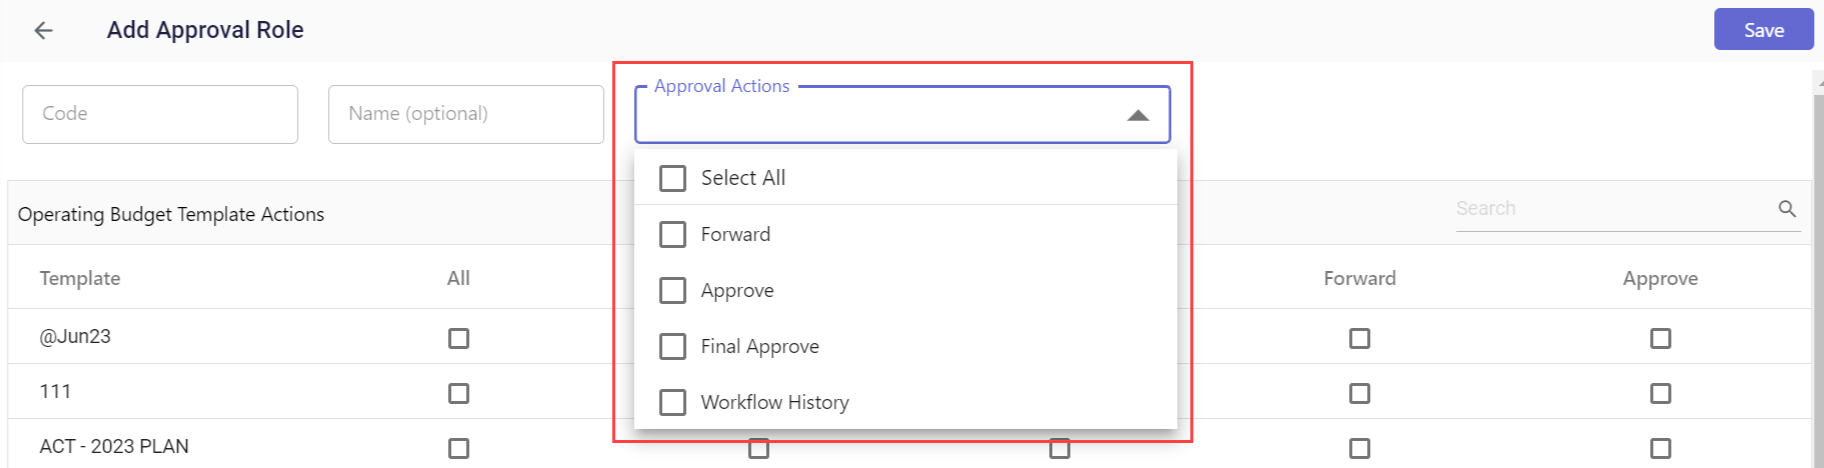
The list of approval actions is explained below:Forward: This option allows you to forward the budget entities that contain budgets for approval. You can forward budgets when the current status of the budget entity is In Progress. Forwarded budgets are locked to ensure that they are not editable.
Approve: This option allows you to approve forwarded budgets.
Final Approve: This option allows you to flag all budgets with a Final Approval status. Final-approved budgets are locked and cannot be edited by users or administrators.
Workflow History:This option allows you to view the complete workflow history of a budget which includes the action, action date, user name, and comment.
Note:
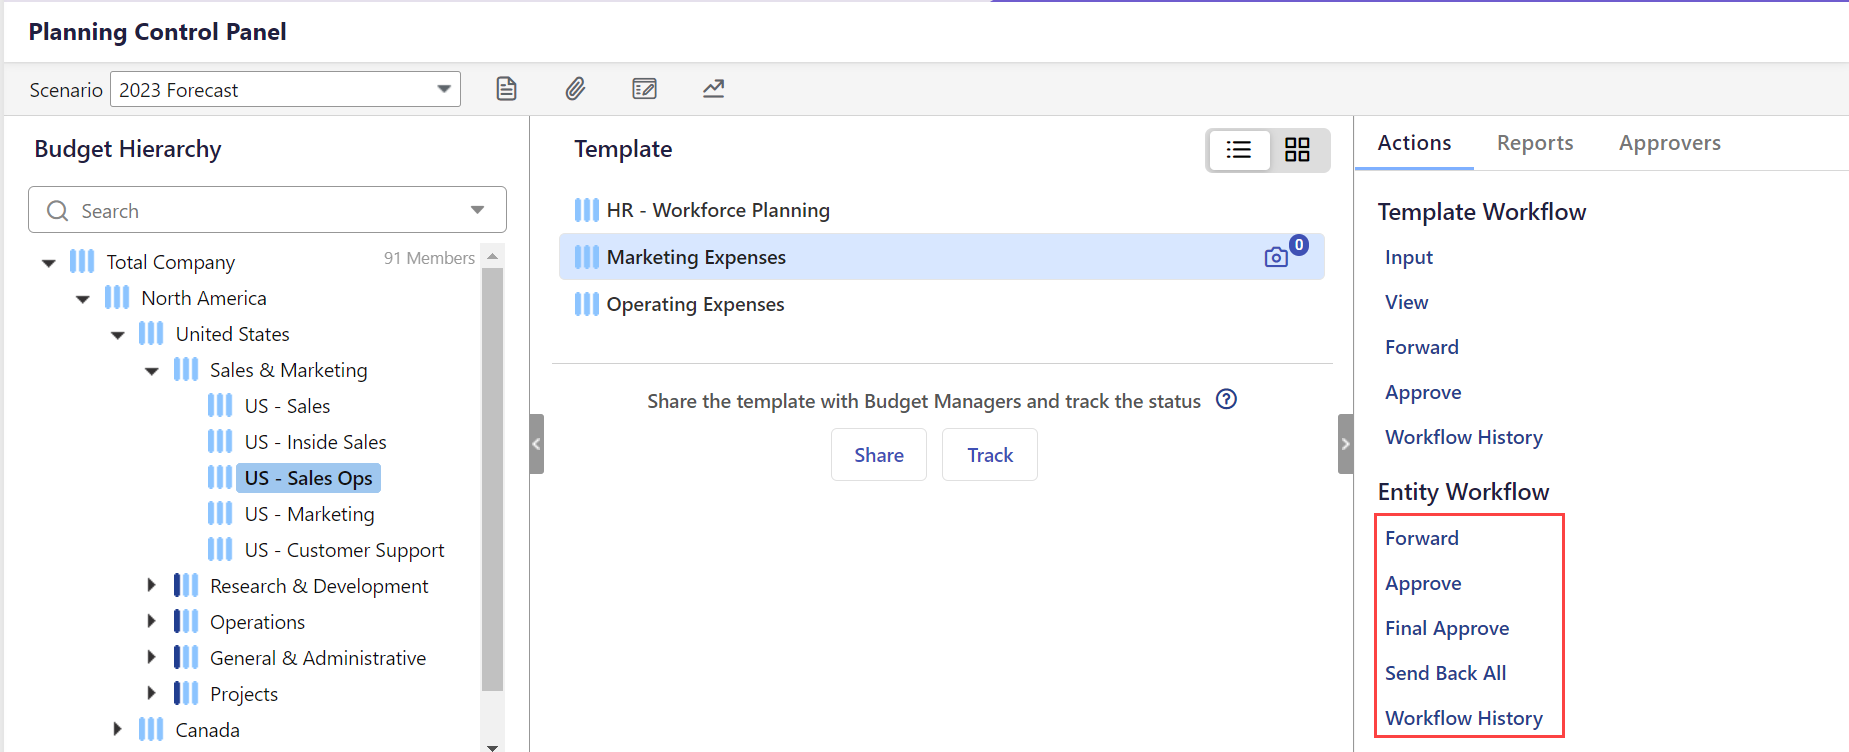
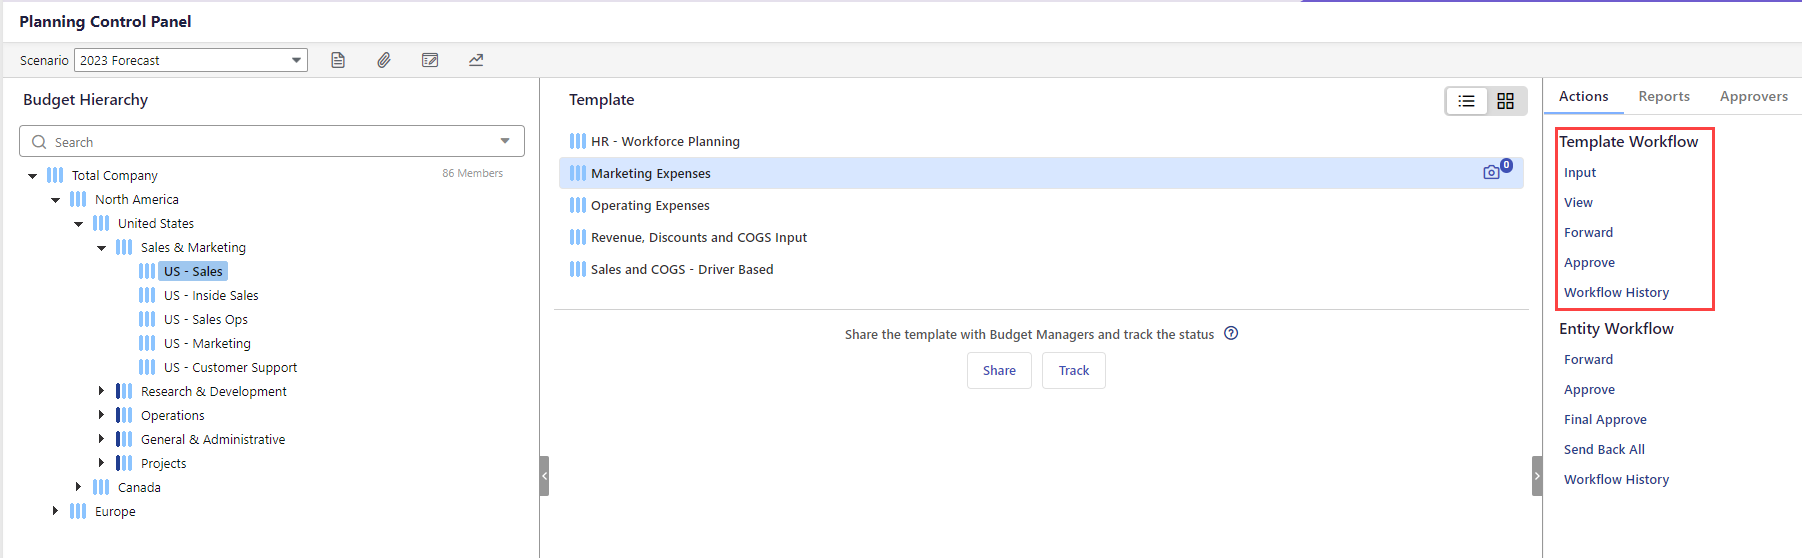
The above options appear on the planning control panel only when you select these for an approval role and assign that approval role to a user. These options appear on the right side of the planning control panel on selecting either roll-up or leaf-level entity.
Select the required template actions from the Operating Budget Template Actionssection for all the required templates for the approval role.
Note:
The availability of the template actions depends on whether the Workflow Setup is enabled or disabled in your application.
If the Workflow setup is enabled, you can see All, Input, View, Forward, and Approve.
.png)
If the workflow setup is not enabled, you can see All, Input, View, and Mark Complete.
.png)
The list of budget template actions is explained below:
All—Allow the approval role to perform all template actions.
Input—Allow the approval role to open budget templates in Input mode and to enter data.
View—Allow the approval role to open budget templates in Read Only mode.
Forward— To allow the approval role to access the Forward action in the Planning Control Panel and forward the budget entities comprising budgets for approval. You can forward budgets when the current status of the budget entity is In Progress. Forwarded budgets are locked to ensure that they are not editable.
Approve— To allow the approval role to access the Approve action in the Planning Control Panel and approve forwarded budgets.
Mark Complete—Allow the approval role to mark templates Complete. Once a template is complete, it cannot be opened in Input mode until marked Not Complete.
Note:
The above actions can be performed only when you select the leaf-level entity under the roll-up on the Planning Control Plan page.
Note
When you add templates to a budget model, update security roles to provide the appropriate access privileges.
Select the required Initiative Approval Actions to allow budget users to perform workflow actions on Initiative budgets.

The list of initiative approval actions is explained below:
All—Allow the approval role to perform all initiative template actions.
Forward—Allow the approval role to forward selected initiatives.
Send Back—Allow the approval role to send back forwarded initiatives.
Approve—Allow the approval role to approve initiatives.
Reset—Allow the approval role to reset initiatives to a status of Work in Progress. All initiatives can be reset even if they are approved.
Click Save.
Was this article helpful?