How to Add a New User Group?
- 1 Minute to read
- Print
- DarkLight
- PDF
How to Add a New User Group?
- 1 Minute to read
- Print
- DarkLight
- PDF
Article summary
Did you find this summary helpful?
Thank you for your feedback
To add a new user group, follow the steps below:
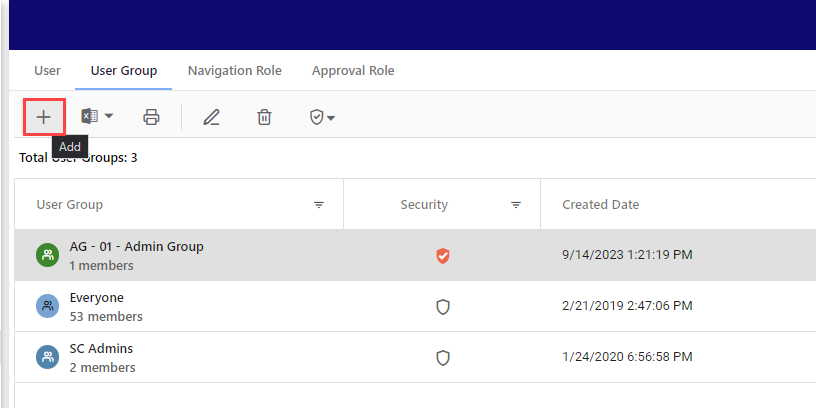
- Navigate to Maintenance > Administration > User & Role Management > User Group.
- Click Add.

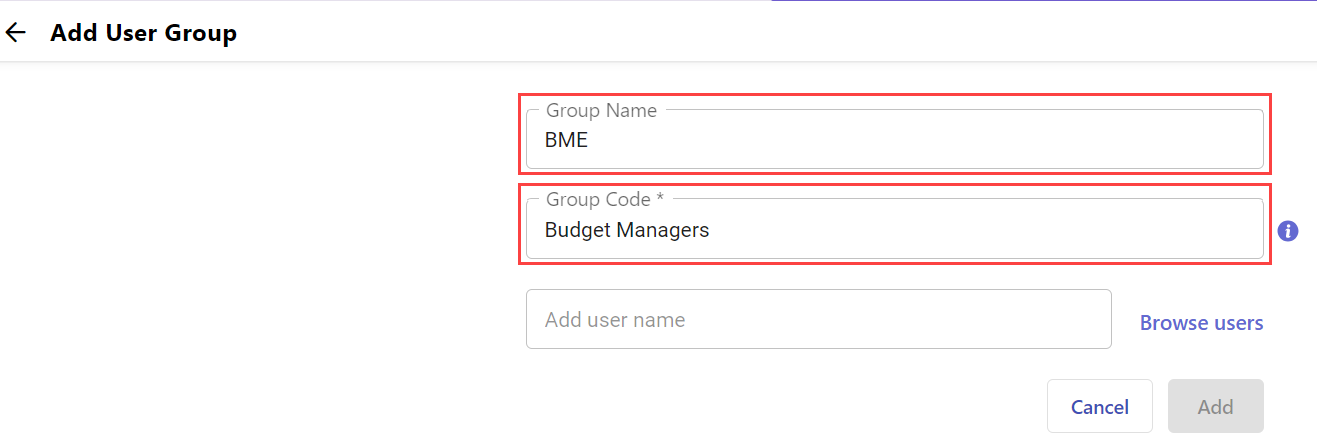
- Enter a descriptive name and code for the User Group.Note:The group code is unique and cannot be changed once you create the User Group.

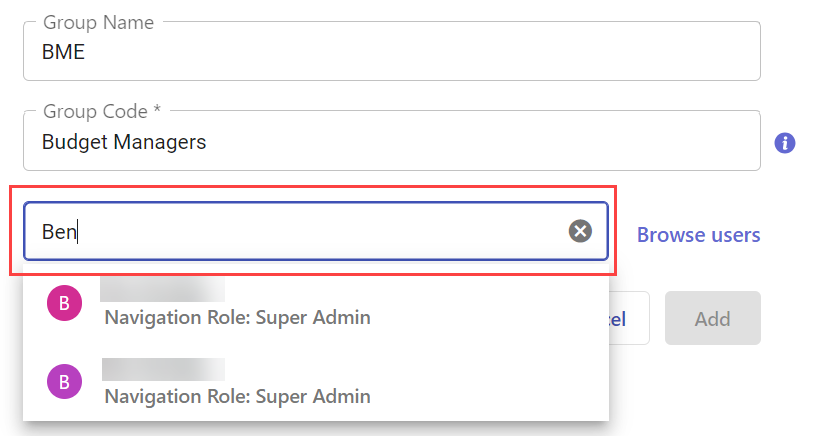
- Click the Add user name field to add users to this group. Start typing the user name or navigation role, and you can see the users appearing in the drop-down.

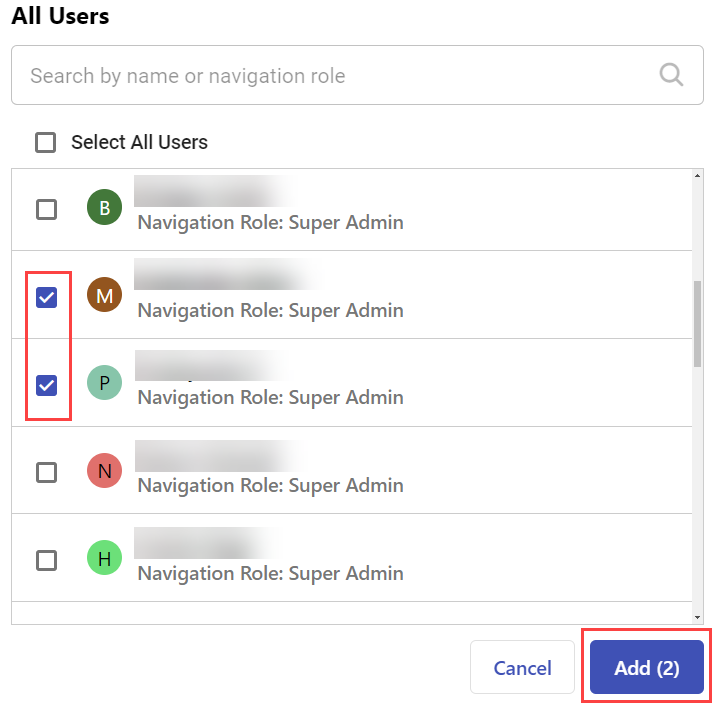
Alternatively, click Browse users to search for all the users. The All Users pop-up will have the list of all users within the application. Select the users you want to add to the user group by clicking the checkbox associated with the user name. Use the search field to search by name or navigation role to find the required user. Click Add once you complete the selection.
You will return to the Add User Group page where you can see the selected users for the group. - Click Add.
.png)
Now, you need to configure the security options for the user group.
Note:
Once you've created a user group, the access configurations are not automatically applied. By default, the status indicator will be no color, indicating that you need to actively configure the security options for the user group. Head over to the Security Options section article to learn more about Security Options and how you can configure them.
Was this article helpful?


.png)