- 3 Minutes to read
- Print
- DarkLight
- PDF
How to Create Global Template - Single Copy Template?
- 3 Minutes to read
- Print
- DarkLight
- PDF
Complete the following steps to add a Global Template - Single Copy type template.
The development of templates involves several steps, progressing through three phases:
Here you will choose the GTSC template type, functionality, and basic architecture. In this first phase of setting up a template, the basics of the template, such as the name of the template and the type of template to be built, are selected.
- Navigate to Maintenance > Templates > Template Setup.
- Select the Default scenario. All templates must created on the Default scenario and then mapped to your scenarios of choice.
- Click the Add button.
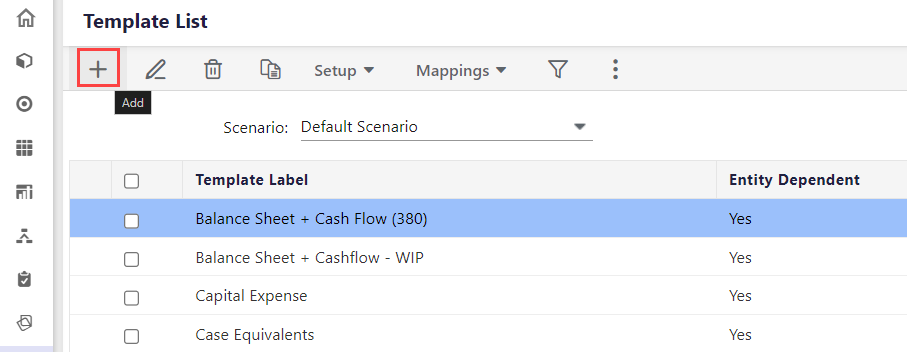
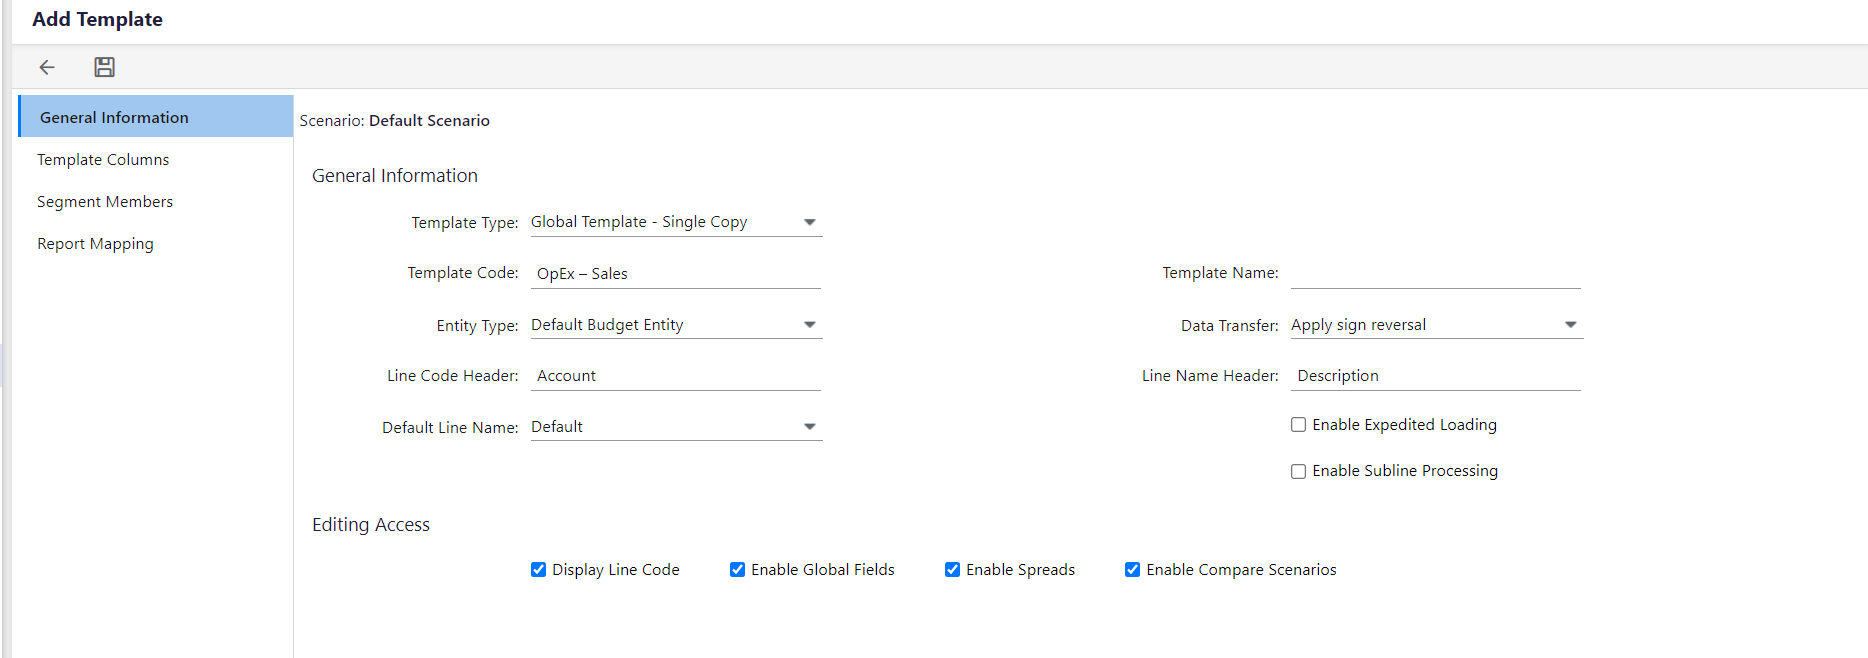
- Now fill in the following tabs on the Add Template page.
- Under General Information, make the following selections:
- Template Type: Select Global Template – Single Copy
- Template Code: Op Ex – Sales
- Template Name: Optional
- Entity Type: Default Budget Entity
- Data Transfer: Apply sign reversal
- Line Code Header: Account (optional)
- Line Name Header: Description (optional)
- Enable Expedited Loading and Subline Processing: Leave Unchecked
- Editing Access: Check all optionsNote:
Do not save the template parameter setup until all sections have been completed. Some information cannot be changed after saving.
- Template Columns: Setup is not necessary for this template
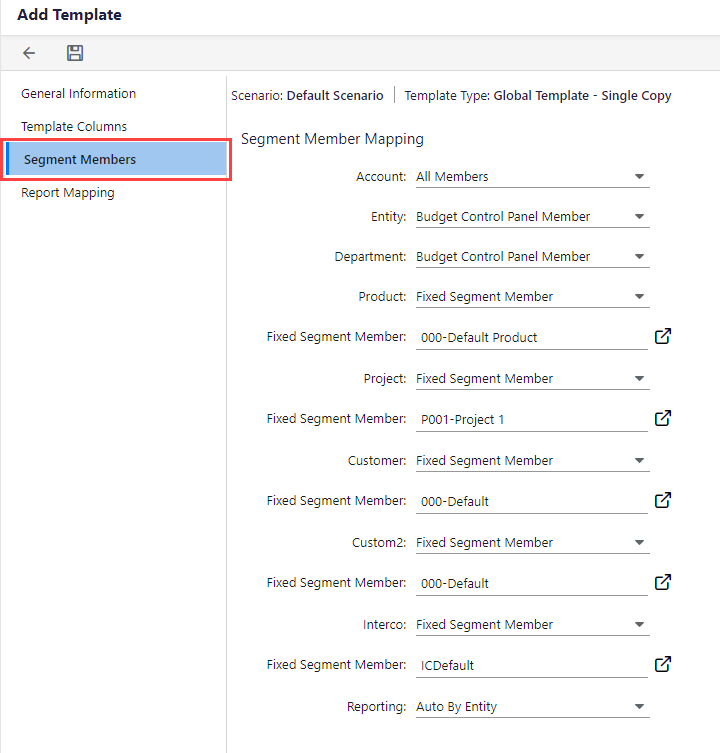
- Under Segment Members Mapping, make the following selections:
- Account: All Members
- Entity: Budget Control Panel Member
- Department: Budget Control Panel Member
- Product: Fixed Segment Member > 00-Default
- Project: Fixed Segment Member > P001 - Project1
- Customer: Fixed Segment Member > 000-Default
- Custom2: Fixed Segment Member > 000-Default
- Intercompany: Fixed Segment Member > ICDefault
- Reporting: Auto by EntityNote:“Budget Control Panel Member” mapping populates from the Budget Entity.
- Report Mapping > Setup is not necessary for this template.
- Click Save.
Click here for more information on all the required fields and their functionality that you see on the Add Template page.
Here you will design the OpEx - Sales template rows, incorporating formatting and building calculations to design an effective template. Once the template parameters are defined and set, the template is ready to be designed. Designing the template to fit the users' needs is important. Functions such as headers, calculations and row lines that can be used to enter data and to reference data from existing sources are available in template design. Formatting, such as shading, borders, bolding, etc., is also incorporated at this level.
- Select Maintenance > Templates > Template Setup
- Select the OpEx – Sales template.
- Go to Setup > Template Setup from the drop-down.
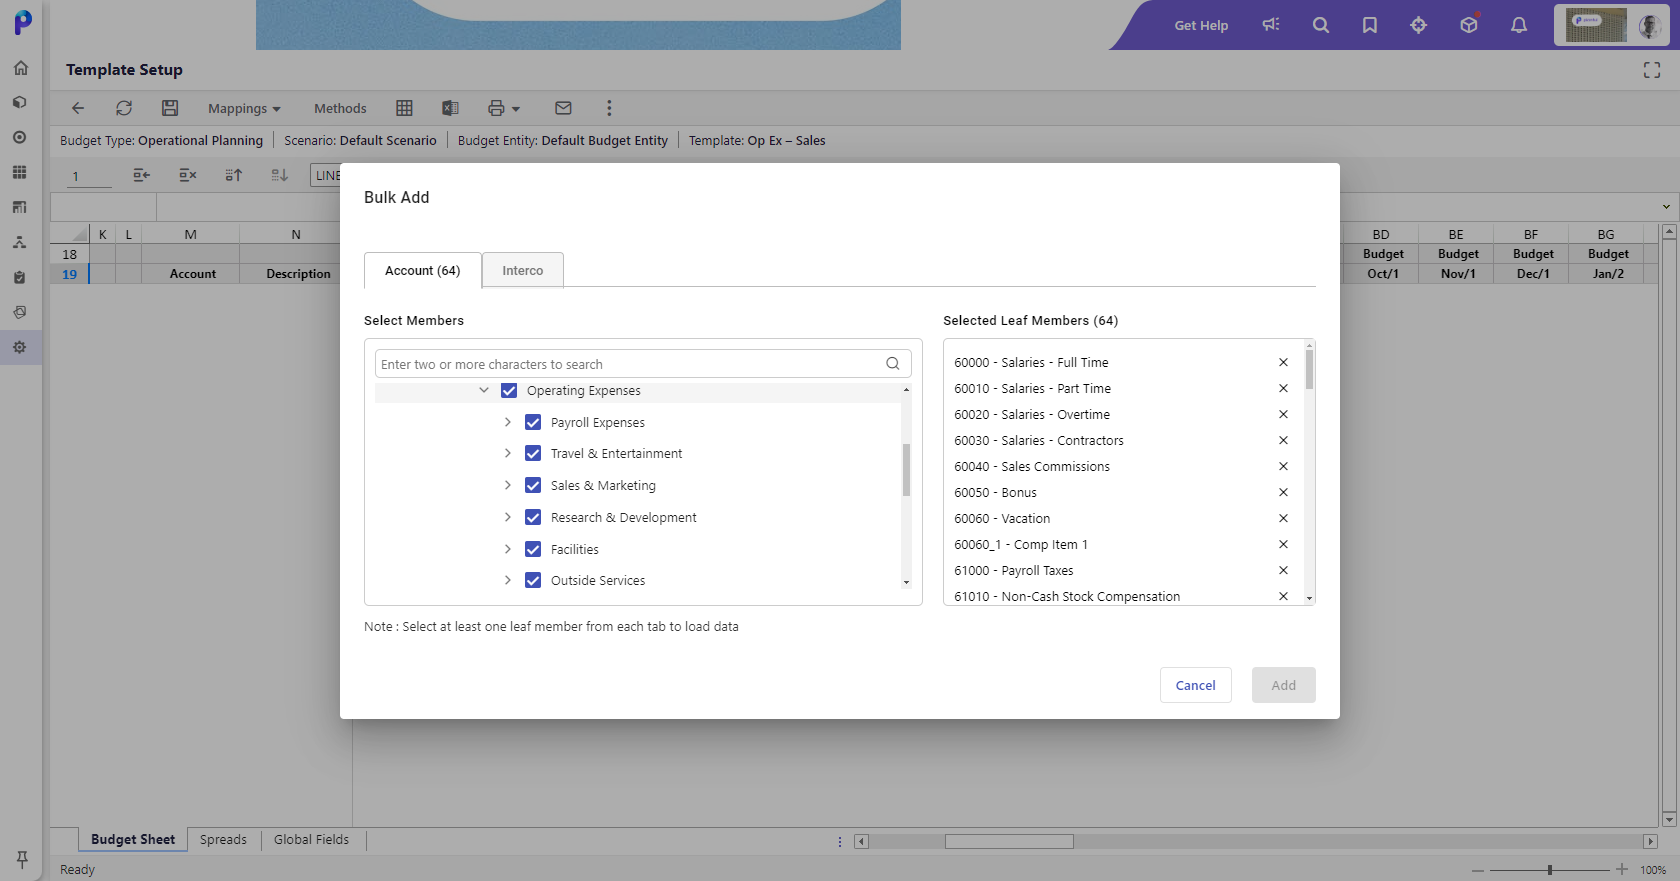
- Select > Mappings > Bulk Add.
- In the Bulk Add pop-up, drill down and make the selections. For example, Net Income> Expenses
- Click Add.
- Complete the design by adding rows and calculations:
- Select > Add Line Item (Row types can be defined by selecting the drop-down for further line type options)
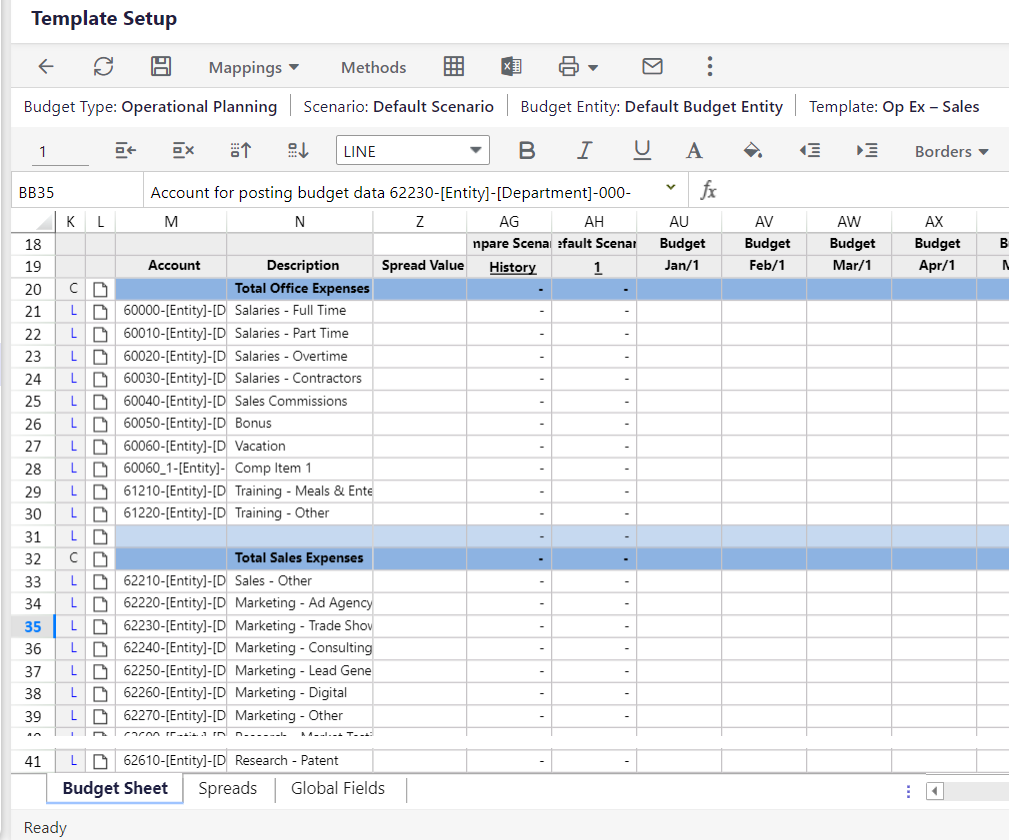
- Add > Calc row for Total Office Expenses
- Add > Calc row for Total Sales Expenses
- Add > Header row after Utilities
- Enter > Calculation formula in cell AU20 enter =SUM AU21 – AU30, copy the formula across all Month/year columns for row 30.
- Enter > Calculation formula in cell AU30 enter =Sum AU33 – AU40, copy the formula across all columns for row 40.
- Format > Bold and update the Background Color for the calculation rows and the Background Color for the Header row as shown in the image below.
- Click Save.
Click here for more information on Template Setup.
Template mapping is required to make a template accessible in the Planning Control Panel. Specifically, templates must be related or mapped, to budget entities, approval roles, and scenarios to be accessed.
- Select Maintenance > Templates > Template Setup
- Select the OpEx – Sales Template.
- Select Setup > Template Setup.
- Select > Mappings > Entity Mapping
- In Entity Mapping, make the following selections:
- Select > Canada Sales
- Select > Mexico Sales
Use the arrow in the center of the panels to map the selected budget entities.
- Click Save and close.
- Select Mappings > Approval Role.
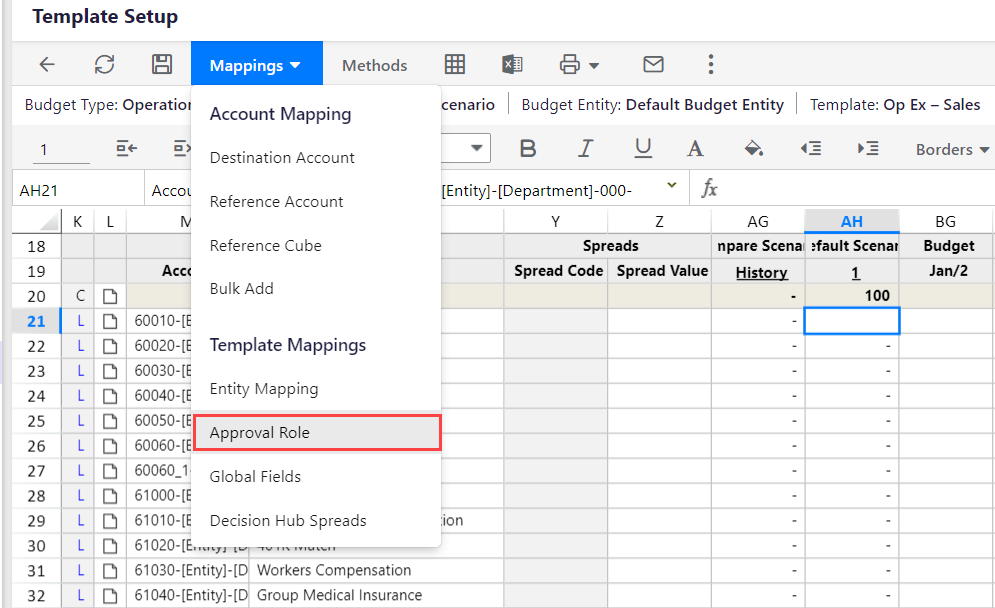
- In Approval Role Mapping, make the following selections:
- Budget Approver: Select All, Input, View, Mark Complete
- Budget Preparer: Select Input, View
- Reporting View Only: Select View
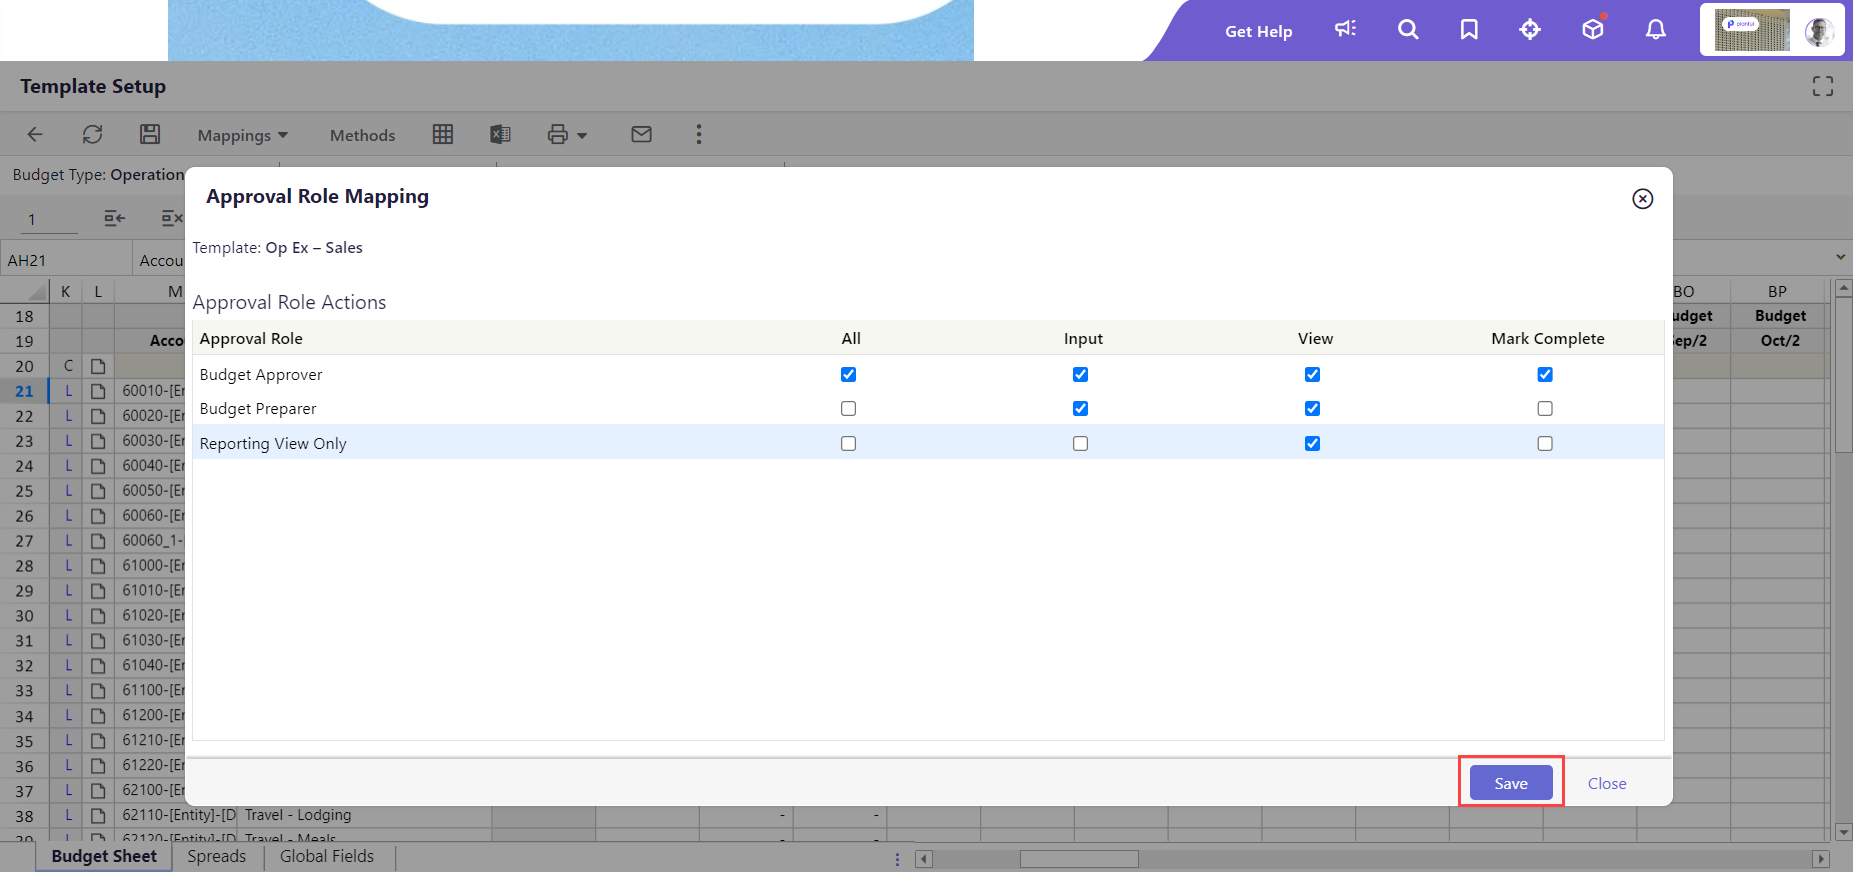
- Click Save.
After mapping the template to an entity and scenario, you need to provide access to the user so they can start inputting the values into this template. Click here to learn more on how to provide user access to the template.

