- 3 Minutes to read
- Print
- DarkLight
- PDF
How to Lock a Model to Prevent Modification or Clearing
- 3 Minutes to read
- Print
- DarkLight
- PDF
Lock a model to prevent modification or clearing of data. Analytic, Master and External Source models can be locked. Models must be in a Generated state to be locked. Not Generated models cannot be locked.
To Lock a Model from SpotlightXL:
- Access the Model task and the Setup subtask.
- Select a Generated model.
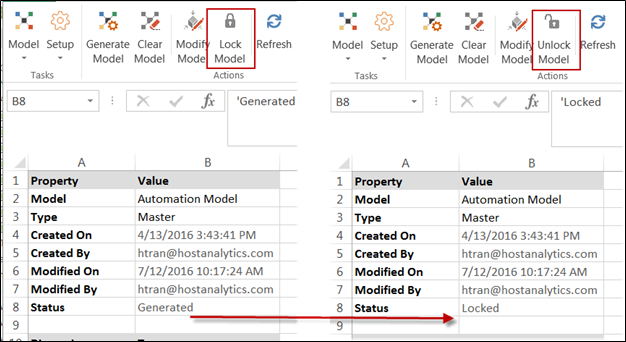
- Click the Lock Model action (which is only enabled when a Generated model is selected). Notice the Status of the model changes from Generated to Locked as shown below. Also, notice that the Lock Model icon changes to Unlock Model.
While locking a model ensures data integrity and prevents clearing the data, it also means that all data may not be saved/updated (see Saving Report Data to Locked Models and Saving View Data to Locked Models) from Views, Reports, Data Load, API Library, Calculation, and so on.
See: Saving Report Data to Locked Models and Saving View Data to Locked Models
To Lock a Model from Spotlight:
Lock and Unlock a model directly from Model Manager (available in Spotlight - web interface).
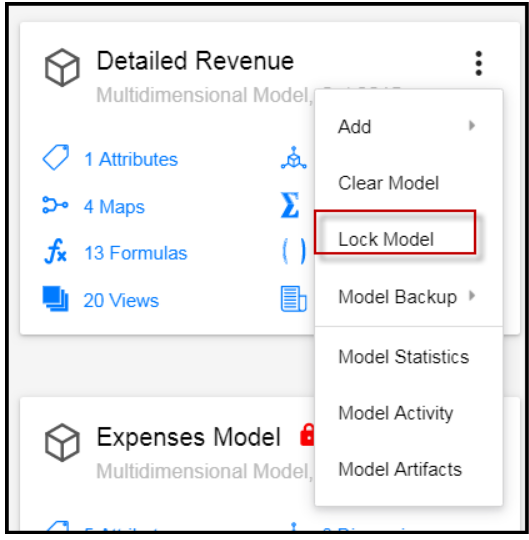
- Open Model Manager
- Click the three dots in the upper right-hand corner for a specific model.
- Select Lock Model.
Saving Report Data to Locked Models
- If a report is associated with a locked model and the Enable Save property is set to All Models as shown below, users cannot save data from that report.
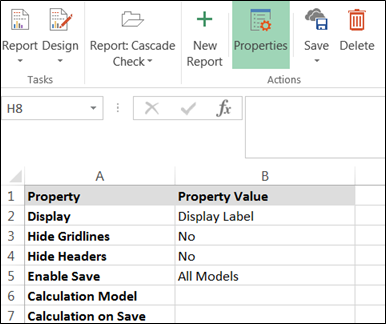
- If a report is associated with multiple models, one of the models is locked, and Enable Save is set to All Models, users cannot save data from that report.
- If a report is associated with a model that is locked, Enable Save is set to Calculation Model and Calculation on Save is based on the model that is locked as shown below, users cannot save data from that report.
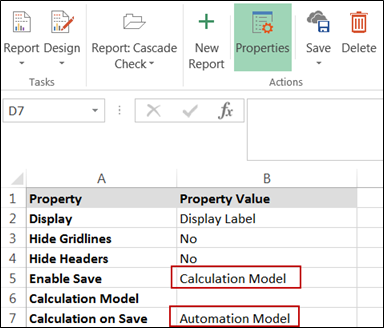
- If a report is associated with multiple models (some that are) locked, Enable Save is set to Calculation Model, and Calculation on Save is not based on the model that is locked, users can save data from that report to the models that are not locked.
Saving View Data to Locked Models
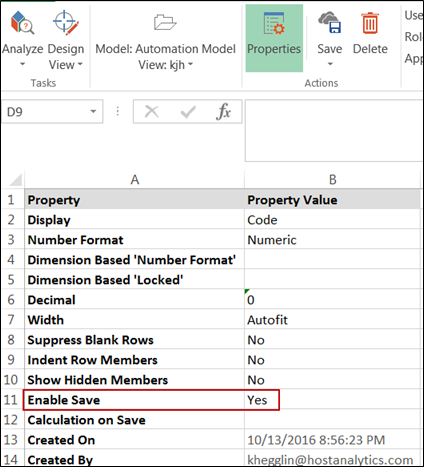
- If Enable Save is set to Yes in a View on a model that is locked as shown below, users cannot save data from that view.
Functionality that can be used on Locked Models
- Append
- Set Display Label
- Set Dimension Based Properties
- Attribute
- Set Attribute Mapping
To Unlock a Model:
- Access the Model task and the Setup subtask.
- Select a Locked model.
- Click the Unlock Model action.
Locking and Unlocking Models Using a Calculation
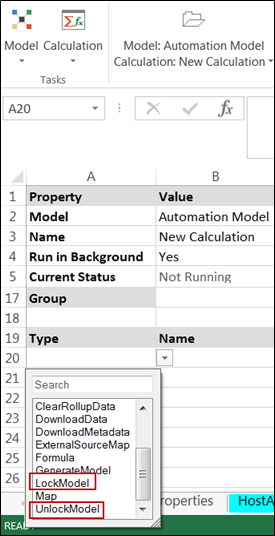
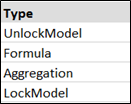
Another way to lock or unlock a model is to select the LockModel or UnlockModel type as a line item in a Calculation. Performing the lock or unlock in a calculation saves time as it automates the process. For example, you might want to unlock a locked model, generate a formula, run aggregation, and then lock the model once again. If this is the case, your Calculation might look like the following:
- Access the Model task and the Calculation subtask.
- Select the model you want to lock or unlock.
- In the Type list box select the LockModel or UnlockModel type as shown below.
