Planning Templates
- 6 Minutes to read
- Print
- DarkLight
- PDF
Planning Templates
- 6 Minutes to read
- Print
- DarkLight
- PDF
Article summary
Did you find this summary helpful?
Thank you for your feedback
The Templates section allows you to define, customize, and manage the crucial components for effective planning and forecasting. These options enable you to tailor the planning templates to meet organizational needs.
Below are the descriptions of each option available in the Planning Templates section:
- Global Fields: Add, edit, or delete Global Fields, which are used in planning and forecast calculations in templates. Global values are pulled automatically by system-defined formulas within the planning templates based on the associated planning entity and scenarios.
- Line Item Category: Add, edit, and delete line item categories, which are used for line item template types. Line item categories do not have a pre-defined format and allow you to specify accounts to include in your plan.
- Attributes: Define, edit, and delete attributes you plan to map to initiatives for Initiative Planning purposes. Attribute columns store information related to an account or row and these values can be used in template calculations.
- Template Setup: Use this page to set up the template structure such as lines, account mapping, formulas, and formatting. You may view and edit the framework of the template. Different fields are opened based on the type of template selected.
Template Example
Explore the following use cases of different templates and an overview of them.
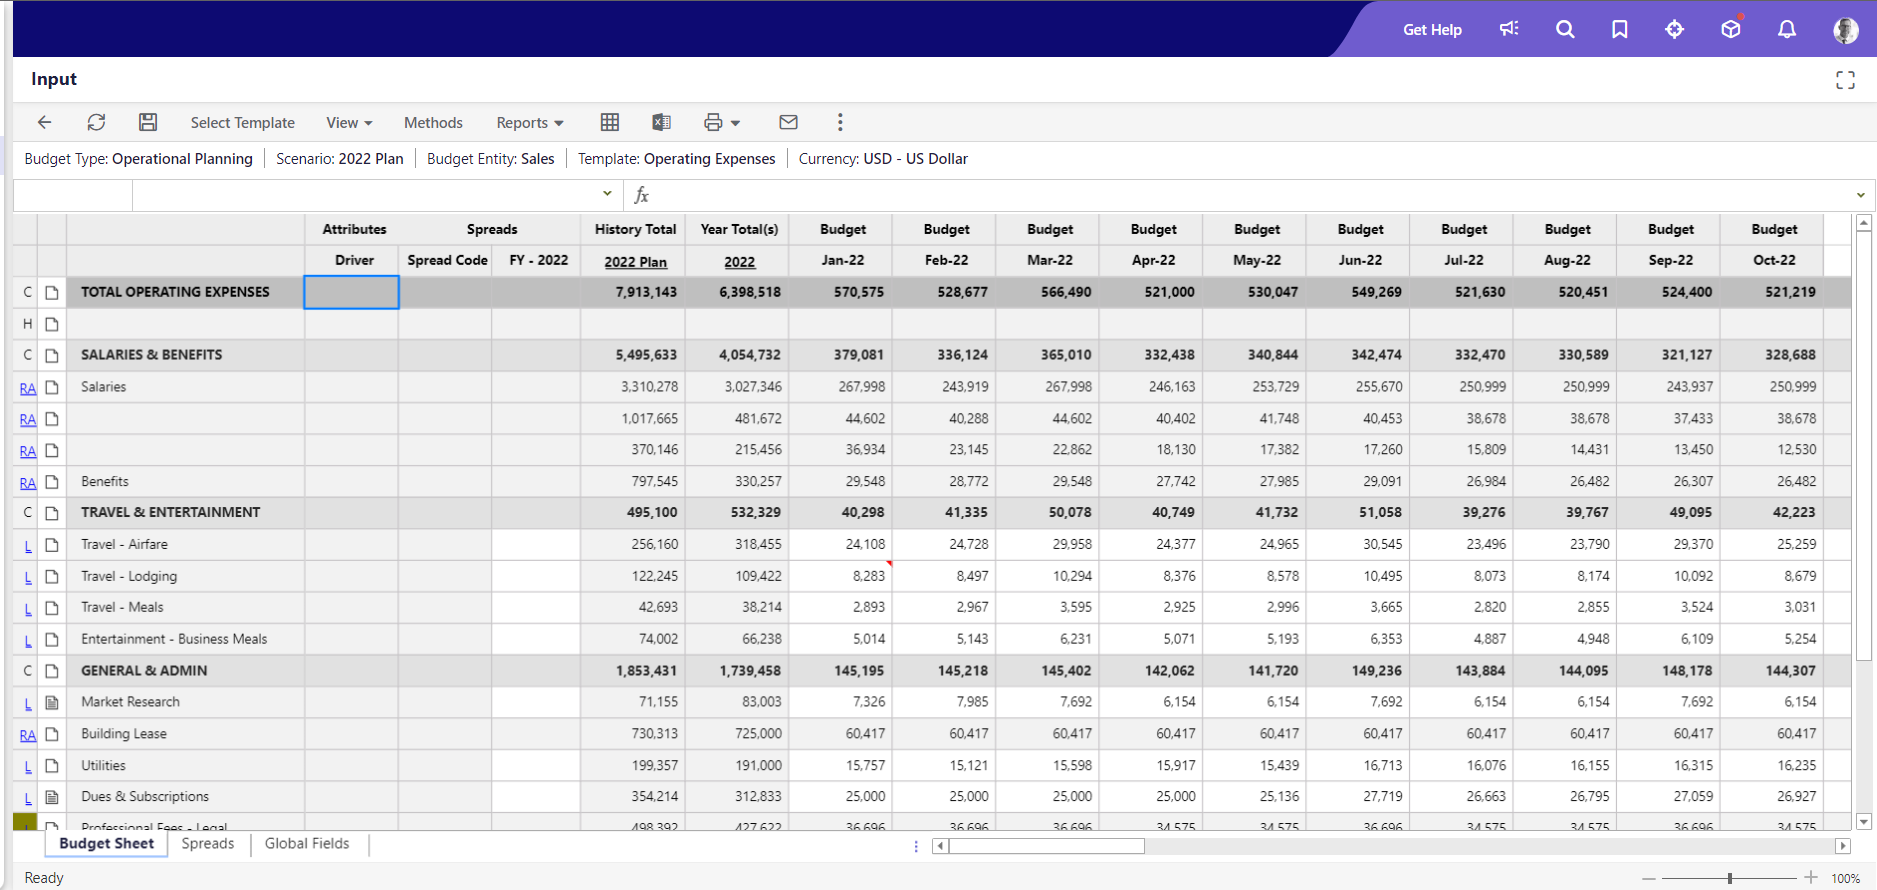
Use Case 1: Operating Expenses Template
The template below is the Operating Expenses template which is used to include the expenditure costs that a company incurs for running its day-to-day operations.
These include any overhead costs that support but don't directly relate to the production of your service or product.
Some highlights regarding the design of this template are provided below.
The following Excel calculations are used:
- In line 22, the total expense is calculated per month. So for column AY, the calculation is SUM(AY28:AY31)
- In line 27, the total expense for Travel & Entertainment for the year 2022 is calculated. So, for column AX, the calculation is SUM(AY27:BJ27)
The RA lines refer to the accounts that list the salaries and benefits of that particular organization.
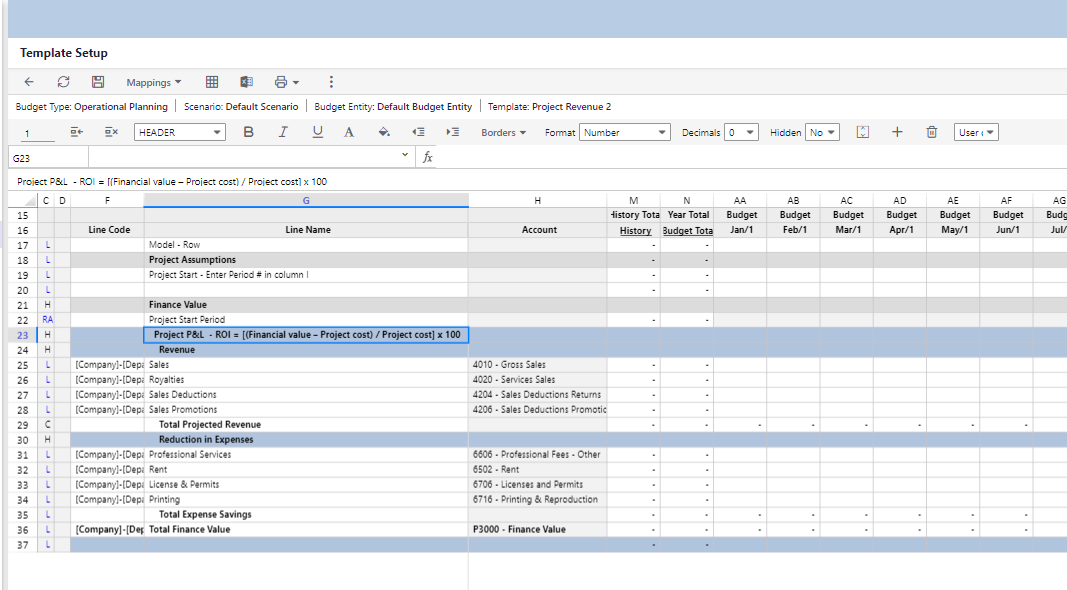
Use Case 2: Project Revenue Block Template
The template below is set up by a product line so that budget end-users can input data on their project revenue that includes the total projected revenue and expense savings for different accounts which represent the repeating block of lines.
The calculated line (represented with a C) returns each product in the product line when selected and loaded to the template in the Planning Control Panel.
There are several Excel formulas to calculate the budget yearly total per account.
When the template was added, Enable Spreads was selected.
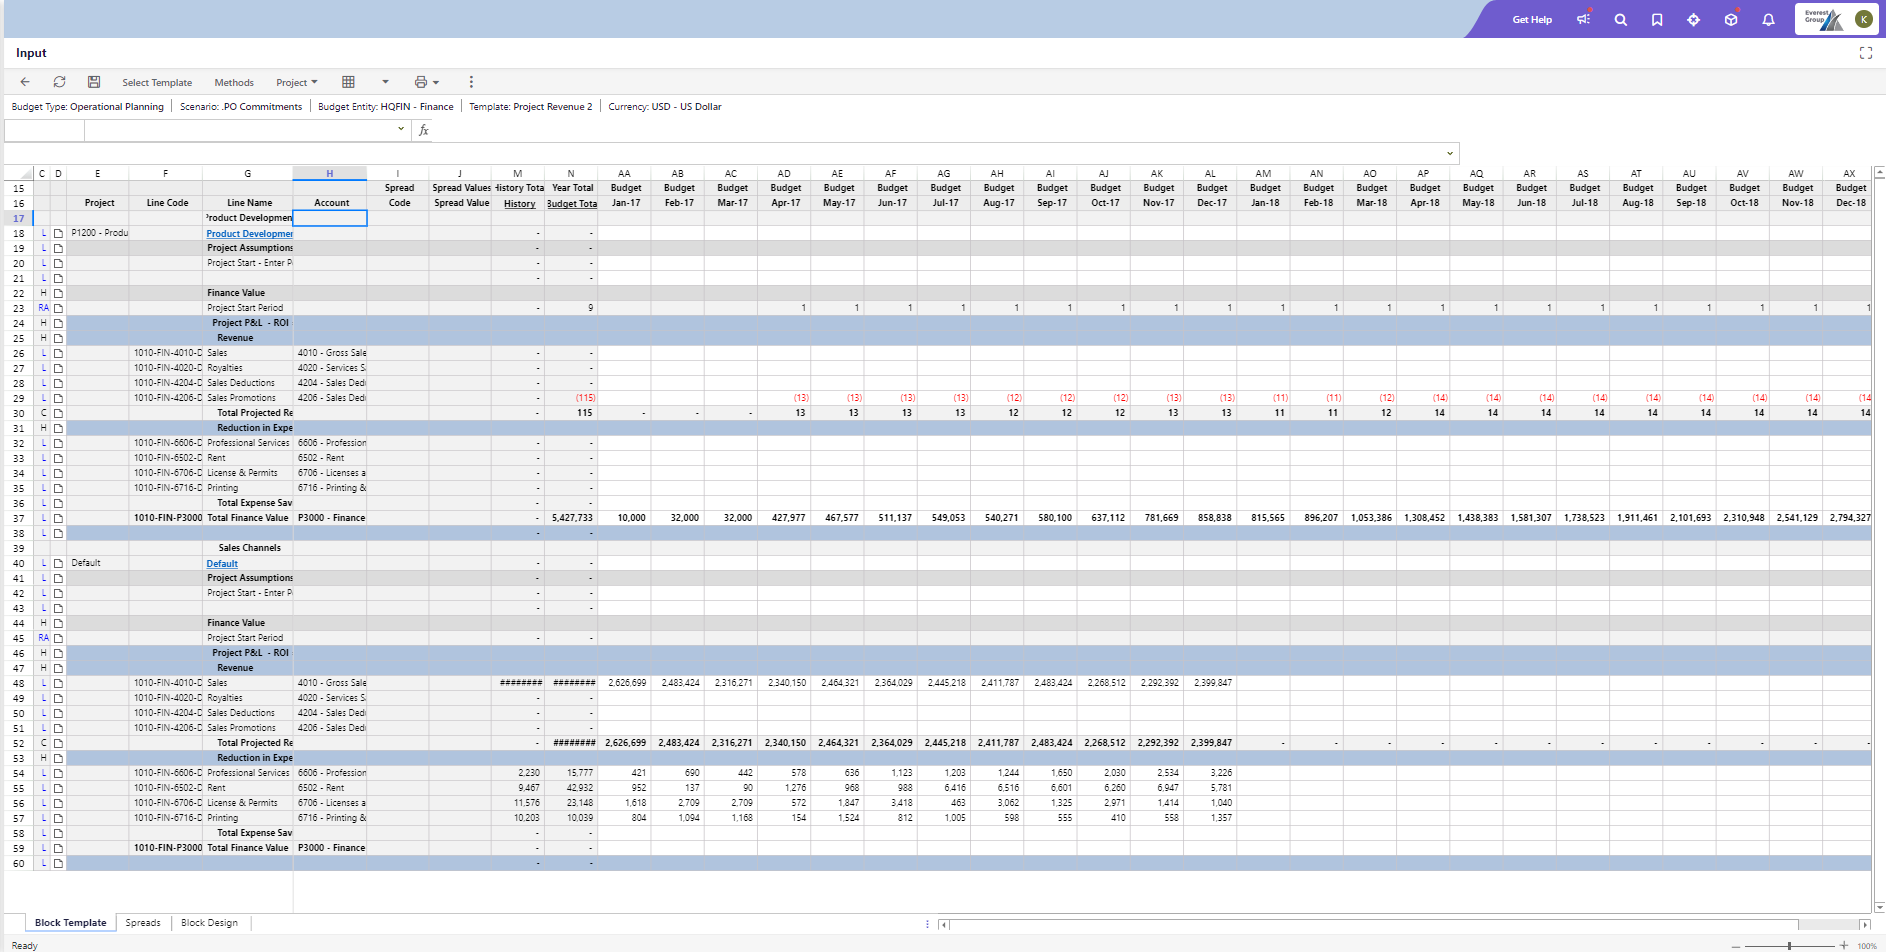
When this template is accessed via the Planning Control Panel, the repeating block of lines per product is evident.
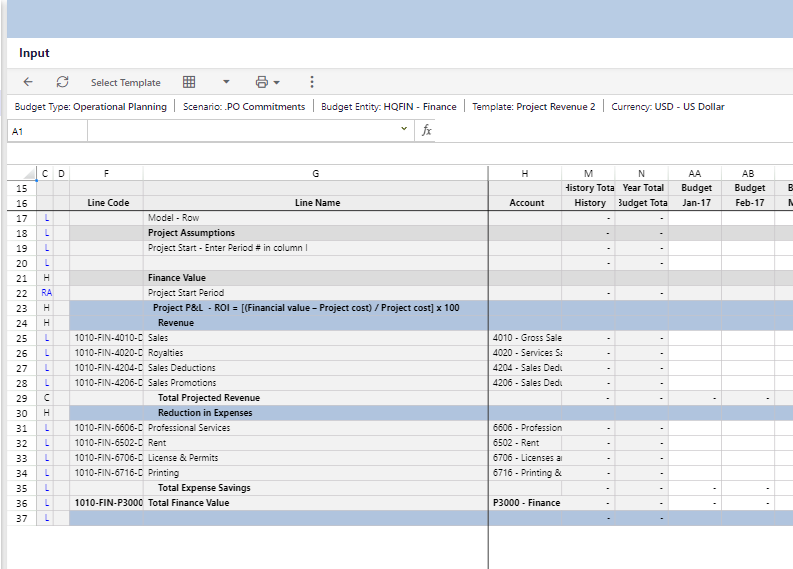
When you click Block Design, the block designed on the Template Setup page is displayed as shown below.
Use Case 3: Allocation Template
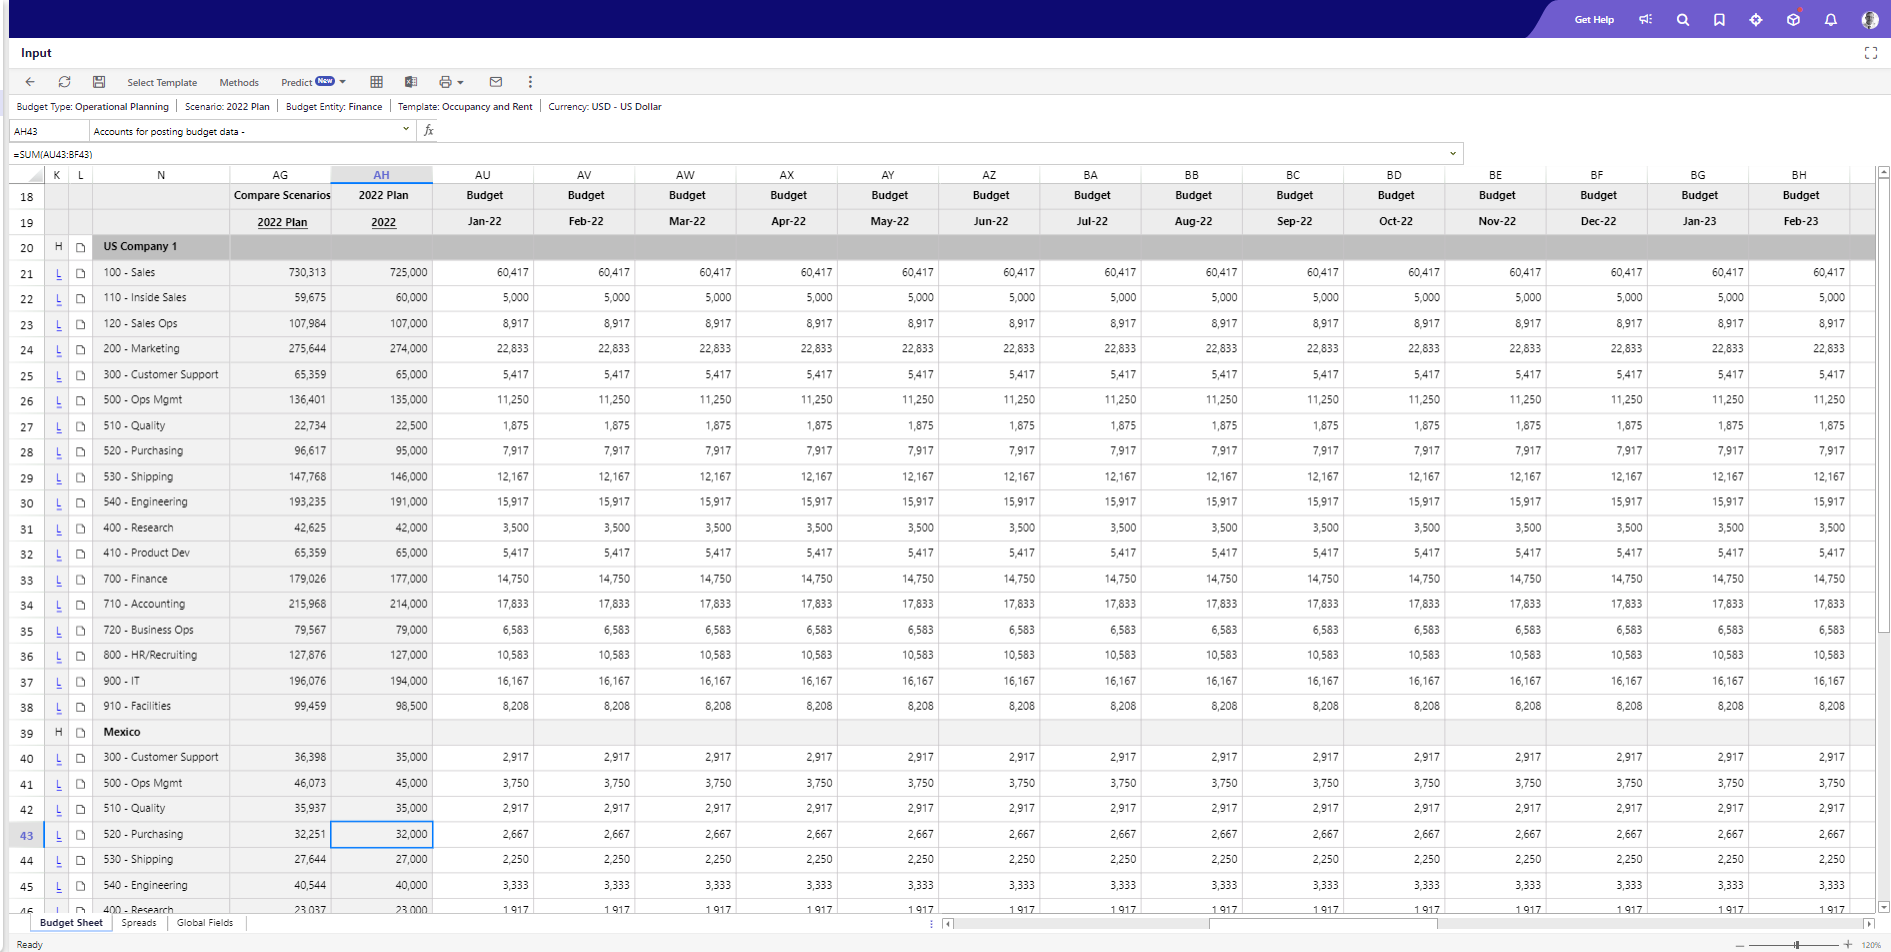
The template below is the Allocation template which is used by the end users to input the occupancy and rent expenses of their company across all its locations.
There are 2 compare scenarios, a target scenario for the current year and the actual data for the prior year (2022), so the expenses can be compared to the current year.
Dynamic Commentary in Planning Templates
The Dynamic commentary feature enables you to post and view comments in planning templates and reports. We have enabled this feature in the GTSC, GTEC, Line Item, and Allocation template types.
You can perform the following with this feature:
- Add cell-level comments
- Edit, Delete, Highlight, Reply, or Resolve comments
- Add text, #tags, and hyperlinks in the comments
- Assign tasks and track their status from Task Manager
- Mark Task as Complete in the Comment(s) pane
- View all comments in the application and perform actions such as Delete and Highlight
- All posted comments and associated actions can also be seen in the Comments Manager
Comments are currently available only for open periods for the below line types:
- RC
- L with posting (with or without sublines)
- L with posting and history accounts (with or without sublines)
- C with posting
- C with posting and history accounts
- RA with single account mapping
You can view an indicator whenever a comment is posted in the report. You can include the following in a comment:
- Add a user - Type + and select the required username to tag the user in a comment. When you type +, username suggestions are provided automatically for ease of selection. A notification is sent to the tagged user. You can turn off the notifications if required.
- Add # tags - Type # to find the most used tags in a comment.
- Add URLs in a comment.
Note:
A maximum of 1024 characters are allowed in a comment. Additionally, up to 30 comments can be posted in a thread for any data intersection and a maximum of 50000 comments are allowed in the application.
Business Value
This feature facilitates user collaboration over different tasks. In addition, the ability to access and review/update templates in a single place will save time and extra effort involved.
Note:
The Dynamic Comment feature is always enabled by default. However, if you are unable to post your comment, go to the more icon and click Comments On.
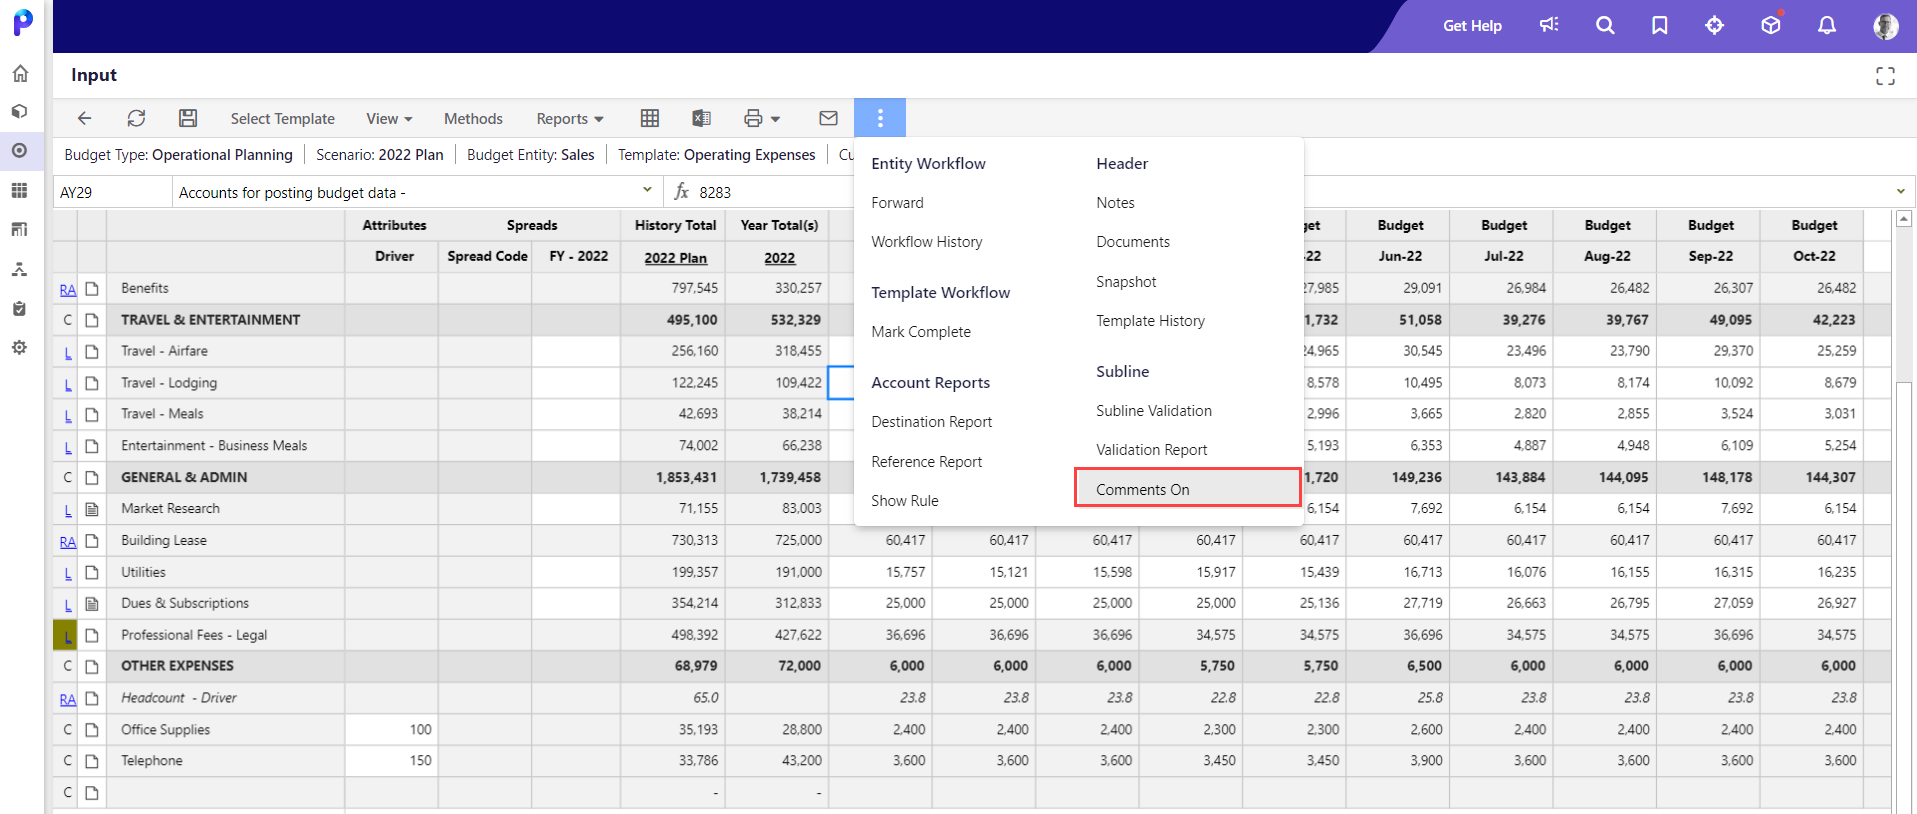
You will now be able to add your comments to the template.
You will now be able to add your comments to the template.
Follow the instructions below to learn how you can add a comment using this feature.
In Practice: To Post a Comment
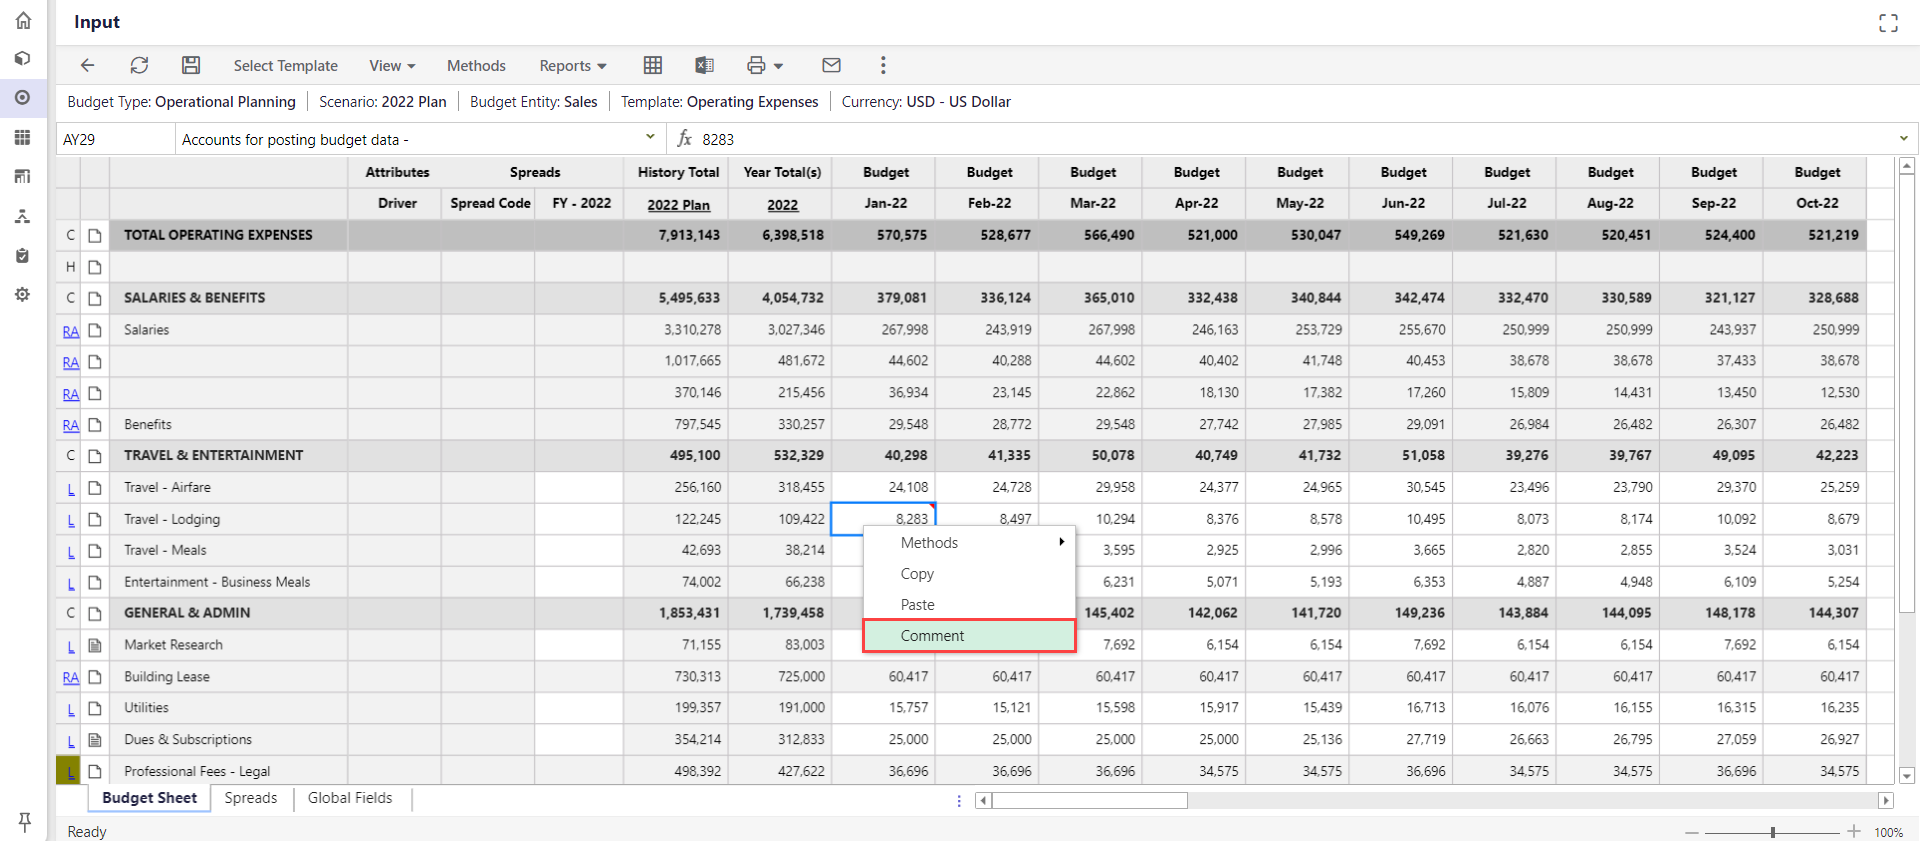
- Select the required cell and right-click on it. From the drop-down, select Comments, and the Comment(s) pane is displayed.
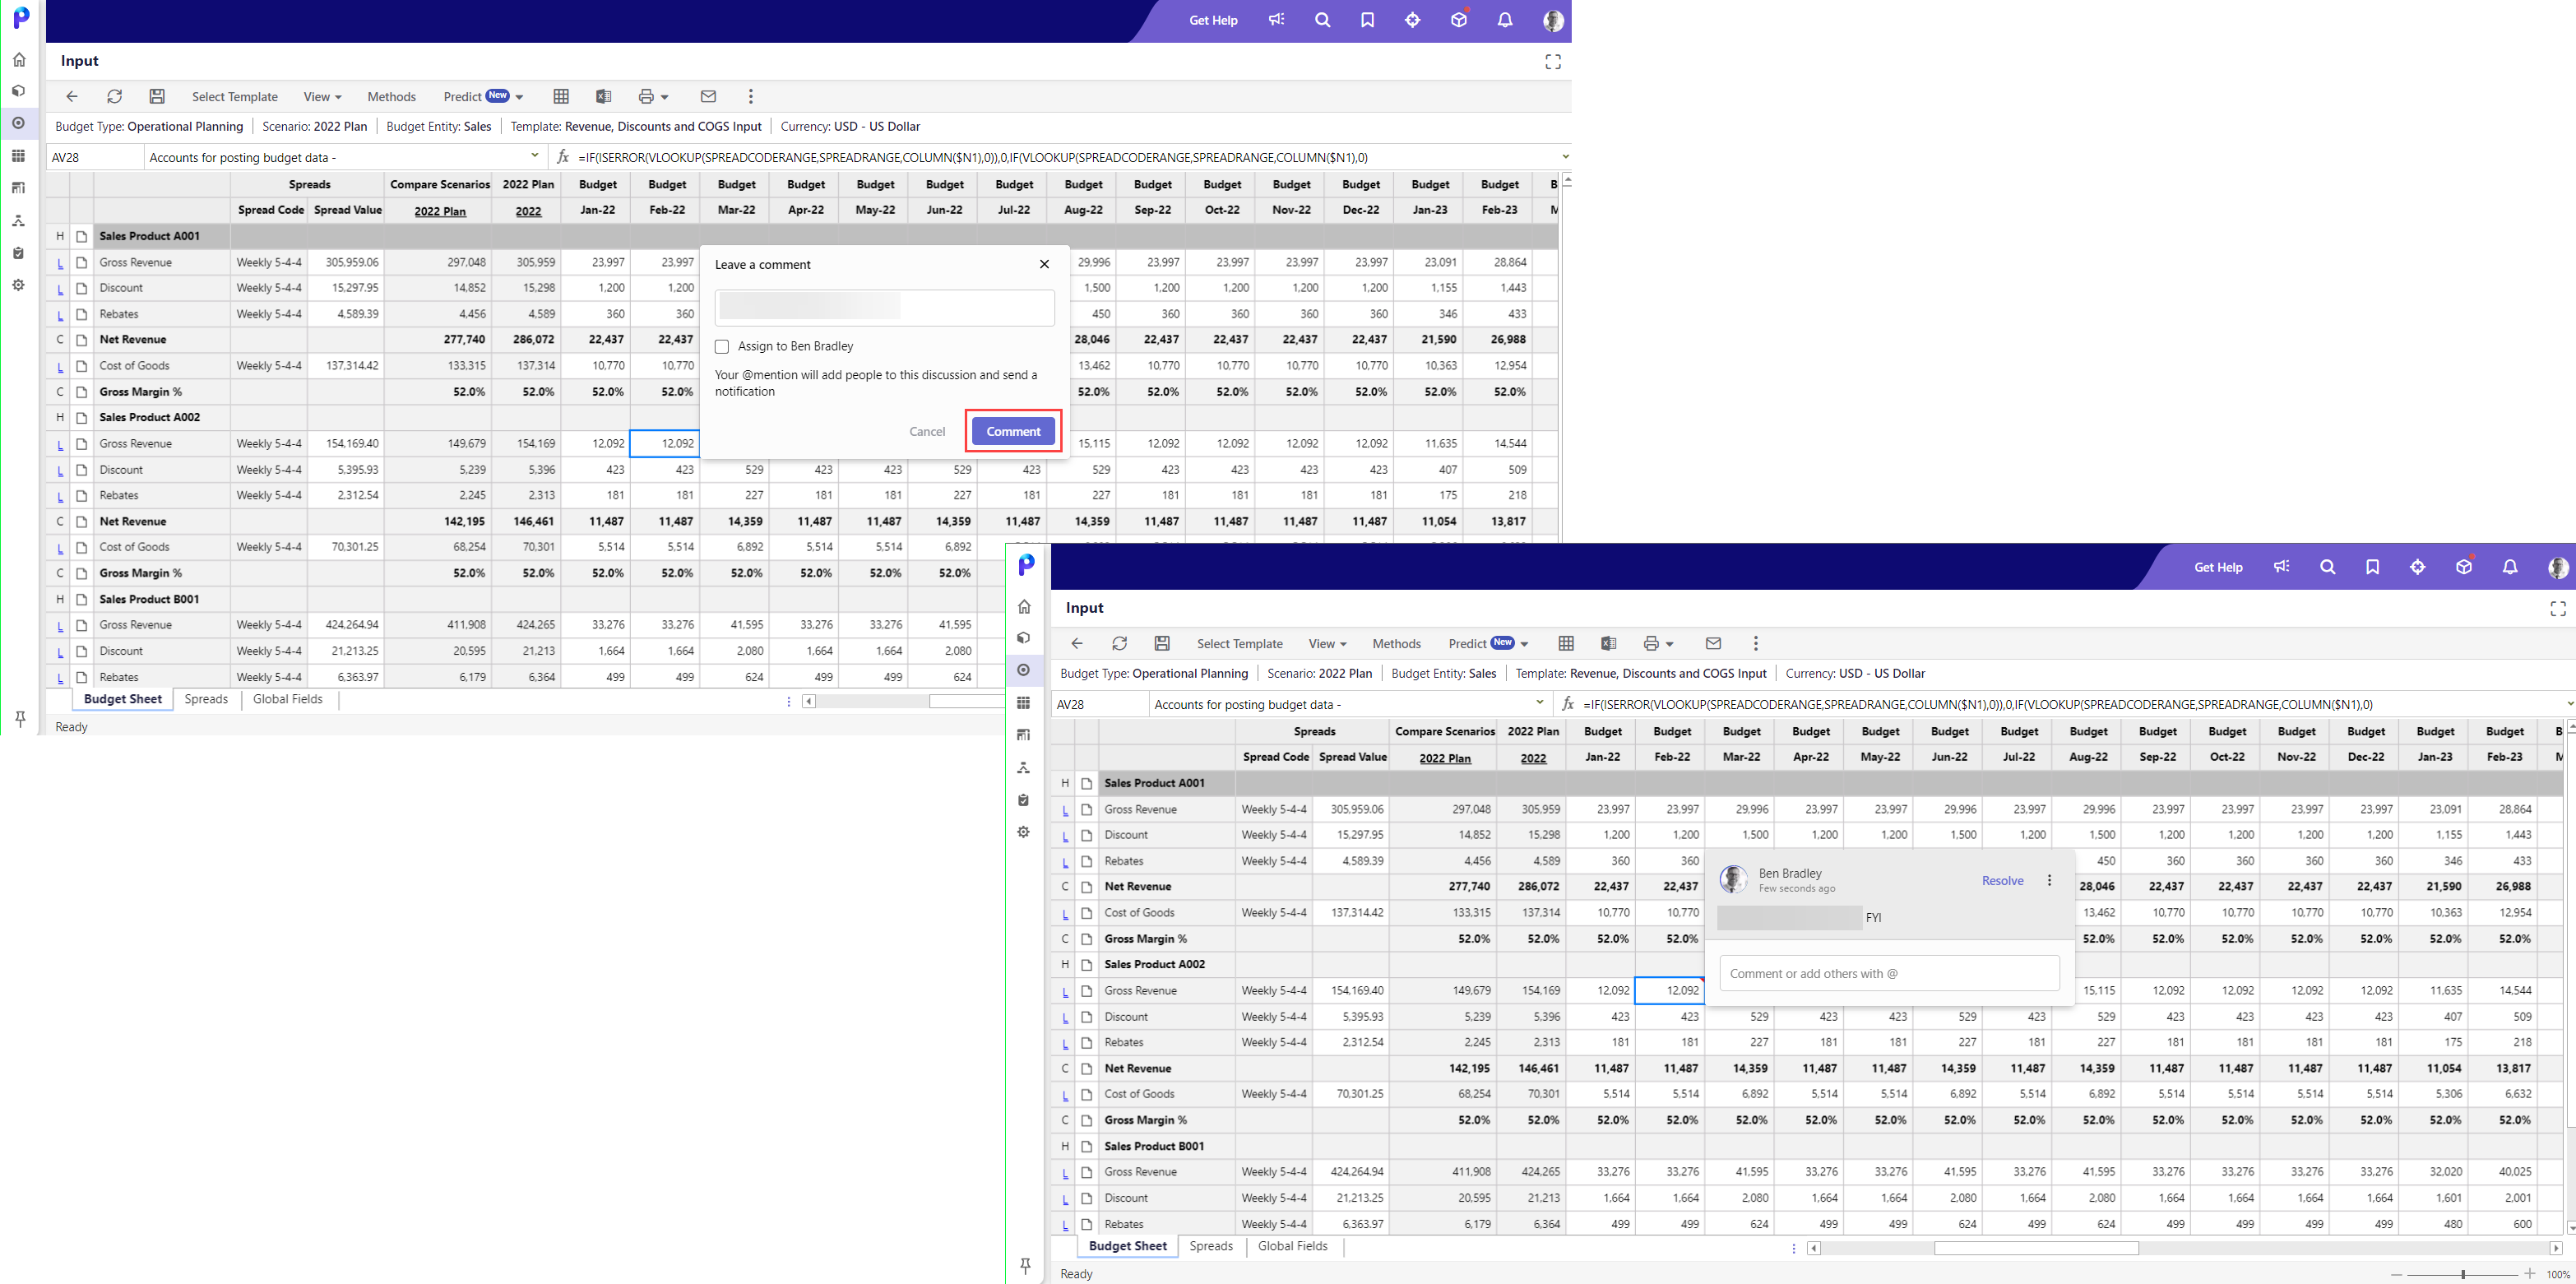
- Enter the required text and click Comment. The comment is saved and displayed in the Comment(s) pane.
You can view an indicator whenever a comment is posted for a line type. So, right-click the cell with an indicator and click Comment. You can see the list of all the comments displayed for that particular line.
To view the comments for your templates (and for the entire application) at once, go to Maintenance > Admin and Comments Manager. Learn more.
To view the comments for your templates (and for the entire application) at once, go to Maintenance > Admin and Comments Manager. Learn more.
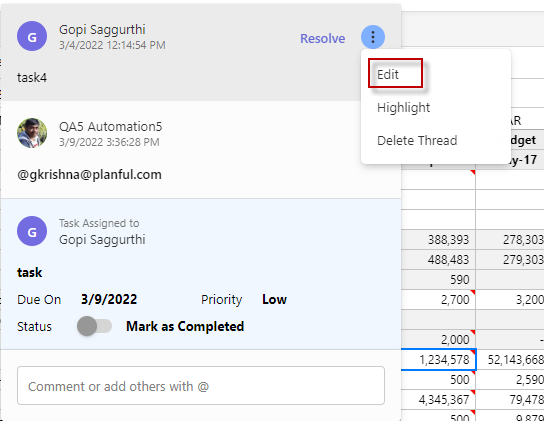
In Practice: To Edit a Comment
- Click the More icon on the right-hand side of the Comments pop-up window and select Edit from the menu list.
- Make the required changes and click Save.
Note:
You can edit the comments posted by you or any user.
In Practice: To Highlight a Comment
- Click the More icon on the right-hand side of the Comments pop-up window and select Highlight from the menu list.
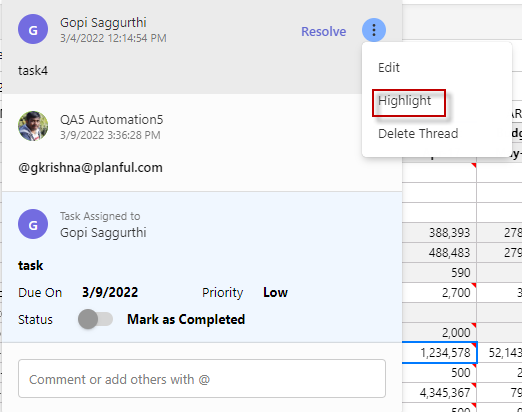
You can highlight the comment(s) posted by you or any other user.
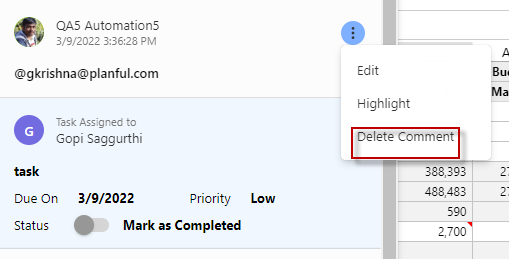
In Practice: To Delete a Comment
- Click the More icon on the right-hand side of the Comments pop-up window and select Delete Comment from the menu list. A confirmation message appears.
- Click Confirm to delete.
Note:
- You can only delete the comments posted by you or any other user.
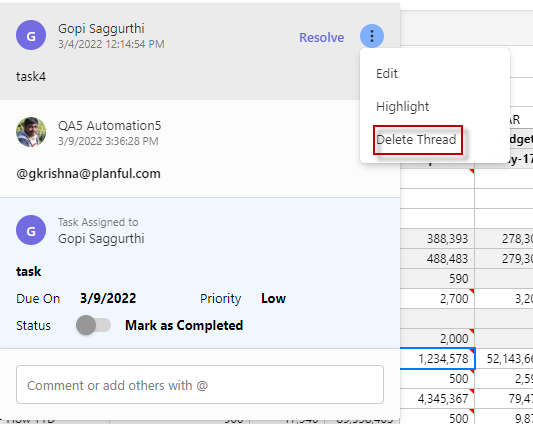
- If you delete the first comment in a thread, all the subsequent comments on the thread are automatically deleted.
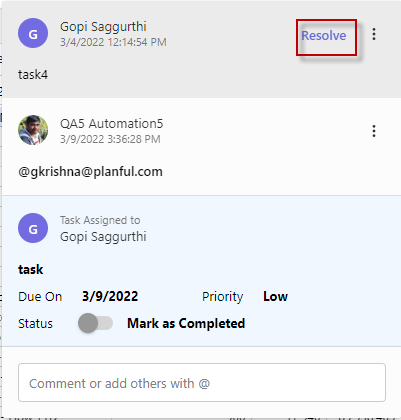
In Practice: To Resolve a Comment
- You can resolve a comment thread by clicking the Resolve option in the first comment of the thread. Once you resolve a comment, the visual indicator is not displayed on the cells.
Note
If you resolve the first comment on a comment thread all the associated comments are resolved automatically.
In Practice: To Assign a task
- Right-click in the required cell and select Comment. The pop-up window appears.
- Enter + and type the user name.
- Select Assign.
- Add task title
- Due On - Select the required to date.
- Priority - Select any of the following:
- Low
- Medium
- High
- Click Comment. A notification is sent to the mentioned user.

The assignees and admin will have access to the assigned tasks. You can view the task details from the Task Manager. You can change the Status of any of your assigned tasks or mark them as Completed directly from the Comments pop-up window. Once you mark a task as completed, the status will be updated on the Task Manager page.
Was this article helpful?