- 2 Minutes to read
- Print
- DarkLight
- PDF
Predict: Signals in Templates
- 2 Minutes to read
- Print
- DarkLight
- PDF
The Predict Signals feature is available on GTSC, GTEC, Line Item, and Allocation Templates. You can select an option, such as Check Selected Lines or Check All Lines, to display Signals on the supported templates. You can also select Resolve Signals to resolve signals for single or multiple cells in templates, and use Hide Signals for any signals you do not want to see.
You can check Signals on the selected supported lines or the entire template as often as required. However, every time you change a cell or a set of cells, the signal will not dynamically change on those cells. Therefore, you must check for Signals again.
- Signals will only work on all the L-type lines in a template.
- Every time you freshly access or refresh a template, the signals will be lost. You must check for Signals again to see the signals on the templates.
Business Value
This functionality will allow users to prevent any data anomalies due to fat-finger errors or typos.
In Practice
To access Predict Signals on templates, perform the following:
- In your application, navigate to Structured Planning and select a Scenario of your choice.
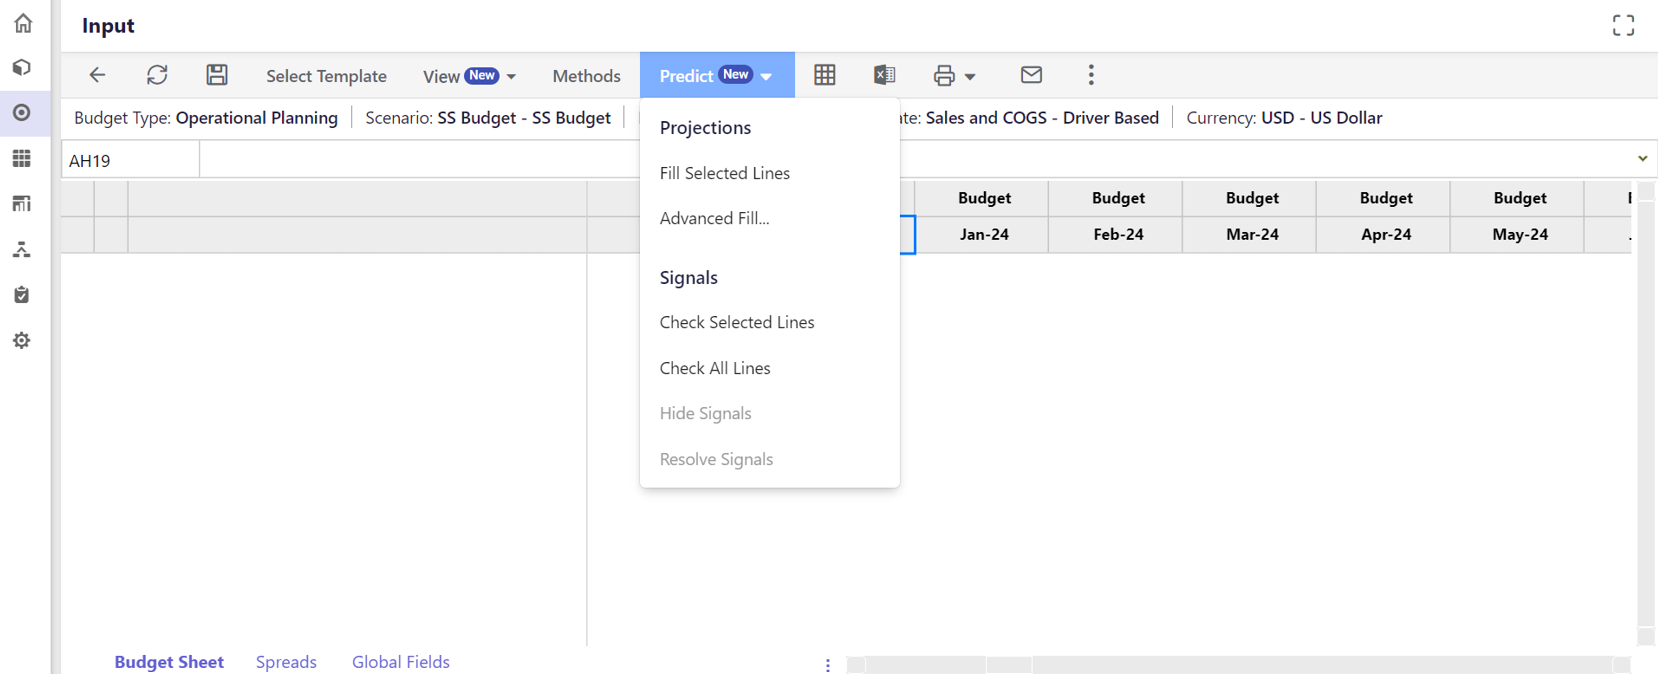
- Choose a Template, and click Input from Template Workflow.
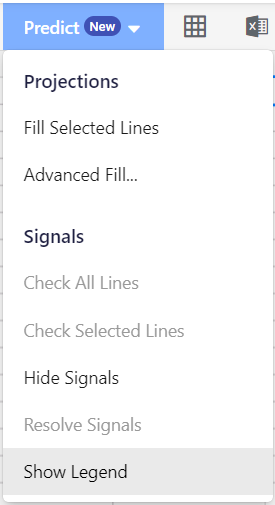
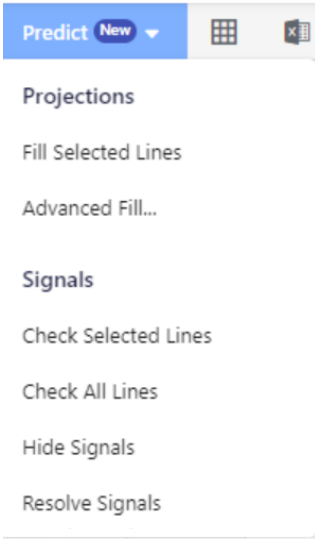
- You will now see the Predict button available in the top menu bar. You can access Signals from this menu button or the context menu when you right-click on any cell. In both cases, you can either Check Selected Lines, Check All Lines, Hide Signals, or Resolve Signals in the template.NoteYou can check signals for a maximum of 100 lines at one go using the Check Selected Lines option.
- The Check All Lines option will not work for large templates. For such cases, it is recommended to use Check Selected Lines.
- If a cell has a signal, when you right-click on that cell, you will see the Show Signal Context option under Predict Signals. This option will take you to the Signal Context screen to better understand the signal.
Resolving Signals
In Practice
To resolve signals, on templates, perform the following:
- Select the cell(s) or line(s) you want to resolve, and right-click.
- Click Predict Signals > Resolve Signals option from the drop-down list.
 The Resolve Signals pane will appear.
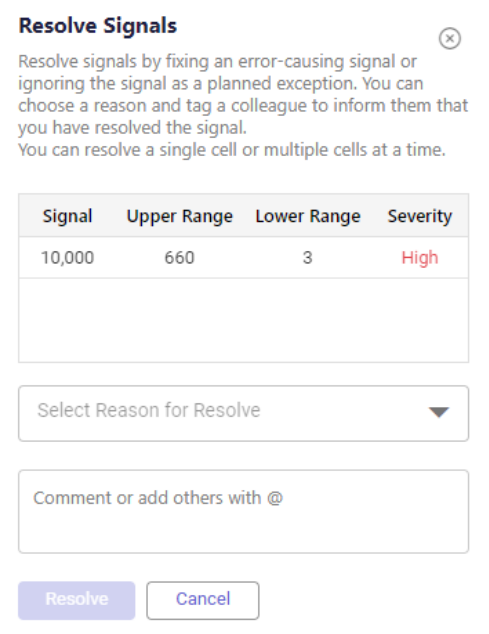
- Select the reason for resolution from a list of pre-existing options. If you resolve multiple signals simultaneously, the same reason will be applied to all.
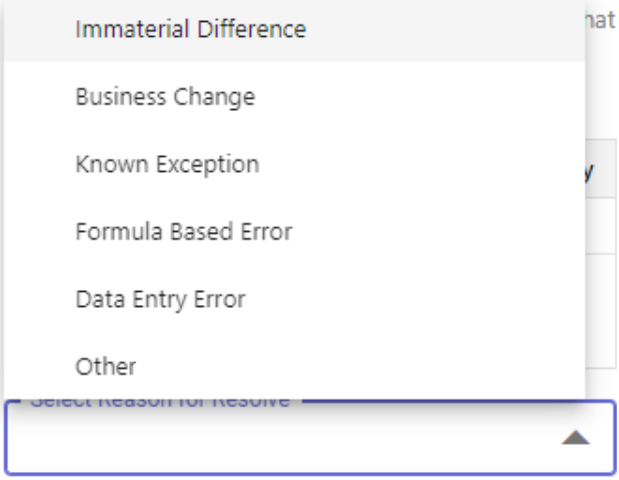
- Click Resolve.
The resolved signal will now appear as a comment in the report. The comment will display the original cell value, the reason for resolving the signal, and any additional information provided while resolving the signal.
Viewing the Legend Panel
The Legend Panel displays color codes for signals, each color code represents the following categories: Red (High-Risk), Orange (Medium-Risk), Cyan (Low-Risk), and Blue (Insufficient History). To highlight a category, unselect the unwanted categories in the legend panel.
In Practice
- Open a template.
- Click Predict > Check All Lines option from the top menu bar.
The application displays color-coded signals along with the Legend panel at the bottom of the screen.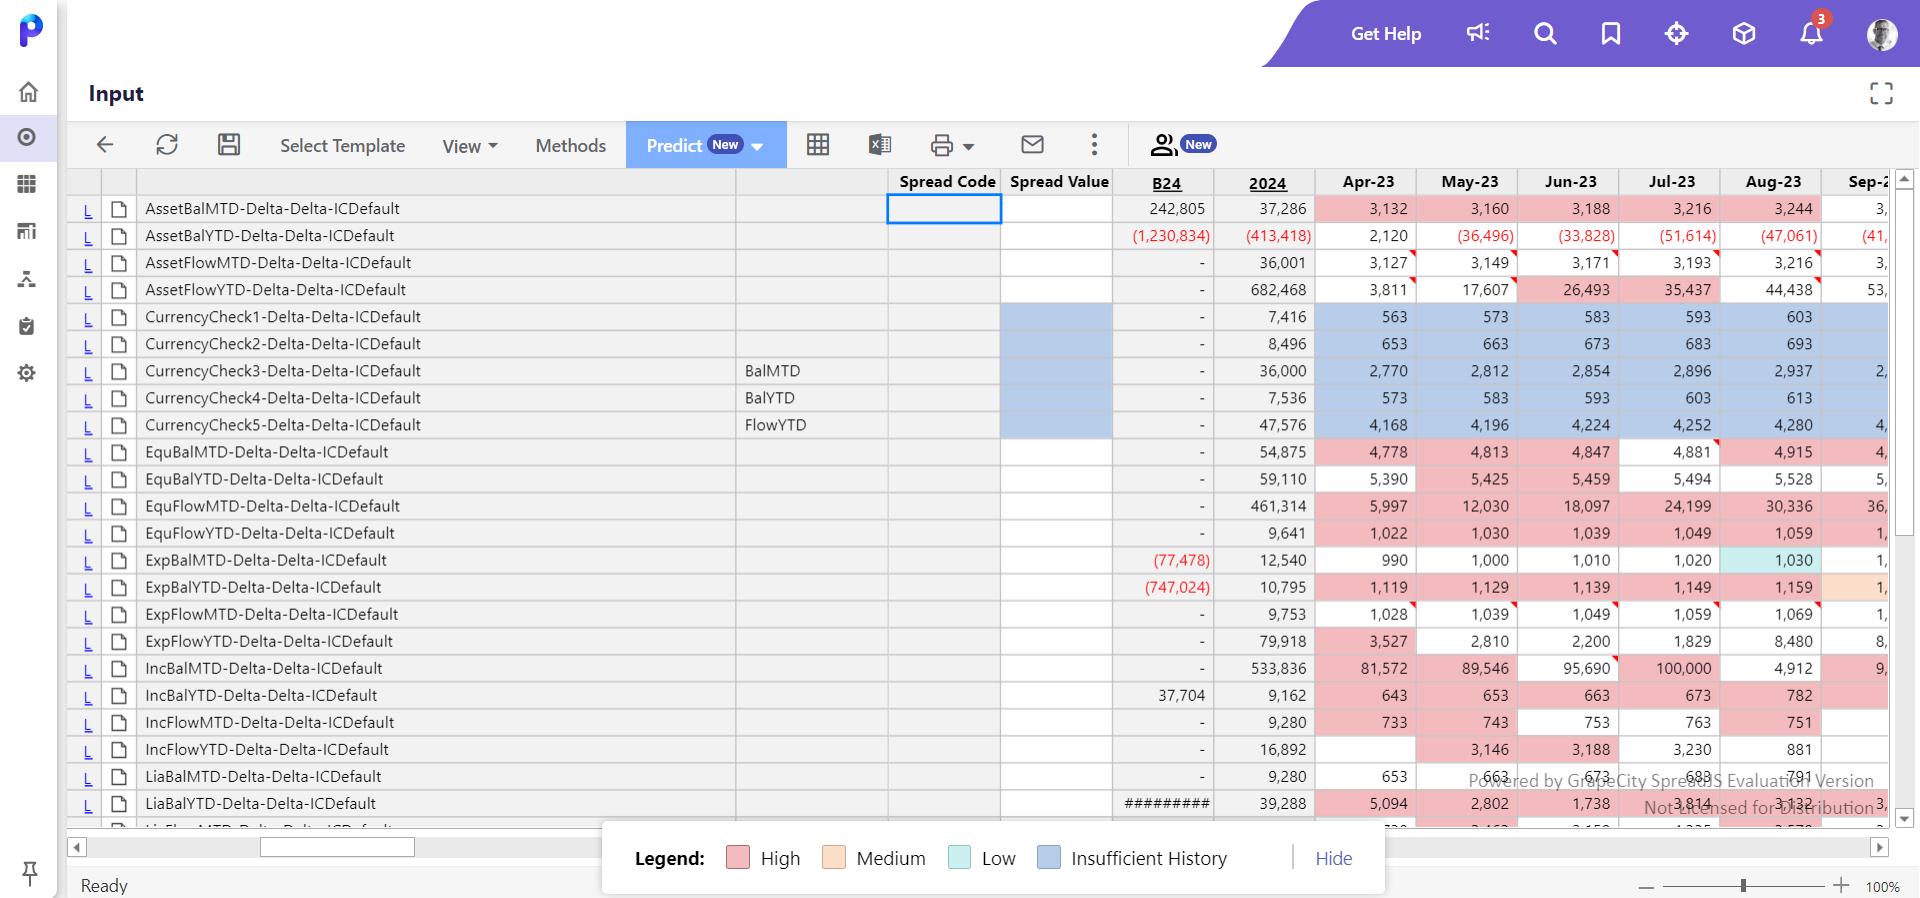
- You can use the Legend panel to highlight the required signal category.

- If you want to hide the legend panel, click the Hide button in the legend panel, or click the Predict > Hide Legend option from the top menu bar.
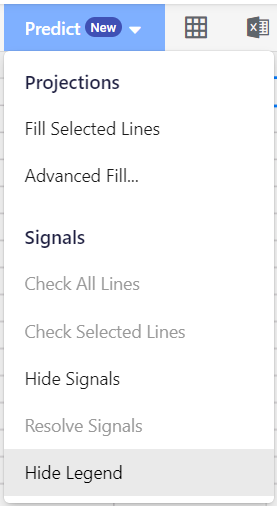
- If you want to view the legend panel after hiding it, click the Predict > Show Legend option from the top menu bar.
