- 9 Minutes to read
- Print
- DarkLight
- PDF
Print Dynamic Reports
- 9 Minutes to read
- Print
- DarkLight
- PDF
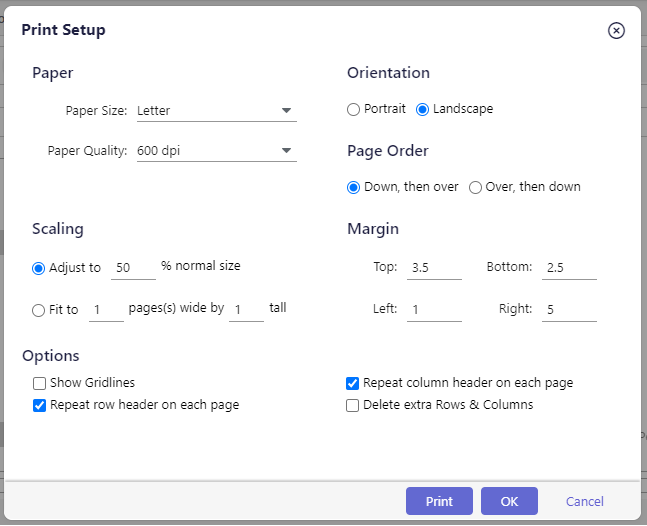
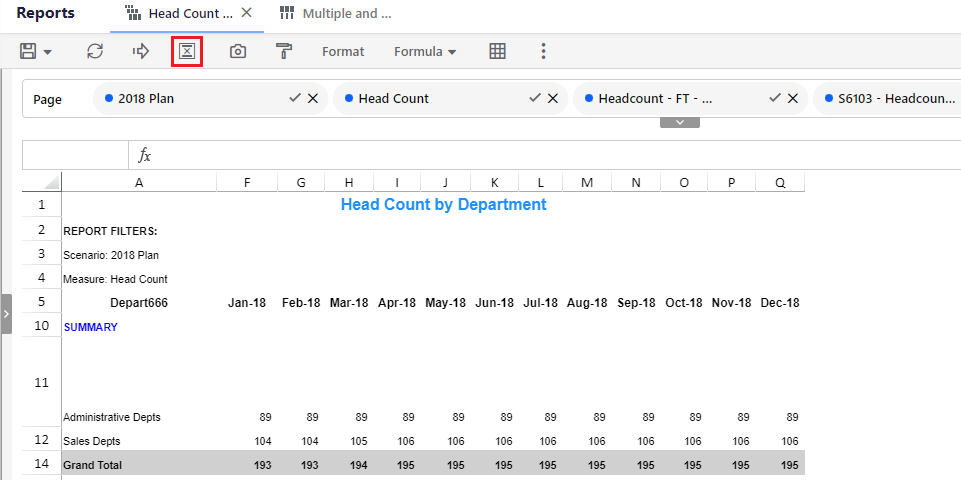
You can print a Dynamic Report and apply the required settings from the Print Setup dialog page using this functionality.
Following are the options available in each section on the Print Setup page
Paper
You can use this section to configure the paper size and quality based on your print output requirement. The following are the options available in this section:
Paper Size: Select the required paper size from the drop-down. The options available are as follows:
- Letter
- Tabloid
- Ledger
- Legal
- Statement
- A3
- A4
- A5
Paper Quality: This option determines the print quality. The higher the number, the better quality. The options available are as follows:
- 300 dpi
- 600 dpi
Scaling
Based on the selected paper type, you can either use the Adjust to or Fit to options to define how the report's content should spread across the pages in the print output.
Ideally, you can use the Adjust to option when the number of columns in the report is less and the Fit To option if the number of columns in the report is more for clear output.
Adjust to
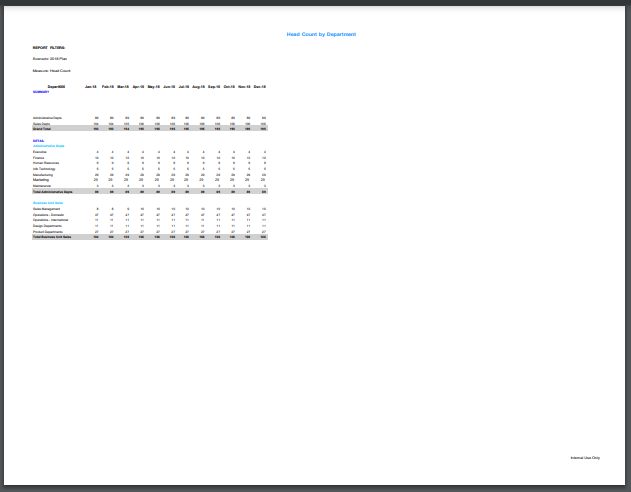
Set the required percentage in this field to determine the overall area the report covers on a page in the print output. For example, if you provide 10%, the report covers only 10% of the area of a page in the output.
Here is an example output preview of the 50% scale.
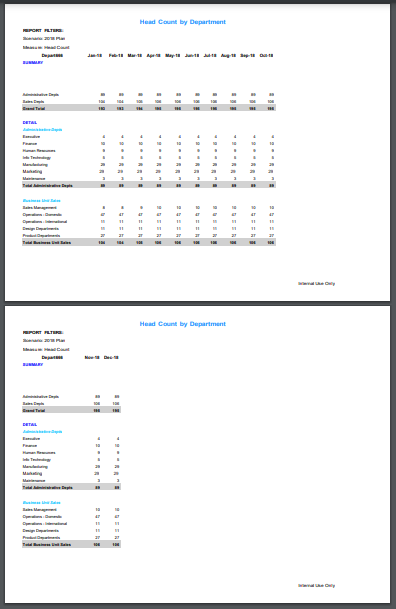
If you provide 100%, the report covers 100% of the area of a page in the output. If the content does not fit on one page (when the number of rows and columns is more), the report is split into multiple pages in the output.
Here is an example output preview of the 100% scale.
Fit to
You can mention the number of pages you want to print the report. For example, if you set Fit to 1 page(s) wide by 1 tall, the entire report is printed on a page.
If you are using the Fit To option, the application will try to fit the content in the output page as per defined values. For example, if we give Page Wide as 1 and Tall as 1, the report’s content will fit on one page.
If you try to fit a report with many columns/rows on less number of pages, the content may not be legible in the output, and the header/footer may not be visible. We recommend that you carefully set the values in the Fit To section based on the size of the report. Update the Pages Wide setting based on the number of columns(typically 12 or more) and the clarity needed. If you are not sure about the value you want to fill for the Tall field, you can leave it. Preview the output and keep adjusting the values until you get the desired output.
Orientation
Select Portrait or Landscape mode for the page layout of the print based on your requirements. Ideally, if a report contains more rows when compared to columns, you can select Portrait as it can accommodate more rows and select Landscape if the report contains more columns than rows.
Page Order
If the report has multiple pages, the page order defines the pattern in which you want to print the pages. The options available are as follows:
- Down, then over
- Over, then down
Margins
The content in the output (including Header and Footer) aligns with the output pages based on the margins provided in this section. The Top, Bottom, Left, and Right margins represent four sides of the output pages and the value given in the respective fields defines the gap between the content and the edges of the output page. In PDFs, the header and footer always align with the layout of the PDF, and its margin depends on the value provided in the Top, Bottom, and Right fields in this section. If you are not able to view the footer in the print preview, try increasing the Right margin until you are able to view the footer.
Other Options:
Select the required checkbox based on your need to further customize the print output:
- Show Gridlines: Selecting this option will display the rows and columns border in the print output.
- Repeat row header on each page: If the report is spread across multiple pages in the print output, selecting this option will add the row header on every page in the output. This checkbox is selected by default.
- Repeat column header on each page: If the report is spread across multiple pages in the print output, selecting this option will add the column header on every page in the output. This checkbox is selected by default.
- Delete extra rows and columns: Select this checkbox if you want to remove any empty or extra rows and columns from the print output. This checkbox is applicable only for Dynamic reports.
Header and Footer
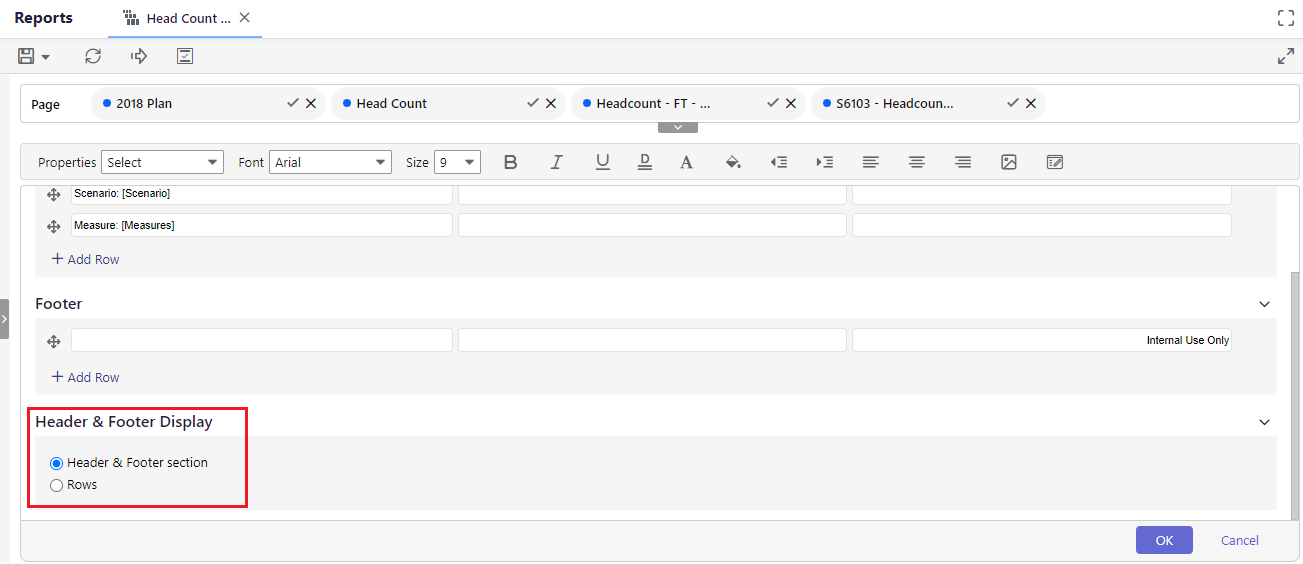
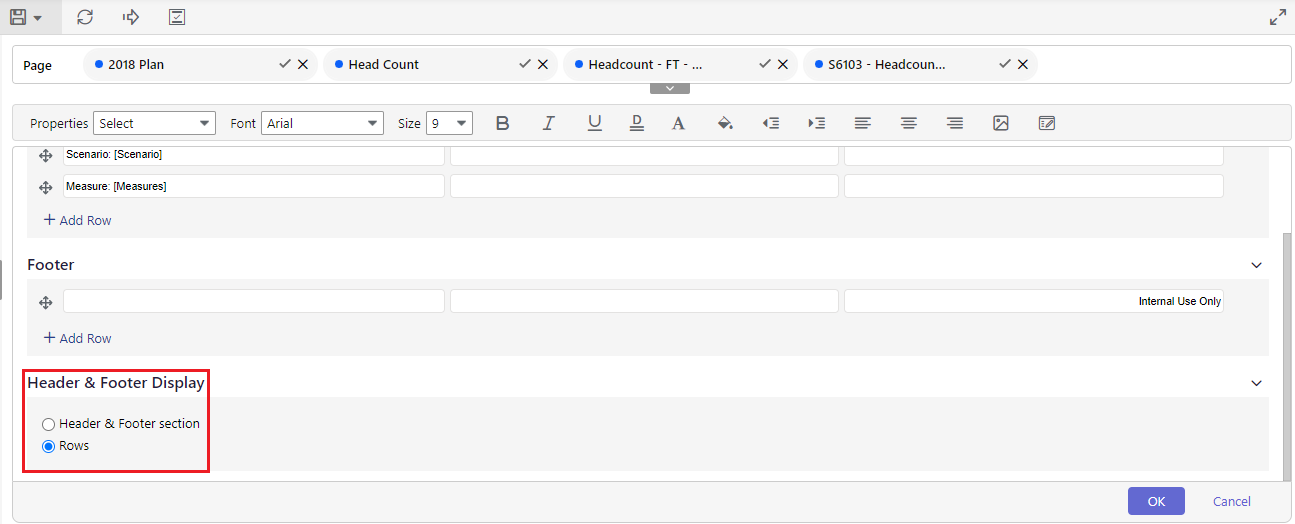
You can configure the header and footer settings for different print output types from this section. Click the Header icon on the top menu and select any of the following options from the Header and Footer Display section based on your requirements.
Header and Footer section: Select this option if your print output is PDF or Excel. In PDFs, the header and footer always align with the layout of the PDF rather than with the report as shown in the application, so it is recommended to preview the output and check their alignment before printing the report. If you have provided any margins in the Print Settings window, the alignment of the header and footer would depend on the margins provided.
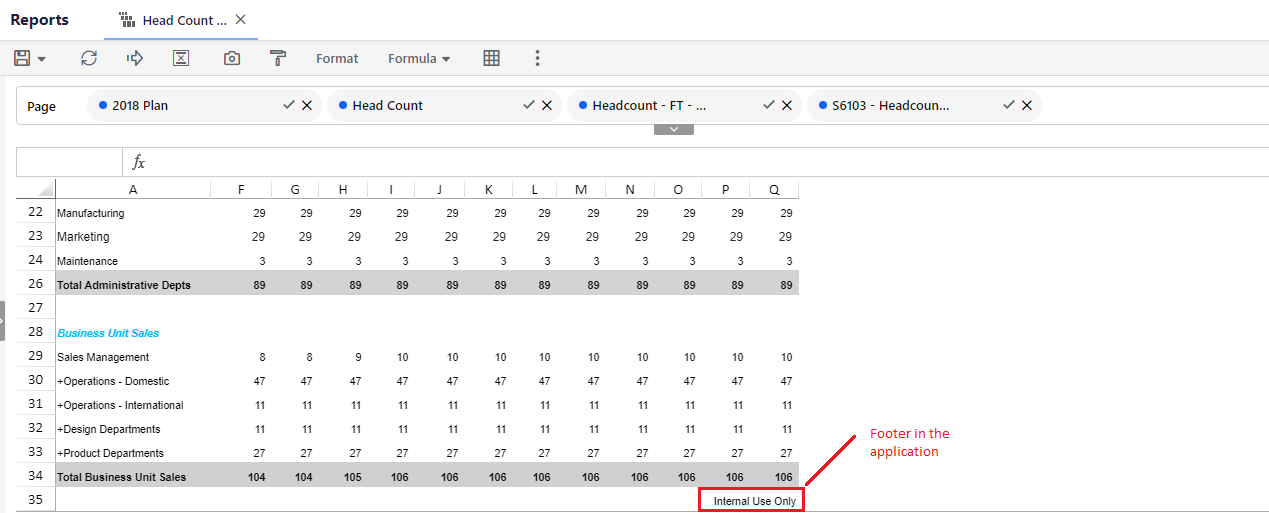
Footer in a report in the application
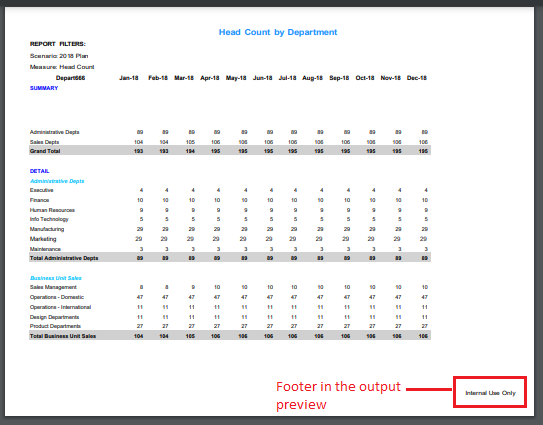
Footer in a report in the print output
Rows: Select this option if your print output is only Excel.
Export to PDF
You can use the Export to PDF option to download the report in PDF format. The format of the data in the downloaded report depends on the print settings you set in the Print Setup screen. Also, make sure that you have selected the Header and Footer Section option in the header and footer settings.
Export to Excel
You can use the Export to Excel option to download the report in Excel format. The format of the data in the downloaded report depends on the print settings you set in the Print Setup screen. Also, make sure that you have selected the Rows option in the header and footer settings.
Best Practices
It is recommended to use the following points for achieving the desired print output:
- Preview the print output after configuring the print setup before printing any report.
- Adjust the Scaling and Margins in the print setup based on the report size. The number of rows and columns in a report always impacts the print output.
- To avoid overlapping headers with report lines when printing, the default top margin in Print Setup is set to 3.5 inches.
- Delete all extra rows and columns option is selected for existing Dynamic Reports. Macros used for Excel output need to be re-adjusted manually.
Limitations
- If you apply fit to 1 x 1 or 1 x 2 option in the Dynamic Reports Print Setup and the report has more than 9 columns, the header and footer section are likely to be improperly aligned in the PDF output. This also applies to Excel output when the Header & Footer configuration is set to ‘Header & Footer Section’.
FAQs
Q1: What can I configure using the Print Setup functionality?
A: The Print Setup dialog allows you to set various parameters for printing dynamic reports or report sets. You can configure paper size, quality, scaling options, orientation, page order, margins, and other printing preferences.
Q2: How do I select the paper size and quality for printing?
A: Within the Paper section, you can choose from options like Letter, Tabloid, Ledger, Legal, A3, A4, A5, and more for paper size. For quality, select from 300 dpi or 600 dpi depending on the desired print quality.
Q3: What is Scaling, and how does it affect the print output?
A: Scaling determines how the report content spreads across pages. Adjust to set the percentage of the page the report covers (e.g., 10% or 100%). Fit to specifies the number of pages wide and tall for printing the report content.
Q4: How should I choose between Adjust to and Fit to options?
A: Adjust to is suitable when the report has fewer columns, while Fit to is ideal for reports with numerous columns. Adjusting these settings ensures clarity and proper content display in the print output.
Q5: How do Orientation settings impact printing?
A: Orientation (Portrait or Landscape) affects the layout of the printed page. Portrait accommodates more rows, while Landscape suits reports with more columns. If there are any Report Sets, select the Page Breaks considering the Orientation.
Q6: Why is the report downloaded in Excel open in Page Layout view instead of the normal view? Also, why aren't my headers or footers aligning correctly?
A: The Page Layout view is designed to enhance the visibility of header and footer details. If you select Rows in the Header and Footer Display section, the report will open by default in Excel's normal view mode.
Though you have defined the alignment of the header and footer in the Header and Footer Settings, in the print output they align with the layout of the PDF. It is recommended to preview the output and check their alignment before printing the report. If you have specified any margins in the Print Settings window, the alignment of the header and footer will depend on the margins provided. For more details, click here.
Q7: Can I customize headers, footers, and other options in the print output?
A: Yes, you can include gridlines, repeat row/column headers, add document titles, page numbers, sheet names, and control other display options based on your printing requirements.
Q8: What is the default top margin in Print Setup?
A: The 3.5-inch top margin is set to prevent headers from overlapping with report lines when printing.
Q9: What are the limitations when applying the 'Fit to 1 x 1' or '1 x 2' option in Dynamic Reports Print Setup with more than 9 columns?
A: When 'Fit to 1 x 1' or '1 x 2' is applied with more than 9 columns, the header and footer sections might become misaligned in the PDF output. This scenario also applies to Excel output configured with the Header & Footer Section. If the footer isn't visible in the print preview, attempt to increase the Right margin until the footer becomes visible.
Q10: How does the Page Break option in Report Sets interact with various print settings?
A: The Page Break option (column "O") in Report Sets operates uniquely based on the report's print settings. It's essential to note that page breaks might not function correctly if the report's print settings are configured to "Fit to X page(s) wide by Y tall". In such cases, the workaround is to utilize the "Adjust to X% normal size" option for proper page break functionality.


