- 3 Minutes to read
- Print
- DarkLight
- PDF
Scheduling Template Snapshot Creation Using Cloud Scheduler
- 3 Minutes to read
- Print
- DarkLight
- PDF
The Template Snapshot feature in Cloud Scheduler simplifies your template management. You can easily create backups of the template for a selected scenario and budget entity. This feature automates the snapshot creation process, eliminating the cumbersome task of manually creating snapshots and saving your time and effort.
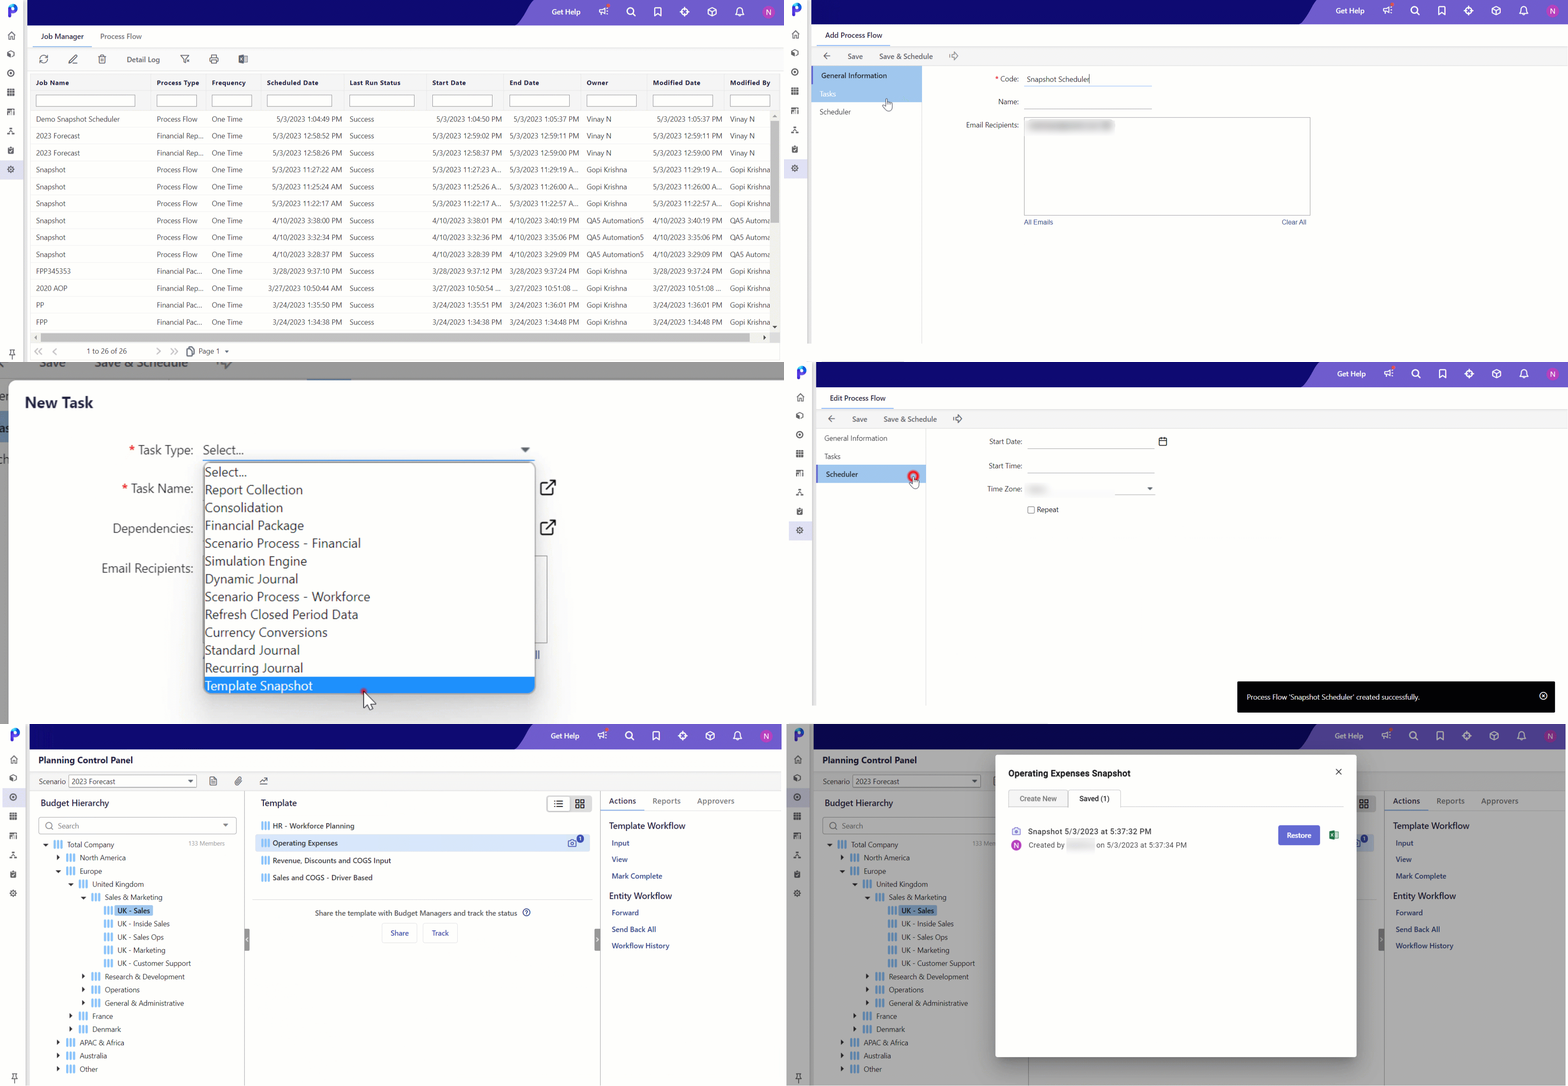
- This feature is currently available only for GTSC templates.
- When scheduling a snapshot, you can select one scenario and template at a time. You can only choose up to 2000 budget entities.
This feature allows you to create a recurring schedule for the template snapshot creation. Once scheduled, the Cloud Scheduler will automatically create snapshots. This ensures the template is consistently backed up at the roll-up level without continuous user intervention. It also maintains the history of template versions, providing easy comparison, analysis, and recovery.
Let's understand this with an example.
Alex, a finance business partner, wants to share her Operating Expenses template with Emily, a budget manager, and her team at the end of every month. With Cloud Scheduler's Template Snapshot Backup feature, Alex can securely automate creating a backup of the Operating Expenses template by scheduling monthly template snapshots. The feature's flexibility automatically creates a backup of the desired template for selected scenarios and budget entities as scheduled, simplifying template management and collaboration.
Cloud Scheduler requires the appropriate user permissions for the template, budget entity, and scenario levels when creating snapshots. If you have view permission, you can only see the existing snapshots of a template. Only users with access to Cloud Scheduler and the Template Snapshot feature enabled for their navigation role can take snapshots. By default, the Snapshot feature is enabled in the application. To disable it, deselect the Enable Template Snapshot checkbox in your user profile's Approval Role Setup screen.

- You can take a maximum of 20 snapshots for one combination of scenario, budget entity, and template. If you attempt to schedule a new snapshot beyond this limit, an error message will be displayed. To proceed with the snapshot for the same combination, you would need to delete the previous snapshot(s) manually.
- It is recommended to automate the snapshot creation process for a template on a weekly basis or with a lesser frequency, specifying an end date.
- The Detail Log records all the activities performed related to the Snapshot feature. Navigate to Job Manager in Cloud Scheduler, select the task, and click Detail Log.
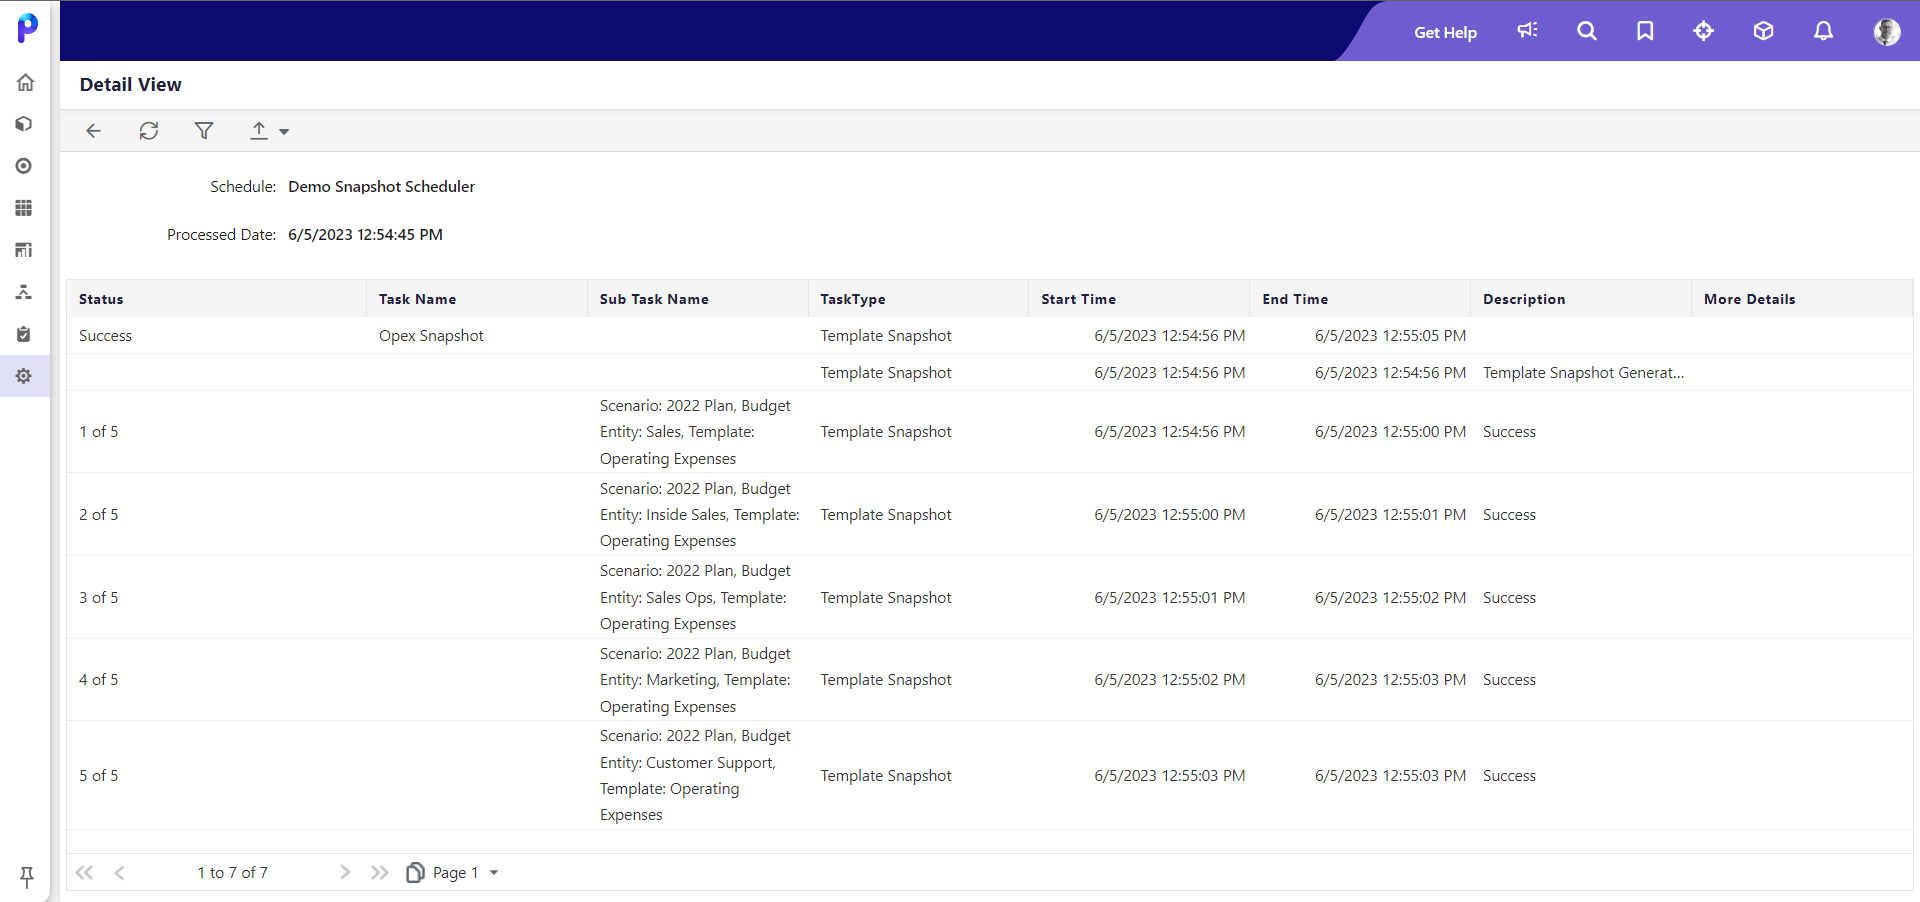
Now let's see the instructions on how to schedule a template snapshot in cloud scheduler:
- Cloud Scheduler can be accessed either from Maintenance > Admin> Cloud Scheduler.
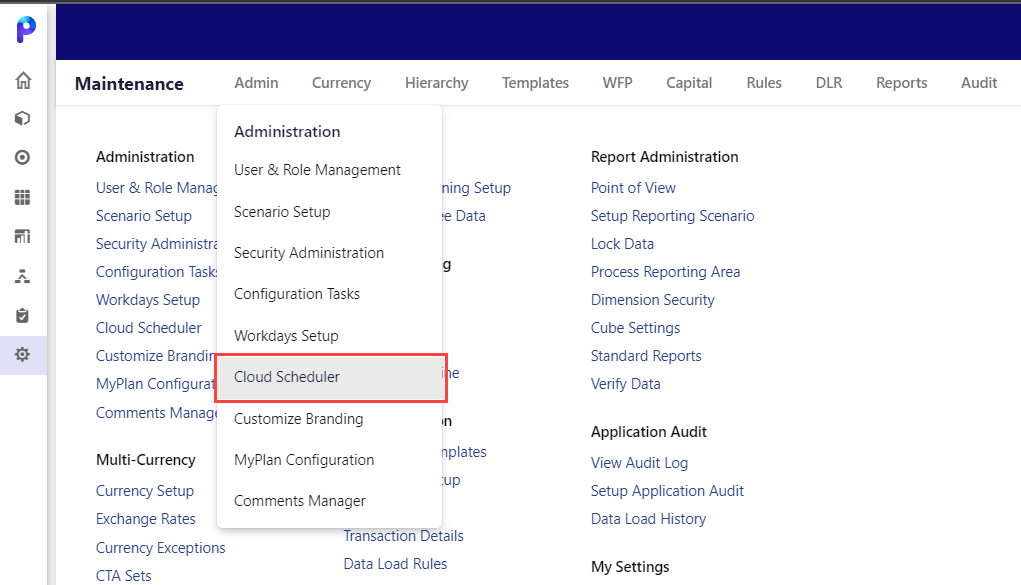
Or when you take a snapshot from the leaf level in the Planning Control Panel. - Click Cloud Scheduler to be directed to the Cloud Scheduler page.
 Note:Access to Cloud Scheduler is restricted to users with the appropriate permissions. If you do not have access, please contact your administrator for assistance in getting access to Cloud Scheduler.
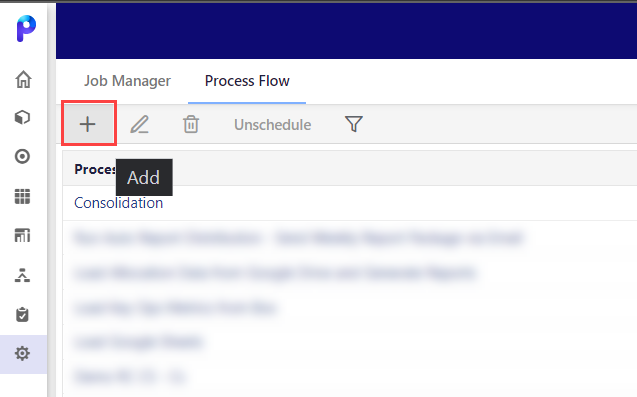
 - Click Add from the Process Flow page.
Three tabs are displayed on the Add Process Flow page: General Information, Tasks, and Scheduler. - Fill in all the details in the General Information.
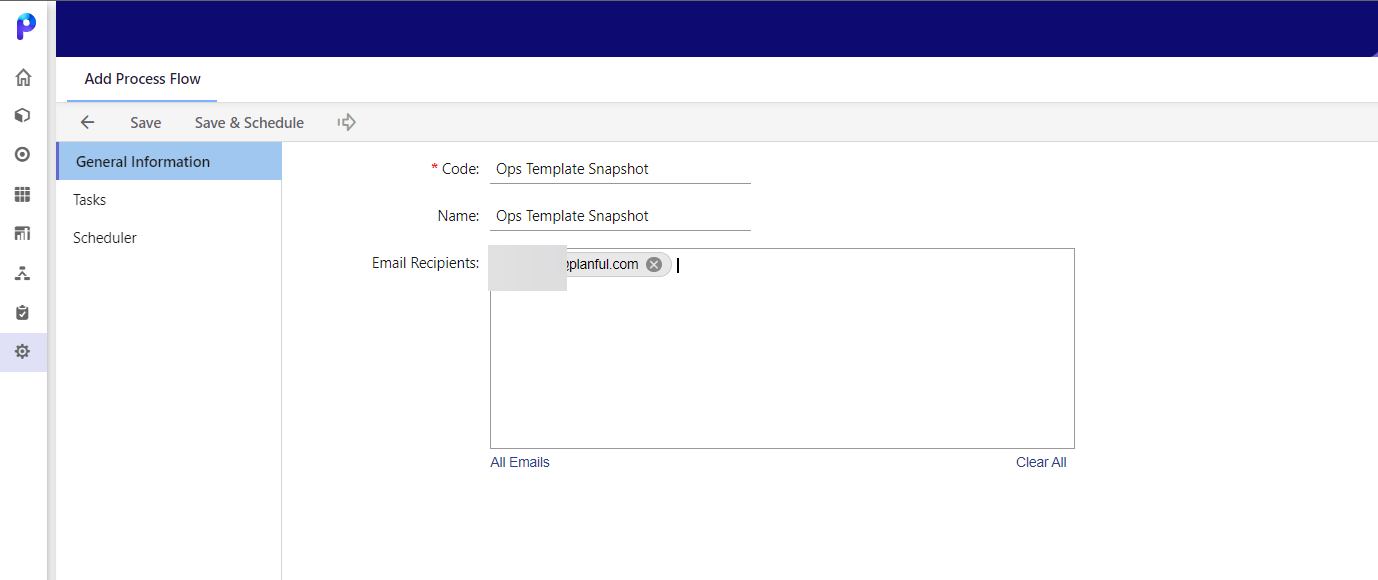
- Now, go to Tasks > Add Task, and on the New Task popup, select Template Snapshot from the Task Type.
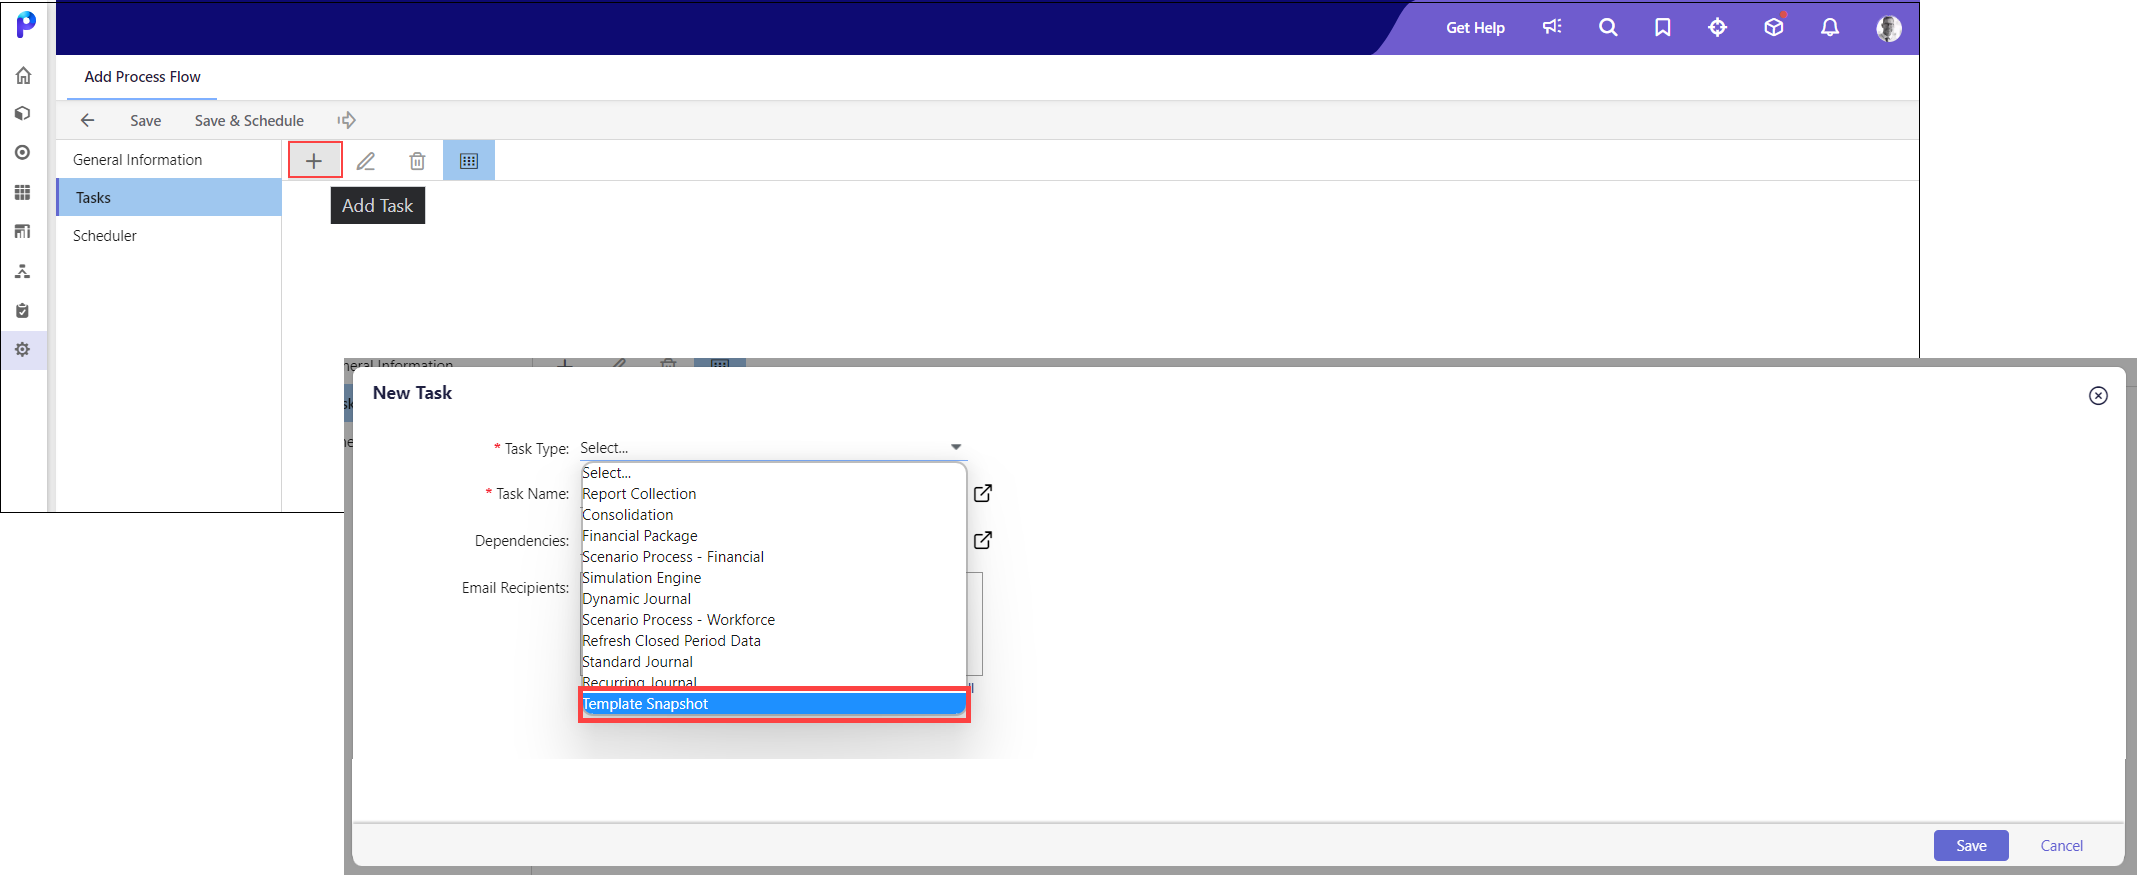
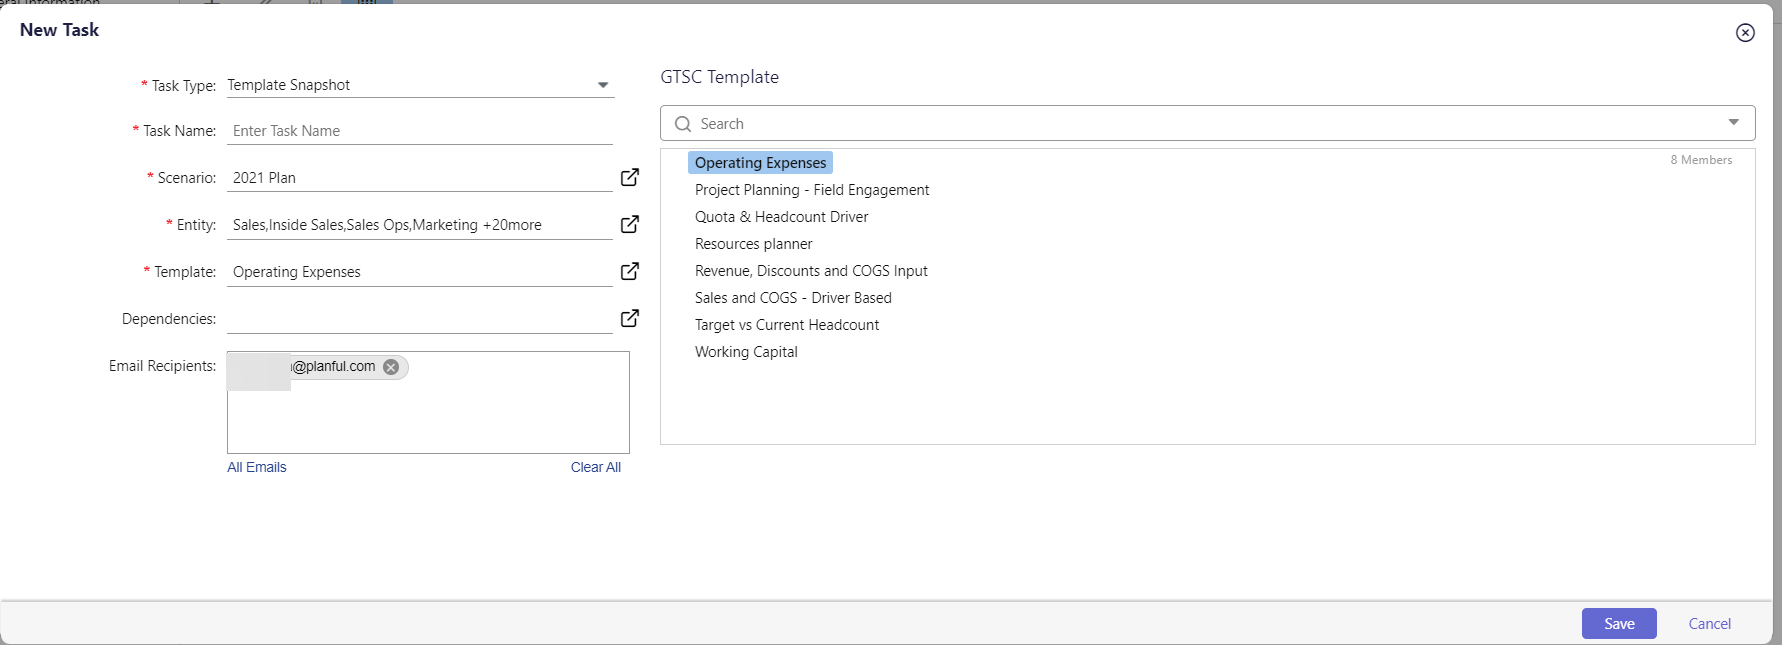
- Enter the Task Name, Scenario, Entity, Template, and Dependencies (this is an optional field) and click Save.
- Use the Scheduler tab to run the process flow at a scheduled date, time, or a selected frequency.

- Click Save or Save & Schedule to save the task. Click Run if you want to run the scheduler immediately.
- Go to the Job Manager to view the completed process and the status of each run.

