Set Up Workforce Planning for a New Planning Cycle
- 3 Minutes to read
- Print
- DarkLight
- PDF
Set Up Workforce Planning for a New Planning Cycle
- 3 Minutes to read
- Print
- DarkLight
- PDF
Article Summary
Share feedback
Thanks for sharing your feedback!
This article helps you to understand the steps to be followed while updating workforce planning for a new planning cycle. The following flowchart gives you a high-level understanding how this process is done for a new working scenario.

To set up workforce planning for a new scenario, do the following:
- Copy the WFP Template to Default Scenario
- Ensure that the latest compensation items, pay plans, and so on are available to copy the HR - Workforce Planning template in the latest working scenario back to default. This ensures that if any changes were made to the HR - Workforce Planning template directly in the working scenario, those changes have now been applied to the template in the default scenario. This might also include compensation item updates, attribute values, tax rates, and so on. Click here to learn how to copy the HR - Workforce Planning template to the default scenario.
- Modify Workforce Components
- Make any other necessary changes to the tax rates, benefit amounts, pay plans, review percentages, attribute values, and so on workforce components in the default scenario and map the new compensation items to the appropriate employee types.
- Map New Budget Entities to the WFP Template in the Default Scenario
- Review any new budget entities and map the HR - Workforce Planning template to these new entities in the default scenario. Click here to learn how to map the budget entities to the HR - Workforce Planning template.
- Update the employee Data load file
- Prepare and update the employee load file for the data load rule. The following fields are required within the Data load rule setup:
- Employee Name
- Employee Number
- Hire Date
- Employee Type
- Pay Plan
- Position Name
- Budget entity or Budget entity Dimensions
- Salary or Rate
- Hours
- Some options such as pay plan, do not require a column in the file and can be identified directly in the data load rule. Additional fields can also be included such as compensation items, attributes, and so on. to avoid having to manually add to each employee. The employee data can be loaded once the file is ready.Note:Ensure that the default scenario is selected within the data load rule.

- Prepare and update the employee load file for the data load rule. The following fields are required within the Data load rule setup:
- Clear Existing Data on DLR
- Navigate to the main Data Load Rule screen to clear data for this data load rule. This ensures that only the employee data in this new file will exist in the HR -Workforce Planning template.

- Navigate to the main Data Load Rule screen to clear data for this data load rule. This ensures that only the employee data in this new file will exist in the HR -Workforce Planning template.
- Upload Employee Data via DLR
- Navigate through the Data Load rule selecting the new file as the sample input file. Select the default scenario and define overall rule settings.Notes:
- Check if the payroll upload date is before the scenario start date.
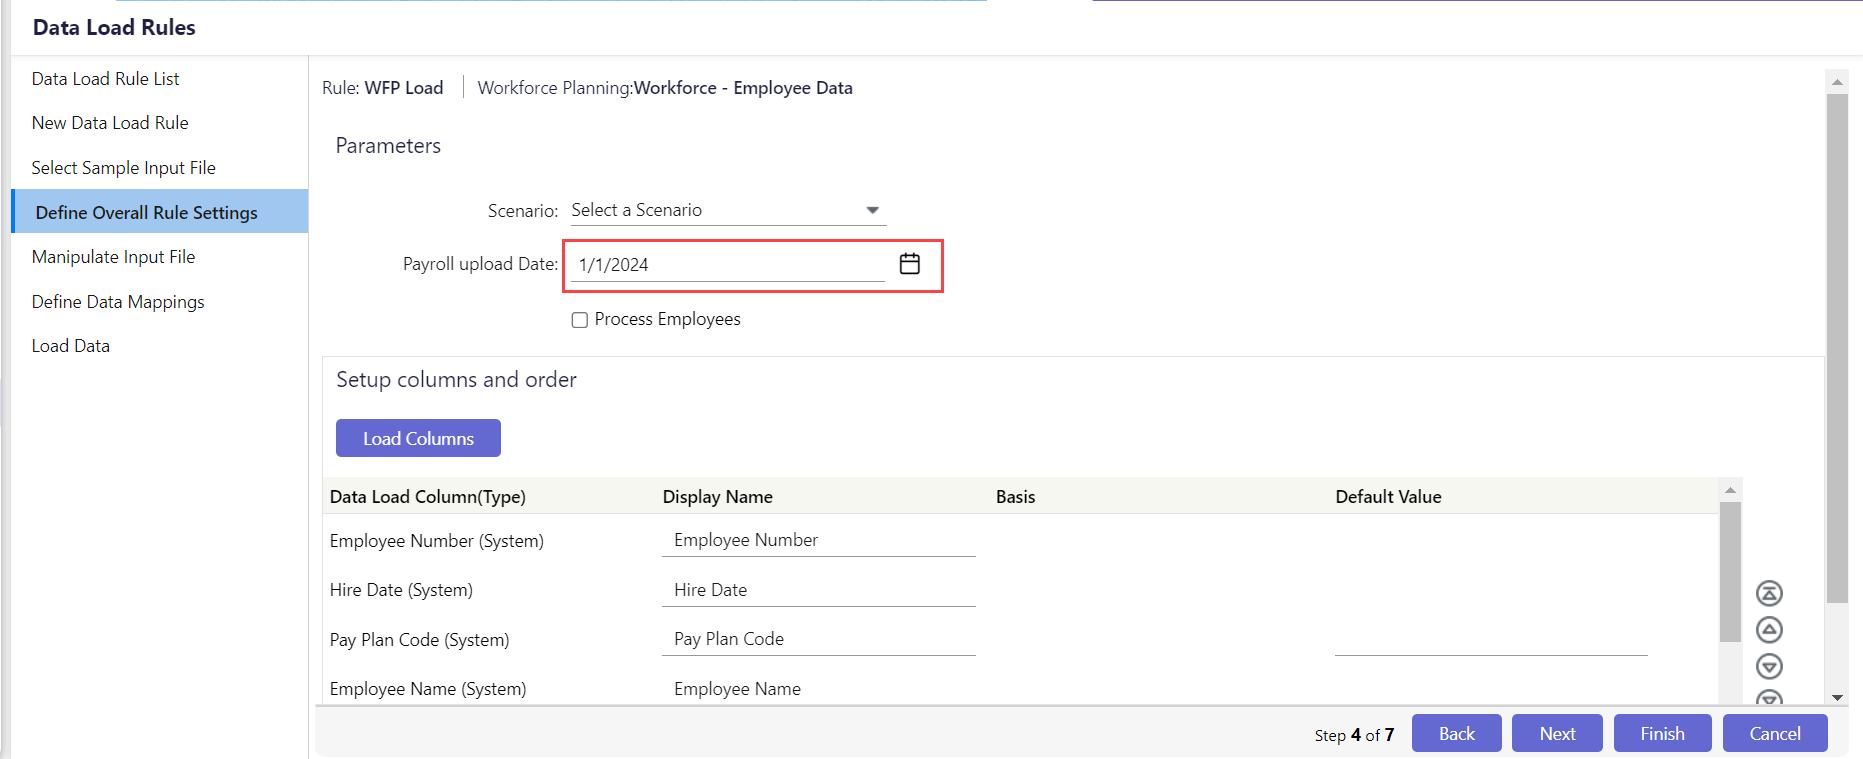
- Upload the data to the default Scenario. In case you are loading to a working scenario and you want the columns to be copied over from the default scenario, after changing the scenario, select Yes when prompted if columns from the default scenario should be retained. If any new attributes, compensation items, and so on have been created and added to the file, select Load Columns to add these fields to the Data Load Rule setup.

- Check the Process Employees checkbox to process the employees automatically when loading the employee data.
Continue through the Data Load process to load employee data. Then ensure the new working scenario has been created and navigate to Template Setup.
- Check if the payroll upload date is before the scenario start date.
- Navigate through the Data Load rule selecting the new file as the sample input file. Select the default scenario and define overall rule settings.
- Map WFP Template to Working Scenario
- Map the HR - Workforce Planning template from the default scenario to the new working scenario to copy the template into the working scenario. In case you did not select the Process Employees checkbox, navigate to the Planning control panel and access the HR - Workforce Planning template to process the employees.


If you are updating Workforce Planning directly within the working scenario:
Add or modify the workforce components such as Compensation items. Ensure that the Update Compensation Items against employee data checkbox is checked before the new compensation item is mapped. This will ensure that the changes are applied to the employees with the associated employee type.
To update Workforce Planning within the working scenario, do the following:
If employee changes are needed and the employees have already been loaded to the working scenario but not modified, data can be reloaded using the below steps:
- Reload to default using the steps mentioned earlier.
- Navigate to Template Setup and unmap the HR - Workforce Planning template from the working scenario to remove the existing data.
- Remap the Workforce template to the working scenario to bring in the new data. The HR - Workforce Planning template can then be accessed from the Planning Control panel where the roster can be reviewed and updated as needed. If there are any direct input compensation items or attributes that were not assigned, those can also be updated.
- Additionally, if allocations need to be loaded or manually updated, that can also be completed. Once saved, employees are processed and reports can then be run.
Was this article helpful?