Using Excel Files in Financial Packages
- 3 Minutes to read
- Print
- DarkLight
- PDF
Using Excel Files in Financial Packages
- 3 Minutes to read
- Print
- DarkLight
- PDF
Article summary
Did you find this summary helpful?
Thank you for your feedback
Working with Excel
The following suggestions are provided to allow you to use the Document Content Type to attach Excel files.
Do not open the files on your local machine while they are being attached to a Financial Package section.
Print setup is applicable only for Dynamic Reports. All artifacts are added as a single page image. Excel is added as a single page table.
When the data in the attached Excel file is spread across multiple columns, you can use options such as Landscape and Portrait to better display the data. To ensure the embedded sections are displayed appropriately, use Page Break settings for the Content Type (i.e. Document) to fit sections into a single page.
When data from Excel files is used in Financial Package sections, you can ensure that tables are designed to fit within a Financial Package Word document. Create your Excel tables with no more than 4-6 average sized columns (width = 26 pixels) so that the data displayed in the Word preview will display the data as desired. The maximum number of rows is 60.
Keep the length of text in any cell to a minimum for the best display in the Financial Package Word document. Try to avoid using long labels or providing textual explanations within the Excel grid. As an alternative, you can use the Text Content Type to provide textual explanations for an embedded Excel grid.
- Excel files that contain macros are not supported. For files that contain macros, save a version without the macros. Use that saved version in a Financial Package.
Excel files that contain links to external sheets are not supported. Save a version with the actual values. Use that saved version in a Financial Package.
The Chart worksheet type is supported only with Financial Package Output files when the source data is not hidden or deleted from the workbook. Alternatively, create a worksheet and copy and paste the content. Use that version in a Financial Package.
To display Excel objects, frame your print area chart/table/content by hiding any unused rows or columns. To ensure that there is no additional data that exists in extraneous cells, either delete or clear content of contiguous rows or columns to ensure the report is rendered as desired. Excel uses the entire range when embedding an object into Word.
Excel sheets that have subtotals opened on rows or columns will not be rendered correctly. Remove the subtotals and upload that version of the document.
Excel Page Breaks are not retained when rendering an embedded Excel object. All of the data will be rendered in a single Excel object. Remove Excel Page Breaks from the file and then upload to the Financial Package.
Attaching Multiple Excel Sheets in a Financial Package
To attach a single Excel workbook and associate one or more sheets with a Financial Package Document section:
- Select a Financial Package section.
- Select Document as the Content Type.
- With the File Type set to System, click Choose File.
Note:
This feature is not supported for documents stored in the Planful File Cabinet.
- Once you select an Excel workbook, the Worksheet Selection pane is opened.
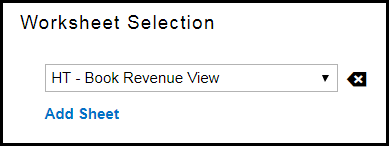
- The sheet selected in the first row will be the “Active” sheet (the sheet that was open when you last saved the Excel workbook).
- Select sheets from the workbook to associate with your Financial Package report. Click the list box to display all sheets in the workbook.
- Reorder the display of sheets in the generated report.
- Click the Delete icon to delete a selected sheet. The first row cannot be deleted. If there is only a single sheet included in the attached Excel file, Delete will not be available.
Note:
You can select a sheet when setting up a Document section with multiple sheets.
When the Financial Package is generated, all of the Excel sheets will be included under the single Section Name as identified for the Document section. If you would like to name the Excel sheet, add the name within the Excel sheet you are referencing.
Was this article helpful?