Using Views to Input Future Opportunities into the Source Model
- 1 Minute to read
- Print
- DarkLight
- PDF
Using Views to Input Future Opportunities into the Source Model
- 1 Minute to read
- Print
- DarkLight
- PDF
Article summary
Did you find this summary helpful?
Thank you for your feedback
You can directly edit data in the Source Model using a view. A Power user must create the view, then all other users can use the view.
We have a series of sales opportunities already loaded into the Source Model from an external data source, and now you can create a view to allow the user to add more opportunities directly.
Start Spotlight (Web).
Under Analyze, Data, select the name of the Source Model, Opportunity Data.
Select the Default view. Here is a snapshot of the existing data.

Decide on a field that will be listed as a Point of View lookup on the page axis, such as Sales Segment.
Select Design View.
Optionally, remove excess columns by right-clicking the column and selecting Delete Column. Remember, to calculate all the fields with formulas in this model, the user need only input 7 fields. Leave the fields in row 1.
Save the view.
Select the Properties icon.
To be able to save the view, you must set the Master Model Map property and a POV Dimension.
Select the Master Model Map from the drop-down.
Below POV dimension, add a blank row by right-clicking on a blank row and selecting Insert Row. Under POV Dimensions, type the name of the field you decided on in step 4.
Set Enable Save to Yes.
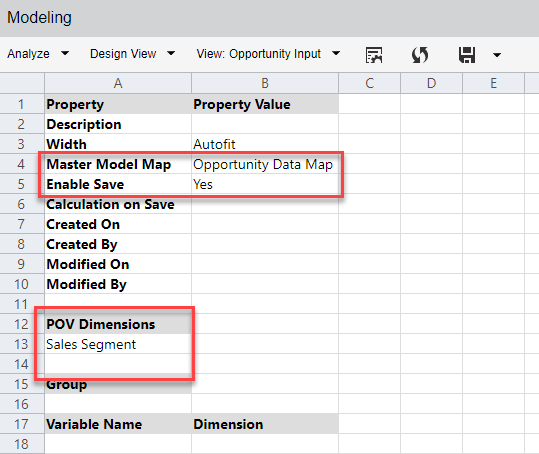
Click Save.
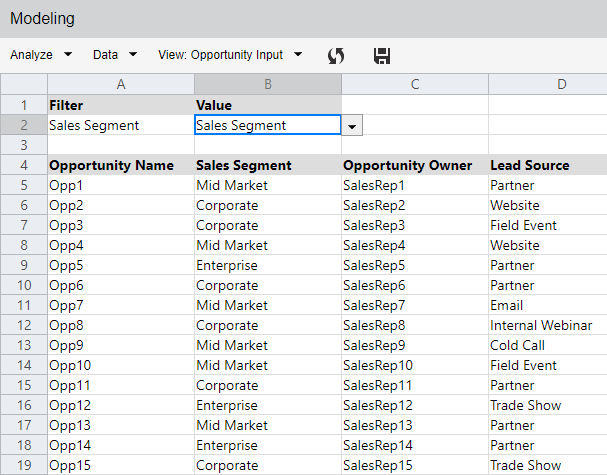
Select Analyze > Data to run the view. Now you have a data entry form you can fill in. Or you can select a Sales Segment from the POV drop-down and view existing data.
To enter a new opportunity, go to the first blank row below the list of opportunities and add another. Fill in the first 7 columns.
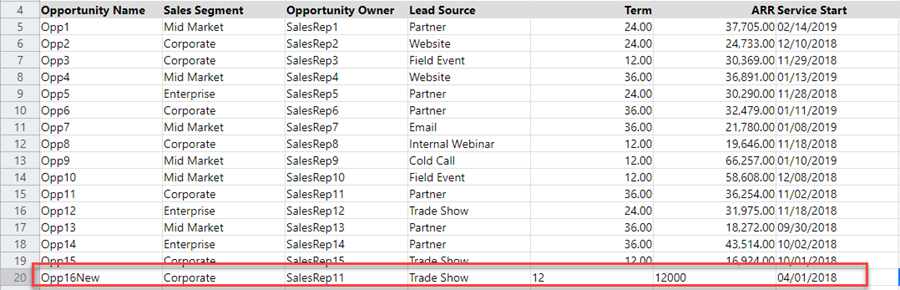
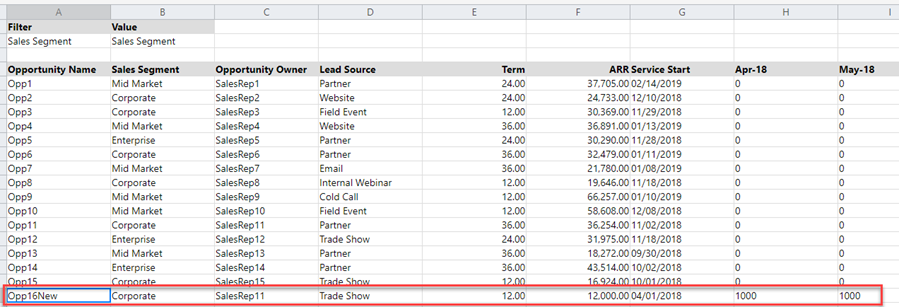
Save the data. The screen refreshes to show the values and results of the formulas.
Was this article helpful?