- 7 Minutes to read
- Print
- DarkLight
- PDF
Validations
- 7 Minutes to read
- Print
- DarkLight
- PDF
Validations ensure proper data values and general accounting standards exist within the application. For example, a Validation might check to see if an account is zero before making the decision to run the Consolidation Process. Or, that a group of accounts should be equal to another account before allowing data to be saved to the application. Validations also ensure proper adherence before executing the Consolidation Process.
Validation functionality allows you to create Validations that should be successfully passed before subsequent actions can be performed. You can create your own Validation methodology to help you manage your Consolidation Process. Validations can be applied to certain aspects of the Consolidation Process to ensure proper usage of the system and adherence to corporate or accounting standards.
Validations can be made executable by end users at different levels within the hierarchy (including interim rollup levels) to ensure accurate results. In addition, Validations should be executed prior to a Consolidation Process to ensure that accurate results are being consolidated..gif)
Add a Validation
In the Consolidation Control Panel, under Processes, click Validations. The Validations grid appears.
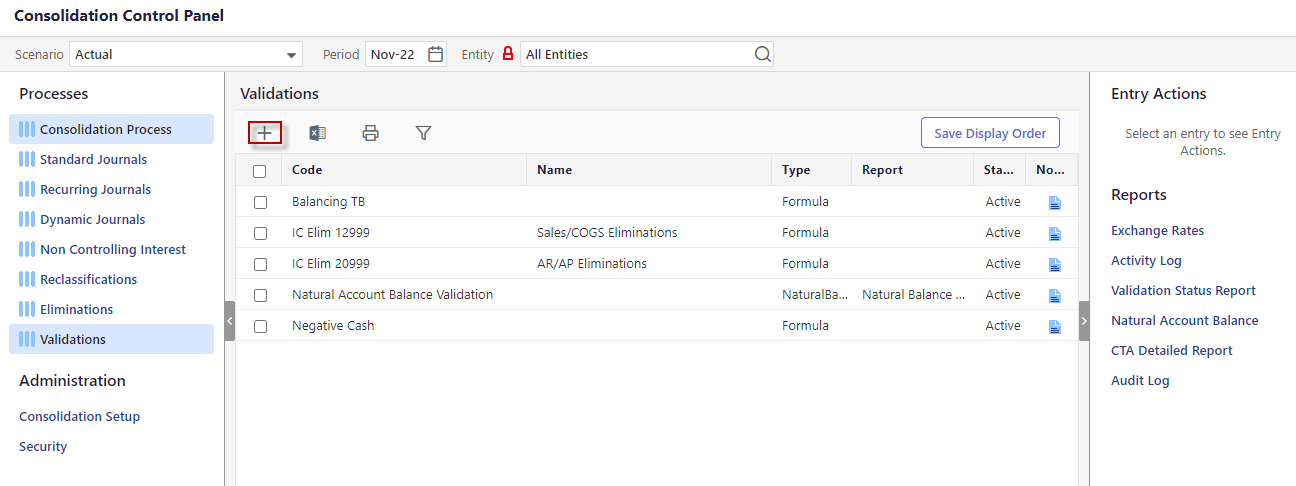
Click Add. The Add Validation dialog appears.
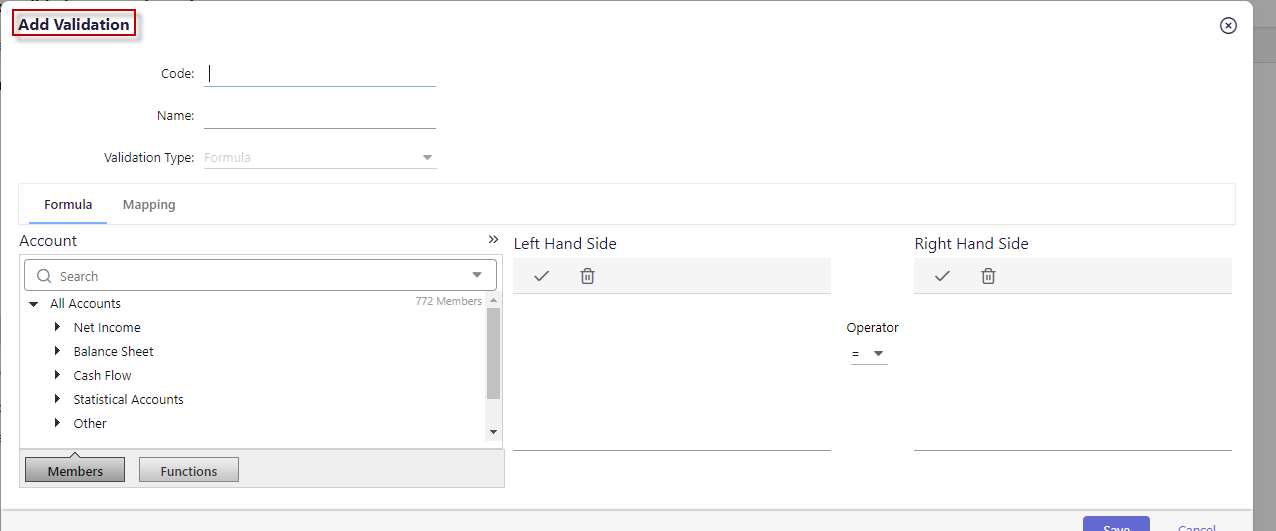
Complete the following fields:
Enter a code of your choice in the Code field. The code that you enter should correlate with your company's accounting identification practices.
Enter a name in the Name field.
Select one of the following Validation Types:
Report Validations —Created for reporting verification and Validation purposes. Report Validations are system-defined and cannot be deleted or edited.
Formula Validations —Specific to your operations. For example, create a Formula Validation to determine whether account A plus account B equals to account C.
Click the Formula tab. The Formula tab is available if the Validation Type is Formula. In Formula, you create a Validation formula by selecting members and functions. By default, Members are shown. Click Functions to display available functions. Set up a formula by performing the following steps:
From within Members and Functions, drag and drop members into the Left Hand Side and functions into Right Hand Side boxes as necessary.
Select the operator from the Operator drop-down list.
Optional. Click √ to check the syntax of the formula. For more information, see Manage Formulas.
Click the Mapping tab, and map members by performing the following steps:
In the hierarchy, locate the member by entering the search criteria in the Search box or expanding the hierarchy.
Select the checkbox next to the members or drag and drop the members from the hierarchy into the Mapped Companies box.
Click Save.
Managing Formulas When Working with Validations
You manage formulas when adding, copying, and editing a Validation. The following elements are available to manage a formula.
Left Hand Side and Right Hand Side —The left-hand and right-hand portion of the formula can include members, functions, or both. You can also click inside the box to edit members and functions directly. A copy-paste is also allowed inside the box.
If the data entered in the Left Hand Side and Right Hand Side returns no data, the application validates as if the data is equal to zero (no data). After the Validation, the result may be a pass or fail based on each case. For example, if LHS(0)=RHS(0), the status is passed.
Operator —Contains various operators to build a meaningful formula. Select an operator for the formula. Use a combination of mathematical operators to build full expressions, including multiple components, if desired.
Example formulas are:
Sum(Acct1,Acct2,Acct3)=Acct4
(Acct1+Acct2)-(Acct3)=Acct4
Acct1*70%=Acct2
Acct1>0
Acct/Acct2 = Acct3/Acct4
When a formula-based Validation is defined using an equal to (=), less than or equal to (<=), or greater than or equal to (>=) operator, the absolute difference between the LHS and RHS is displayed for your convenience. For example, if account 1 is not equal to account 2, the difference between the accounts is displayed.
Check Syntax —Click √ to verify whether the formula is syntactically correct.
Clear Formula —Click Clear Formula to clear the formula. The Clear Formula option is available for both the Left Hand Side and Right Hand Side boxes.
Add and Clear a Formula
In the Consolidation Control Panel, under Processes, click Validations. The Validations grid appears.
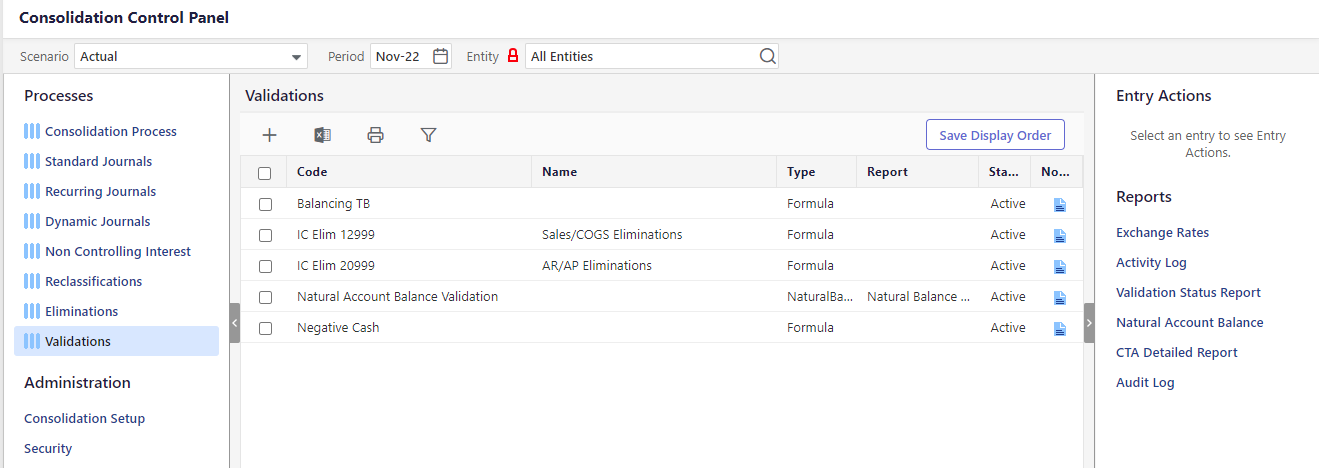
Click Add (or Edit or Copy). The dialog to add, edit, or copy a Validation appears.
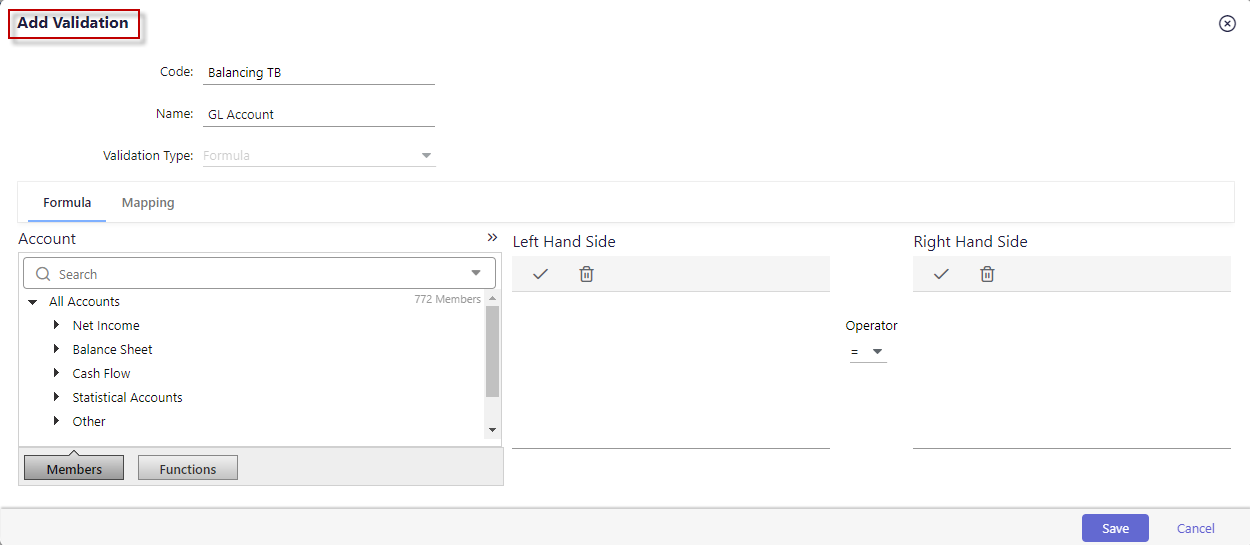
Click the Formula tab.
Build a formula by performing the following steps:
From within Members and Functions, drag and drop members and functions into the Left Hand Side and Right Hand Side boxes as necessary.
Select an operator from the Operator drop-down list.
Optional. Click √ to check the syntax of the formula. A status message will appear below the Left Hand Side and Right Hand Side boxes indicating whether or not the syntax is correct.
Clear a formula in the Left Hand Side box or Right Hand Side box by performing the following step:
Click Clear Formula associated with the Left Hand Side box or Right Hand Side box.
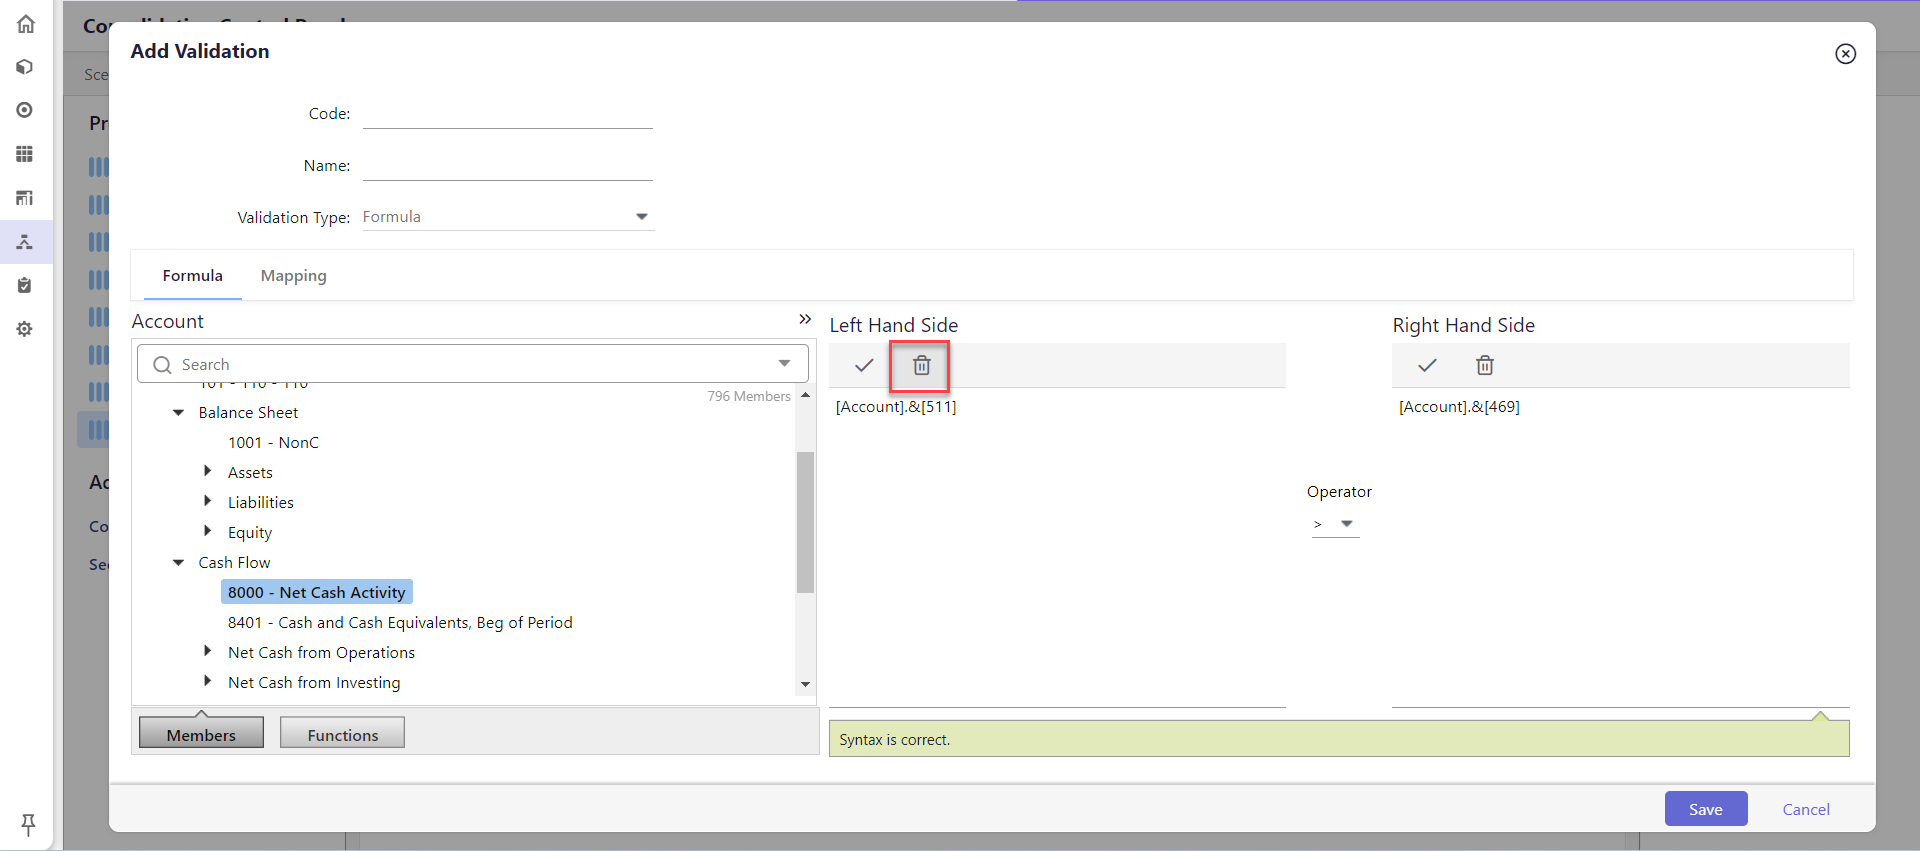
Click Save.
Manage Validation Mappings
Only the mapped members are considered when you run the Validation Process. You manage mappings when adding, copying, and editing a Validation.
To map and unmap members :
In the Consolidation Control Panel, under Processes, click Validations. The Validations grid appears.
Click Add. The Add Validation dialog appears.
Click the Mapping tab.
Map members by performing the following steps:
In the hierarchy, locate members by entering the search criteria in the Search box or expanding the hierarchy.
Select the checkbox next to the members or drag and drop the members from the hierarchy into the Mapped Companies box.
Unmap members by performing the following steps:
In the hierarchy, locate the member by entering the search criteria in the Search box or expanding the hierarchy.
Select the checkbox next to the members or drag and drop the members from the hierarchy into the Mapped Companies box.
OR
In the Mapped Companies pane, locate the member you wish to unmap by entering the search criteria or by using the scroll bar, then drag and drop the member from Mapped Companies box into the hierarchy on the left.
Copy a Validation within the Same Scenario
In the Consolidation Control Panel, under Processes, click Validations. The Validations grid appears.
Select a Validation.

Click Copy. The Copy Validation dialog appears.
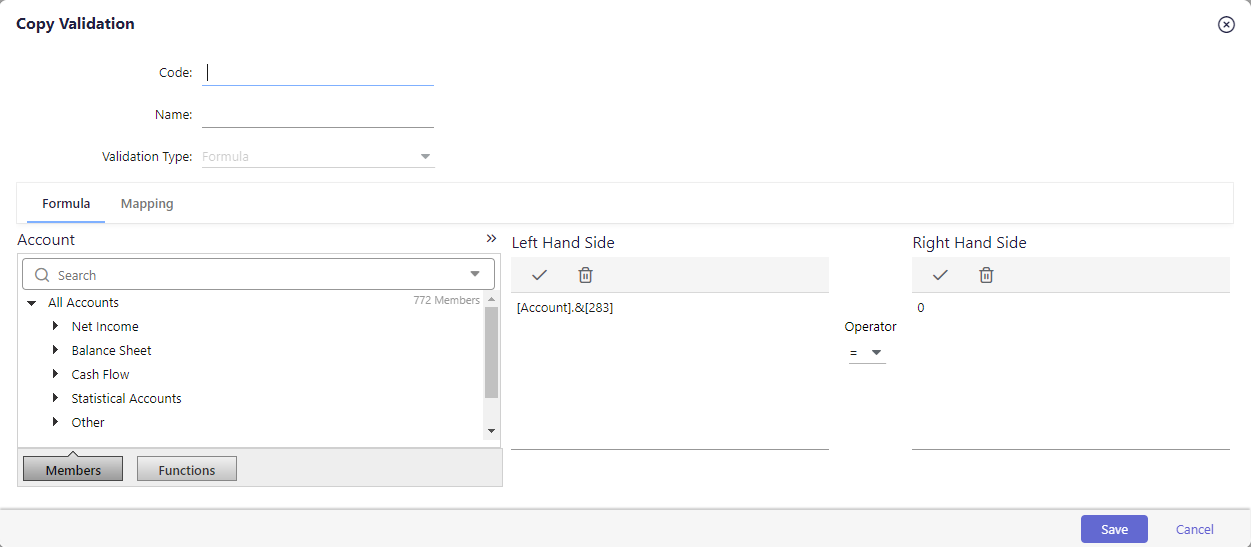
Complete Code, Name, and all other fields available on the Formula tab and Mappings tab.
Click Save.
Copy a Validation from One Scenario to Another
Navigate to the Consolidation Control Panel.
Select the scenario from which you want to copy the Validations.
Select a process and click the checkbox next to the entry you want to copy.
Click the Copy icon. Select Copy Multiple. The Copy page appears.
Enter a Code and Name and select period dates.
Select the Target Scenario.
Complete all selections based on the process being copied.
Click Save.
If you select Validations to copy, the Copy Single option will not be available.
Edit a Validation
You will want to edit a Validation to add, edit, or delete mapping members, before processing a Validation.
In the Consolidation Control Panel, under Processes, click Validations. The Validations grid appears.
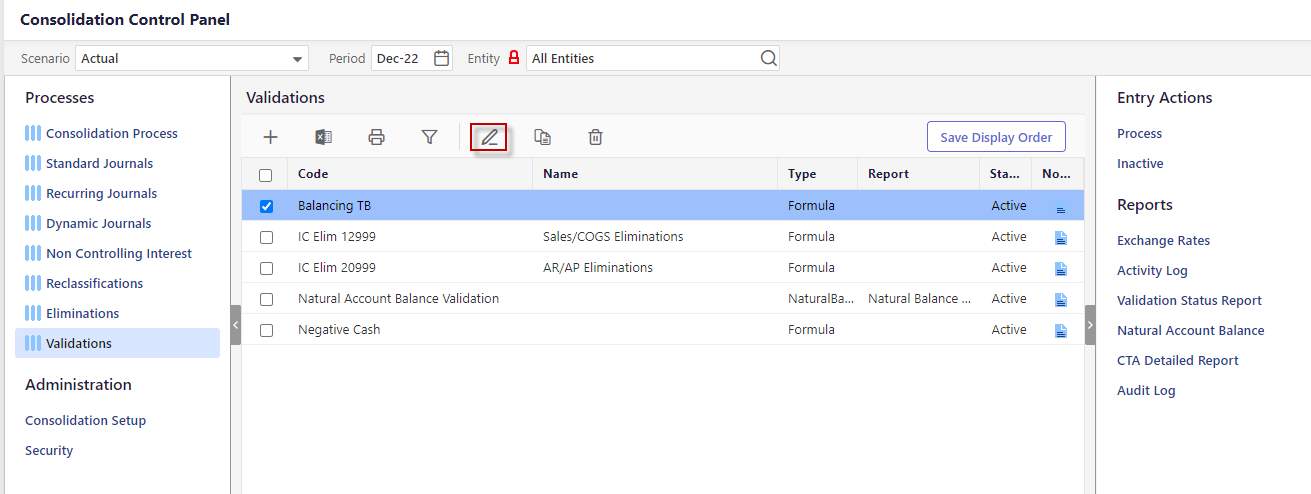
Click the Edit icon. The Edit Validation dialog appears.
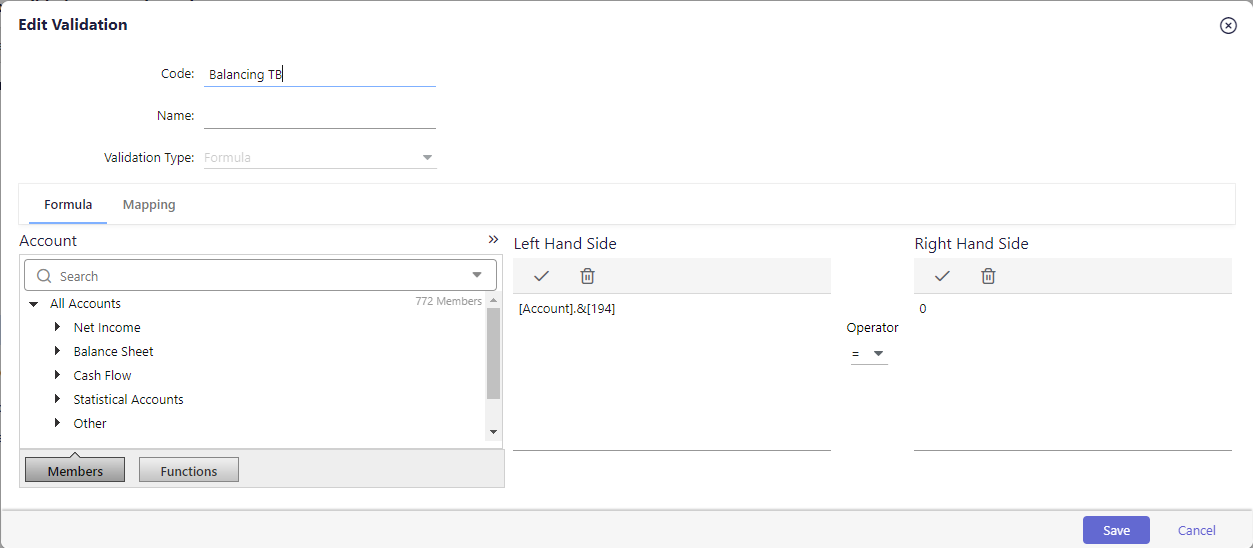
Edit Code, Name, and any other fields on the Formula tab and Mappings.
Click Save.
Delete a Validation
You can delete unused or inactive Validations.
In the Consolidation Control Panel, under Processes, click Validations. The Validations grid appears.
Select the Validation.
Click Delete.
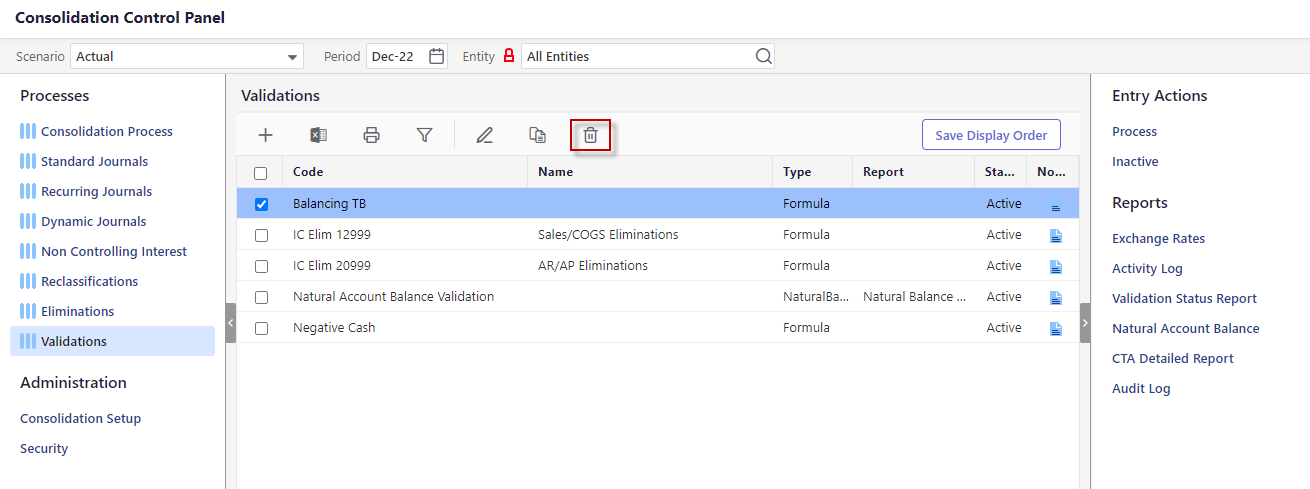
In the confirmation dialog that appears, click OK. The Validation is deleted.
Entry Actions
Process a Validation
You can process only active Validations. The Validation is performed on the mapped members to confirm whether the calculations pertaining to those members have produced accurate results.
In the Consolidation Control Panel, under Processes, click Validations. The Validations grid appears.
Select the active Validation, under Entry Actions, and click Process. The Process Setup dialog appears.
The Scenario field is read-only and indicates the scenario used when processing the Validation.
Select the fiscal Year by using the calendar icon.
Select the Period by selecting a month range.
Select the Reporting currency type. Available currency types are Common Currency (CC) and Local Currency (LC).
Select the Email notification checkbox if you want to send a notification about results when the process is complete, and enter the email addresses of the recipients you wish to notify.
Click Process. The Process Setup dialog is exited. A message appears indicating that the Validation is submitted for processing based on the selected periods and includes a link to navigate to the Detail View for status.
Make a Validation Active/Inactive
- Navigate to Consolidation Control Panel and select Validations under Processes.
- Select an Inactive validation and click Active under Entry Actions.
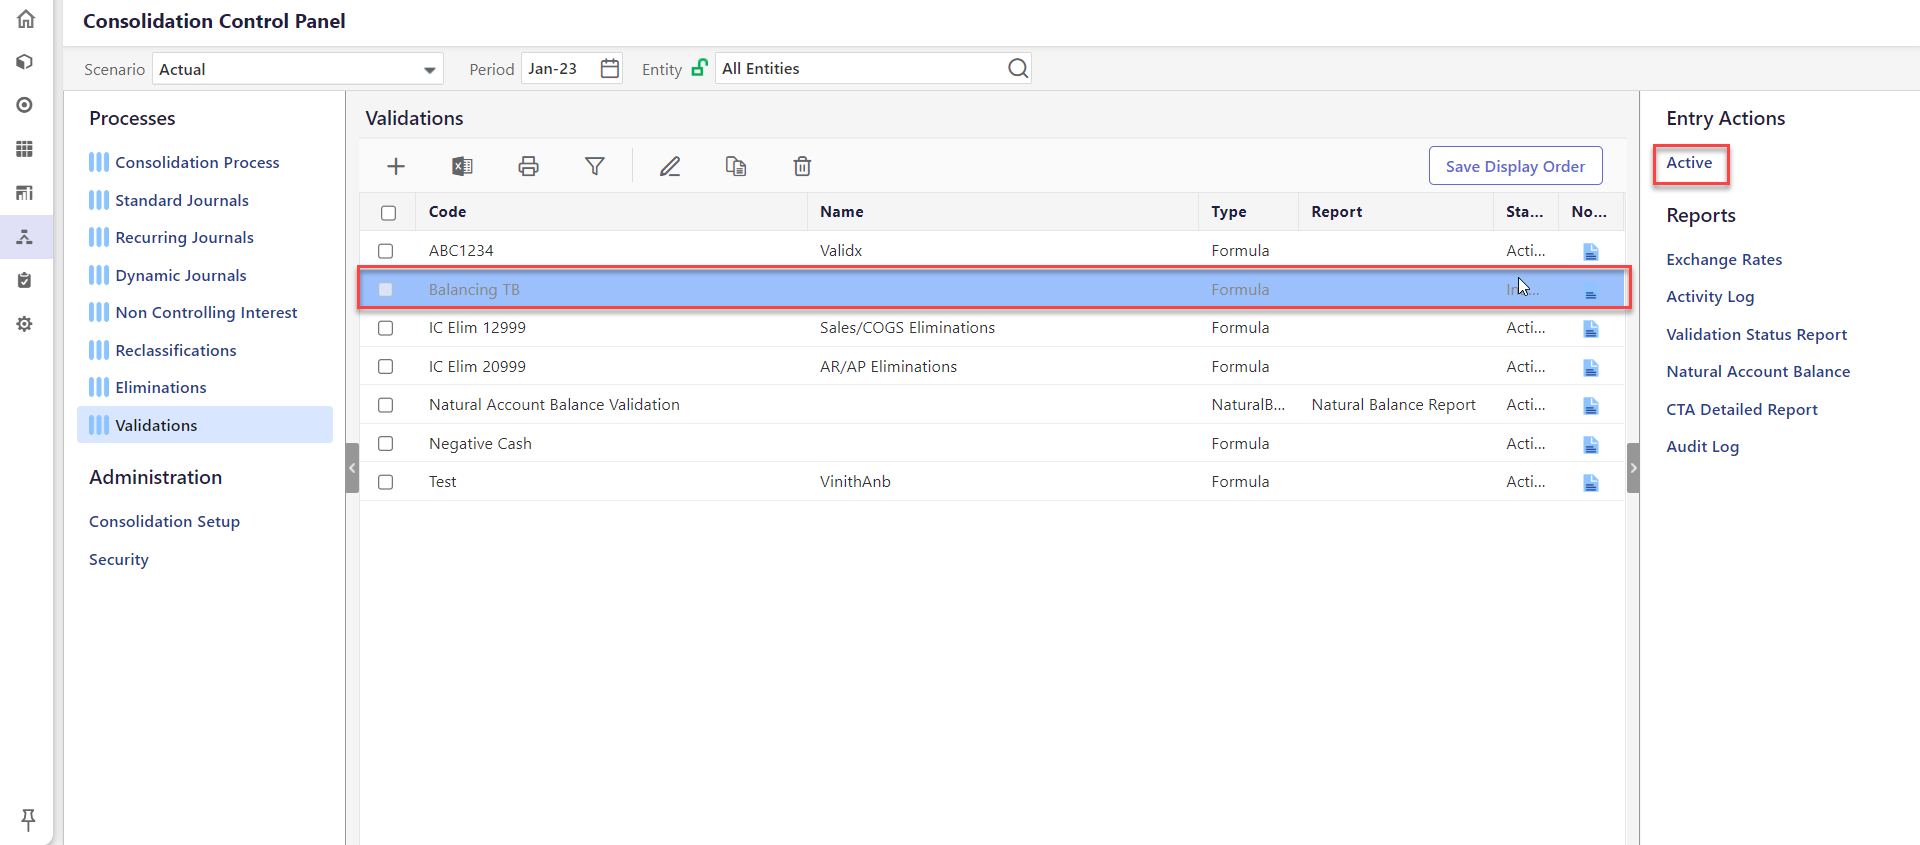
- The validation is changed to Active status. Perform the same steps to make an Active validation Inactive.

Pre-Defined Report Validations
Planful provides you with pre-defined Validations to support your general financial and accounting practices and ensure proper reporting.

