Workforce Attributes
- 4 Minutes to read
- Print
- DarkLight
- PDF
Workforce Attributes
- 4 Minutes to read
- Print
- DarkLight
- PDF
Article summary
Did you find this summary helpful?
Thank you for your feedback
Workforce Attributes are used to assist in the calculation of compensation items. This works by creating a flag or attribute that can be used to incorporate another factor in the calculation.
For example, the unemployment tax is based on the state an employee works in, so work state could be an attribute that is then identified for each employee and used to calculate the correct state unemployment tax rate.
Workforce attributes are used to calculate compensation items that use an attribute basis. You might also create attributes to manage additional employee position information. Employee position attributes are referred to as Reporting Attributes.
How-Tos
Refer to the following how to's for quick reference:
Now, let's explore all the options on the Workforce Attributes tab.
Note:
The order of the tabs in this article is structured based on the sequence of options visible on this screen.
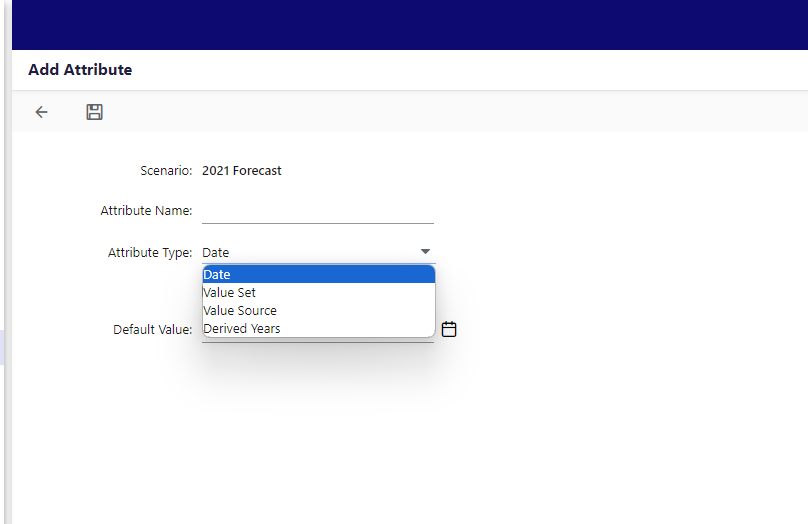
This option is used to add a workforce attribute.
To add a workforce attribute, do the following:
- Select a scenario to which you want to add the workforce attribute. You can see the system-defined attributes already listed on the screen. Click here to learn more about system-defined attributes.
- Click the Add button. The Add Attribute page appears.
- Enter the Attribute Name.

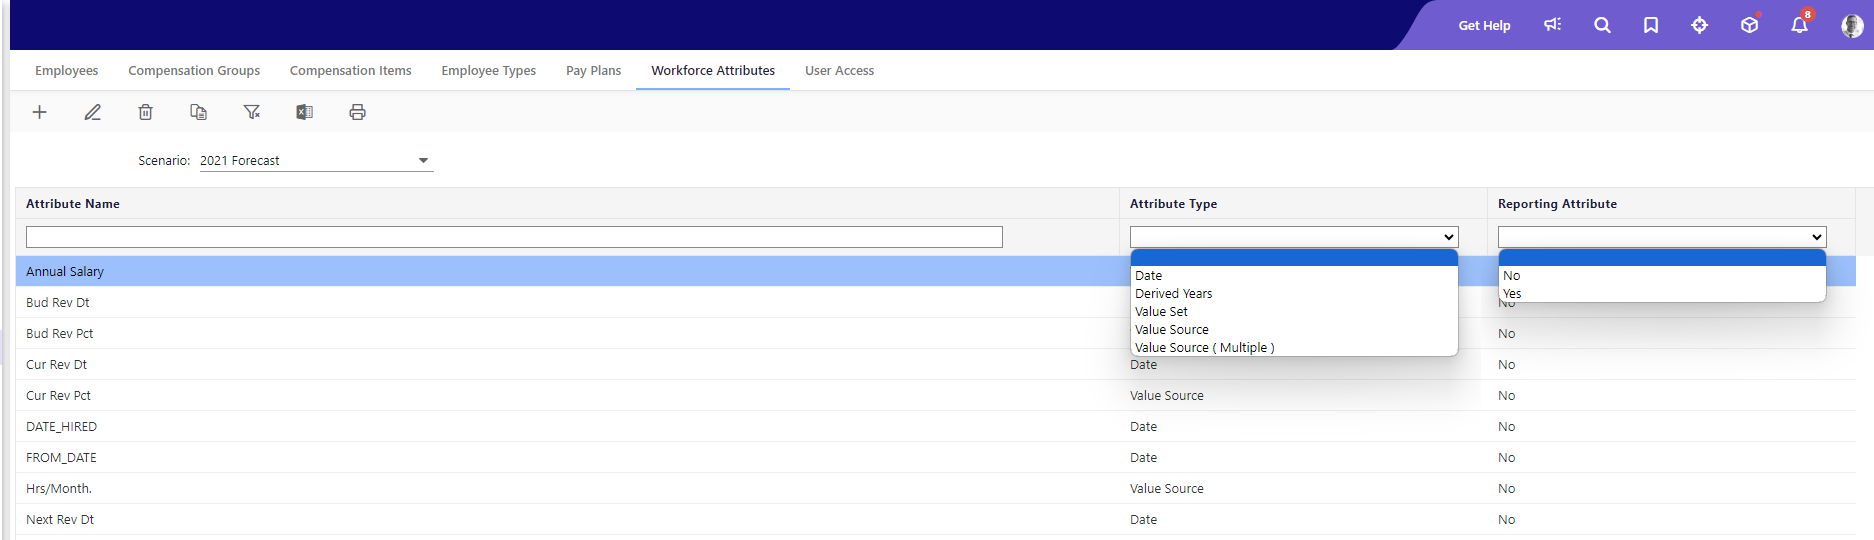
- Select an Attribute Type from the following:
- Date: Aides in the computation for the date of eligibility of individual employees for certain compensation items. For example, the 401K eligibility date is configured as a Workforce Attribute of type Date.
- Value Set: Helps configure compensation items individually for a set of attribute values. For example, the State attribute is defined with a set of state attribute values in which your organization has operations. This attribute is used to configure SUTA individually for all states as it varies from state to state.
- Value Source: These attributes have a default value. The value can be changed for individual employee positions.
- Derived Years: Helps calculate compensation items based on employee years of service. For example, to apply the contribution to an employee retirement plan as a compensation item based on the years of service of the employee, you need to have an attribute that calculates the seniority(years of service) based on the hire date of the employee.Note:You cannot edit the Attribute Type. So choose the attribute type carefully when selecting the attribute type.
- The Reporting Attribute checkbox may be available based on the Attribute Type you select.Note:
A Reporting attribute is not a Compensation attribute. When you select the Reporting Attribute checkbox, it signifies that the input provided for this attribute will not affect the calculation of compensation data. When you select the Reporting Attribute checkbox, another option becomes available, called Read Only Attribute for Budget Input.
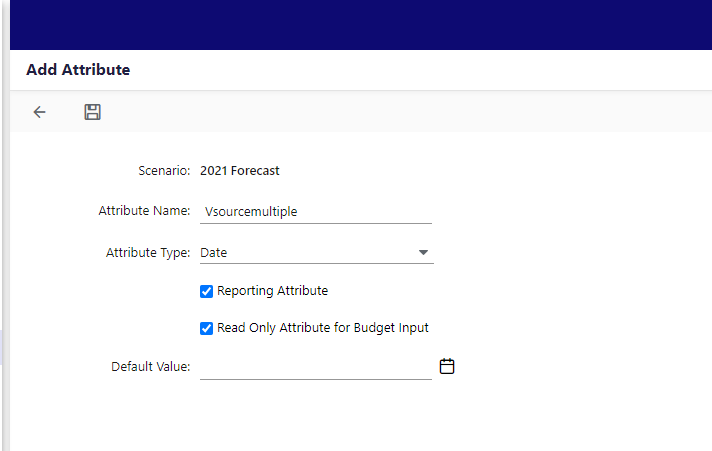
You can utilize this option to make Workforce reporting attributes read-only, preventing budget users from making modifications. Consequently, these read-only attributes cannot be edited through the Planning Control Panel as they are read-only. However, read-only attributes remain editable in the Default scenario within Maintenance, from the Employee add and edit pages. This allows budget users to make necessary edits and provide default values for these fields as needed.
- Based on the Attribute Type selected, you can add a Default Value. Default values for value set attributes should be within the attribute value list. Default values can be edited from the Default Scenario Add/Edit page.
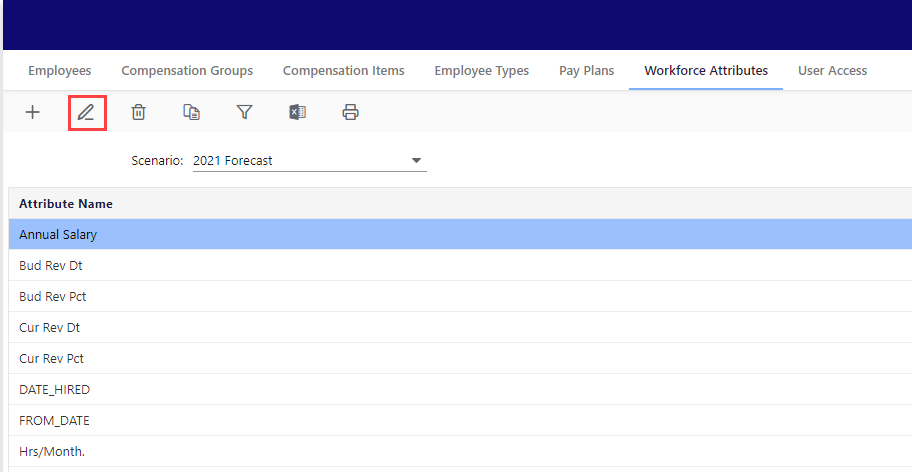
This option is used to edit an existing workforce attribute.
To edit a workforce attribute, do the following:
- Click the Edit icon. The Edit Attribute page appears.Note:You cannot edit a system-defined attribute.
- Update the Attribute Name and Default Value.Note:
You cannot edit the Attribute Type. So carefully choose the attribute type when creating the attribute.
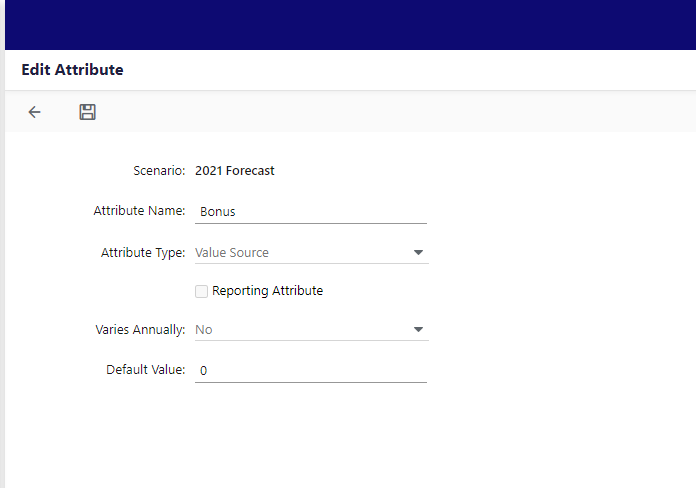
- Click Save to save your changes.
This option is used to delete the employee type.
- Select the workforce attribute you want to delete.
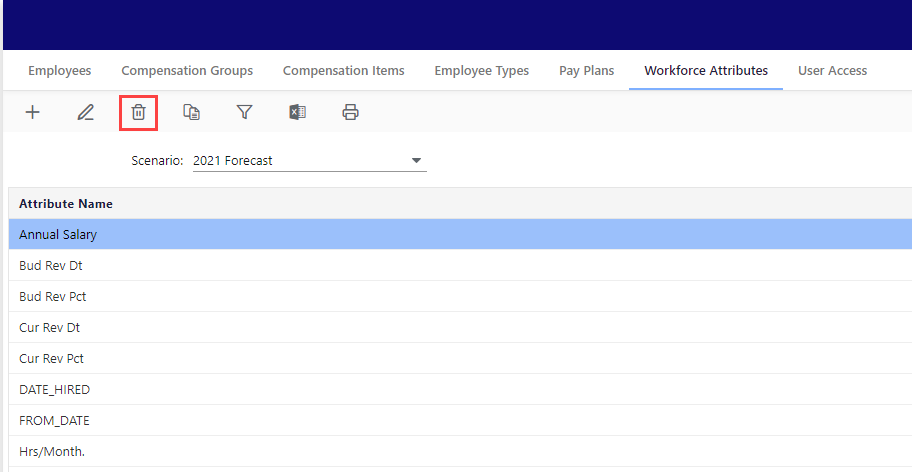
- Now, click the delete icon. A confirmation message appears on the screen to confirm the deletion.Note:
- You cannot edit a system-defined attribute.
- You cannot delete a workforce attribute if it has dependencies.
This option allows you to copy an existing compensation item.
To copy a workforce attribute, do the following:
- Select an existing attribute.Note:You cannot copy a system-defined attribute.
- Click Copy. The Copy Attribute pop-up appears.
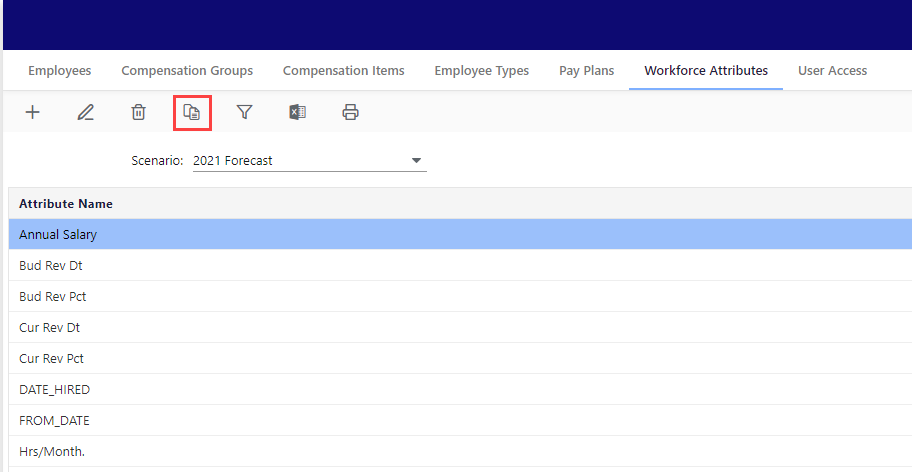
- Enter the New Attribute Name. These fields are already pre-filled with Copy_ followed by the name of the attribute you've selected.
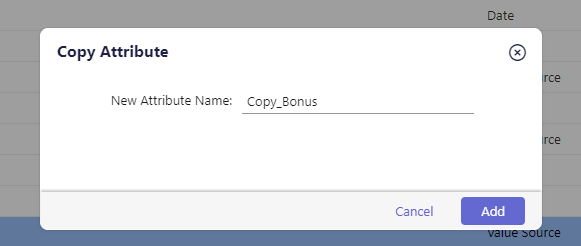
- Click Add. You can see the attribute being added to the list. Edit the attribute if required.
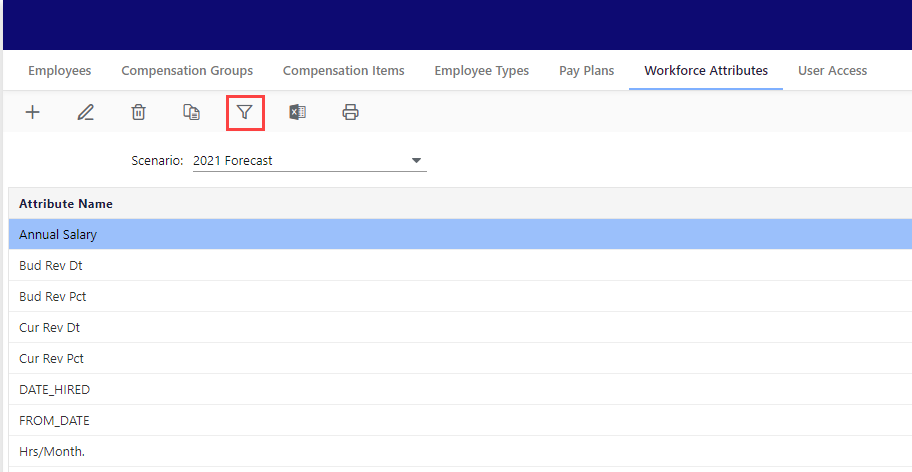
This option simplifies your search process. By clicking the Apply Filter option, you can narrow down your search results.
The search fields appear below the Attribute Name. To find your workforce attribute, enter the attribute name, select the attribute type from the Attribute Type drop-down, and specify whether it is a reporting attribute using the Yes or No indicators in the Reporting Attribute drop-downs.
These options allow you to export the workforce attributes.
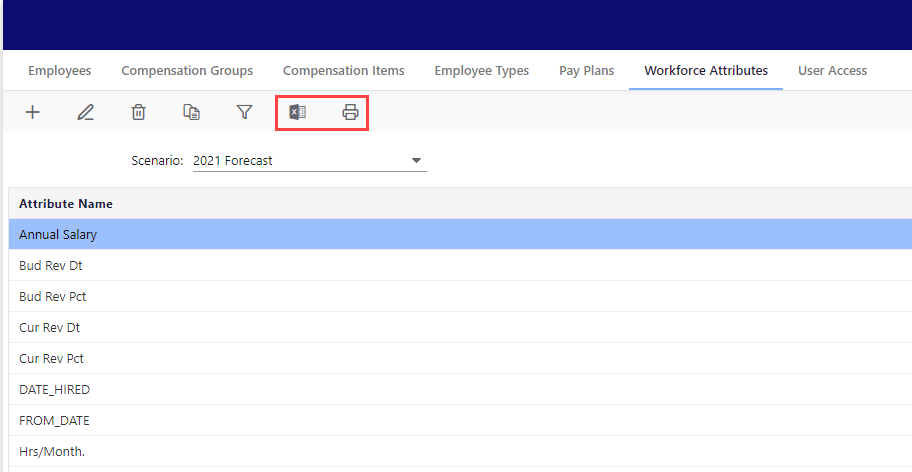
Export to Excel
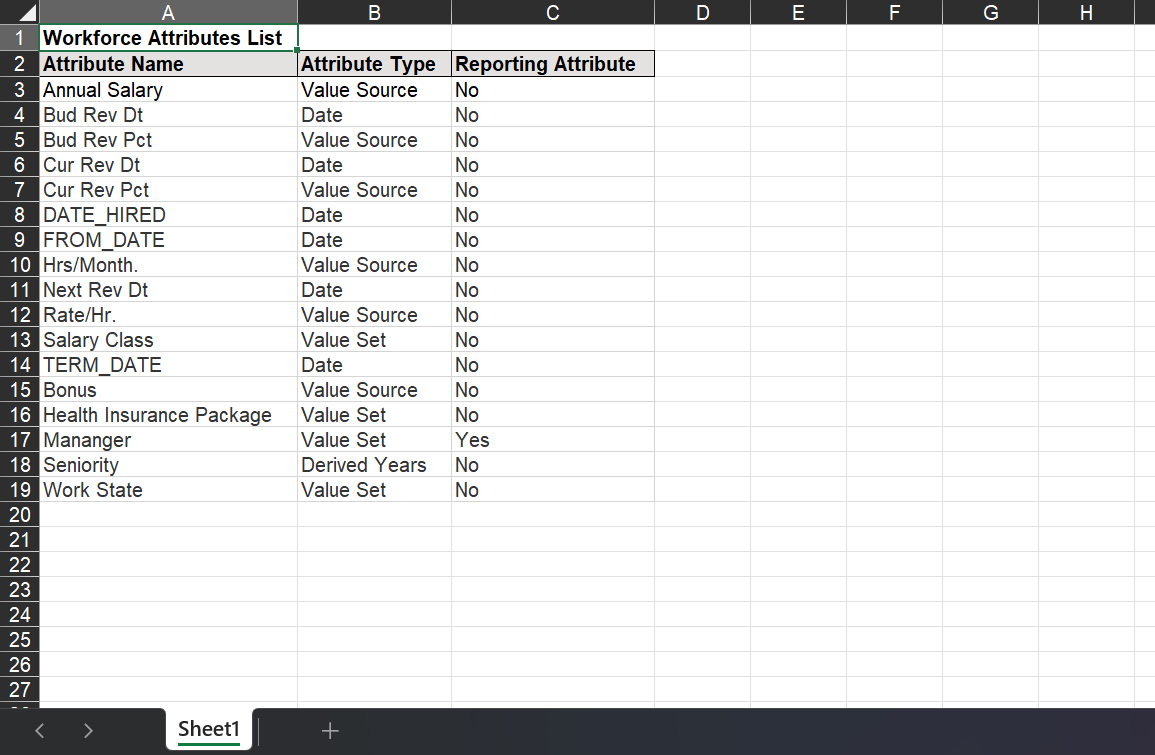
This option enables you to export the entire Workforce Attributes List, which shows the Attribute Name, Attribute Type, and Reporting Attribute status with Yes or No indicators in the columns. The exported data will be identical to what is displayed on the Workforce Attributes screen.
This option enables you to print the entire Workforce Attributes List, which shows the Attribute Name, Attribute Type, and Reporting Attribute status with Yes or No indicators in the columns. The exported data will be identical to what is displayed on the Workforce Attributes screen.

Related Articles
Was this article helpful?