How to Add an Elimination
- 1 Minute to read
- Print
- DarkLight
- PDF
How to Add an Elimination
- 1 Minute to read
- Print
- DarkLight
- PDF
Article summary
Did you find this summary helpful?
Thank you for your feedback
The elimination process works on the elimination rules that you have created. When you run the consolidation process, the system passes elimination entries based on the active elimination rules available on the Eliminations page in the Consolidation Control Panel.
To create an elimination rule, do the following:
Navigate to Consolidation > Consolidation Control Panel > Processes tab.
Under the Processes pane, select Eliminations. The Eliminations grid appears.
Click the Add icon. The Add Elimination window appears with the Properties tab active.
In the Properties tab, configure the following fields:
Elimination Type - Select the elimination type:
Flow - This elimination rule is considered for the calculation of Income Statement eliminations. They impact the distribution of profits.
Balance - This elimination rule is considered for the calculation of Balance Sheet eliminations. They do not impact the distribution of profits.
Code - Enter an elimination rule code of your choice.
Name - Enter an elimination rule name of your choice.
Out of Balance Account - Select the account to store the differences resulting from intercompany transactions. It is to keep the balance sheet in balance.
Select Default values for other Segments - Select default accounts where the elimination rule impact should be posted. This is a mandatory selection, irrespective of the Retain Source Segments option.
Retain Source Segments - Select to retain original source segments and overrule the default segment values in the reversal entries posted by the application. If this checkbox is not selected, then the application posts reversal entries to the Out of Balance Account.
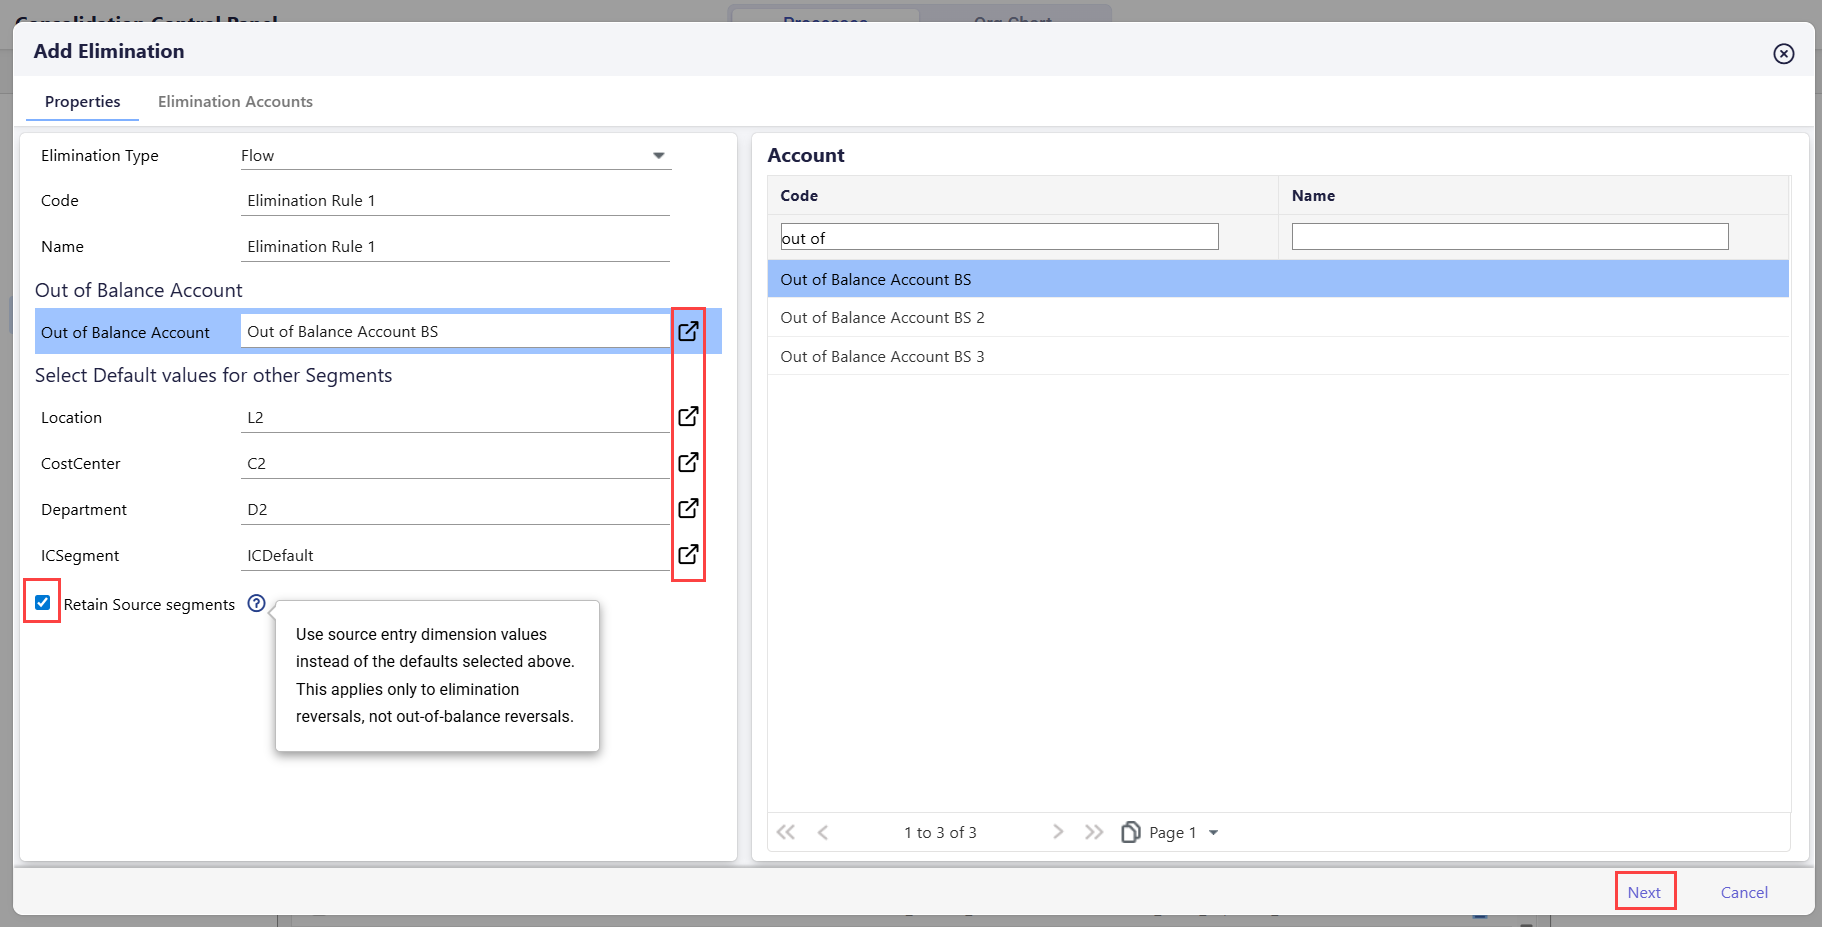
Click Next. The Elimination Accounts tab appears.
In the Elimination Accounts tab, configure the following:
Account - Select the account checkbox for the account you want to add to the elimination rule. The selected accounts appear in the grid. Accounts in this pane are populated based on the elimination type selected, that is, Flow or Balance accounts.
Variance Thresholds - Enter a number for Maximum Variance Thresholds. Variance thresholds represent the variation bands and coloring schemes for displaying current variances.
Actions - Click the cross icon to remove a selected elimination account from the list.
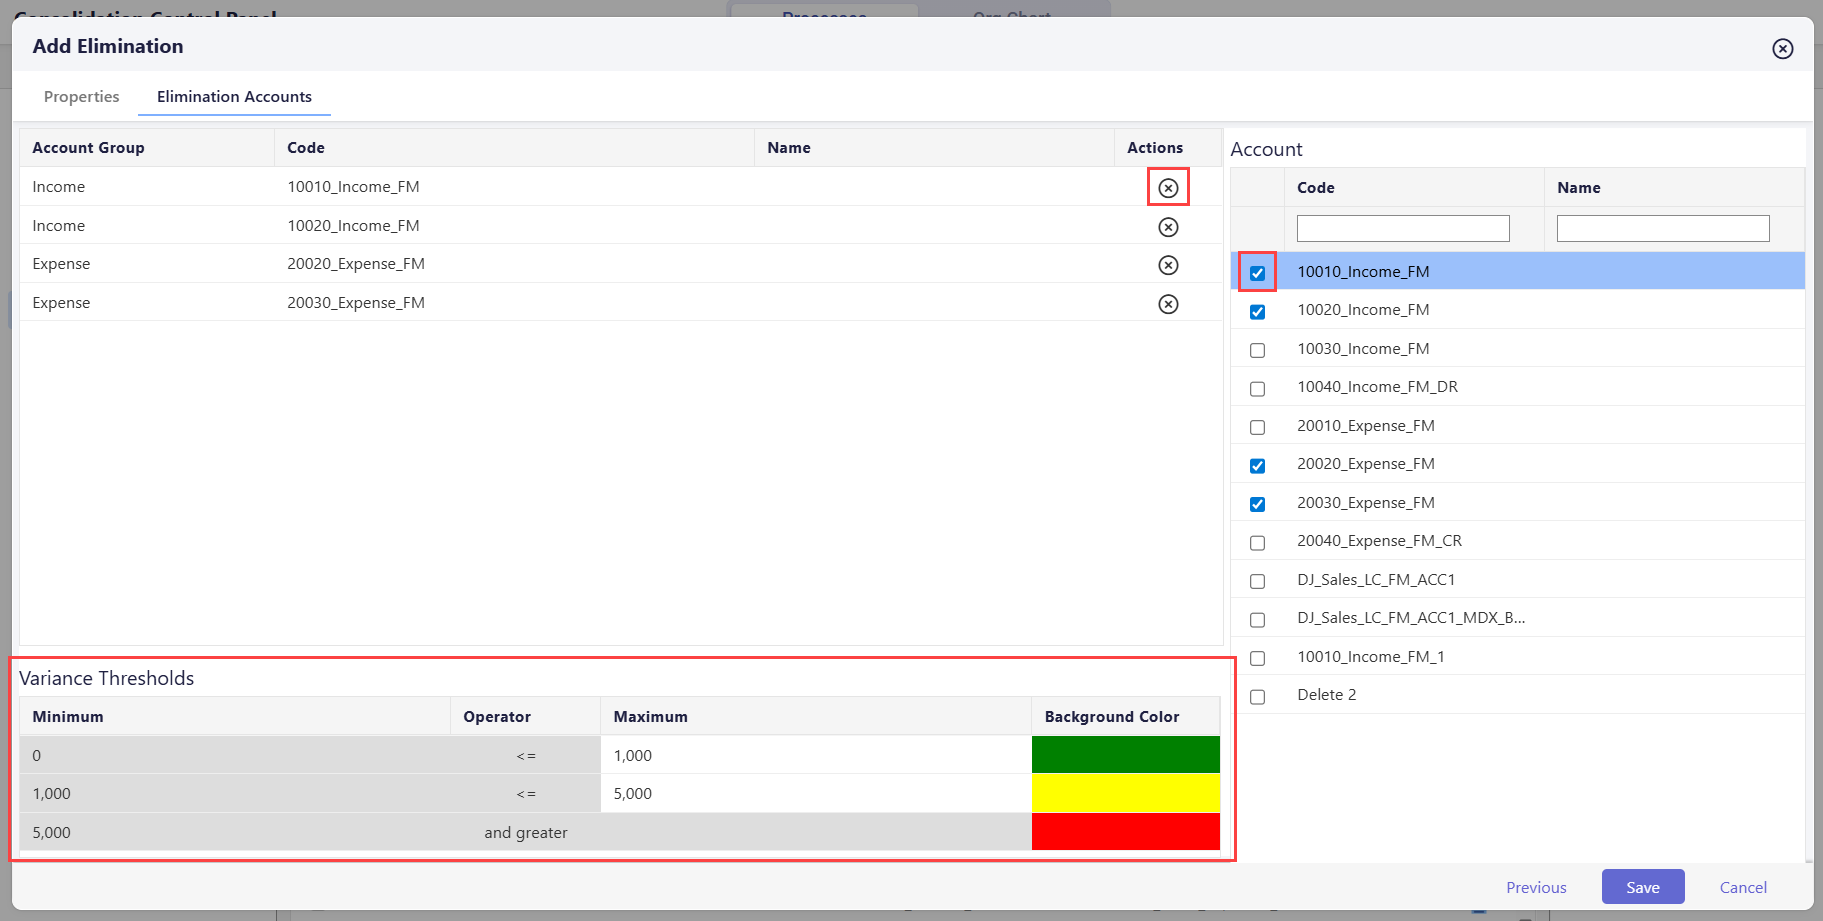
(Optional Step) Click Previous to navigate back to the Properties tab.
Click Save. The elimination is created successfully and appears on the Eliminations page.
Was this article helpful?