How to Bulk Import Approval Roles
- 3 Minutes to read
- Print
- DarkLight
- PDF
How to Bulk Import Approval Roles
- 3 Minutes to read
- Print
- DarkLight
- PDF
Article Summary
Share feedback
Thanks for sharing your feedback!
- Go to Maintenance > Admin > User Management > User tab.
- Click More and then select Approval Role Setup.
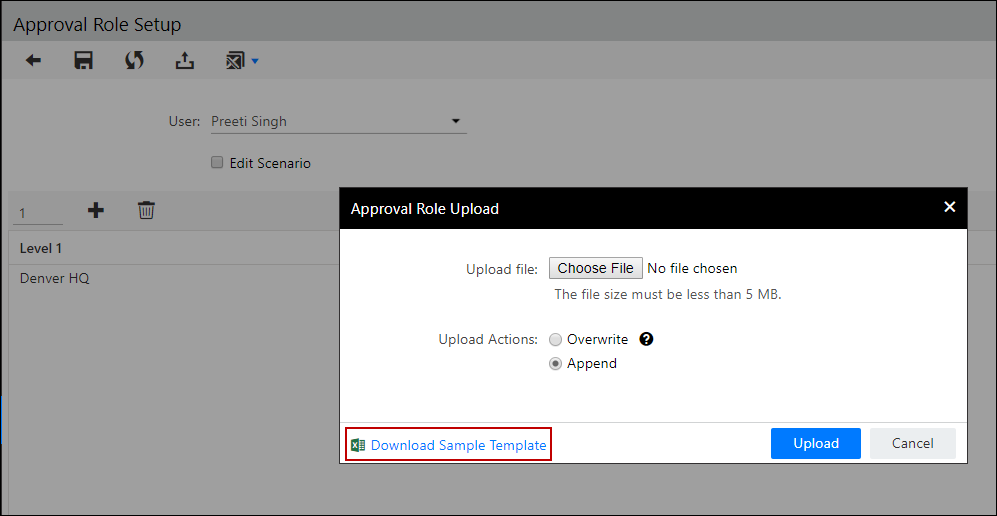
- Click the Import icon. The Approval Role Upload dialog box appears.


Click Download Sample Template. It is important that you use the sample Excel template, because it instructs you how to organize your data and load it back into the application successfully

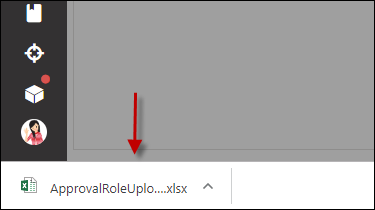
After the template has been downloaded to your computer, open the template.

The template displays the required fields. Also, this template provides information about how you can enter the correct data in all the fields.
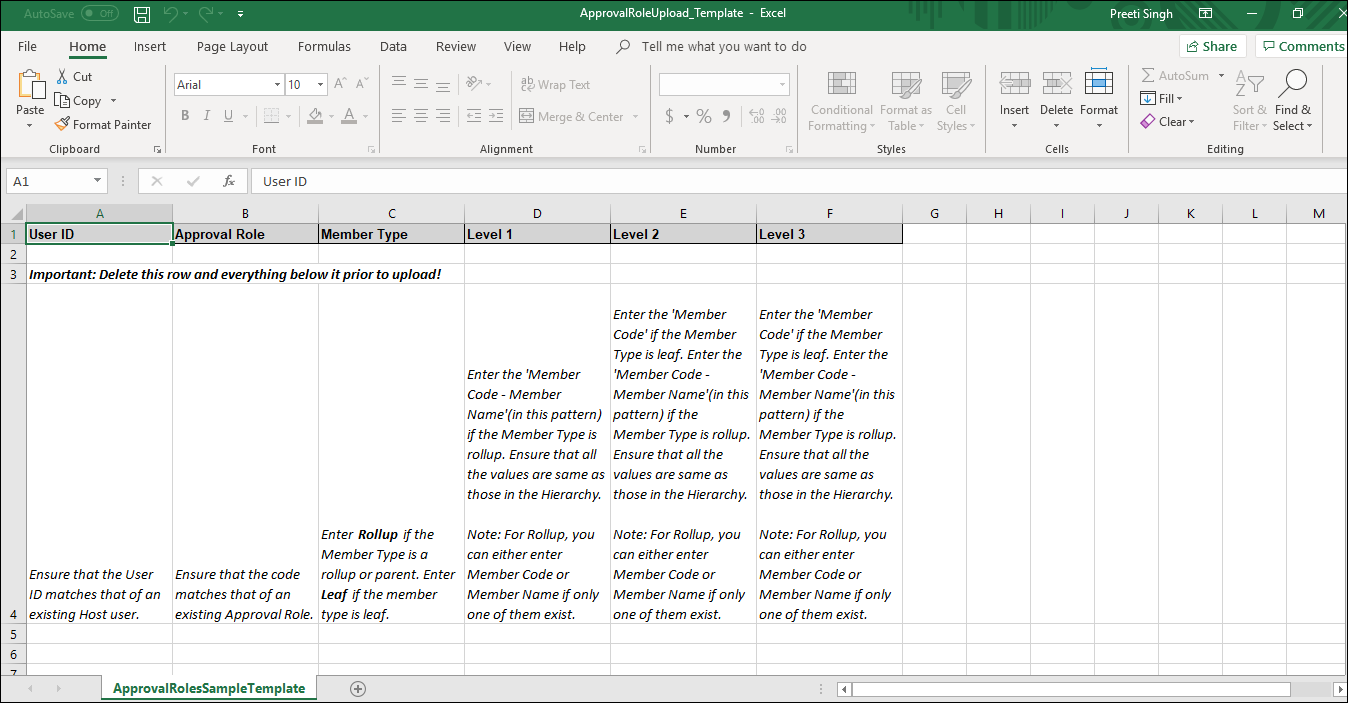

Enter the relevant details in the User ID, Approval Role, Member Type, Level1, Level 2, and Level 3 columns according to the instructions provided in the sample template. Ensure that you delete all the instructions in the sample file before uploading it.
The following table describes the columns in the sample template.
User ID
Approval Role
Member Type
Level 1
Level 2
Level 3
Ensure that the User ID matches that of an existing Planful user.
Ensure that the code matches that of an existing Approval Role.
Enter Rollup if the Member Type is a rollup or parent. Enter Leaf if the member type is leaf.
Enter the 'Member Code - Member Name'(in this pattern) if the Member Type is rollup. Ensure that all the values are the same as those in the Hierarchy.
Note:For Rollup, you can either enter Member Code or Member Name if only one of them exist."Enter the 'Member Code' if the Member Type is leaf. Enter the 'Member Code - Member Name'(in this pattern) if the Member Type is rollup. Ensure that all the values are same as those in the Hierarchy.
Note:For Rollup, you can either enter Member Code or Member Name if only one of them exist.Enter the 'Member Code' if the Member Type is leaf. Enter the 'Member Code - Member Name'(in this pattern) if the Member Type is rollup. Ensure that all the values are same as those in the Hierarchy.
Note:For Rollup, you can either enter Member Code or Member Name if only one of them exist.The following table contains sample data for the columns in the sample template.
User ID
Approval Role
Member Type
Level 1
Level 2
Level 3
psingh@gmail.com.
Reviewer
Rollup
Budget Hierarchy
Denver - Denver HQ
stevearmtestuser@gmail.com
Budget Approver
Leaf
Budget Hierarchy
Denver - Denver HQ
Australia
svadlamudi@gmail.com
Simple Budget Approver
Leaf
Budget Hierarchy
Denver - Denver HQ
Australia
Note:In the required levels, every rollup member must have the details in the “Member Code - Member Name” format.Note:You can have more levels depending on the hierarchy that you have defined in the application.Note:Ensure that you delete all the instructions in the sample file before uploading it.
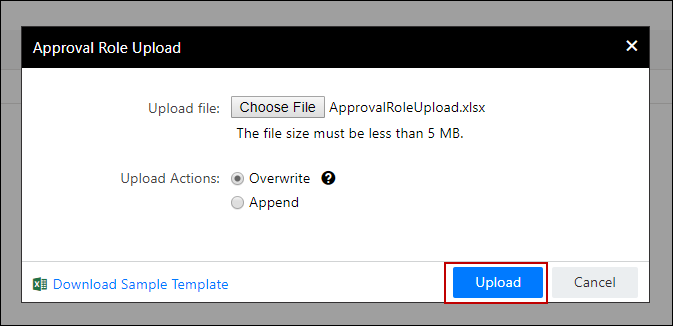
- Save the XLSX file to your computer.
- In the Approval Role Upload dialog box, click Choose File.


- Browse for and select the XLSX file that you saved to your computer.
- Click any one of the following options from the Upload Actionsfield:
- Overwrite: To overwrite all the existing levels and approval roles. Or, to overwrite a specific level or overwrite specific approval roles. To do so, you can download the file for a specific user and update the required levels/approval role, and then upload the file to replace the existing data for this user with the data in the uploaded file.Note:If you want to overwrite specific levels or overwrite specific approval roles, it is important that you download the ApprovalRoleExport excel file by using the required option from the Export drop-down list
- Append: To update the existing approval roles and to add additional levels with approval roles.
- Overwrite: To overwrite all the existing levels and approval roles. Or, to overwrite a specific level or overwrite specific approval roles. To do so, you can download the file for a specific user and update the required levels/approval role, and then upload the file to replace the existing data for this user with the data in the uploaded file.
- Click Upload.

- After the file has been uploaded, a confirmation message is displayed. Click through to the Detail View dialog box (as shown here) to view the status of the upload action. Additionally, a process called ApprovalRolesUpload is created on the Job Manager page (as shown here).


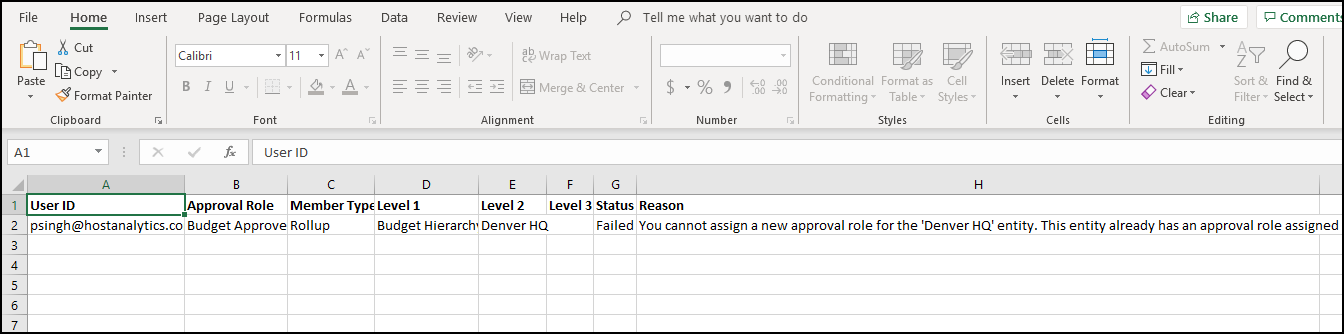
- If the upload process failed or was completed with errors, select the Click Here link under the Statuscolumn of the Detail View dialog box. This action downloads an Excel file with detailed information about why the failure occurred.

An example of a failed upload process is shown here. Fix the errors and upload the file again.
After the approval roles have been uploaded successfully, a confirmation message is displayed. The uploaded approval roles are displayed on the Approval Role Setup page, as shown here.


Best Practices
To make permission management easier, you can use the user export options. If you use this feature, you do not have to worry about the format; you can just make the necessary changes to the exported information and quickly reload the file.
You can use the Overwrite functionality to replace data. If you want to completely remove the existing data and replace it with new data, use the Overwrite option; otherwise, you can just use the Append option.
If you are a bit hesitant to use this functionality, you should try out this feature in your sandbox environment. After you are familiar with the functionality, you can make any changes to the Approval Roles or Permissions on your production environment.
Was this article helpful?