22.8 Release Notes
- 6 Minutes to read
- Print
- DarkLight
- PDF
22.8 Release Notes
- 6 Minutes to read
- Print
- DarkLight
- PDF
Article summary
Did you find this summary helpful?
Thank you for your feedback
Structured Planning: Introduced Copy Over Home or Position Budget Entity Data
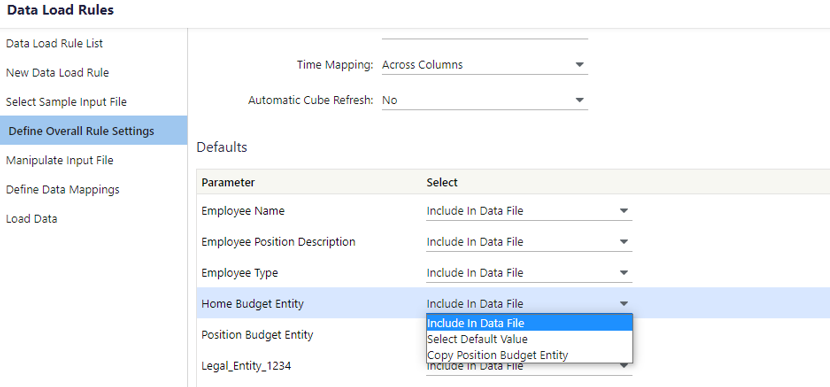
With this release, as a part of Workforce Planning Actuals, you can map Home Budget Entity or Position Budget Entity to the load file and copy over the missing entity while defining the rules to load a DLR. Now, when you choose a scenario reference file consisting of only one entity value, Home Budget Entity or Position Budget Entity, you can map the entity from the entity drop-down list instead of revisiting the file to enter the missing value.
The Home Budget Entity and Position Budget Entity contain the following options, and you can use the combination of options in these drop-downs that suit your needs:
- Include in Data File
- Select Default Value
- Copy Home/Position Budget Entity
In Practice: Copy Data from Home or Position Budget Entity
- Navigate to Maintenance > Data Load Rules.
- Click the New Data Load Rule available in the side navigation.
- Enter a Name for the Data Load Rule and fill all the fields with specific data.
- Select Workforce- Employee Actuals Load Item and Load Sub Item from the drop-down list.
- Fill all the fields with required data in the following screens and click Next.
- In the Define Overall Rule Settings screen, fill all the other parameters with data.
- In the Defaults section, select Include In Data File for the required fields
- Select an appropriate option for Home Budget Entity from the drop-down.
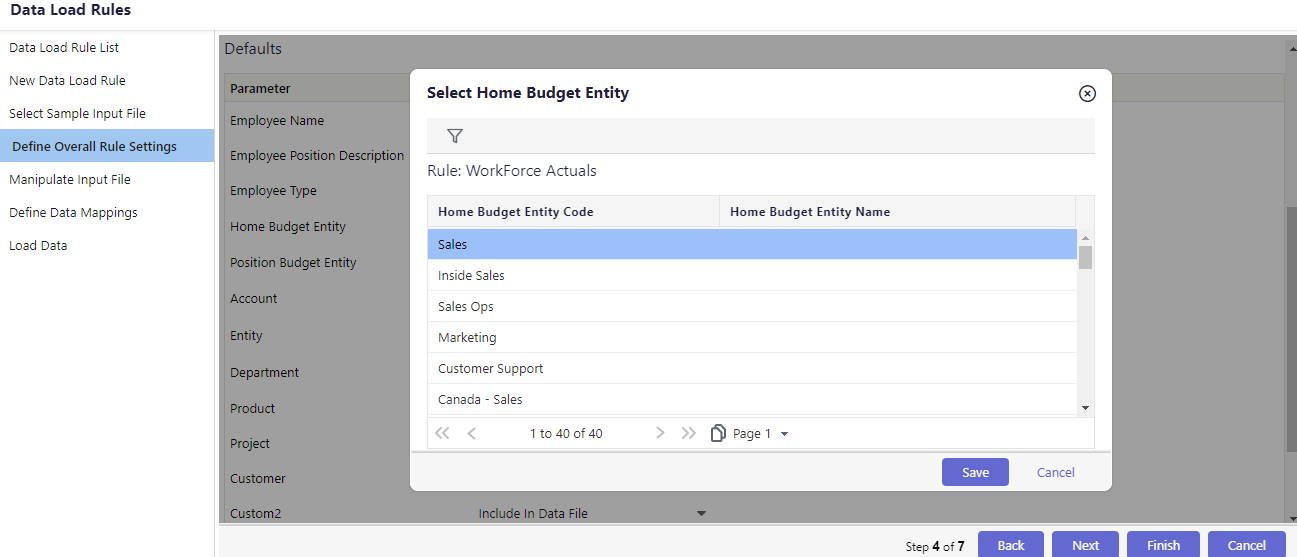
- If you have selected Select Default Value, you can select a Home Budget Entity from the pop-up screen.
- Based on the option selected for Home Budget Entity, select an appropriate option for Position Budget Entity from the drop-down.

- Fill all the fields with specific data in the following screens and click Next.
- You can choose a new Data file or click Finish in the Load Data Screen.
Structured Planning: Introduced Employee Compensation Metadata Export Option
With this release, you can now export the employee compensation metadata. Navigate to the Workforce Planning Export > Employee Reports screen and select the Employee Compensation Metadata option added in the Report Type drop-down to download the data. You can analyse this data and use it accordingly. For more information about Export Reports, click here.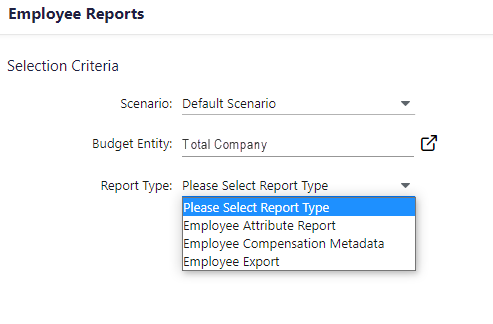
Dynamic Planning: Unique URLs for Artifacts
With this release, the following functions in the Dynamic Planning module will have a unique URL:
- Reports
- Plans
- Analyze
- Models
You can share these links with other users and also use them in tasks in Task Manager. For more information about Task Manager, click here.
You can use the External Link feature and add the link in tasks in Task Manager for any module within Dynamic Planning.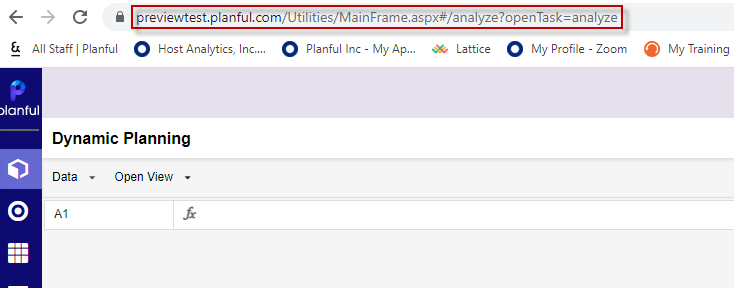
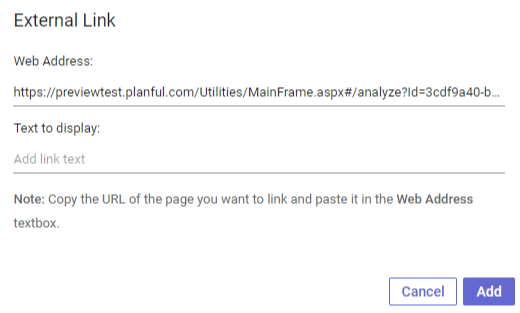
In Practice: Creating tasks in the Task Manager using External Link
- Navigate to the Task Manager and select Add Task.
.png)
- Under task location, you can browse tasks from the existing tasks in the system or select External Link.
- Select Insert Link. In the External Link pop-up, insert the URL and provide a display text.
- Click Add. A new task is created, and you can navigate directly to the view from this task location.
Dynamic Planning: Update to the SpotlightXL Add-In
If you have automated installation for SpotlightXL, then there is nothing you need to do as the update will be done automatically. If you manually install SpotlightXL and related updates, then you must access the Spotlight for Office Installation Guide and download the latest update.
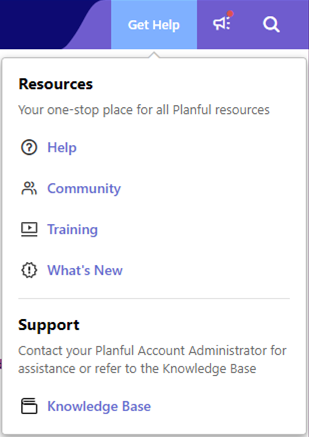
Platform: Heads Up! Deprecating Help, Support & Community, and Training links from the User Menu
From the upcoming release onwards, you will no longer be able to access Help, Support & Community, and Training links from the User menu. Instead, you can access them only from the Get Help menu in the top toolbar.
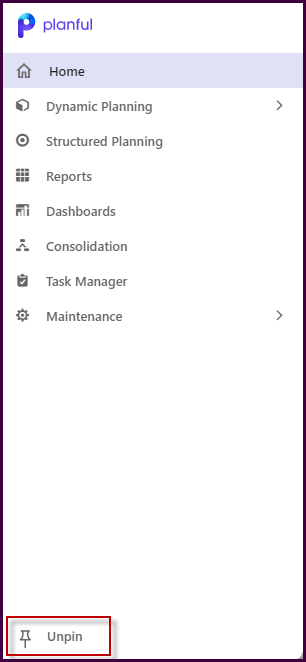
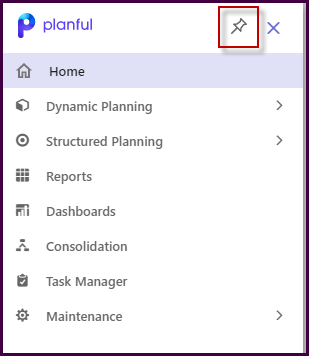
Platform: Heads Up! Enhancing the Left Navigation Pane
From the upcoming release onwards, you will see the enhanced left navigation menu in the pinned state and can no longer use the old navigation menu. You can choose to unpin the navigation menu for maximum horizontal space.
The following is an illustration of a pinned left navigation menu.

The following is an illustration of an expanded pinned left navigation menu, highlighting the unpin icon which you can click on to collapse/unpin the menu.
The following is an illustration of an unpinned left navigation menu, highlighting the pin icon which you can click on to expand/pin the menu.
Predict: Added Projections on Templates with Dimension Attributes
With this release, Predict Projections will be available on templates based on budget entities with dimension attributes. You can use the Advanced fill and Fill Selected Lines features on such templates to generate projections.
For more information on Predict Projections, click here.
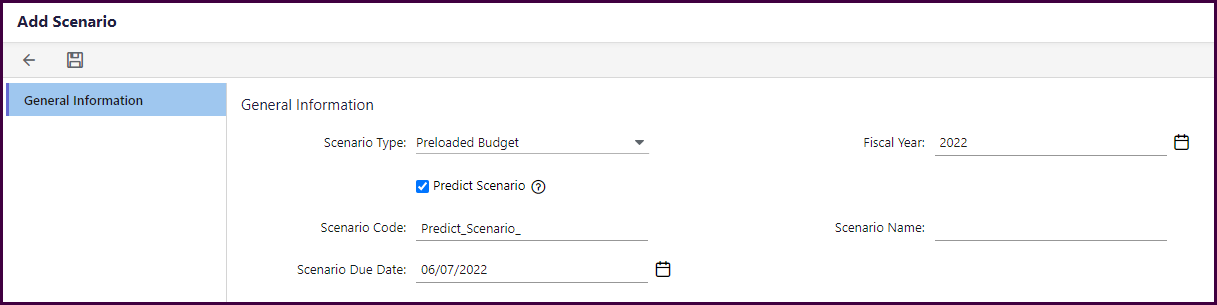
Predict: Introduced Predict Scenarios for AI Projections Seeding
You can now directly seed AI projections into scenarios using the Preloaded Budget option in the Scenario Type drop-down and selecting the Predict Scenario check box in the scenario creation process. This feature allows you to create a template prefilled with AI-generated projections to generate more data-driven forecasts and reduce the manual efforts required to create baseline budgets.
Business Value
Templates already filled with AI projections are a great start to building baseline budgets and forecast scenarios.
In Practice
To pre-populate a template with AI projections, perform the following steps:
- Go to Maintenance > Admin > Scenario Setup to access the Scenario List page.
- Select the Add scenario option.
- In the General Information section of the Add Scenario page, select Scenario Type as Preloaded Budget.
- Check the Predict Scenario check box; this will prefill the Scenario Code with a prefix of Predict_Scenario_. You can then add a meaningful suffix to identify the scenario.
- Save the scenario.
You can then use this scenario during the data seeding of other scenarios to pre-populate templates with AI projections. Also, you can use the preloaded Predict scenario in Dynamic Reports for further analysis.
Note
You can fill both budget and forecast scenarios with AI Projections by using this preloaded Predict Scenario.
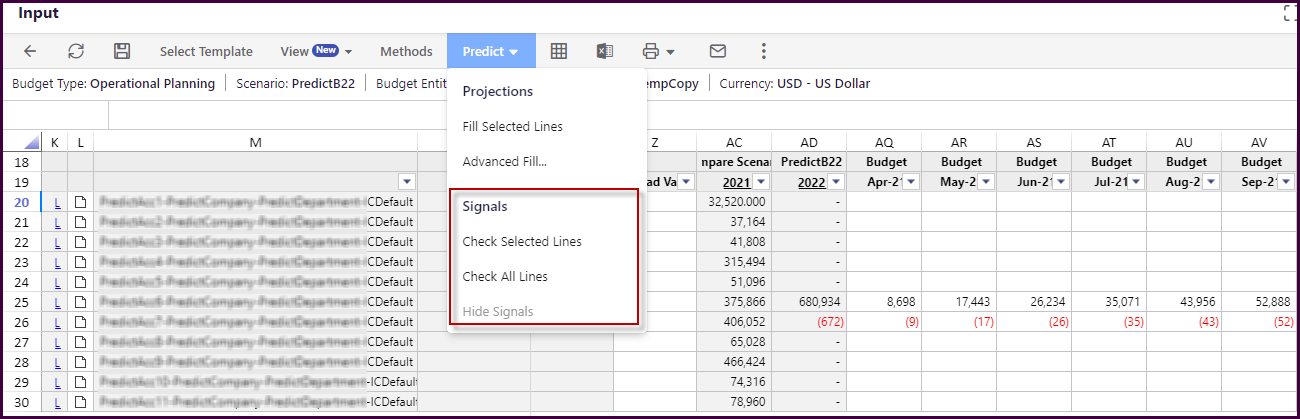
Predict: Added Support for Signals on GTSC, GTEC, and Line Item Templates
With this release, Signals will now be available on GTSC, GTEC, and Line Item templates. You can select an option, such as Check Selected Lines or Check All Lines, to display Signals on the supported templates.
You can check Signals on the selected supported lines or the entire template as often as required. However, every time you change a cell or a set of cells, the signal will not dynamically change on those cells. Therefore, you must check for Signals again.
Note
Signals will only work on all the L-type lines in a template.
Note
Every time you freshly access or refresh a template, the signals will be lost. You must check for Signals again to see the signals on the templates.
Business Value
This functionality will allow users to prevent any data anomalies due to fat-finger errors or typos.
In Practice
To access Predict Signals on templates, perform the following:
- In your application, navigate to Structured Planning and select a Scenario of your choice.
- Choose a Template, and click Input from Template Workflow.
- You will now see the Predict button available in the top menu bar. You can access Signals from this menu button or the context menu when you right-click on any cell. In both cases, you can either Check Selected Lines or Check All Lines in the template.NoteYou can check signals for a maximum of 10 lines at one go using the Check Selected Lines option.
The Check All Lines option will not work for large templates containing more than 200 rows. For such cases, it is recommended to use Check Selected Lines. - If a cell has a signal, when you right-click on that cell, you will see the Show Signal Context option under Predict Signals. This option will take you to the Signal Context screen to better understand the signal.
For more information about Predict Signals, click here.
Was this article helpful?