22.7 Release Notes
- 9 Minutes to read
- Print
- DarkLight
- PDF
22.7 Release Notes
- 9 Minutes to read
- Print
- DarkLight
- PDF
Article summary
Did you find this summary helpful?
Thank you for your feedback
Structured Planning: Introduced the Reset option in Advanced Search
With this release, we have introduced a Reset button in the Advanced search option of the Workforce Planning roster screen. In the Advanced Search option, you can see all the entities listed in the grid by default as a search option. You can now reset the search entries in the Advanced search pop-up screen.
In Practice
- Go to Structured Planning > Planning Control Panel.
- Select a Budget Hierarchy and Template Workflow in Input or View mode.
- Click the Advanced Search icon, as illustrated in the following image:
.png)
- You can fill in the required fields to search for specific employee data.
- Click the Reset button to restart the search selection.
.png)
Structured Planning: Employee Actuals in Workforce Planning
With this release, you can load employee actuals for employees transferred from one budget entity to another. Now, you can load two different budget entities for an employee, provided the entities have the same currency. In this case, the dynamic report will show different entries for the same employee consisting of different entities.
Note:
This is applicable for all load types, that is, copy-paste, file load, and web services.
In Practice:
- Navigate to Maintenance > Data Load Rules.
- Click the New Data Load Rule available in the side navigation.
- Enter a Name for the Data Load Rule and fill all the fields with specific data.
- Select Workforce- Employee Actuals Load Item and Load Sub Item from the drop-down list.
- Fill all the fields with specific data in the following screens and click Next.
- You can choose a new Data file or click Finish in the Load Data Screen.
.png)
Once the data load is successful, you can navigate to Dynamic Reports. In case, multiple entities are mapped to an employee having the same currency, your report will have multiple entries for the same employee.
Dynamic Planning: Enhancement to the Source Map
With this release, you can view the Mapping table only after selecting a source and a target model while creating new ESM Source Maps. Previously, you could view the mapping table by default after selecting a source model. In SpotlightXL, navigate to External Source Model> Source Map to view and map the fields.
.png)
.png)
Dynamic Planning: Enhanced SpotlightXL Multi-Tab Parameter
With this release, the default value for the Enable SpotlightXL Multi-Tab property is Yes when you create a new account. In SpotlightXL, navigate to User Management > Application Administration > Application Settings. The Model Property column contains the Enable SpotlightXL Multi-Tab property. Previously, the default value for this property was No for all the new accounts.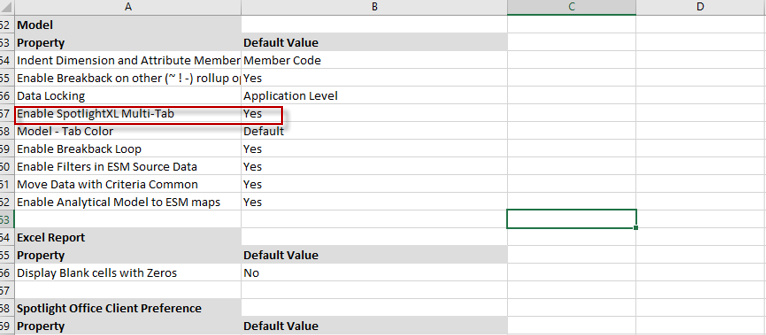
Dynamic Planning: External Source Model Data Load Rules Integration
With this release, we have introduced a Calculations tab in the Define Overall Rule Settings screen for ESM data load via DLRs. Users can now select a calculation from any model as soon as the data load rule is successfully run, automating the calculation process every time the ESM DLR is run. You will receive a notification after the calculation is complete. Previously, the users had to run the calculation script manually after the ESM data load, which was time-consuming.
Note:
This update is only applicable for File load and Copy-paste load types.
In Practice: Executing Calculations in DLR
- Navigate to Maintenance > Data Load Rules.
- Click the New Data Load Rule available in the side navigation.
- Enter a name for the Data Load Rule.
- Select External Source Model Load Item and Load Sub Item from the drop-down list.
- Fill in all the details in the Select Sample Input File screen.
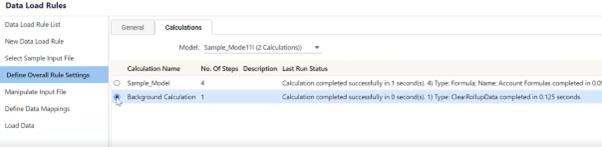
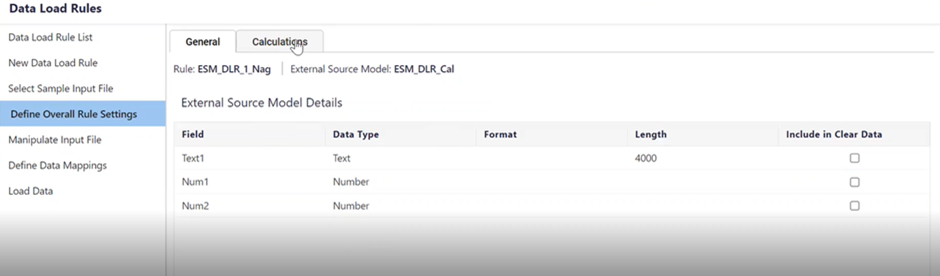
- In the Define Overall Rule Settings screen, fill the following details:
- Select External Source Model details in the General tab.
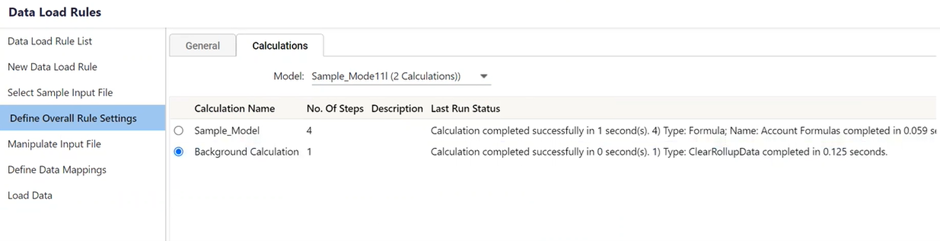
- Select Model and Calculation from the calculations list.
- The functionality in the Manipulate Input File screen tab will remain the same. Click Next.
- You need to map fields in the Source Column to values available in the Maps To field drop-down lists, click Next.
- You can select the Execute Calculation check box in the Load Data screen.
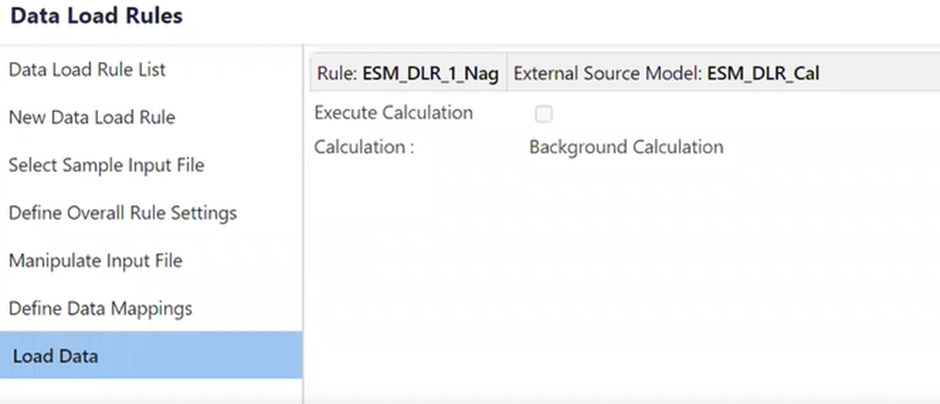
- Click Finish, and you will either receive a Data Load success message or an exception report.
- Calculation will run in the background, and you will be notified upon completion.
Dynamic Planning: ESM Maps
With this release, you can now transfer data from Analytical Model to ESM. Previously, we could transfer Analytical Model data to Analytical Model, and ESM data to ESM or Analytical Model. In the Source Model drop-down list, you can now see Analytical and ESM options which you can map to the Target ESM.
In Practice: To Transfer Data
- In SpotlightXL, select the Model task> External Source Model> Source Map.
- Enter the name of the Source Map and add the description.
- Select the type as Data for loading external source data.
- Select the Analytical model you want to map the target ESM.
.png)
- Select any of the following in the Maps To column:
- DimensionFilter: This filter indicates that there is no field present in the Source ESM to map to the Target ESM. You will have to specify a value in the Default Value Column.
- Value: indicates that this field in the external source is a value to be copied as-is to the specified field in the target ESM.
- Run the Source Map to check the data in the ESM.
Budget Manager Experience: Validate Access
With Validate access, you can check whether the budget manager who would receive the link has access to that template to complete the task. If the budget manager has no permissions, you can navigate directly to the User Management screen from the share template screen and provide the necessary permissions before sharing the template.
To view a respective template, a budget manager should have access permissions to the following parameters related to that template:
- Scenario
- Budget entity approval role
- Template
In practice: Validating Budget Managers' access permissions:
- Navigate to Planning Control Panel and select a Budget entity from the left pane.
- Select a GTSC template from the Template pane and click Email. The Share Template screen is displayed that shows the list of Budget Managers.
- Select a template you want to share with the Budget Manager(s) from the Select Template drop-down.
- Select the required Budget Managers, and you can see an icon against the selected budget managers.
- Click the icon to view the permission details of the respective budget manager for that template.
A link to the user management module is available if a respective Budget Manager has no permission. Click the link to navigate directly to the User Management screen and provide the required access.
.png)
.png)
To learn more about the Budget Manager Experience, click here.
Structured Planning: Views
You can create different layouts of a template and save them using Views. The scope of a View can depend on the different use cases you want to address using the template. When you share these layouts with any end-user, it will help them focus on the data they want to see and hide any unnecessary data.
While creating a View, you can hide any row(s) or column(s) or filter any column based on the use case and save the View.
In Practice: Accessing the View Option
- Navigate to Planning Control Panel and select a Budget entity from the Budget Hierarchy pane.
- Select the required template from the Template pane.
- From the right pane, click Input under the Template Workflow section in the Actions tab. The selected template data is displayed.
- You can access the View feature from the top menu bar.

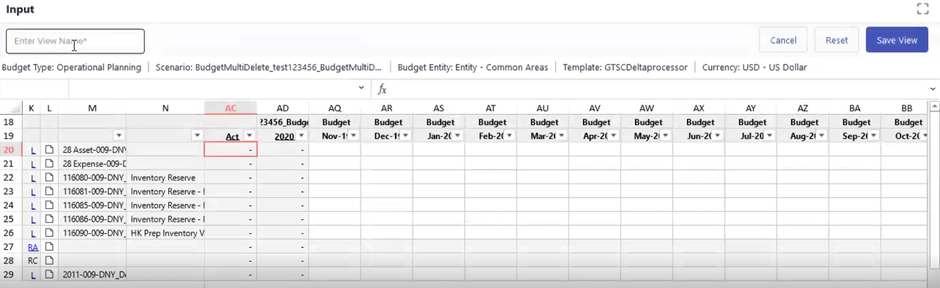
Create a New View
Perform the following steps to create a new View:
- Click the View option on the top menu bar in a template.
- Select the Create a New View option from the list.
- Provide a unique name for the View in the Enter View Name field, and do the following:
- Filter the required column
- Hide the required row(s) and column(s)
- Click Save View. The saved view is listed in the Views list.
Note:
You can use the Reset option to undo the changes made in that view till that point.
If you want to access any View created before, click the View option in the menu bar and click on the required view from the list.
Manage Views
If you want to edit or delete any View that was already created, perform the following steps:
- Click the View option on the top menu bar in a template.
- Select the Manage Views option from the list. The list of already created views is displayed.
- If you want to delete any view, click the delete icon adjacent to that respective view.
- If you want to edit any view, click the edit icon adjacent to that respective view, and do the required updates.

Budget Manager Experience: Copy Link
Now you can use the Copy Link feature to share the template with any budget manager. Instead of sharing a template through email, you can use the Copy Link option to copy the template link and share it with any budget manager directly without sending an email.
In Practice: Accessing Copy Link
- Navigate to Planning Control Panel and select a Budget entity from the left pane.
- Select a GTSC template from the Template pane and click Email. The Share Template screen is displayed that shows the list of Budget Managers.
- Select a template you want to share with the Budget Manager(s) from the Select Template drop-down menu.
- Select the required Budget Manager and click the Copy Link option. The template link is copied.
.png)
To learn more about the Budget Manager Experience, click here.
Platform: Deprecation of Announcements in Task Manager
With this release, the ability to create and customize announcements is no longer available in the Task Manager tab of the application. Instead, this feature is now made available globally throughout the application.
Platform: Added a Global Announcements Feature
With this release, you can post announcements to all the users in an environment. An Announcements icon is now available on the ribbon menu at the top-right corner of the application.
Previously, the ability to post announcements was available only to admins through the Task Manager screen, and only the users who had access to the Task Manager tab could view these announcements.
To allow a user to post announcements, you need to explicitly enable the Enable Post Message checkbox for the user in the User & Role Management > User > Edit User screen.
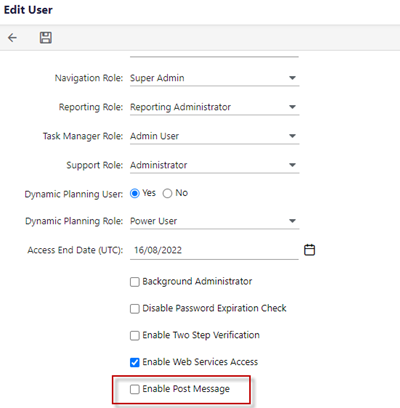
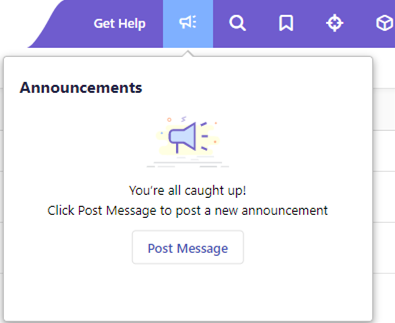
The following is an illustration of an empty announcement pop-up window when the Enable Post Message check box is not selected in your user profile.
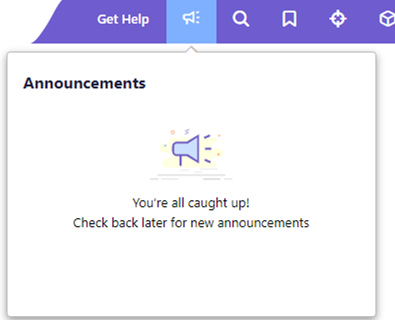
The following is an illustration of an empty announcement pop-up window when the Enable Post Message checkbox is selected in your user profile.
In Practice: How to Post a Message
If you have the authorization to post a message in the Announcements menu, here’s how you can create a new message to post.
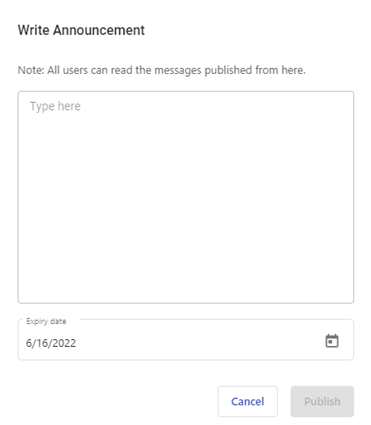
- Click on the Announcements icon and then click Post Message. The Write Announcement pop-up appears.
- You can write and select the Expiry date for the announcement. The announcement will stop appearing post the set date on the Announcements menu.
- Click Publish to post the announcement.
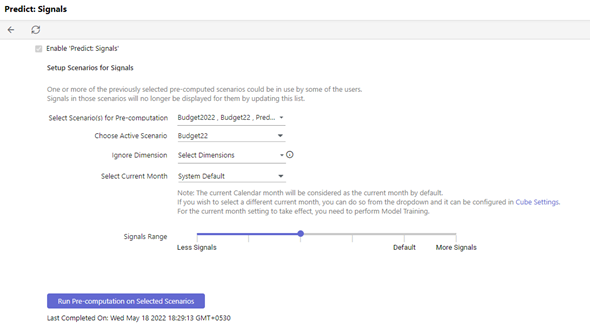
Predict: Introduced Signals Range
With this release, you can now control the number of signals the Predict AI engine generates. You can modify the number of signals generated by using the Signals Range slider in the Predict: Signals Admin screen.
Note
For the changes to take effect, you must trigger the Model Training process. Go to Maintenance > Overview > Configuration Tasks > Predict: Signals > Start Model Training. This step is necessary to ensure that the updated number of Signals are displayed in DR and the Signals Overview screen.
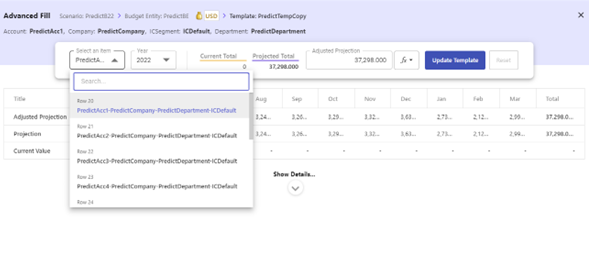
Predict: Enhanced the Advanced Fill feature in Predict Projections
With this release, you can search for a row from the Select an item drop-down menu in the Advanced Fill screen. With this update, you can easily choose or change the row for which you want to implement the Advanced Fill feature.
Predict: Added the Ability to Control Email Notifications for Predict
You can now enable/disable email notifications for all Predict processes from the Manage Your Account > General page or the Maintenance > Overview > My Settings page in the application.
Was this article helpful?