22.6 Release Notes
- 2 Minutes to read
- Print
- DarkLight
- PDF
22.6 Release Notes
- 2 Minutes to read
- Print
- DarkLight
- PDF
Article summary
Did you find this summary helpful?
Thank you for your feedback
Structured Planning: Advanced Search Option in Workforce Planning
With this release, we have introduced an Advanced search option in the Workforce Planning roster screen as a part of the UI. In the Advanced Search option, you can see all the entities listed in the grid by default, as a search option. You can move the search fields up or down or deselect the fields you no longer wish to include in the Advanced search popup with the settings icon drop-down. You can apply search or clear the search entirely.
Note
1. If the Current Review in the drop-down is selected as an Amount, the Current Review percent field will be disabled, and vice versa.
2. If the Budget Review in the drop-down is selected as an Amount, the Budget Review percent field will be disabled, and vice versa.
2. If the Budget Review in the drop-down is selected as an Amount, the Budget Review percent field will be disabled, and vice versa.
In Practice:
- Go to Structured Planning > Planning Control Panel.
- Select a Budget Hierarchy and Template Workflow in Input or View mode.
- Click the Advanced Search icon, as illustrated in the following image.
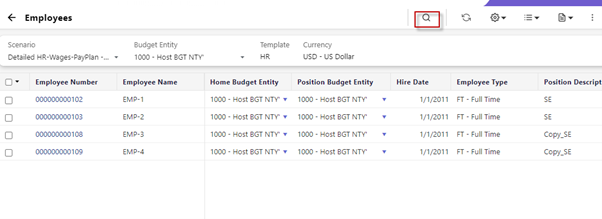
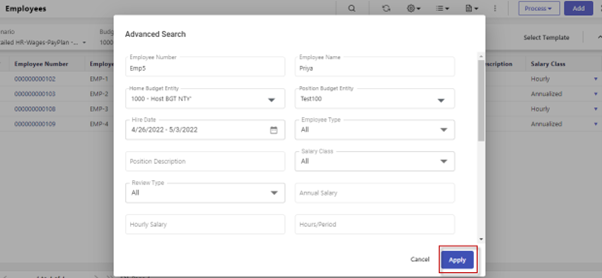
- You can fill in the required fields to search specific employee data.
- Click Apply. The Employee information is displayed.
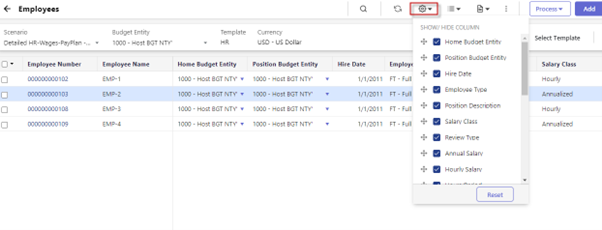
- Click the Settings icon, as shown in the image below. You can move the search column position in the Advanced Search pop-up or deselect the field you no longer wish to include.
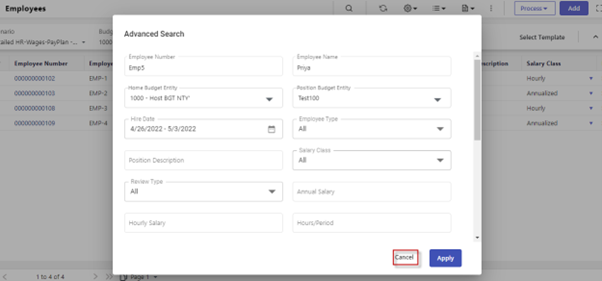
- Click the Cancel button to delete the selected search combination.
Note
The numeric fields consist of decimal rounding up to two decimal places, that will round up the value input by the user and the existing data to compare the two values and perform the search. You cannot enter non-numeric characters in the numeric fields.
To clear the advanced search results displayed on the employee roster screen, click the Clear Search option as shown in the following image. 
Dynamic Planning: Aggregation Performance Improvement Flag
With this release, we have enabled the Aggregation Performance Improvement Flag for all the users across all models in the application.
Platform: Enhanced the User Management page
With this release, we have further improved the look and feel of the User Management page under Maintenance > Administration > User & Role Management.
The following are the changes you will be able to see on this screen.
- Added the following icons to the toolbar.
- Export
- Copy Permissions
- Security
- Password Reset
Previously, these options were a part of the kebab menu icon.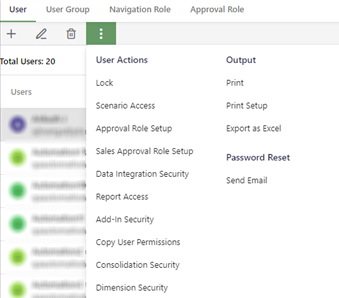
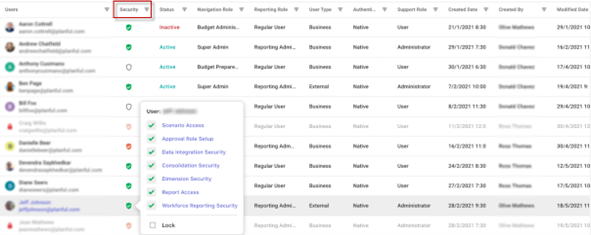
- Added a Security column to display the security setting for every user.
- A green shield icon implies that the user has all securities enabled
- A red shield icon implies that the user has a few securities enabled
- An empty shield icon implies that the user has no securities enabled.
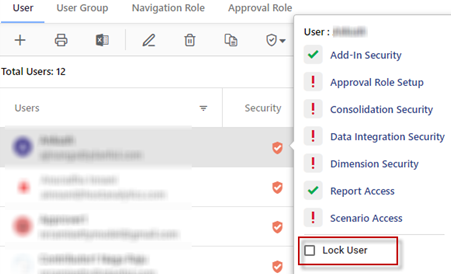
You can click on the shield icon to view which securities have been enabled for a specific user and also click on any of the listed securities to access the respective page and edit the settings.
A green tick mark on the security list indicates that the security is enabled for the user. Whereas, a red exclamation mark indicates that the security has not been enabled for the user.
You can also choose to Lock a user from the Security options list.

Predict: Enhanced the Predict Signals Generation Engine for Performance Improvement
With this release we have now enabled a more powerful Signals Generation Engine (V2). This engine increases the signal generation accuracy and is more robust. It has been upgraded to produce more reliable ranges not only for the current year, but also for the future years.
Note
In order to view the Signals generated by the upgraded engine you must trigger the Model Training process. Go to Maintenance > Overview > Configuration Tasks > Predict: Signals > Start Model Training.
This step is necessary to ensure that proper Signals are displayed in DR and the Signals Overview screen.
Was this article helpful?