23.1 Release Notes
- 4 Minutes to read
- Print
- DarkLight
- PDF
23.1 Release Notes
- 4 Minutes to read
- Print
- DarkLight
- PDF
Article summary
Did you find this summary helpful?
Thank you for your feedback
Budget Manager Experience: Introduced Predict Signals
With this release, the Budget Manager Experience supports Predict Signals. Predict Signals detects and flags potential anomalies in your data, enabling you to take corrective actions through data-driven insights. These anomalies could arise from typos, mistakes, erroneous formulas, or conscious changes in planning assumptions. It gives you a detailed context around each signal by using an intuitive graph and lets you collaborate with your colleagues and peers to make more informed decisions.
Budget managers can select any cell in the template or a report and right-click on it to access the Predict Signals options from the context menu. The following options are available to generate signals:
- Check All Lines generates signals instantly for smaller templates or reports of up to 50 lines. The same is referred to as Signals for all Lines in reports.
- Check Selected Line(s) allows you to check signals for a maximum of 10 lines in one go. The same is referred to as Signals for Selected Line(s) in reports.
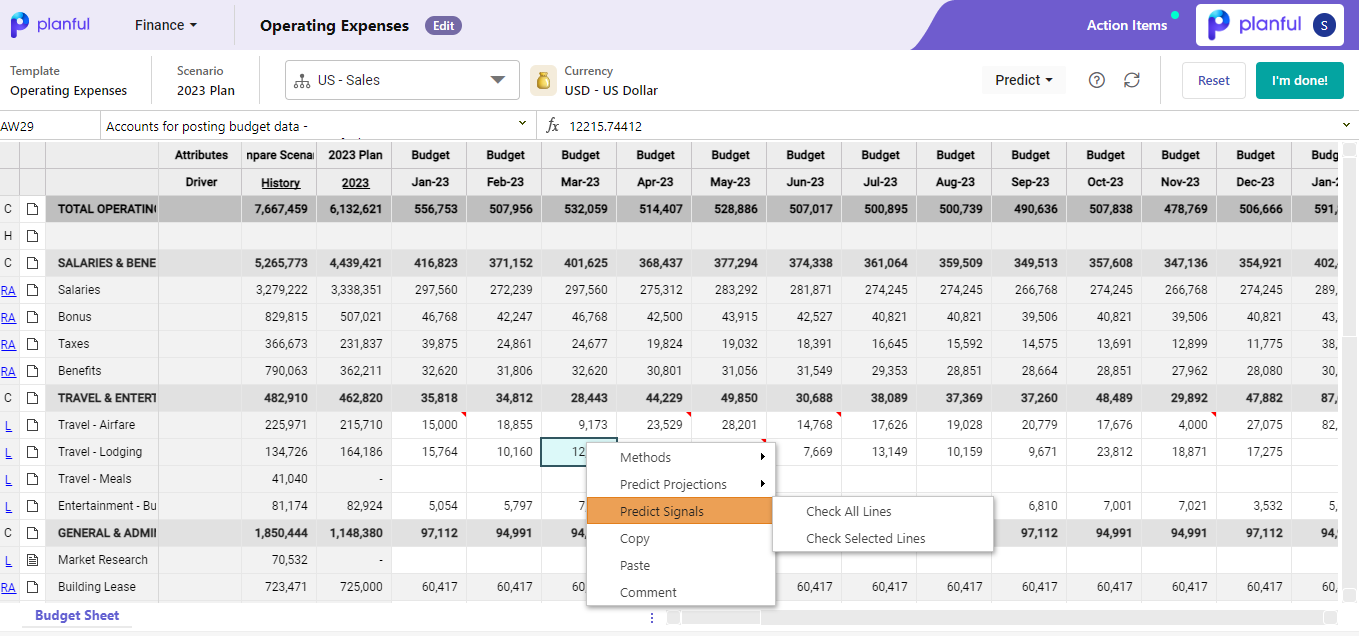
The cells having signals are highlighted, and budget managers can right-click on that cell to either Resolve the signal or use the Signal Context Screen option to navigate to the Signal Context screen to analyze the signal.
To know more about how Predict Signals work in Budget Manager Experience, click here.
Platform: Additional Load Type Support via REST APIs
With this release, the Workforce Planning data load type is supported through REST APIs.
Consolidation: Manage Display of Security Link in Consolidation Control Panel
With this release, you can manage the display of the Security option in the Administration section of the Consolidation Control Panel screen. This option is visible by default to all users..png)
You can now remove this option from the Consolidation Control Panel screen by disabling the "Security- Consolidation Control Panel" from the Configuration tasks list page. The Show Security Option in the Configurations task list page is set to Yes by default for all users..jpg)
In Practice: Disabling the Security – Consolidation Control Panel option
- Navigate to Maintenance> Administration> Configuration tasks. The Configuration Task List page appears.
- Under the Consolidation section, click the Security- Consolidation Control Panel option. The Show Security screen appears.
.jpg)
- Select No from the Show Security Option drop-down. If you set it as No, users cannot access the Security option from the Consolidation Control Panel.
.png)
Consolidation: Updated the Eliminations Variance Report
Now, we have rearranged the amount columns associated with the elimination entry in the Eliminations Variance Report. With this change, the Elimination Variance reports status for consolidation users will be changed to "Not Deployed."
You will have to deploy the reports again manually.
In Practice: How to Deploy the Elimination Variance Report
- Navigate to Maintenance > Report Administration > Standard Reports.
.png)
- Select Elimination Variance Report and click the More menu from the toolbar.
.png)
- Click Deploy Reports and select reports from the Deploy Reports dialog.
- Click Save. The selected elimination variance reports will be deployed and you will receive a confirmation message on the screen.
Platform: Scenario Permission by User Group
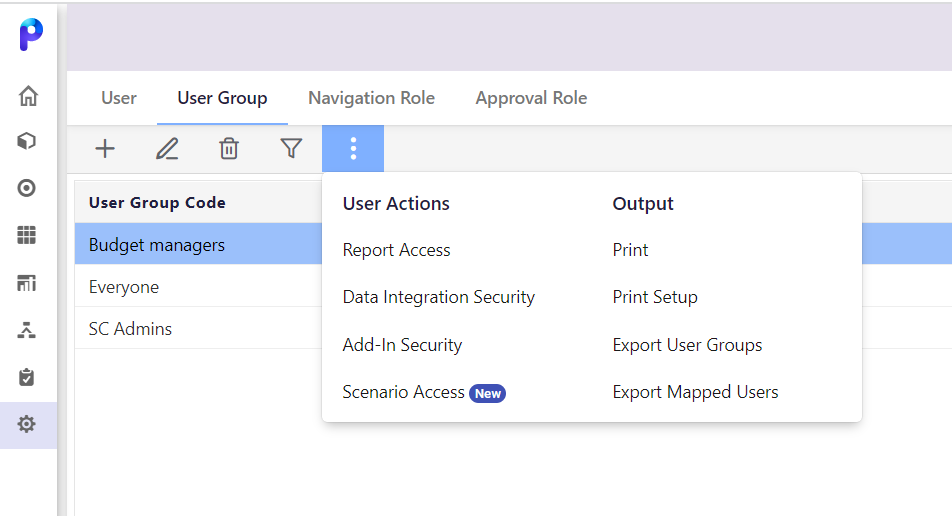
With this release, the administrators can manage scenario permissions for users at the user group level in addition to the individual user level, saving a lot of time and effort managing scenario permissions. A Scenario Access option is available for user groups in the More drop-down menu. When you select any user group and update scenario permissions, all users within the user group get access to the selected scenarios.
Let's understand this with an example:
Administrator Jane received a request to grant access to the 2023 Forecast scenario for users in the Sales Managers user group. With this feature, Jane can easily manage Scenario Access for the Sales Managers user group with a single click by deselecting the scenario that users no longer need, and selecting the 2023 Forecast scenario. Without this feature, Jane had to select each user and change the scenario permission. This feature will help administrators like Jane in setting up scenario security efficiently.
In Practice: Setting Up Scenario Access for User Group
- Navigate to Maintenance > User & Role Management > User Group.
- Click the more icon and select the Scenario Access option.
- Select the User Group radio button and select the required user group from the drop-down menu to manage its access.
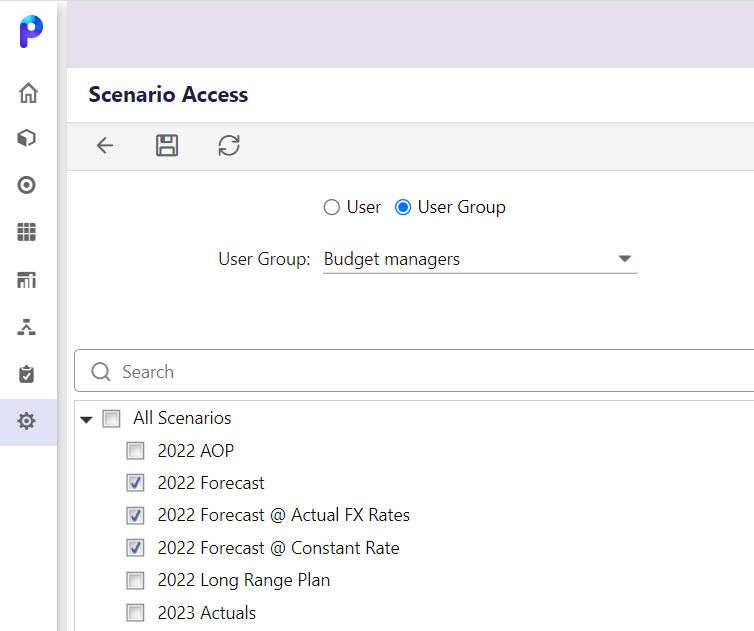
- Select or deselect the required scenarios from the scenarios list, and click the Save icon.
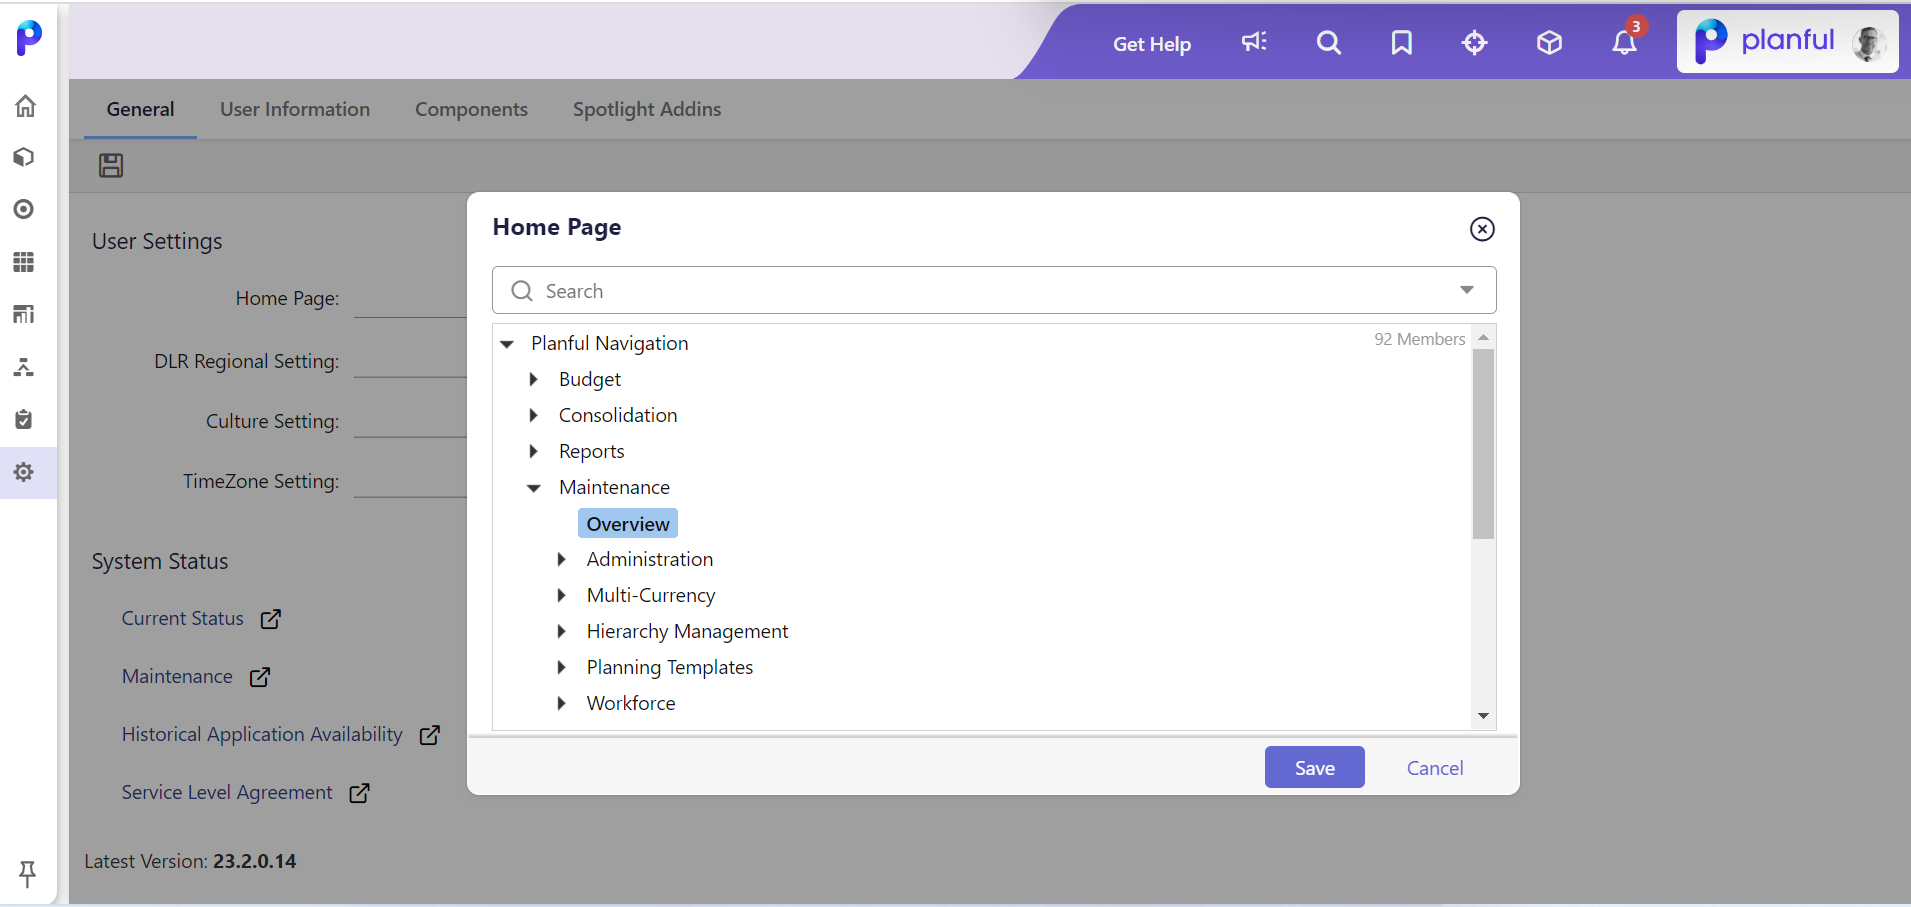
Platform: Set Maintenance Overview as Home Page
With this release, you can set the Maintenance Overview screen as the home page. This update will help administrators quickly navigate to the required links in the Overview screen.
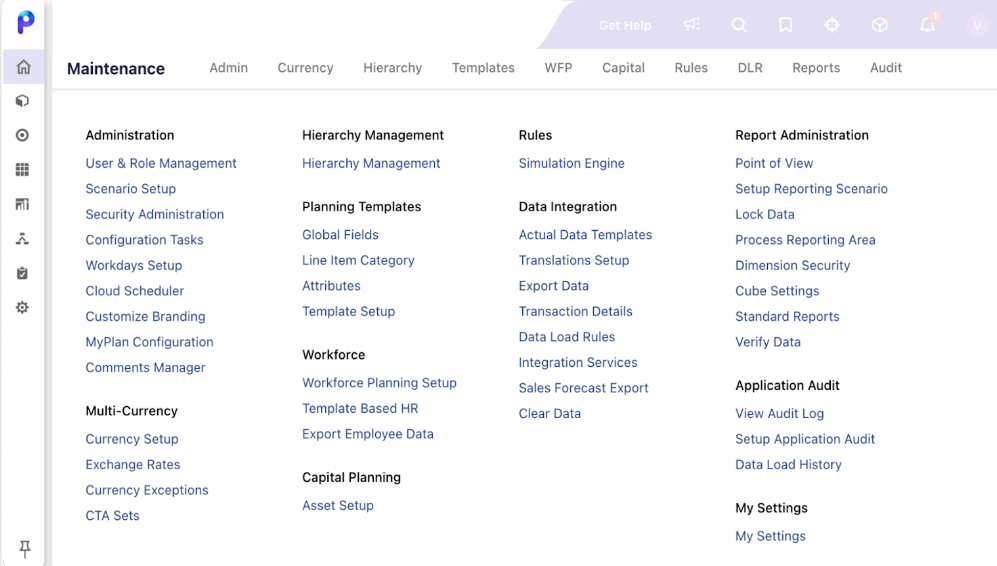
To set the Maintenance Overview screen as the home page, navigate to your profile avatar > Manage your account > General > Home page and click Maintenance > Overview.
Platform: Customize Application Name Indication
With this release, you can customize the top toolbar of the application to display a personalized application name, for example, Training, Sandbox, v1, etc. This update will help you identify the application on which you are working. You can contact the Planful support team to set the required display name.
Note:
The toolbar will display only the first 10 characters of the name. The full name of the application will be displayed only if you hover the cursor over the name.
The following is an illustration of the updated screen.

Was this article helpful?