- 9 Minutes to read
- Print
- DarkLight
- PDF
Clear Data
- 9 Minutes to read
- Print
- DarkLight
- PDF
Clear Data-Workforce Planning Introduction
Workforce Planning has been introduced in the Clear Data screen to support the deletion of loaded Workforce Actuals. You can see the Workforce option in the Select Area drop-down list.
You can select Time Period as a parameter and delete the Actuals loaded data in the Workforce Clear Data screen. Once you select the Time Periods and click Delete, a job will be scheduled. After completion of the job, a confirmation alert message containing exported file links is displayed.
In Practice: To Clear Data for Specified Time Periods
- Navigate to Maintenance > Data Load Rules.
- Click Clear Data. The Clear Data screen is displayed.
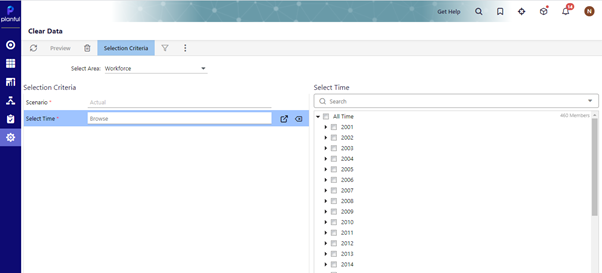
- Select Area as Workforce from the drop-down list.
- In the Selection Criteria, the Scenario is set to Actual by default.
- Select time from the Select Time drop-down menu. You can select multiple time periods.
- Click Delete. A confirmation message appears.
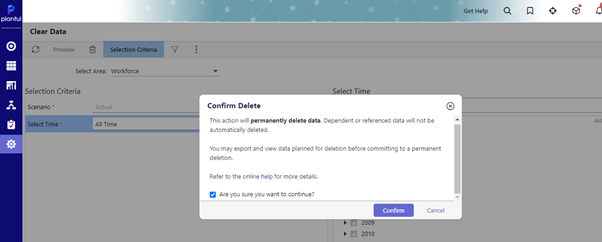
- Click Confirm. A Job submission message appears.
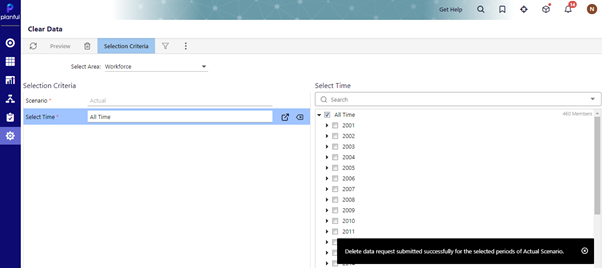
- After completion of the job, a Delete confirmation message appears.
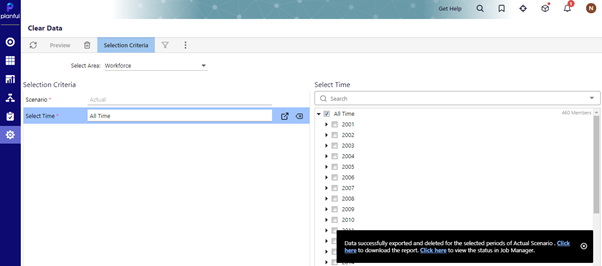
Clear Data: Preview and Export Data for Selected Time Periods
You can preview and export the loaded Workforce Actuals in the Clear Data screen before deleting them.
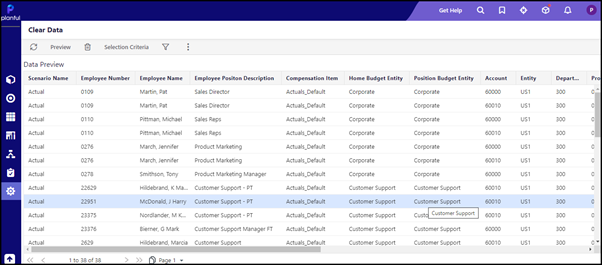
The Preview option allows you to view the details of actuals data of employees such as Scenario Name, Employee Number, Employee Name, Employee Position Description, Home Budget Entity, Position Budget Entity, Account, other finance segments, Currency(LC), and loaded amounts for selected time periods. The Export to CSV option allows you to export all the data for a selected time period. You can select the required time period and click Export to CSV to submit a request to export data. You can view the export status in the Job Manager. You will also receive a message containing links to download the exported file. The data is exported as a ZIP file. You can extract the ZIP file to see the exported data.
With this release, you can see the actual amounts in Local currency only. The preview screen only supports two digits after the decimal.
In Practice: To Preview for Specified Time Periods
1. Navigate to Maintenance > Data Load Rules.
2. Click Clear Data. The Clear Data screen is displayed.
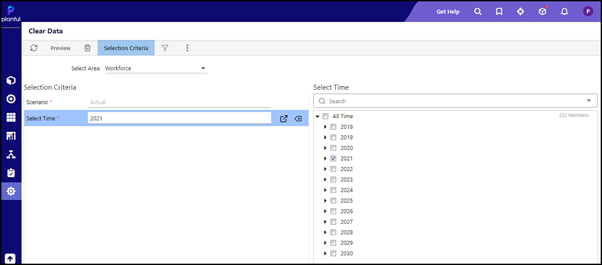
3. Select Area as Workforce from the drop-down list.
4. In the Selection Criteria, the Scenario is set to Actual by default.
5. Select time from the Select Time drop-down menu. You can select multiple time periods.
6. Click Preview.
In Practice: To Export Data for Specified Time Periods
1. Navigate to Maintenance > Data Load Rules.
2. Click Clear Data. The Clear Data screen is displayed.
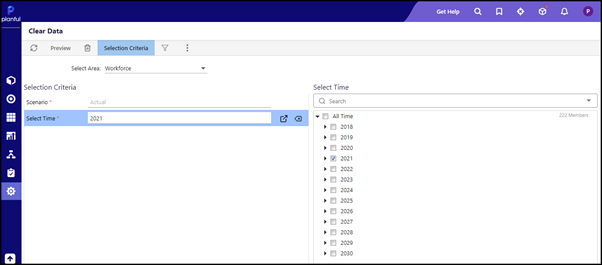
3. Select Area as Workforce from the drop-down list.
4. In the Selection Criteria, the Scenario is set to Actual by default.
5. Select time from the Select Time drop-down menu. You can select multiple time periods.
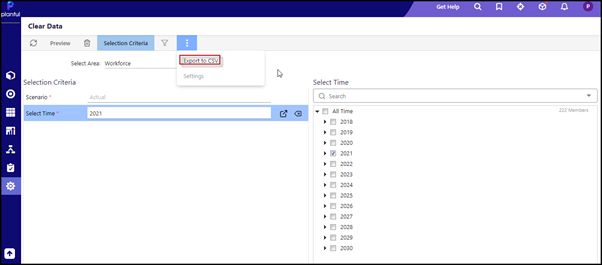
6. Click Export to CSV. A message is displayed confirming the submission of the export request.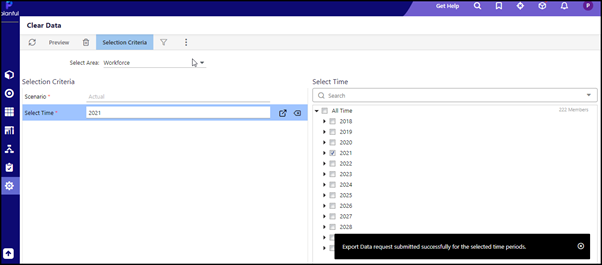
7. A message is displayed once the file is exported.
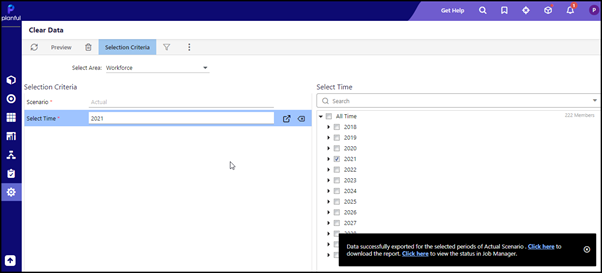
8. Click the download link in the confirmation message to download the zip file containing the data.
9. Click the another link in the confirmation message to view the status in the Job Manager.
You can view, export, and delete all Actuals data posted against the Actual scenario with these options.
Clear Data: Home Budget Entity
As a Workforce admin user, you will have the ability to Delete Actuals data based on the entity access. If you do not have access to the entities will not be able to see the Workforce data. You will also be able to export the data based on the selections in the Selection Criteria column, allowing you to maintain a file of data for future references. You can also delete the wrong actual amounts loaded into the planful system by specifying the home budget entity and time period. Before deleting actuals for a Home Budget Entity, you can also preview the data to verify before the deletion.
In Practice: To Preview for Specified Home Budget Entity
- Navigate to Maintenance > Data Load Rules.
- Click Clear Data. The Clear Data screen is displayed.
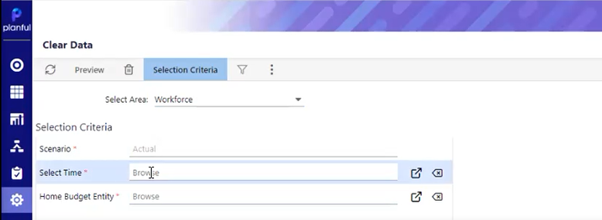
- Select Area as Workforce from the drop-down list.
- In the Selection Criteria, the Scenario is set to Actual by default.
- Select time from the Select Time drop-down menu. You can select multiple time periods.
- Select an entity from the Home Budget entity drop-down menu. You can select multiple entities.

- Click Preview.

In Practice: To Export Data for Specified Home Budget Entity
- Navigate to Maintenance > Data Load Rules.
- Click Clear Data. The Clear Data screen is displayed.
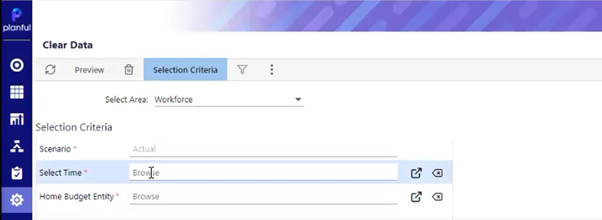
- Select Area as Workforce from the drop-down list.
- In the Selection Criteria, the Scenario is set to Actual by default.
- Select time from the Select Time drop-down menu. You can select multiple time periods.
- Select entity from the Home Budget entity drop-down menu. You can select multiple entities.
- Click Export to CSV. A message is displayed confirming the submission of the export request.

- A message is displayed once the file is exported.
- Click the download link in the confirmation message to download the zip file containing the data.
- Click the another link in the confirmation message to view the status in the Job Manager.
Clear Data: Combination of Finance Segments
As a Workforce admin user, you will have the ability to Preview, Export, and Delete Workforce Actuals data based on the combination of finance segments. All the finance segments are displayed under the workforce area in the Clear Data screen. In case of no data available for the selected segment combination, a notification is displayed when you click on Preview. You will be able to delete the data displayed based on the selection of segments on the Clear Data screen.
In Practice: To preview for specified segment combination
1. Navigate to Maintenance > Data Load Rules.
2. Click Clear Data. The Clear Data screen is displayed.
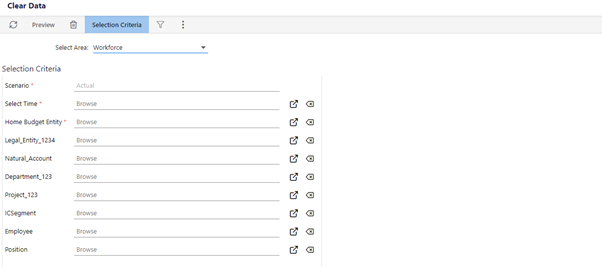
3. Select Area as Workforce from the drop-down list.
4. In the Selection Criteria, the Scenario is set to Actual by default.
5. Select time from the Select Time drop-down menu. You can select multiple time periods.
6. Select an entity from the Home Budget entity drop-down menu. You can select multiple entities.
7. Select a member from the Legal entity drop-down menu. You can select multiple entities.
8. Select an account from the Natural Account drop-down menu. You can select multiple accounts.
9. Select a department from the Department drop-down menu. You can select multiple departments.
10. Select a project from the Project drop-down menu. You can select multiple projects.
11. Select a member from the ICSegment drop-down menu. You can select multiple segments.
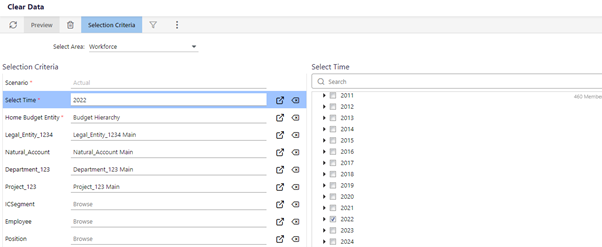
12. Click Preview.

In Practice: To delete data using the specified segment combination
1. Navigate to Maintenance > Data Load Rules.
2. Click Clear Data. The Clear Data screen is displayed.
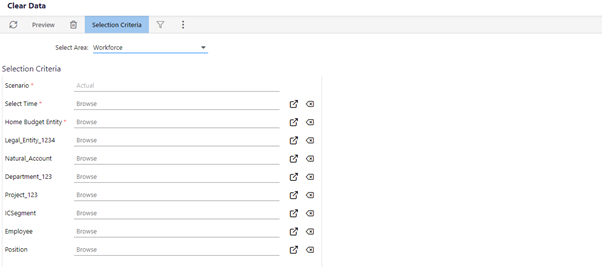
3. Select Area as Workforce from the drop-down list.
4. In the Selection Criteria, the Scenario is set to Actual by default.
5. Select time from the Select Time drop-down menu. You can select multiple time periods.
6. Select an entity from the Home Budget entity drop-down menu. You can select multiple entities.
7. Select a member from the Legal entity drop-down menu. You can select multiple entities.
8. Select an account from the Natural Account drop-down menu. You can select multiple accounts.
9. Select a department from the Department drop-down menu. You can select multiple departments.
10. Select a project from the Project drop-down menu. You can select multiple projects.
11. Select a member from the ICSegment drop-down menu. You can select multiple segments.
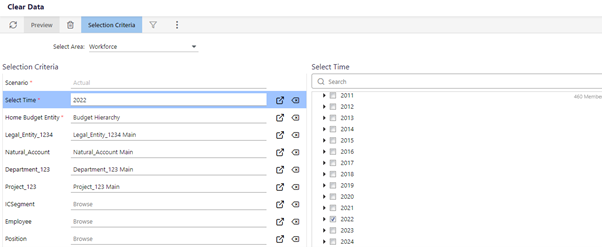
12. Click the **Delete** icon. The data for the selected combination will be deleted.
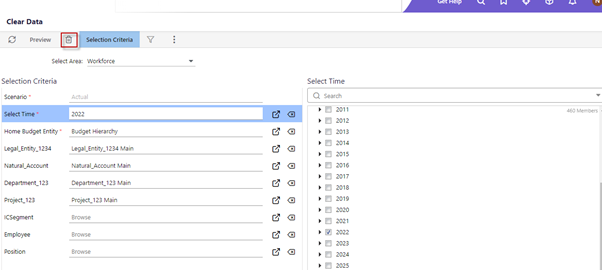
Clear Data: Employee and Position
As a Workforce admin user, you will have the ability to Preview, Export, and Delete workforce actuals data based on Employee and Position. This will provide you the ability to preview multiple employees and delete and reload the wrong actual amounts loaded into the system.
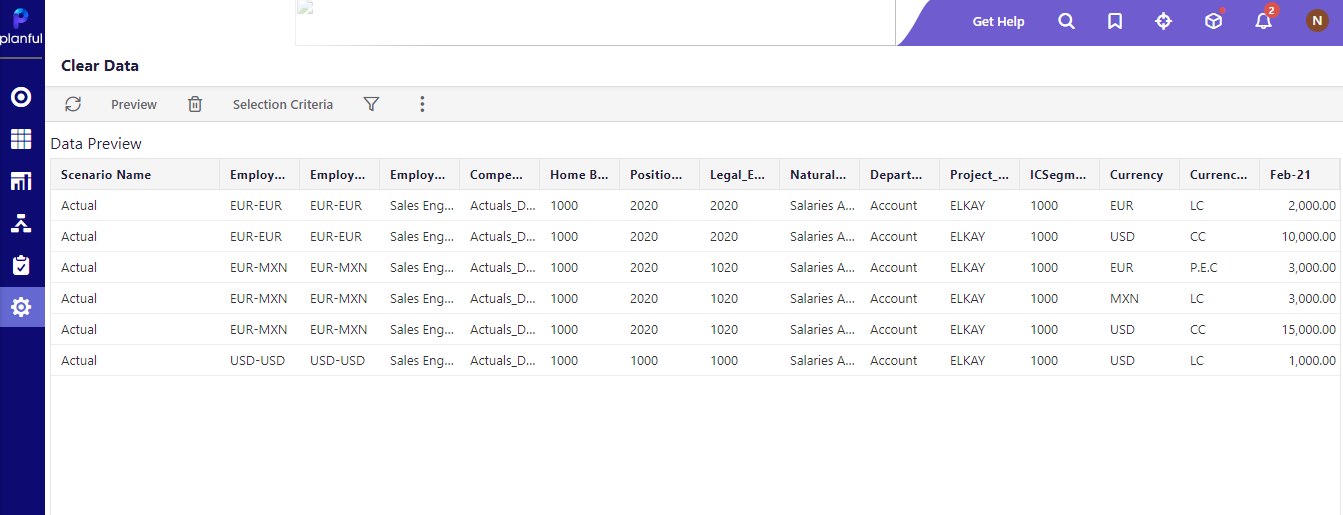
The Preview option allows you to view the details of actuals data of employees such as Scenario Name, Employee Number, Employee Name, Employee Position Description, Home Budget Entity, Position Budget Entity, Account, other finance segments, Currency(LC), and loaded amounts for selected time periods. Once the selection is complete, you can click Delete, and a job will be scheduled. The Export to CSV option allows you to export all the data for a selected employee and positions. You can select the employee and positions and click Export to CSV to submit a request to export data. You can view the export status in the Job Manager. You will also receive a message containing links to download the exported file. The data is exported as a ZIP file. You can extract the ZIP file to see the exported data.
In Practice: To preview for specified employee and position
1. Navigate to Maintenance > Data Load Rules.
2. Click Clear Data. The Clear Data screen is displayed.
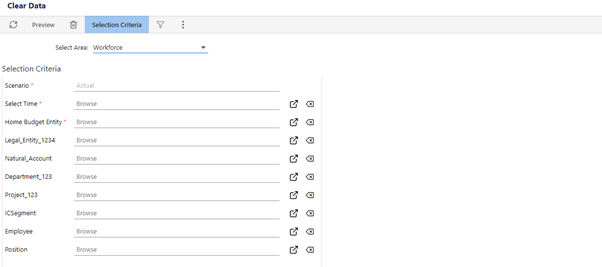
3. Select Area as Workforce from the drop-down list.
4. In the Selection Criteria, the Scenario is set to Actual by default.
5. Select time from the Select Time drop-down menu. You can select multiple time periods.
6. Select an entity from the Home Budget entity drop-down menu. You can select multiple entities.
7. Select an employee from the Employee drop-down menu. You can select multiple employees.
8. Select an employee position from the Position drop-down menu. You can select multiple employee positions.
9. Click Preview.
In Practice: To delete data using the specified employee and position
1. Navigate to Maintenance > Data Load Rules.
2. Click Clear Data. The Clear Data screen is displayed.
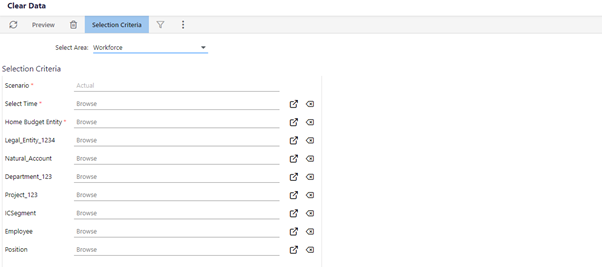
3. Select Area as Workforce from the drop-down list.
4. In the Selection Criteria, the Scenario is set to Actual by default.
5. Select time from the Select Time drop-down menu. You can select multiple time periods.
6. Select an entity from the Home Budget entity drop-down menu. You can select multiple entities.
7. Select an employee from the Employee drop-down menu. You can select multiple employees.
8. Select an employee position from the Position drop-down menu. You can select multiple employee positions.
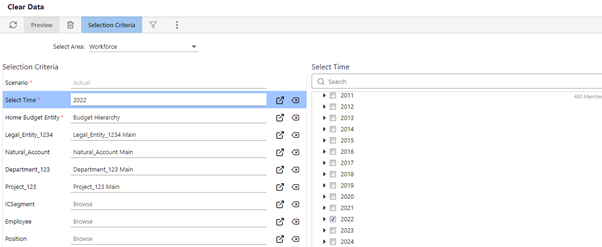
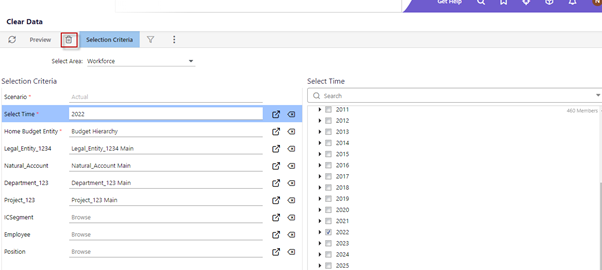
9. Click the Delete icon. The data for the selected combination will be deleted.
In Practice: To export data using the specified employee and position
1. Navigate to Maintenance > Data Load Rules.
2. Click Clear Data. The Clear Data screen is displayed.
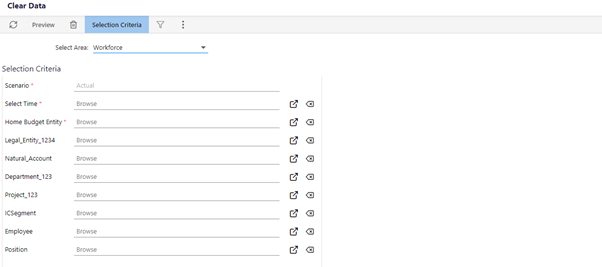
3. Select Area as Workforce from the drop-down list.
4. In the Selection Criteria, the Scenario is set to Actual by default.
5. Select time from the Select Time drop-down menu. You can select multiple time periods.
6. Select an entity from the Home Budget entity drop-down menu. You can select multiple entities.
7. Select an employee from the Employee drop-down menu. You can select multiple employees.
8. Select an employee position from the Position drop-down menu. You can select multiple employee positions.
9. Click Export to CSV. A message is displayed confirming the submission of the export request.

10. A message is displayed once the file is exported.
11. Click the download link in the confirmation message to download the zip file containing the data.
12. Click the other link in the confirmation message to view the status in the Job Manager.
Enhancement to Workforce Area in Clear Data Preview Screen
As an Admin user, you will be able to see up to 1000 rows of data in the Clear Data Preview Screen. Previously this limitation only existed in the Finance area, now with this release, it is applied to the Workforce area as well.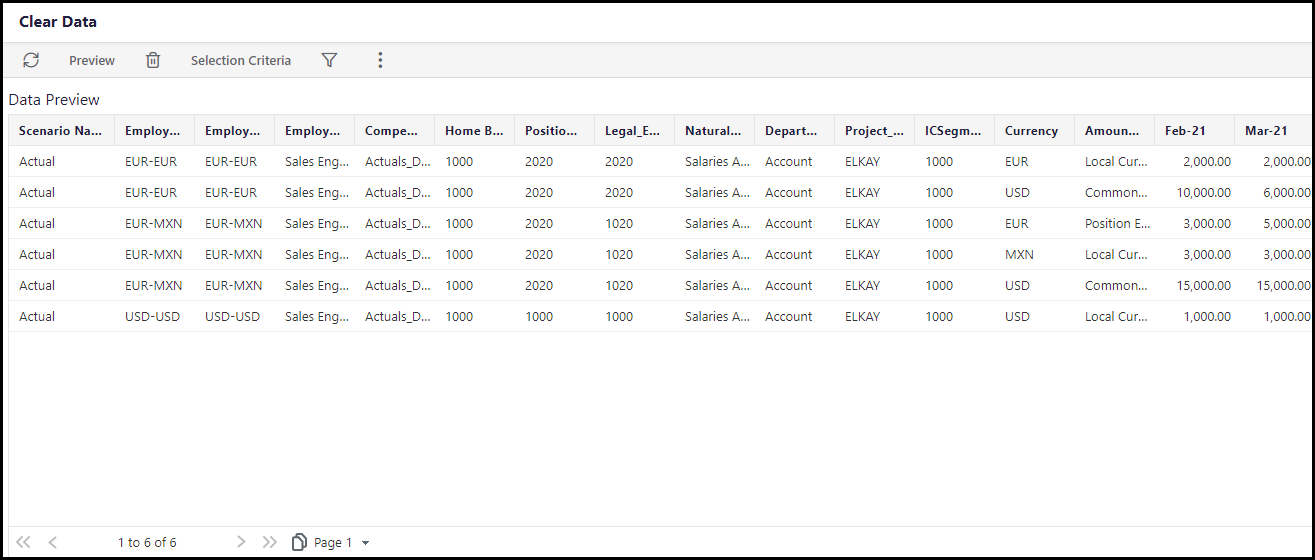
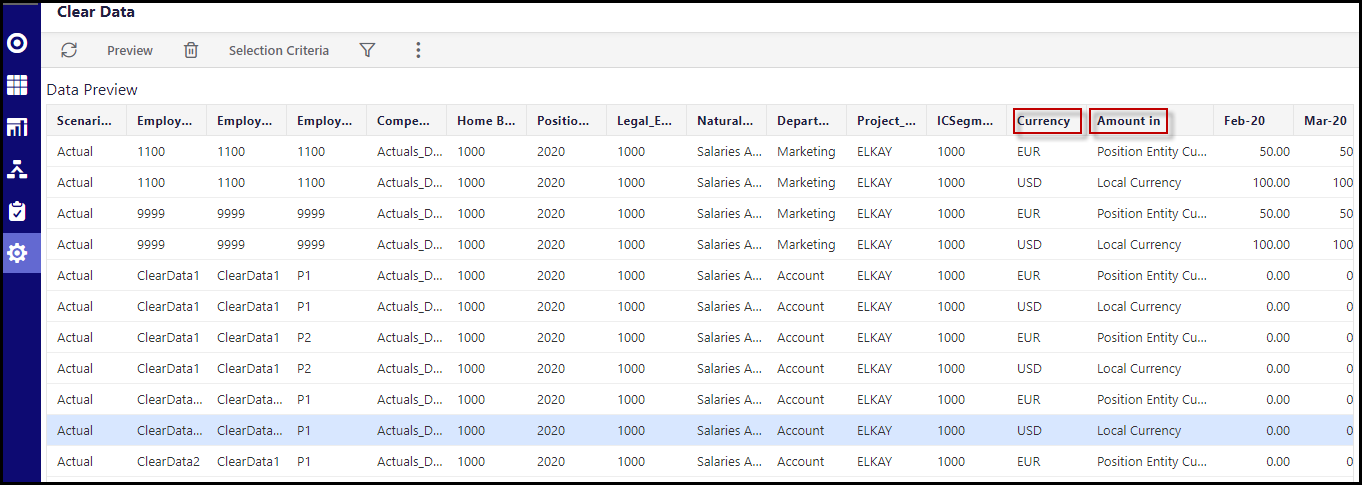
Clear Data-Currency types Updated
We have introduced a few currency types in the Clear Data screen. Previously we only had Local Currency as currency type mapped against the employees, which has now been updated to the Currency field. As an admin user you will now be able to view Local currency, Common currency, and Position Entity currency type against the employees. You can also see an ‘Amount in’ column in the Clear Data preview screen, that will display currency names mapped against the employees.


