Configuration in NetSuite
- 1 Minute to read
- Print
- DarkLight
- PDF
Configuration in NetSuite
- 1 Minute to read
- Print
- DarkLight
- PDF
Article summary
Did you find this summary helpful?
Thank you for your feedback
To complete the Configuration in NetSuite step, complete 3 tasks.
Enable Features (i.e. Token Based Authentication)
1. Enable Features
Token based authentication between Planful and NetSuite is used to secure your connection between the two applications
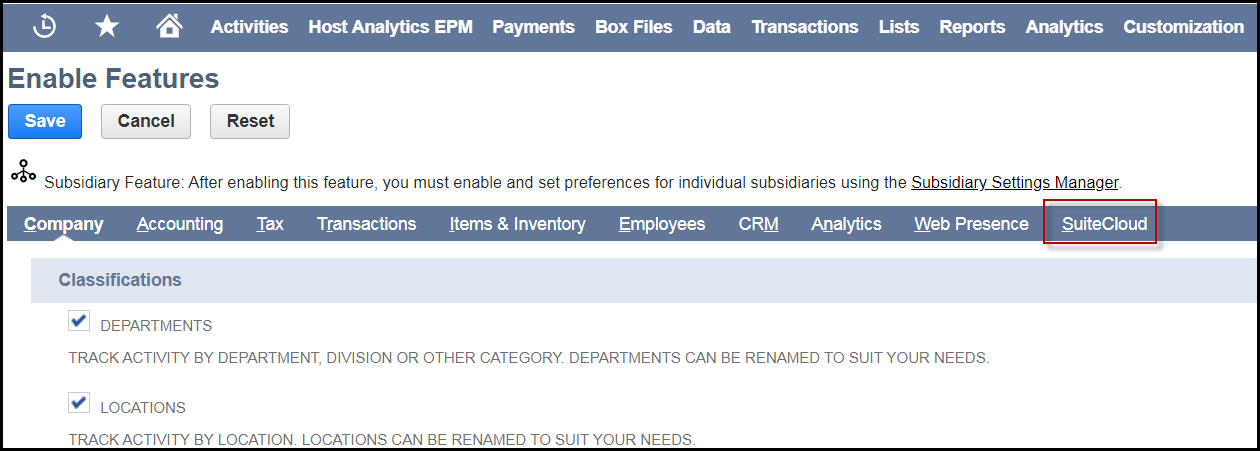
Navigate to Setup > Company > Enable Features.

The last tab is SuiteCloud. Click it.
Scroll down to the SuiteScript section.
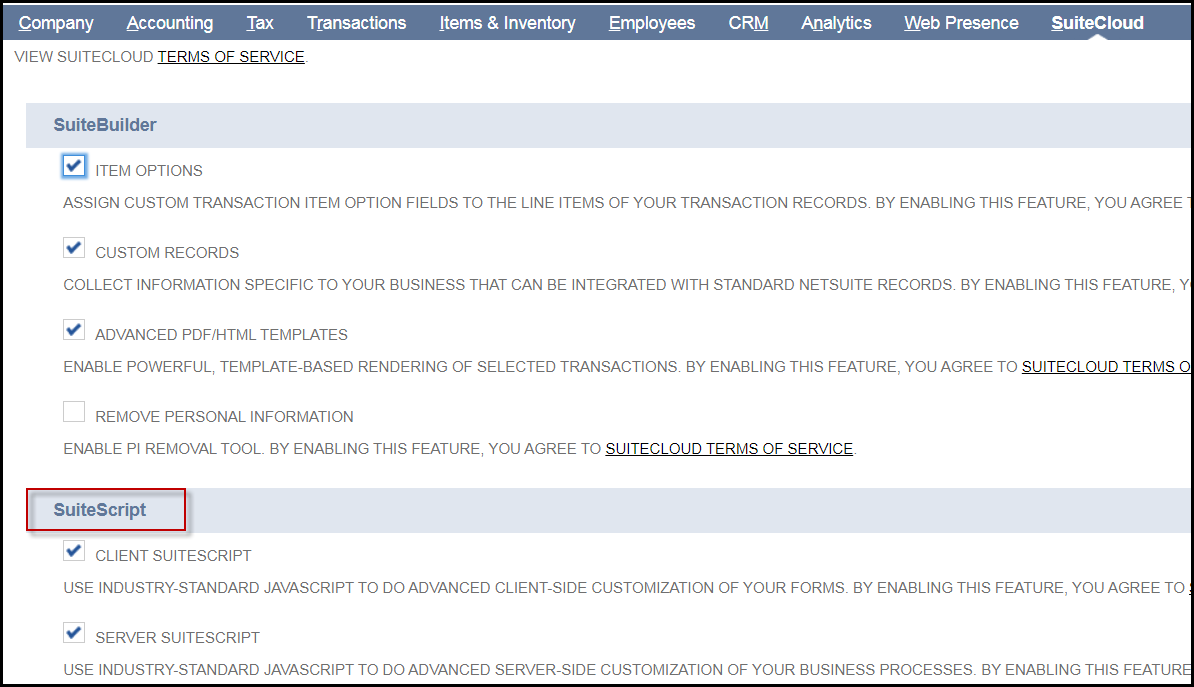
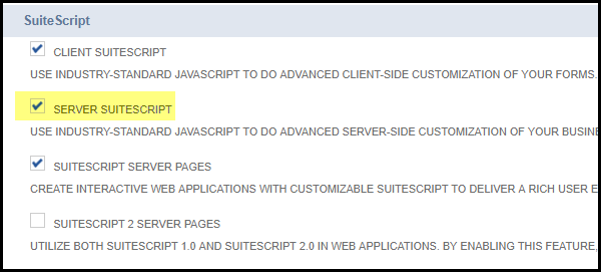
Select the SERVER SUITESCRIPT checkbox.
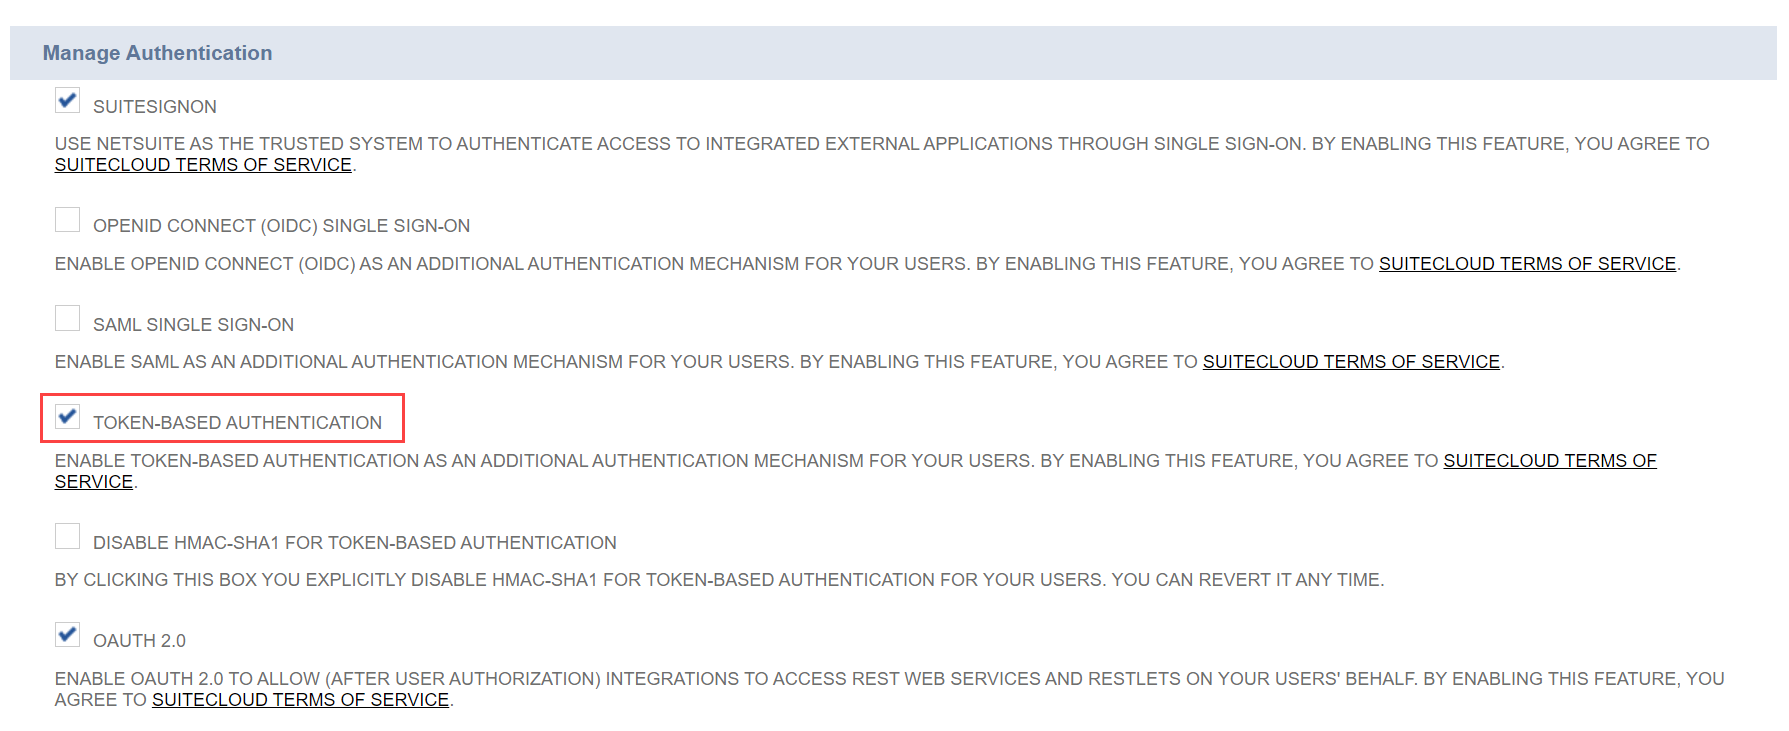
Scroll to Manage Authentication and select the TOKEN-BASED AUTHENTICATION checkbox and save.
2. Create an Integration Application
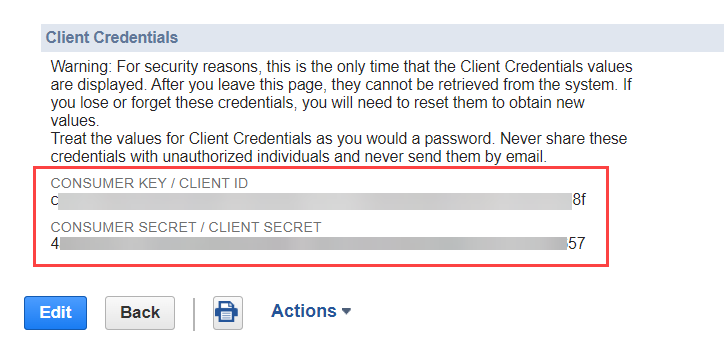
Completion of this task will result in generation of a Consumer Key and Consumer Secret. The screen will be displayed only once. Make note of the content displayed as it is to be used while setting up NetSuite Connect in Planful. Tip! Copy and paste the Consumer Key and Secret into Notepad.
Navigate to Setup > Integration > Manage Integrations > New.
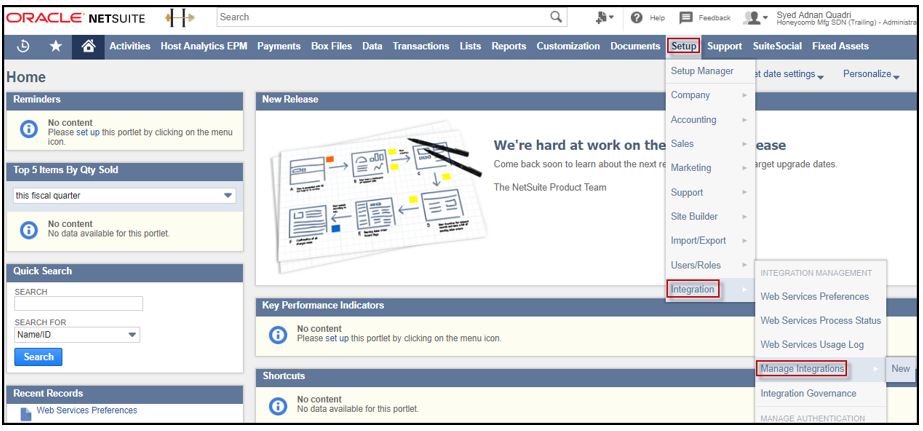
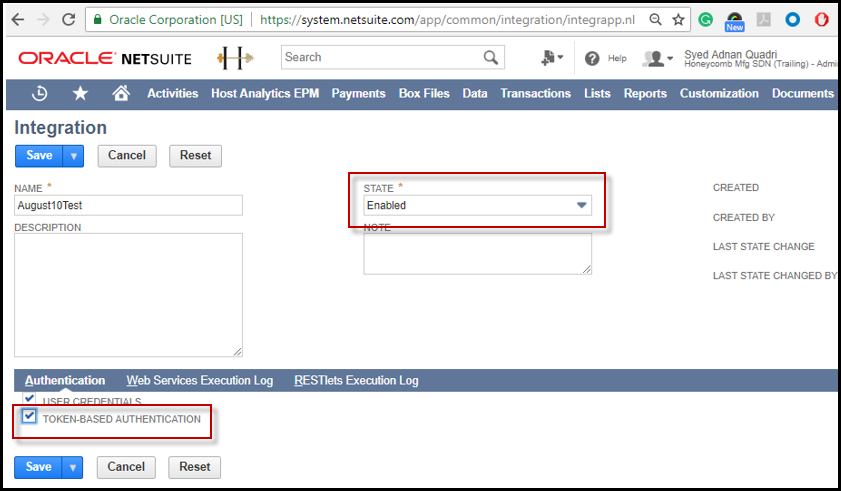
Fill in the name and select Enabled forState and Token-Based Authentication.
Click Save.
The Confirmation page appears. Copy and paste the Consumer Key and Secret into Notepad or some other application.
3. Generate an Access Token
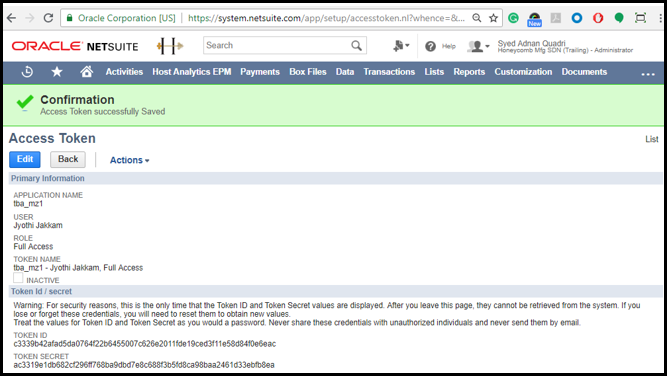
Completion of this task will result in the generation of a Token ID and Token Secret.
If you are an Admin user, complete the steps under Admin User . If not, complete the steps under Role Level.
Note:
If the token is generated for a user with an Administrator role, that Administrator must create the token. This step cannot be performed by any other user or Administrator. If the token is generated for a user with a role other than Administrator, this step can be performed by any user or Administrator.
Admin User
Navigate to Home > Settings > Manage Access Tokens.
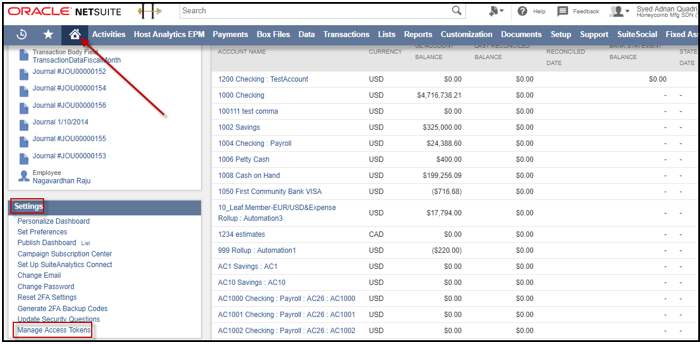
Click New My Access Token.
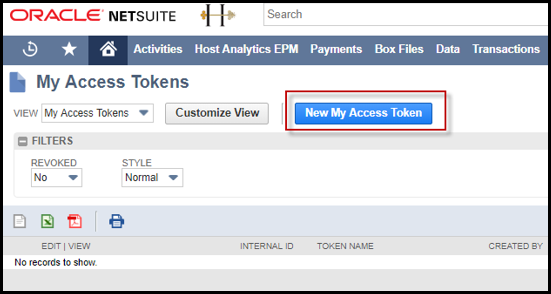
Select the Application Name and click Save.
Role Level
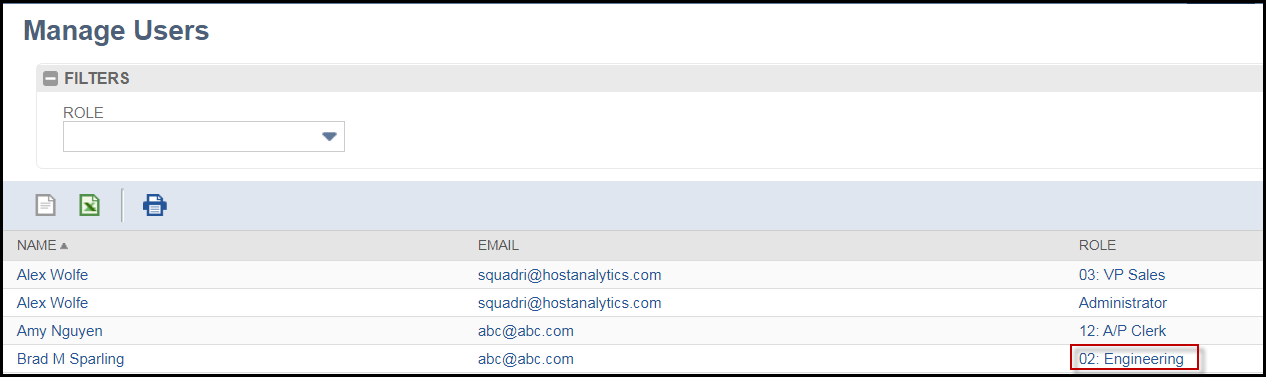
Navigate to Setup > Users/Roles > Manage Roles.
.png)
Edit the Role mapped to the user by clicking on it.
When the Role page appears, click Edit.
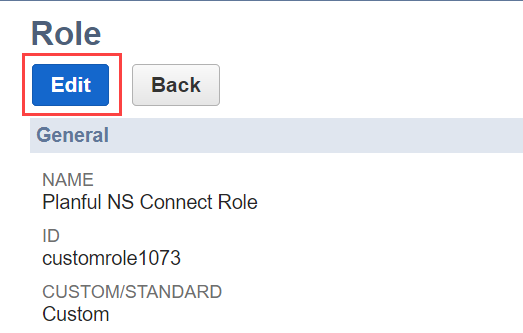
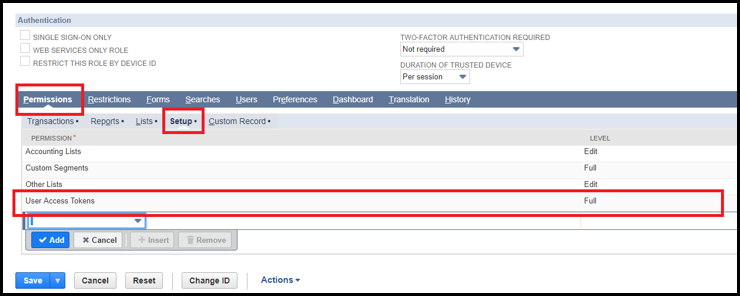
Scroll down to Permissions.
Click the Setup tab and add the Permission of User Access Tokens and click Save.
Generate the Access Token
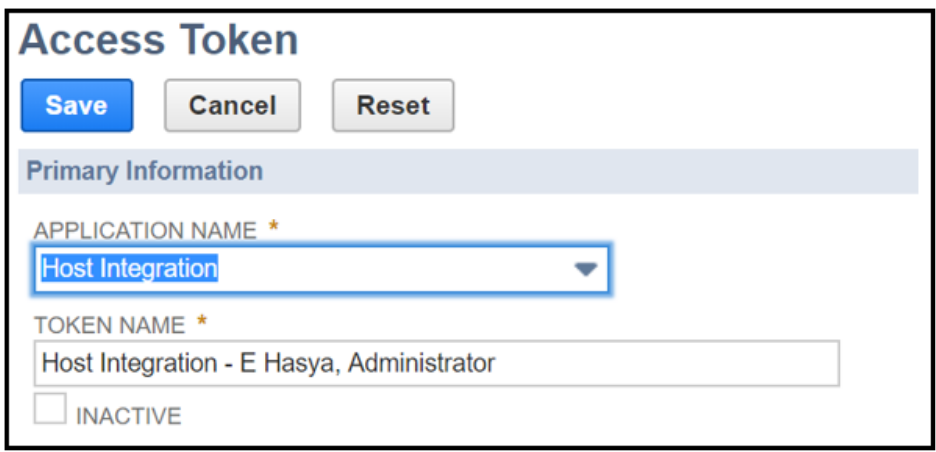
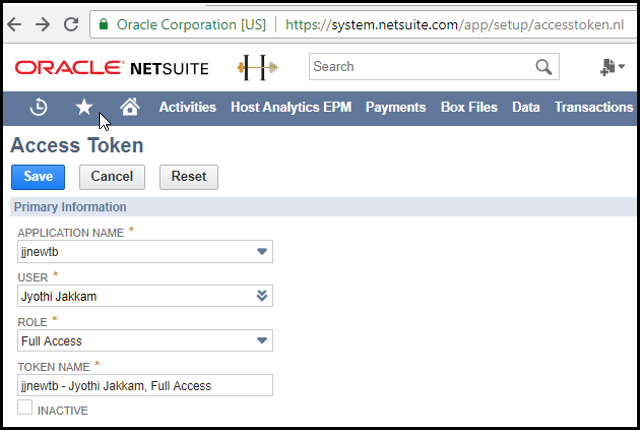
Navigate to Setup > User/Roles > Access Tokens > New.
.png)
Select the Application Name that you provided in task 2. Select a User and Role. Click Save.
The screen below will be displayed only once. Make note of the information on this screen as it will be used while setting up NetSuite Connect in Planful. Tip! Copy and paste this information into Notepad
Was this article helpful?